Sharp R-1511 R-1510 , R-1511 , R-1512 , R-1514 Microwave Operation Manual
Sharp R-1511 Manual
 |
UPC - 074000610439
View all Sharp R-1511 manuals
Add to My Manuals
Save this manual to your list of manuals |
Sharp R-1511 manual content summary:
- Sharp R-1511 | R-1510 , R-1511 , R-1512 , R-1514 Microwave Operation Manual - Page 1
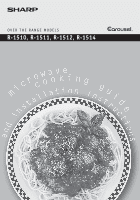
® OVER THE RANGE MODELS R-1510, R-1511, R-1512, R-1514 - Sharp R-1511 | R-1510 , R-1511 , R-1512 , R-1514 Microwave Operation Manual - Page 2
SERVICER TELEPHONE TO PHONE: DIAL 1-800-BE-SHARP ( 237-4277 ) for : SERVICE (for your nearest Sharp Authorized Servicer) PARTS (for your authorized parts area code) and description of the problem. PRECAUTIONS TO AVOID POSSIBLE EXPOSURE TO EXCESSIVE MICROWAVE ENERGY (a) Do not attempt to operate - Sharp R-1511 | R-1510 , R-1511 , R-1512 , R-1514 Microwave Operation Manual - Page 3
the Microwave 16 About Microwave Cooking 17 About Safety 17 Part Names 18-19 Before Operating 20 To Set the Clock 20 Stop/Clear 20 Manual Operation 31 Fan Hi/Lo 31 Cleaning and Care 32 Replacing Parts 33 Service Call Check 34 The Ultimate Accessory 34 Specifications 35 Cookbook Order - Sharp R-1511 | R-1510 , R-1511 , R-1512 , R-1514 Microwave Operation Manual - Page 4
Model Number & Description: R-1510, R-1511, R-1512 or R-1514 Home Use Carousel™ Microwave Oven. (Be sure to have this information available when you need service for your Product.) Warranty Period for this Product: One (1) year parts and labor in-home service. The warranty period continues for an - Sharp R-1511 | R-1510 , R-1511 , R-1512 , R-1514 Microwave Operation Manual - Page 5
, injury to persons or exposure to excessive microwave energy: 1. READ ALL INSTRUCTIONS BEFORE USING THE APPLIANCE. 2. Read and or dropped. 9. This appliance should be serviced only by qualified service personnel. Contact nearest Sharp Authorized Servicer for examination, repair or adjustment. 10. - Sharp R-1511 | R-1510 , R-1511 , R-1512 , R-1514 Microwave Operation Manual - Page 6
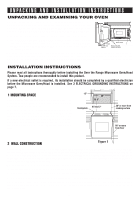
SAVE the Operation Manual. Waveguide cover Check SHARP AUTHORIZED SERVICER. See Installation Instructions for more details. INSTALLATION INSTRUCTIONS Please read all instructions thoroughly before installing the Over the Range Microwave must be capable of supporting weight of 110 pounds-the - Sharp R-1511 | R-1510 , R-1511 , R-1512 , R-1514 Microwave Operation Manual - Page 7
Microwave Oven mounting location as shown in Figure 2. NOTE: 1. If you have any questions about the grounding or electrical instructions, consult a qualified electrician or serviceperson. 2. Neither Sharp feet of equivalent length of some typical ductwork parts. Use the values in paren- theses for - Sharp R-1511 | R-1510 , R-1511 , R-1512 , R-1514 Microwave Operation Manual - Page 8
UNPACKING AND INSTALLATION INSTRUCTIONS 5 TOOLS RECOMMENDED FOR INSTALLATION • Phillips Screwdriver • Electric Drill • Damper Assembly 1 ! Scale Plate 2 " Grease Filter 2 PART CODE XTSSD50P35000 LX-BZ0195WRE0 XBRSD50P60000 LX-MZB001MRE0 XOTSE40P12000 XWHSD50-16300 LBSHC0040MRE0 PCUSUB059MRP0 - Sharp R-1511 | R-1510 , R-1511 , R-1512 , R-1514 Microwave Operation Manual - Page 9
UNPACKING AND INSTALLATION INSTRUCTIONS 7 PREPARATION OF THE OVEN 1. Turn oven on the side. See Figure 5. 2. Follow steps (A)-(D) to (D) Repeat step (B) on other side. Figure 5 (A) (B) (C) Figure 6 (A) Use screwdriver to assist in releasing mounting plate. Bottom of Microwave (D) Mounting Plate 9 - Sharp R-1511 | R-1510 , R-1511 , R-1512 , R-1514 Microwave Operation Manual - Page 10
UNPACKING AND INSTALLATION INSTRUCTIONS 8 VENTILATION SYSTEM (PREPARING OVEN FOR INSTALLATION) This Microwave Oven/Hood is designed for adaptation to three types of hood ventilation systems. Select the type required for your installation. Recirculating - non-vented, ductless. Follow - Sharp R-1511 | R-1510 , R-1511 , R-1512 , R-1514 Microwave Operation Manual - Page 11
UNPACKING AND INSTALLATION INSTRUCTIONS (C) VERTICAL EXHAUST: OUTSIDE VENTILATION 1. Remove and save 2 screws from back edge and 3 screws from the top center of the Fan Cover Bracket. Remove Fan Cover - Sharp R-1511 | R-1510 , R-1511 , R-1512 , R-1514 Microwave Operation Manual - Page 12
9 OVEN INSTALLATION THIS OVEN CANNOT BE PROPERLY INSTALLED WITHOUT REFERRING TO THE MOUNTING INSTRUCTIONS FOUND ON WALL AND TOP CABINET TEMPLATES. THE NEXT STEP IS TO READ AND FOLLOW MOUNTING INFORMATION ON WALL AND TOP CABINET TEMPLATES. THIS OVEN - Sharp R-1511 | R-1510 , R-1511 , R-1512 , R-1514 Microwave Operation Manual - Page 13
UNPACKING AND INSTALLATION INSTRUCTIONS 10 PREPARATION AND USE OF THE CARTON TO ASSIST IN THE INSTALLATION OF THE MICROWAVE OVEN Utilization of the carton may make installation easier. 1. Place carton upside down. See Figure 20. 2. Using cutting line around the carton, cut into two - Sharp R-1511 | R-1510 , R-1511 , R-1512 , R-1514 Microwave Operation Manual - Page 14
UNPACKING AND INSTALLATION INSTRUCTIONS MOUNTING OVEN TO THE WALL Two people are recommended to attach the Microwave Oven/Hood to the all of the Installation Instructions and the Wall and Top Cabinet Templates. 2. Plug in the power cord. 3. Keep the Operation Manual. OPTIONAL ACCESSORIES Two - Sharp R-1511 | R-1510 , R-1511 , R-1512 , R-1514 Microwave Operation Manual - Page 15
the Ultimate Accessory, the Sharp Carousel Microwave Cookbook. NEVER use the oven without the turntable and support nor turn the turntable over to the touch when cooking or reheating. Condensation is a normal part of microwave cooking. Room humidity and the moisture in food will influence the - Sharp R-1511 | R-1510 , R-1511 , R-1512 , R-1514 Microwave Operation Manual - Page 16
and assure you that foods have been cooked to safe temperatures. Sharp is not responsible for any damage to the oven when accessories are used. ABOUT CHILDREN AND THE MICROWAVE Children below the age of 7 should use the microwave oven with a supervising person very near to them. Between the ages - Sharp R-1511 | R-1510 , R-1511 , R-1512 , R-1514 Microwave Operation Manual - Page 17
thermometer in a thick or dense area away from fat or bone. NEVER leave the thermometer in the food during cooking, unless it is approved for microwave oven use. • ALWAYS use potholders to prevent burns when handling utensils that are in contact with hot food. Enough heat from the food can transfer - Sharp R-1511 | R-1510 , R-1511 , R-1512 , R-1514 Microwave Operation Manual - Page 18
PART NAMES FRONT VIEW 14 13 14 2 6 1 12 4 3 5 6 BOTTOM VIEW 17 7 8 9 15 10 11 16 (Front of Microwave) 18 (Rear of Microwave) 1 Oven door with Only remove for cleaning. 16 Removable turntable support First, carefully place the turntable support in the motor shaft in the center of - Sharp R-1511 | R-1510 , R-1511 , R-1512 , R-1514 Microwave Operation Manual - Page 19
PART NAMES CONTROL PANEL Words in the lower portion of the display will light to indicate what function is in progress. 29 29 30 23 31 24 31 20 27 31 28 31 21 20 R-1510 / R-1511/ R-1512/ R-1514 Number next to the control panel illustration indicates pages on which there are feature - Sharp R-1511 | R-1510 , R-1511 , R-1512 , R-1514 Microwave Operation Manual - Page 20
BEFORE OPERATING • Before operating your new microwave oven make sure you read and understand this operation manual completely. • Before the oven can be used, follow these procedures: 1. Plug in the oven. Close the door. The oven display will show SHARP SIMPLY THE AND PRESS CLOCK . BEST PRESS - Sharp R-1511 | R-1510 , R-1511 , R-1512 , R-1514 Microwave Operation Manual - Page 21
the limits in the "Amount" column on the DEFROST CENTER CHART (see page 28), you need to defrost manually. You can defrost any frozen food, either raw or previously cooked, by using Power Level for 30%. Follow long enough to remove from the plastic in order to place in a microwave-safe dish. 21 - Sharp R-1511 | R-1510 , R-1511 , R-1512 , R-1514 Microwave Operation Manual - Page 22
COOK Sharp's Sensor the chart should be cooked following the guidelines in any microwave cookbook. 6. During the first part of Sensor Cook, food name will appear on the . To continue cooking, touch the STOP/CLEAR pad and cook manually. When the sensor detects the vapor emitted from the food, - Sharp R-1511 | R-1510 , R-1511 , R-1512 , R-1514 Microwave Operation Manual - Page 23
after heating. If additional time is needed, continue to heat manually. INSTANT SENSOR CHART FOOD REHEAT POPCORN AMOUNT 4 - 36 oz bag (Regular) 1.5 - 1.75 oz bag (Snack) Use only popcorn packaged for the microwave. Try several brands to decide which you like. Do not try to pop unpopped kernels. - Sharp R-1511 | R-1510 , R-1511 , R-1512 , R-1514 Microwave Operation Manual - Page 24
after heating. If additional time is needed, continue to heat manually. 2 Touch START/ MINUTE PLUS pad. START MINUTE PLUS When patties or in a casserole to be added to other ingredients. Place patties on a microwave-safe rack and cover with wax paper. Place ground meat in a casserole and cover - Sharp R-1511 | R-1510 , R-1511 , R-1512 , R-1514 Microwave Operation Manual - Page 25
potatoes with oil to coat well. 2 In small bowl, combine remaining ingredients. Sprinkle over potatoes. 3 Cover potatoes with wax paper. Microwave using INSTANT SENSOR BAKED POTATOES setting. Rearrange potatoes when time appears on display. Let stand, covered, 5 minutes. Hearty Turkey Chili 1 pound - Sharp R-1511 | R-1510 , R-1511 , R-1512 , R-1514 Microwave Operation Manual - Page 26
1/2 pounds), peeled and sliced into 8 pieces each 3 tablespoons chopped green pistachios 1 Combine brown sugar, margarine and apricot preserves in a small bowl. Microwave at HIGH (100%) until margarine melts and preserves soften, 45 seconds to 1 minute. Stir in nutmeg, salt, sugar, orange juice and - Sharp R-1511 | R-1510 , R-1511 , R-1512 , R-1514 Microwave Operation Manual - Page 27
quantity listed in the chart should be heated following the guidelines in any microwave cookbook. 2. Reheat can be programmed with More or Less Time Adjustment. after heating. If additional time is needed, continue to heat manually. REHEAT CHART FOOD AMOUNT FRESH ROLLS/ MUFFINS 1 - 8 - Sharp R-1511 | R-1510 , R-1511 , R-1512 , R-1514 Microwave Operation Manual - Page 28
allowed on the DEFROST CENTER CHART, use time and 30% power. See MANUAL DEFROST on page 21. If you attempt to enter more or less .5 - 3.0 lb Arrange pieces with meatiest portions toward outside of glass dish or microwave safe rack. After each stage, if there are warm or thawed portions, rearrange or - Sharp R-1511 | R-1510 , R-1511 , R-1512 , R-1514 Microwave Operation Manual - Page 29
HOT WATER pad 3 times. HOT WATER x 3 2 Touch START/MINUTE PLUS pad. START MINUTE PLUS You can program Keep Warm Plus with manual cooking to keep food warm continuously after cooking. WITH MANUAL COOKING • Suppose you want to cook a cup of soup for 2 minutes at 70% and keep the soup warm for 15 - Sharp R-1511 | R-1510 , R-1511 , R-1512 , R-1514 Microwave Operation Manual - Page 30
4 features that make using your oven easy because specific instructions are provided in the interactive display. 1. CHILD LOCK START/ MINUTE PLUS pad. START MINUTE PLUS NOTE: 1. Auto Start can be used for manual cooking if clock is set. 2. If the oven door is opened after programming Auto Start, - Sharp R-1511 | R-1510 , R-1511 , R-1512 , R-1514 Microwave Operation Manual - Page 31
will automatically start when heat rises from range surface units or burners. This protects the microwave oven from excessive temperature rise. The fan will stay on until the temperature decreases. It cannot be turned off manually during this time. For other uses, press FAN HI/LO pad to select fan - Sharp R-1511 | R-1510 , R-1511 , R-1512 , R-1514 Microwave Operation Manual - Page 32
both sides with a damp cloth to remove any spills or spatters. Metal parts will be easier to maintain if wiped frequently with a damp cloth. cool. Wipe interior with a soft cloth. Turntable/Turntable Support The turntable and turntable support can be removed for easy cleaning. Wash them in mild - Sharp R-1511 | R-1510 , R-1511 , R-1512 , R-1514 Microwave Operation Manual - Page 33
cover, remove the screw on the light cover. (See illustration.) 3. Replace light bulbs with equivalent watt bulb available from your Sharp Authorized Servicer or parts distributor. Bulbs are also available at most hardware stores or lighting centers. DO NOT USE A BULB LARGER THAN 30 WATTS. 4. Close - Sharp R-1511 | R-1510 , R-1511 , R-1512 , R-1514 Microwave Operation Manual - Page 34
never be serviced by a "do-it-yourself" repair person. NOTE: If time appearing in the display is counting down very rapidly, check Demonstration Mode on page 30 and cancel. THE ULTIMATE ACCESSORY ✪ Great recipes ✪ Reliable microwave reference guide ✪ Many color photos ✪ Step-by-step instructions - Sharp R-1511 | R-1510 , R-1511 , R-1512 , R-1514 Microwave Operation Manual - Page 35
SPECIFICATIONS R-1510, R-1511, R-1512, R- Authorized. DHHS - Complies with Department of Health and Human Services (DHHS) rule, CFR, Title 21, Chapter I, Subchapter $ ________ I have enclosed a check made payable to Sharp Accessories & Supplies Center. Please bill my VISA MASTERCARD AMERICAN - Sharp R-1511 | R-1510 , R-1511 , R-1512 , R-1514 Microwave Operation Manual - Page 36
NOTES 36 - Sharp R-1511 | R-1510 , R-1511 , R-1512 , R-1514 Microwave Operation Manual - Page 37
NOTES 37 - Sharp R-1511 | R-1510 , R-1511 , R-1512 , R-1514 Microwave Operation Manual - Page 38
GUIA AUTO-TOUCH Para mayor informacion y precauciones de seguridad, consulte el Manual de Operaciones. PONER LA HORA Si en la pantalla se lee SHARP SIMPLY THE BEST PRESS CLEAR AND PRESS CLOCK toque primero STOP/CLEAR. 1 Toque el botón que dice CLOCK y CLOCK 2 número 2 . 2 Ajuste el reloj en la - Sharp R-1511 | R-1510 , R-1511 , R-1512 , R-1514 Microwave Operation Manual - Page 39
el ciclo de descongelamiento concluya, deje reposar el alimento. DEFROST CENTER 2 START MINUTE PLUS START MINUTE PLUS START MINUTE PLUS AUTO-TOUCH GUIDE Continued from back cover. DEFROST CENTER 1 Touch DEFROST CENTER pad and number 2 for Steaks/Chops. Enter weight 2.0 lb. Touch START/MINUTE - Sharp R-1511 | R-1510 , R-1511 , R-1512 , R-1514 Microwave Operation Manual - Page 40
AUTO-TOUCH GUIDE For more complete information and safety precautions, refer to your Operation Manual. SET CLOCK If SHARP SIMPLY THE BEST PRESS CLEAR AND PRESS CLOCK is in the display, first touch STOP/CLEAR. 1 Touch TIMER/CLOCK pad and number 2. TIMER CLOCK 2 2 Enter
-
 1
1 -
 2
2 -
 3
3 -
 4
4 -
 5
5 -
 6
6 -
 7
7 -
8
-
9
-
10
-
11
-
12
-
13
-
14
-
15
-
16
-
17
-
18
-
19
-
20
-
21
-
22
-
23
-
24
-
25
-
26
-
27
-
28
-
29
-
30
-
31
-
32
-
33
-
34
-
35
-
36
-
37
-
38
-
39
-
40
 |
 |

OVER THE RANGE MODELS
R-1510, R-1511, R-1512, R-1514
®