Sharp T19D1-B Operation Manual
Sharp T19D1-B - LL - 19" LCD Monitor Manual
 |
UPC - 074000047808
View all Sharp T19D1-B manuals
Add to My Manuals
Save this manual to your list of manuals |
Sharp T19D1-B manual content summary:
- Sharp T19D1-B | Operation Manual - Page 1
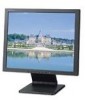
LCD Monitor LCD Farbmonitor Moniteur LCD Monitor LCD Monitor LCD LL-T19D1 OPERATION MANUAL BEDIENUNGSANLEITUNG MODE D'EMPLOI MANUALE D'USO MANUAL DE FUNCIONAMIENTO - Sharp T19D1-B | Operation Manual - Page 2
Table of Contents/Inhaltsverzeichnis/Table des matières/Indice/Índice Notice for Users in Europe 3 Notice for Users in the UK 4 Notice for Users in Australia 4 Notice for Users in the USA 5 TCO'99 6 English 7 Deutsch 31 Français 55 Italiano 79 Español 103 - Sharp T19D1-B | Operation Manual - Page 3
EEC ja 73/23/EEC vaatimukset, joita on muutettu direktiivillä 93/ 68/EEC. CAUTION: TO PREVENT ELECTRICAL SHOCK, DISCONNECT THE AC CORD BEFORE SERVICING. CAUTION: FOR A COMPLETE ELECTRICAL DISCONNECTION, PULL OUT THE MAIN PLUG. VORSICHT: UM DIE STROMZUFUHR VOLLSTÄNDIG ZU UNTERBRECHEN, DEN NETZSTECKER - Sharp T19D1-B | Operation Manual - Page 4
. If you are in any doubt consult a qualified electrician. "WARNING: THIS APPARATUS MUST BE EARTHED." Notice for Users in Australia Service Inquiries Please contact your dealer for service if required or contact Sharp Corporation of Australia on 1 300 13 50 22 for referral to your nearest - Sharp T19D1-B | Operation Manual - Page 5
and, if not installed and used in accordance with the instructions, may cause harmful interference to radio communications. However, there B computing equipment. Declaration of Conformity SHARP LCD Color Monitor LL-T19D1-H/LL-T19D1-B This device complies with part 15 of the FCC rules. Operation is - Sharp T19D1-B | Operation Manual - Page 6
for encouraging the adaptation of goods and services to the environment. The main problem, as far as computers and other electronics for the time being, permitted in the back light system of flat panel monitors as there today is no commercially available alternative. TCO aims on removing this - Sharp T19D1-B | Operation Manual - Page 7
(When using a digital signal 20 Monitor care and repair 22 Monitor care 22 Storage 22 Troubleshooting 22 Specifications 23 Installing set-up information and the ICC profile (For Windows 26 Information about the ColorSync profile (For MacOS 29 Instructions for attaching a VESA compliant arm - Sharp T19D1-B | Operation Manual - Page 8
video signals. - Never rub or tap the monitor with hard objects. - Please understand that Sharp Corporation bears no responsibility for errors made during in the package. - LCD monitor (1) - Analog signal cable (1) (model name: 0NK3080420400) - CD-ROM (1) - Operation manual (1) Notes: - The digital - Sharp T19D1-B | Operation Manual - Page 9
may or may not be possible. 11. Security lock anchor By connecting a security lock (commercially available) to the security lock anchor, the monitor is fixed so that it cannot be transported. The security slot works in conjunction with Kensington Micro Saver Security Systems. 12. Ventilation - Sharp T19D1-B | Operation Manual - Page 10
Height adjustment, angle adjustment CAUTION! - Pressure from hands on the LCD panel could cause damage. - Do not attempt to move the monitor beyond its movement range. Applying excessive force to move the monitor may damage the product. - Be careful not to allow your fingers to be pinched. Height - Sharp T19D1-B | Operation Manual - Page 11
to a computer Digital connection Connect the separately-sold digital signal cable (NL-C01E) to the digital RGB output terminal of the computer. - The monitor has an input for connecting to a computer with a DVI-compatible output connector (DVI-D24 pin or DVI-I29 pin) and SXGA output capability - Sharp T19D1-B | Operation Manual - Page 12
switching the main power switch on and off, always wait for an interval of at least 5 seconds. Rapid switching may result in malfunction. 2.Press the monitor's POWER button. The power LED will light up orange. 3.Turn on the computer. Press power button. Turn on the computer power supply. ON When - Sharp T19D1-B | Operation Manual - Page 13
INPUT button to switch between signal input terminals. Analog RGB input terminal 1 Turning the power off 1. Turn the computer off. 2. Press the monitor's POWER button. The Power LED will disappear. Turn the computer off. OFF Press power button. Analog RGB input terminal 2 DVI-D input terminal - Sharp T19D1-B | Operation Manual - Page 14
display For analog signal 1.First perform an automatic adjustment. (p.16) 2.Perform manual adjustment where necessary. (p.17) For digital signal The monitor can generally be used without adjustment. If necessary perform manual adjustment. (p.20) Note: - All adjustments will be saved even after - Sharp T19D1-B | Operation Manual - Page 15
English Español Italiano Français Deutsch English Adjusting the screen display Setting display mode Color tone or brightness can be changed with one command. STD Displays image with the color tone results from original scheme of liquid crystal panel. OFFICE Display brightness is lowered. The - Sharp T19D1-B | Operation Manual - Page 16
. The ADJUSTMENT Menu will be displayed. Note: - When setting up this monitor for the first time or after having changed an aspect of the current system or 3 times. - If necessary due to any of the following, manual adjustments (p.17) can be performed after the automatic adjustment. - When further - Sharp T19D1-B | Operation Manual - Page 17
Adjustment Pattern (for Windows). How to adjust 1.Press the MENU button. The ADJUSTMENT Menu will be displayed. ADJUSTMENT Menu MANUAL: Individual menu options are manually adjusted. AUTO: Every menu option is automatically adjusted. Notes: - Press the button to select [AUTO]. - To choose a menu - Sharp T19D1-B | Operation Manual - Page 18
from the computer is composite sync or sync on green, automatic adjustment cannot be performed. Please perform manual adjustment instead. - If [OUT OF ADJUST] is displayed, perform manual adjustment. - When using the Auto Gain Control function, set [WHITE BALANCE] to other than [USER]. If [USER - Sharp T19D1-B | Operation Manual - Page 19
position) The position of the OSD Menu can be moved up and down. ( buttons) SCALING (Level of scaling) The sharpness of the image can be adjusted. ( buttons) Note: - When the display mode is set to less than 1280 choose a language. 3. Press the MENU button. Language Selection Menu will disappear. 19 - Sharp T19D1-B | Operation Manual - Page 20
Adjusting the screen display (When using a digital signal) Adjustments can be made using On Screen Display (OSD) Menu provided. WHITE BALANCE Menu On Screen Display for adjustment If you are using Windows, open the Adjustment Pattern on the accompanying Utility Disk. (p.16) If your system is not - Sharp T19D1-B | Operation Manual - Page 21
. ( buttons) OSD V-POSITION (OSD vertical position) The position of the OSD Menu can be moved up and down. ( buttons) SCALING (Level of scaling) The sharpness of the image can be adjusted. ( buttons) Note: - When the display mode is set to less than 1280 x 1024 pixels, the display is enlarged to - Sharp T19D1-B | Operation Manual - Page 22
LCD panel section Use a soft dry cloth to lightly wipe away dirt and dust from the surface of the LCD change or change in shape. Troubleshooting If you think the monitor may be faulty, please check shop where you purchased the monitor or your nearest Sharp authorized Service Center. (Never attempt - Sharp T19D1-B | Operation Manual - Page 23
English Español Italiano Français Deutsch English Specifications Product specifications Model name LL-T19D1-H (Frosty gray)/LL-T19D1-B (Black) LCD display 48 cm measured diagonally TFT LCD module Resolution (max.) SXGA 1280 x 1024 pixels Displayable colors (max.) Approx.16.77 million colors (8 bit - Sharp T19D1-B | Operation Manual - Page 24
is receiving timing signals that are not compatible, [OUT OF TIMING] will appear. Follow your computer's instruction manual to set the timing so that it is compatible with the monitor. - If the monitor is not receiving any signal (synch signal), [NO SIGNAL] will appear. US text - Recommended - Sharp T19D1-B | Operation Manual - Page 25
detection 5 N.C. 17 TMDS data 0- 6 DDC clock 18 TMDS data 0+ 7 DDC data 19 TMDS data 0/5 shield 8 N.C. 20 N.C. 9 TMDS data 1- 21 N.C. 10 TMDS data monitor supports the VESA DDC (Display Data Channel) standard. DDC is a signal standard for carrying out Plug & Play functions on the monitor - Sharp T19D1-B | Operation Manual - Page 26
manual while reading this.) About the ICC profile An ICC (International Color Consortium) profile is a file that describes the color characteristics of the LCD monitor Check [Display a list of all the drivers in a specific location, so you can select the driver you want.], then click [Next]. 4. When - Sharp T19D1-B | Operation Manual - Page 27
Panel]. 3. Double click on [Display]. 4. Click on [Settings], [Advanced] and [Monitor]. 5. Click on [Properties], [Driver] and [Update Driver]. 6. When [Upgrade Device Driver Wizard] appears, click [Next]. 7. Check [Display a list of the known drivers for this device so that I can choose a specific - Sharp T19D1-B | Operation Manual - Page 28
[Control Panel]. 3. Switch to Classic View. 4. Double click on [Display]. 5. Click on [Settings], [Advanced] and [Monitor]. 6. Click on [Properties], [Driver] and [Update Driver]. 7. When [Hardware Update Wizard] appears, check [Install from a list or specific location [Advanced]] and click [Next - Sharp T19D1-B | Operation Manual - Page 29
ColorSync profile describes the color characteristics of the LCD monitor. Notes: - This monitor's ColorSync profile works with MacOS 8.5 or above command names and methods may differ. Please follow the computer's own operation manual while reading this. 1.Load the accessory CD-ROM into the CD-ROM - Sharp T19D1-B | Operation Manual - Page 30
being attached to the monitor. How to attach the arm or stand - Be careful not to overly bend the cable or add extension cords as this could lead to malfunction. - While following these instructions, please also refer to the installation instructions in the operation manual included with the arm - Sharp T19D1-B | Operation Manual - Page 31
Bildschirmeinstellung 40 Manuelle Bildschirmeinstellung 41 Einstellen der Bildschirmanzeige (bei Verwendung eines Digitalsignals 44 Pflege des Monitors und Reparaturen 46 Pflege des Monitors 46 Lagerung 46 Fehlersuche 46 Technische Daten 47 Installieren der Setup-Informationen und des ICC - Sharp T19D1-B | Operation Manual - Page 32
hren. Checkliste für Monitor und Zubehör - Prüfen Sie den Kartoninhalt auf Vollständigkeit. - LCD-Monitor (1) - Analogsignalkabel (1) - Bewahren Sie den Karton für einen eventuellen Transport des Monitors auf. - Sharp Corporation besitzt Urheberrechte am Programm Utility Disk. Eine Reproduktion ist - Sharp T19D1-B | Operation Manual - Page 33
ein. 5. Netzschalter Mit dieser Taste schalten Sie den Monitor ein. Schalten Sie den Monitor über den Netzschalter wieder aus. 6. Betriebsanzeige Diese LED Sicherheitsverriegelung anbringen (im Handel erhältlich), wird der Monitor so befestigt, dass er nicht wegtransportiert werden kann. - Sharp T19D1-B | Operation Manual - Page 34
ACHTUNG! - Wenn Sie mit der Hand auf den LCD-Bildschirm drücken, kann dieser beschädigt werden. - Nicht versuchen, den Monitor über seinen Bewegungsbereich hinaus zu bewegen. Wenn zu starke Kraft zum Bewegen des Monitors angewendet wird, kann das Produkt beschädigt werden. - Vorsichtig - Sharp T19D1-B | Operation Manual - Page 35
das Kabel nicht überdehnen, und schließen Sie kein Verlängerungskabel an, da dies Funktionsstörungen hervorrufen kann. Verbinden des Monitors mit einem Computer Analoger Anschluss Das Analogsignalkabel am analoger RGBAusgangsanschluss des Computers anschließen. - Für analogen Anschluss das als Zubeh - Sharp T19D1-B | Operation Manual - Page 36
Hauptschalter sollten Sie mindestens fünf Sekunden warten. Durch ein schnelles Umschalten können Fehlfunktionen auftreten. 2. Drücken Sie den Netzschalter am Monitor. Die Betriebsanzeige leuchtet orange auf. 3.Schalten Sie den Computer ein. Netzschalter betätigen. Schalten Sie den Computer ein. ON - Sharp T19D1-B | Operation Manual - Page 37
Schalten Sie den Computer aus. OFF Netzschalter betätigen. Analogen RGB-Eingangsanschluss 2 DVI-D-Eingangsanschluss Wenn der Monitor längere Zeit nicht verwendet wird, sollten Sie den Monitor mit dem Hauptschalter ausschalten und den Netzstecker von der Steckdose abtrennen. Hinweis: - Wenn kein - Sharp T19D1-B | Operation Manual - Page 38
bei Bedarf eine manuelle Einstellung durch. (S.41) Digitalsignal Der Monitor kann in der Regel ohne Einstellung verwendet werden. Führen Sie nnen auf die ursprünglichen Werkseinstellungen zurückgesetzt werden. 1. Schalten Sie den Monitor ein. 2. Drücken Sie gleichzeitig die Taste MENU und die Taste - Sharp T19D1-B | Operation Manual - Page 39
Befehl geändert werden. STD Der Farbton stammt vom Originalschema des LCD-Bildschirms. OFFICE Die Display-Helligkeit wird verringert. Die Helligkeit wird auf Commission) festgelegt wurde. Es erfolgt eine Farbumwandlung anhand der LCD-Eigenschaften, so dass ein Farbton dargestellt wird, der dem - Sharp T19D1-B | Operation Manual - Page 40
, PHASE, H-POS, V-POS). Automatisches Einstellen des Bildschirms 1.Drücken Sie die Taste MENU. Das Menü ADJUSTMENT wird angezeigt. Hinweis: - Wenn Sie den Monitor zum ersten Mal einrichten oder eine Komponente des bestehenden Systems geändert haben, führen Sie vor der Verwendung eine automatische - Sharp T19D1-B | Operation Manual - Page 41
Hilfe des Einstellmusters (für Windows) beschrieben. Einstellen 1.Drücken Sie die Taste MENU. Das Menü ADJUSTMENT wird angezeigt. Menü ADJUSTMENT MANUAL: Einzelne Menüoptionen werden manuell eingestellt. AUTO: Alle Menüoptionen werden automatisch eingestellt. Hinweise: - Drücken Sie die Taste um - Sharp T19D1-B | Operation Manual - Page 42
Einstellen der Bildschirmanzeige (bei Verwendung eines Analogsignals) Menü GAIN CONTROL Menü WHITE BALANCE MANUAL: Einzelne Menüoptionen werden manuell eingestellt. AUTO: Alle Menüoptionen werden mit der Funktion Auto Gain Control* automatisch eingestellt. Hinweise: - Drücken Sie die Taste , - Sharp T19D1-B | Operation Manual - Page 43
English Español Italiano Français Deutsch English Einstellen der Bildschirmanzeige (bei Verwendung eines Analogsignals) Menü MODE SELECT Hinweise: - Abhängig von der Auflösung des Eingangssignals ändert sich die Anzeige eventuell selbst dann nicht, wenn die Menüoptionen ausgewählt werden können. - - Sharp T19D1-B | Operation Manual - Page 44
Einstellen der Bildschirmanzeige (bei Verwendung eines Digitalsignals) Die Einstellungen können über das OSD-Menü vorgenommen werden. Menü WHITE BALANCE OSD für die Einstellung Wenn Sie mit Windows arbeiten, öffnen Sie das Einstellmuster auf der mitgelieferten Utility Disk. (S.40) Falls Ihr - Sharp T19D1-B | Operation Manual - Page 45
English Español Italiano Français Deutsch English Einstellen der Bildschirmanzeige (bei Verwendung eines Digitalsignals) Menü MODE SELECT Hinweise: - So wählen Sie eine Menüoption: Taste / MODE - Nach Abschluss der Einstellung: Taste MENU OSD H-POSITION (OSD horizontale Position) Die Position der - Sharp T19D1-B | Operation Manual - Page 46
neutrales Reinigungsmittel auf ein feuchtes, weiches Tuch, wringen Sie es gut aus, und wischen Sie den Monitor sauber. LCD-Bildschirm Wischen Sie Schmutz und Staub von der Oberfläche des LCD-Bildschirms mit einem weichen, trockenen Tuch vorsichtig ab. (Es eignet sich ein weiches Tuch, beispielsweise - Sharp T19D1-B | Operation Manual - Page 47
English Español Italiano Français Deutsch English Technische Daten Produktspezifikationen Modellbezeichnung LL-T19D1-H (Frostig grau)/LL-T19D1-B (Schwarz) LCD-Anzeige 48 cm diagonal gemessen TFT-LCD-Modul Auflösung (max.) SXGA 1280 x 1024 Pixel Anzeigbare Farben (max.) Ca. 16,77 Millionen Farben - Sharp T19D1-B | Operation Manual - Page 48
, die nicht kompatibel sind, wird [OUT OF TIMING] angezeigt. Stimmen Sie den Takt anhand der Anweisungen im Computer-Benutzerhandbuch auf den Monitor ab. - Wenn der Monitor überhaupt kein Signal empfängt (Sync-Signal), wird [NO SIGNAL] angezeigt. US-Text - Die empfohlene Auflösung ist 1280 x 1024 - Sharp T19D1-B | Operation Manual - Page 49
belegt 17 TMDS-Daten 0- 6 DDC-Takt 18 TMDS-Daten 0+ 7 DDC-Daten 19 TMDS-Daten 0/5 abgeschirmt 8 nicht belegt 20 nicht belegt 9 TMDS-Daten 1- 21 Plug & Play-Funktionen am Monitor oder PC. Er überträgt Informationen, beispielsweise den Auflösungsgrad, zwischen dem Monitor und dem PC. Sie kö - Sharp T19D1-B | Operation Manual - Page 50
Aktivieren Sie unter [Options] [Automatically detect Plug & Play monitors], und klicken Sie auf [Change]. 6. Klicken Sie auf [Next]. 7. Klicken Sie auf [Display a list of all the drivers in a specific location, so you can select the driver you want.] und dann auf [Next]. 8. Wenn [Models] angezeigt - Sharp T19D1-B | Operation Manual - Page 51
Option [Control Panel]. 3. Doppelklicken Sie auf [Display]. 4. Klicken Sie auf [Settings], [Advanced] und [Monitor]. 5. Klicken Sie auf [Properties], [Driver] und [Update Driver]. 6. Wenn [Upgrade Device Driver Wizard] angezeigt wird, klicken Sie auf [Next]. 7. Aktivieren Sie [Display a list of the - Sharp T19D1-B | Operation Manual - Page 52
Sie auf "Classic View". 4. Doppelklicken Sie auf [Display]. 5. Klicken Sie auf [Settings], [Advanced] und [Monitor]. 6. Klicken Sie auf [Properties], [Driver] und [Update Driver]. 7. Wenn [Hardware Update Wizard] angezeigt wird, aktivieren Sie [Install from a list or specific location [Advanced - Sharp T19D1-B | Operation Manual - Page 53
bei Verwendung mit einer kompatiblen Anwendung. Ein ColorSync-Profil beschreibt die Farbeigenschaften des LCDMonitors. Hinweise: - Das ColorSync-Profil dieses Monitors kann zusammen mit MacOS 8.5 oder höher eingesetzt werden. - Bei Verwendung des ColorSync-Profils [DISPLAY MODE] und [WHITE BALANCE - Sharp T19D1-B | Operation Manual - Page 54
100 mm vorliegen. - Er darf nicht abfallen oder abbrechen, nachdem er am Monitor befestigt wurde. Befestigen des Arms oder Fußes - Achten Sie darauf, dass Sie Fußes enthalten ist. Hinweise: - Der Fuß ist nur für diesen Monitor bestimmt, verwenden Sie ihn für keine anderen Geräte oder nutzen Sie ihn - Sharp T19D1-B | Operation Manual - Page 55
71 Installation des fichiers relatifs au paramétrage du moniteur et au profil ICC (Pour Windows 74 Informations sur le profil ColorSync (Pour MacOS 77 Instructions relatives à l'installation d'un bras conforme VESA 78 55 - Sharp T19D1-B | Operation Manual - Page 56
pas un mauvais fonctionnement mais un phénomène courant des écrans LCD et que cela n'affecte aucunement les performances du moniteur. - Ne l'ordinateur avec des objets durs. - Il faut savoir que la société Sharp décline toute responsabilité en cas d'erreur survenue durant l'utilisation par le client - Sharp T19D1-B | Operation Manual - Page 57
Description du produit English Español Italiano Français Deutsch English . 1. Bouton INPUT Pour passer d'une borne d'entrée du signal à l'autre. 2. Bouton MENU Ce bouton est utilisé pour faire apparaître, sélectionner et refermer le menu OSD (On Screen Display). 3. Bouton / MODE Lorsque le - Sharp T19D1-B | Operation Manual - Page 58
l'inclinaison ATTENTION ! - Appuyer les mains sur l'écran LCD peut provoquer son endommagement. - Ne pas essayer de approx. 20° approx. 60° - Quand l'affichage est positionné plus haut, maintenez le support serré de façon qu'il ne bouge pas avec l'affichage. Réglage de l'inclinaison approx. - Sharp T19D1-B | Operation Manual - Page 59
English Español Italiano Français Deutsch English Raccordement, activation et désactivation du moniteur ATTENTION ! - Lors du raccordement, s'assurer que l'alimentation tant du moniteur que de l'ordinateur est désactivée. - Ne pas courber le câble de manière excessive ni y ajouter de rallonge car - Sharp T19D1-B | Operation Manual - Page 60
Raccordement, activation et désactivation du moniteur Raccordement du moniteur à une source d'alimentation Activation de l'alimentation 1.Activer la source d'alimentation principale du moniteur. Borne d'alimentation Interrupteur principal Cordon d'alimentation secteur - Pour allumer et é - Sharp T19D1-B | Operation Manual - Page 61
English Español Italiano Français Deutsch English Raccordement, activation et désactivation du moniteur Inversion entre les bornes d'entrée Utiliser le bouton INPUT pour basculer entre les bornes d'entrée. Borne d'entrée RVB analogique 1 Désactivation de l'alimentation 1. Mettre l'ordinateur hors - Sharp T19D1-B | Operation Manual - Page 62
Réglage de l'image au moniteur Pour le signal analogique 1.Effectuer tout d'abord un réglage automatique. (p.64) 2. Effectuer au besoin un réglage manuel. (p.65) Pour le signal numérique Le moniteur peut généralement être utilisé sans réglage. Effectuer au besoin un réglage manuel. (p.68) Remarque - Sharp T19D1-B | Operation Manual - Page 63
English Español Italiano Français Deutsch English Réglage de l'image au moniteur Réglage du mode d'affichage Le ton de couleur ou la luminosité peut être changée avec une seule commande. STD Affiche une image dont les nuances de couleur résultent des combinaisons originales d'un écran à cristaux - Sharp T19D1-B | Operation Manual - Page 64
Réglage de l'image du moniteur (avec un signal analogique) Réglage automatique de l'image Les options CLOCK, PHASE, H-POS, V-POS du menu ADJUSTMENT peuvent être ajustées automatiquement. Réglage automatique du moniteur 1.Appuyer sur le bouton MENU. Le menu ADJUSTMENT apparaît. Remarque : - Lors - Sharp T19D1-B | Operation Manual - Page 65
au moyen du Modèle de réglage (pour Windows). Comment procéder aux réglages 1.Appuyer sur le bouton MENU. Le menu ADJUSTMENT s'affiche. MANUAL : Les options individuelles du menu sont réglées manuellement. AUTO : Chaque option du menu est réglée automatiquement. Remarques : - Appuyer sur le bouton - Sharp T19D1-B | Operation Manual - Page 66
Réglage de l'image du moniteur (avec un signal analogique) Menu GAIN CONTROL (REGLAGE DES COULEURS) Menu WHITE BALANCE (EQUILIBRE DU BLANC) MANUAL : Les options individuelles du menu sont réglées manuellement. AUTO : Chaque option du menu est automatiquement réglée via la fonction de Auto Gain - Sharp T19D1-B | Operation Manual - Page 67
English Español Italiano Français Deutsch English Réglage de l'image du moniteur (avec un signal analogique) Menu MODE SELECT (SELECTION DU MODE) Remarques : - En fonction de la résolution du signal d'entrée, même si les options peuvent être sélectionnées, l'affichage ne peut pas être modifié. - - Sharp T19D1-B | Operation Manual - Page 68
Réglage de l'image du moniteur (avec un signal numérique) Des réglages peuvent être effectués au moyen du menu interactif (OSD) proposé. Menu WHITE BALANCE (EQUILIBRE DU BLANC) Affichage à l'écran pour le réglage Si l'on se trouve sous un environnement Windows, ouvrir le Modèle de réglage se - Sharp T19D1-B | Operation Manual - Page 69
English Español Italiano Français Deutsch English Réglage de l'image du moniteur (avec un signal numérique) Menu MODE SELECT (SELECTION DU MODE) Remarques : - Pour choisir une option du menu : Bouton / MODE - Lorsque le réglage est terminé : Bouton MENU OSD H-POSITION (positionnement horizontal OSD - Sharp T19D1-B | Operation Manual - Page 70
avec un détergent neutre, le tordre et éliminer les saletés. Dalle LCD Utiliser un chiffon doux et sec pour éliminer la poussière de la de rétroéclairage. Se renseigner auprès du revendeur ou du réparateur agréé Sharp le plus proche. (Ne jamais tenter d'effectuer ce remplacement soi-même.) - Au - Sharp T19D1-B | Operation Manual - Page 71
du produit Nom du modèle LL-T19D1-H (Gris glacé)/LL-T19D1-B (Noir) Moniteur LCD 48 cm en diagonale Module TFT à 423 mm x 222 mm x 392 - 439 mm Poids Approx. 6,9 kg (approx. 4,7 kg sans le support) (A l'exception du câble de signal.) Dimensions (Unités : mm) - Câble de signal analogique : approx - Sharp T19D1-B | Operation Manual - Page 72
Caractéristiques techniques Fréquences des signaux (analogique) Mode affichage VESA Hsync Vsync Bande passante Fréquences des signaux (numérique) Mode affichage VESA Hsync Vsync Bande passante Saisie de texte US Série Macintosh Série Sun Ultra - La résolution recommandée est 1280 x 1024. - Sharp T19D1-B | Operation Manual - Page 73
es 0- 6 DDC horloge 18 TMDS données 0+ 7 DDC données 19 Ecran TMDS data 0/5 8 N.C. 20 N.C. 9 TMDS données 1- 21 Oui Oui Non Non Non DMPM: Digital Monitor Power Management Mode DMPM Ecran Consommation é W DDC (Plug & Play) Ce moniteur supporte la norme VESA DDC (Display Data Channel). - Sharp T19D1-B | Operation Manual - Page 74
qui décrit les caractéristiques des couleurs du moniteur LCD. En utilisant une application qui fonctionne de pair avec Monitor]. 5. Dans [Options], cocher [Automatically detect Plug & Play monitors] et cliquer sur [Change]. 6. Cliquer sur [Next]. 7. Cocher la case [Display a list of all the drivers - Sharp T19D1-B | Operation Manual - Page 75
[Control Panel]. 3. Double-cliquer sur [Display]. 4. Cliquer sur [Settings], sur [Advanced], et sur [Monitor]. 5. Cliquer sur [Properties], sur [Driver], et sur [Update Driver]. 6. Lorsque [Upgrade Device Driver Wizard] apparaît, cliquer sur [Next]. 7. Cocher la case [Display a list of the known - Sharp T19D1-B | Operation Manual - Page 76
Settings], sur [Advanced], et sur [Monitor]. 6. Cliquer sur [Properties], sur [Driver], et sur [Update Driver]. 7. Lorsque [Hardware Update Wizard] cliquer sur [Next]. 8. Cocher la case [Don't search. I will choose the driver to install.] et cliquer sur [Next]. 9. Cliquer sur [Have disk], et s' - Sharp T19D1-B | Operation Manual - Page 77
affichage des couleurs lors d'une utilisation avec une application compatible. Un profil ColorSync décrit les caractéristiques de couleur du moniteur LCD. Remarques : - Le profil ColorSync de ce moniteur fonctionne sous MacOS 8.5 ou version ultérieure. - Si vous utilisez le profil ColorSync, réglez - Sharp T19D1-B | Operation Manual - Page 78
rallonge car cela peut provoquer un dysfonctionnement. - Tout en suivant ces instructions, se reporter aux instructions relatives à l'installation dans le mode d'emploi qui accompagne le bras ou le support. Remarques : - Le support est conçu spécifiquement pour ce moniteur, ne pas l'utiliser pour - Sharp T19D1-B | Operation Manual - Page 79
analogico 88 Regolazione automatica dello schermo 88 Regolazione manuale dello schermo 89 Regolazione della visualizzazione sullo schermo (quando si usa un segnale digitale 92 Cura e riparazione del monitor 94 Cura del monitor 94 Immagazzinamento 94 Ricerca ed eliminazione di inconvenienti - Sharp T19D1-B | Operation Manual - Page 80
monitor con oggetti duri. - Per favore abbiate comprensione per il fatto che la Sharp Corporation non si assume nessuna responsabilità per errori fatti nell'uso da parte articoli. - Monitor LCD (1) - Cavo segnale analogico (1) (nome del modello: 0NK3080420400) - CD-ROM (1) - Manuale operativo (1) - Sharp T19D1-B | Operation Manual - Page 81
RGB digitale del computer. Per il collegamento sono necessari il cavo da acquistare a parte (NLC01E). (p.80) Esso può essere collegato ad un computer con un terminale acquistare in commercio) al foro di ancoraggio di sicurezza, il monitor rimane bloccato, in modo da non poter essere trasportato. Il - Sharp T19D1-B | Operation Manual - Page 82
dell'angolazione ATTENZIONE! - La pressione con le mani sul pannello LCD può produrre dei danni. - Non tentare di spostare il monitor oltre la relativa gamma del movimento. Applicando una forza eccessiva per spostare il monitor, si può danneggiare il prodotto. - Fare attenzione a non rimanere con - Sharp T19D1-B | Operation Manual - Page 83
ad un computer Collegamento digitale Collegare il cavo del segnale digitale comprato separatamente (NL-C01E) al terminale digitale di uscita RGB del computer. - Il monitor ha un ingresso per il collegamento a un computer con un connettore di uscita compatibile DVI (DVI-D a 24 pin o DVI-I a 29 pin - Sharp T19D1-B | Operation Manual - Page 84
tempo di almeno 5 secondi fra le due operazioni. Farlo rapidamente potrebbe essere causa di malfunzionamento. 2.Premere il tasto di alimentazione del monitor. Il LED di alimentazione si illuminerà in arancione. 3.Accendete il computer. Premete il tasto di alimentazione. Accendete il computer. ON - Sharp T19D1-B | Operation Manual - Page 85
tra i terminali di ingresso del segnale. Terminale di ingresso RGB analogico 1 1. Spegnete il computer. 2. Premete il tasto di alimentazione del monitor. Il LED di alimentazione si spegnerà. Spegnete il computer. OFF Premete il tasto di alimentazione. Terminale di ingresso RGB analogico 2 DVI - Sharp T19D1-B | Operation Manual - Page 86
, se necessario. (p.89) Per il segnale digitale Di solito si può utilizzare il monitor senza regolarlo. Se necessario, eseguite la regolazione manuale. (p.92) Nota: - Tutte le regolazioni verranno conservate anche dopo che si è spenta l'alimentazione. Reset di tutti i valori di regolazione Tutti - Sharp T19D1-B | Operation Manual - Page 87
English Español Italiano Français Deutsch English Regolazione della visualizzazione sullo schermo Impostazione della modalità del display La tonalità del colore o la luminosità si può impostare come segue. STD Visualizza un'immagine con la tonalità di colore risultante dallo schema originale del - Sharp T19D1-B | Operation Manual - Page 88
Il menu ADJUSTMENT verrà visualizzato. Nota: - Quando impostate questo monitor per la prima volta oppure dopo aver cambiato un aspetto del sistema inglese di Windows. Questa spiegazione è per Windows 95/98/Me/ 2000/XP, e parte dall'ipotesi che l'unità per CDROM sia "D". 1.Inserire il CD-ROM degli - Sharp T19D1-B | Operation Manual - Page 89
dello schermo mediante il monoscopio (per Windows). Come eseguire la regolazione 1. Premete il tasto MENU. Il menu ADJUSTMENT verrà visualizzato. MANUAL: le singole opzioni del menu vengono regolate manualmente. AUTO: ogni opzione di menu viene regolata automaticamente. Note: - Premete il tasto - Sharp T19D1-B | Operation Manual - Page 90
sullo schermo (quando si usa un segnale analogico) Menu GAIN CONTROL (CONTROLLO DEL GUADAGNO) Menu WHITE BALANCE (BILANCIAMENTO DEL BIANCO) MANUAL: le singole opzioni del menu vengono regolate manualmente. AUTO: ogni opzione del menu viene regolata automaticamente, utilizzando la funzione Auto - Sharp T19D1-B | Operation Manual - Page 91
English Español Italiano Français Deutsch English Regolazione della visualizzazione sullo schermo (quando si usa un segnale analogico) Menu MODE SELECT Note: - A seconda della risoluzione del segnale di input, anche se si possono selezionare delle opzioni di menu, il display potrebbe non cambiare. - Sharp T19D1-B | Operation Manual - Page 92
Regolazione della visualizzazione sullo schermo (quando si usa un segnale digitale) Le regolazioni si possono fare mediante il menu On Screen Display (OSD) fornito. Menu WHITE BALANCE (BILANCIAMENTO DEL BIANCO) On Screen Display per la regolazione Se usate Windows, aprite il monoscopio sul Disco - Sharp T19D1-B | Operation Manual - Page 93
English Español Italiano Français Deutsch English Regolazione della visualizzazione sullo schermo (quando si usa un segnale digitale) Menu MODE SELECT Note: - Per selezionare un'opzione di menu: Tasto / MODE - Quando la regolazione è stata completata: Tasto MENU OSD H-POSITION (posizione - Sharp T19D1-B | Operation Manual - Page 94
a non funzionare, per favore mettetevi in contatto con il negozio dove avete acquistato il monitor oppure al più vicino centro autorizzato del Servizio Tecnico Assistenza Clienti della Sharp. Sezione pannello LCD Usate un panno morbido ed asciutto per portare via la sporcizia e la polvere dalla - Sharp T19D1-B | Operation Manual - Page 95
English Español Italiano Français Deutsch English Specifiche del prodotto Nome del modello LL-T19D1-H (Grigio gelido)/LL-T19D1-B (Nero) Display LCD 48 cm misurati diagonalmente Modulo TFT LCD Risoluzione (max.) SXGA 1280 x 1024 pixel Colori visualizzabili (max.) Circa 16,77 million di colori - Sharp T19D1-B | Operation Manual - Page 96
che non sono compatibili, verrà visualizzato [OUT OF TIMING]. Seguite il manuale di istruzioni del vostro computer per impostare il sincronismo in modo da renderlo compatibile con quello del monitor. - Se il monitor non riceve nessun segnale (segnale di sincronismo), verrà visualizzato [NO SIGNAL - Sharp T19D1-B | Operation Manual - Page 97
plug 5 N.C. 17 Dati TMDS 0- 6 Clock DDC 18 Dati TMDS 0+ 7 Dati DDC 19 Dati TMDS schermo 0/5 8 N.C. 20 N.C. 9 Dati TMDS 1- 21 N.C. 10 Dati TMDS funzioni Plug & Play sul monitor o sul PC. Esso trasferisce delle informazioni, come il grado di risoluzione, tra il monitor ed il PC. Potete - Sharp T19D1-B | Operation Manual - Page 98
possono essere differenti. Per favore seguite il manuale operativo proprio del computer, mentre leggete questo.) Profilo ICC Un profilo ICC (International Color Consortium) è un file che descrive le caratteristiche cromatiche del monitor LCD. Utilizzando un'applicazione che funziona con un profilo - Sharp T19D1-B | Operation Manual - Page 99
parte dall'ipotesi che l'unità per CD-ROM sia "D". Per Windows Me Installazione delle informazioni di setup del monitor in Windows Me, e impostazione del profilo ICC del monitor e [Monitor]. 5. Fate clic su [Properties], [Driver] e [Update Driver]. 6. Quando appare [Upgrade Device Driver Wizard], - Sharp T19D1-B | Operation Manual - Page 100
Fate clic su [Settings], [Advanced] e [Monitor]. 6. Fate clic su [Properties], [Driver] e [Update Driver]. 7. Quando appare [Hardware Update Wizard], spuntate , si basano sulla versione inglese di Windows. In questa spiegazione si parte dall'ipotesi che l'unità per CD-ROM sia "D". 1. Inserire il - Sharp T19D1-B | Operation Manual - Page 101
ColorSync descrive le caratteristiche cromatiche del monitor LCD. Note: - Il profilo ColorSync di questo monitor funziona con MacOS 8.5 o superiore. comandi ed i metodi possono essere differenti. Per favore seguite il manuale operativo proprio del computer, mentre leggete questo. 1.Inserire il CD- - Sharp T19D1-B | Operation Manual - Page 102
nel manuale operativo accluso al braccio oppure al supporto. Note: - Il supporto è progettato appositamente per questo monitor, non altro tipo di viti può dare luogo alla caduta del monitor oppure a danni alla parte interna del monitor. 4.Rimuovere il coperchio. - Mentre si premono le zone - Sharp T19D1-B | Operation Manual - Page 103
ógica 112 Ajuste automático de la pantalla 112 Ajuste manual de la pantalla 113 Ajuste de la pantalla (cuando se utiliza una señal digital 116 Conservación y reparación del monitor 118 Conservación del monitor 118 Almacenamiento 118 Solución de problemas 118 Especificaciones 119 Instalaci - Sharp T19D1-B | Operation Manual - Page 104
capaz de transmitir señales de vídeo de alta calidad. - No frote ni golpee jamás el monitor con objetos duros. - Sharp Corporation no asume responsabilidad alguna por las faltas cometidas durante el uso por parte del usuario o de terceros, ni por cualquier otra anomalía o daños a este producto que - Sharp T19D1-B | Operation Manual - Page 105
correcta visualización. 11. Llave de seguridad Si conecta un cierre de seguridad (de venta en el comercio) al anclaje de seguridad, el monitor queda enclavado de forma que es imposible transportarlo. El orificio de seguridad antirrobo actúa junto con los sistemas de seguridad Kensington Micro - Sharp T19D1-B | Operation Manual - Page 106
Ajuste de altura y ajuste de ángulo ¡PRECAUCIÓN! - Si presiona el panel LCD con las manos podría dañarlo. - No trate de mover el monitor más allá de la gama de movimientos. Una fuerza excesiva para mover el monitor puede dañar el producto. - Tenga cuidado para que sus dedos no queden atrapados. - Sharp T19D1-B | Operation Manual - Page 107
- Tenga cuidado de no doblar excesivamente el cable ni utilizar cables de prolongación ya que ello podría llevar a un funcionamiento anómalo. Conexión del monitor a un ordenador Conexión analógica Conecte el cable de señal analógica al terminal de salida RGB analógica del ordenador. - Para la conexi - Sharp T19D1-B | Operation Manual - Page 108
- Cuando utilice una señal analógica, realice un ajuste automático de la pantalla bajo las condiciones siguientes (p.112): - Cuando utilice el monitor por primera vez. - Después de haber cambiado los ajustes del sistema durante la utilización. - Según sea el tipo de ordenador o de sistema operativo - Sharp T19D1-B | Operation Manual - Page 109
entre bornes de entrada de señal. Borne de entrada RGB analógica 1 Apagado 1. Apague el ordenador. 2.Pulse el botón de encendido/apagado del monitor. El LED indicador de conexión se apagará. Apague el ordenador. OFF Pulse el botón de encendido/apagado. Borne de entrada RGB analógica 2 Borne - Sharp T19D1-B | Operation Manual - Page 110
un ajuste automático. (p.112) 2.En caso necesario, realice un ajuste manual. (p.113) Para la señal digital Normalmente no es necesario ajustar el monitor antes de utilizarlo. En caso necesario, realice un ajuste manual. (p.116) Nota: - Todos los ajustes quedarán guardados incluso después de apagar - Sharp T19D1-B | Operation Manual - Page 111
English Español Italiano Français Deutsch English Ajuste de la pantalla Configuración del modo de pantalla La tonalidad cromática o brillo puede cambiarse con un comando. STD La imagen se verá con la tonalidad resutltante de la combinación de colores original del panel de cristal líquido. OFFICE - Sharp T19D1-B | Operation Manual - Page 112
Aparecerá el menú ADJUSTMENT. Nota: - Al configurar por primera vez el monitor o tras cambiar cualquier aspecto del sistema actual, lleve a cabo un ajuste autom ático 2 ó 3 veces. - Se puede llevar a cabo un ajuste manual tras el ajuste automático, si resultara necesario debido a una de las - Sharp T19D1-B | Operation Manual - Page 113
cómo ajustar la pantalla utilizando el Patrón de ajuste (para Windows). Cómo realizar el ajuste 1.Pulse el botón MENU. Aparecerá el menú ADJUSTMENT. MANUAL: Las diferentes opciones del menú se ajustan manualmente. AUTO: Cada opción del menú se ajusta automáticamente. Notas: - Pulse el botón para - Sharp T19D1-B | Operation Manual - Page 114
es composite sync o sync on green, no se podrá realizar un ajuste automático. En tal caso, realice un ajuste manual. - Si se visualiza [OUT OF ADJUST], realice el ajuste manual. - Cuando utilice la función Control Automático de Ganancia, ajuste [WHITE BALANCE] a un valor que no sea [USER]. Si ajusta - Sharp T19D1-B | Operation Manual - Page 115
English Español Italiano Français Deutsch English Ajuste de la pantalla (cuando se utiliza una señal analógica) Menú MODE SELECT Notas: - Según sea la resolución de la señal de entrada, la pantalla puede no cambiar incluso si pueden seleccionarse las opciones del menú. - Para seleccionar una opción - Sharp T19D1-B | Operation Manual - Page 116
Ajuste de la pantalla (cuando se utiliza una señal digital) Los ajustes se pueden realizar a través del menú Máscara en pantalla (OSD). Menú WHITE BALANCE Máscara en pantalla para el ajuste Si está utilizando Windows, abra el Patrón de ajuste incluido en el Disquete de utilidades. (p.112) Si su - Sharp T19D1-B | Operation Manual - Page 117
English Español Italiano Français Deutsch English Ajuste de la pantalla (cuando se utiliza una señal digital) Menú MODE SELECT Notas: - Para seleccionar una opción del menú: Botón / MODE - Una vez finalizados los ajustes: Botón MENU OSD H-POSITION (posición horizontal OSD) La posición del menú OSD - Sharp T19D1-B | Operation Manual - Page 118
escúrralo bien y proceda a la limpieza. Sector del panel LCD Utilice un paño suave y seco para limpiar, sin apretar demasiado, la suciedad y o con el servicio autorizado de asistencia técnica de Sharp más cercano. Los tubos fluorescentes del monitor tienen una vida útil limitada. - Si la pantalla - Sharp T19D1-B | Operation Manual - Page 119
ñol Italiano Français Deutsch English Especificaciones Especificaciones del producto Nombre del modelo LL-T19D1-H (Gris Plomizo)/LL-T19D1-B (Negro) Display LCD 48 cm medidos en diagonal Módulo TFT LCD Resolución (máx.) SXGA 1280 x 1024 pixels Colores reproducibles (máx.) Aprox. 16,77 millones de - Sharp T19D1-B | Operation Manual - Page 120
señales de sincronización que no son compatibles, aparecerá [OUT OF TIMING]. Consulte el manual de instrucciones de su ordenador para ajustar la sincronización de forma compatible con el monitor. - Si el monitor no recibe ninguna señal (synch signal), aparecerá [NO SIGNAL]. US text - La resoluci - Sharp T19D1-B | Operation Manual - Page 121
(masa) 16 Detección de clavija en caliente 17 Datos TMDS 0- 18 Datos TMDS 0+ 19 Protector 0/5 de datos TMDS 20 N.C. 21 N.C. 22 Protector de reloj TMDS 23 Reloj TMDS + 24 Reloj TMDS - Gestión de energía El monitor está basado en los estándares VESA DPMS y DVI DMPM. Para activar la funci - Sharp T19D1-B | Operation Manual - Page 122
manual de uso propio del ordenador mientras lee esto.) Acerca del perfil ICC Un perfil ICC (Consorcio Internacional de Color) es un archivo en el que se describen las características cromáticas del monitor LCD list of all the drivers in a specific location, so you can select the driver you want.] y a - Sharp T19D1-B | Operation Manual - Page 123
[Control Panel]. 3. Haga doble clic en [Display]. 4. Haga clic en [Settings], [Advanced] y [Monitor]. 5. Haga clic sobre [Properties], [Driver] y [Update Driver]. 6. Cuando aparezca el Asistente [Upgrade Device Driver Wizard], haga clic sobre [Next]. 7. Coloque una tilde en [Display a list of the - Sharp T19D1-B | Operation Manual - Page 124
[Control Panel]. 3. Cambie a "Classic View". 4. Haga doble clic en [Display]. 5. Haga clic en [Settings], [Advanced] y [Monitor]. 6. Haga clic sobre [Properties], [Driver] y [Update Driver]. 7. Cuando aparezca el Asistente [Hardware Update Wizard], compruebe [Install from a list or specific location - Sharp T19D1-B | Operation Manual - Page 125
ColorSync describe las características cromáticas del monitor LCD. Notas: - El perfil ColorSync de este monitor funciona con MacOS 8.5 o superior. - los comandos y los procedimientos a seguir podrían ser diferentes. Siga el manual de uso propio del ordenador mientras lee esto. 1.Introduzca el CD-ROM - Sharp T19D1-B | Operation Manual - Page 126
que sigue estas instrucciones, consulte también las instrucciones de instalación en el manual de manejo suministrado con el brazo o la base. ¡PRECAUCIÓN! - Tenga tipo de tornillos, puede dañar la parte interior del monitor. 6. Acople el brazo al monitor apretando los cuatro tornillos. 1.Retire los - Sharp T19D1-B | Operation Manual - Page 127
127 - Sharp T19D1-B | Operation Manual - Page 128
128 - Sharp T19D1-B | Operation Manual - Page 129
129 - Sharp T19D1-B | Operation Manual - Page 130
130 - Sharp T19D1-B | Operation Manual - Page 131
- Sharp T19D1-B | Operation Manual - Page 132
SHARP CORPORATION © 2003 SHARP CORPORATION Printed in Thailand 0NK5011088500 (1)
-
 1
1 -
 2
2 -
 3
3 -
 4
4 -
 5
5 -
 6
6 -
 7
7 -
8
-
9
-
10
-
11
-
12
-
13
-
14
-
15
-
16
-
17
-
18
-
19
-
20
-
21
-
22
-
23
-
24
-
25
-
26
-
27
-
28
-
29
-
30
-
31
-
32
-
33
-
34
-
35
-
36
-
37
-
38
-
39
-
40
-
41
-
42
-
43
-
44
-
45
-
46
-
47
-
48
-
49
-
50
-
51
-
52
-
53
-
54
-
55
-
56
-
57
-
58
-
59
-
60
-
61
-
62
-
63
-
64
-
65
-
66
-
67
-
68
-
69
-
70
-
71
-
72
-
73
-
74
-
75
-
76
-
77
-
78
-
79
-
80
-
81
-
82
-
83
-
84
-
85
-
86
-
87
-
88
-
89
-
90
-
91
-
92
-
93
-
94
-
95
-
96
-
97
-
98
-
99
-
100
-
101
-
102
-
103
-
104
-
105
-
106
-
107
-
108
-
109
-
110
-
111
-
112
-
113
-
114
-
115
-
116
-
117
-
118
-
119
-
120
-
121
-
122
-
123
-
124
-
125
-
126
-
127
-
128
-
129
-
130
-
131
-
132
 |
 |

LCD Monitor
LCD Farbmonitor
Moniteur LCD
Monitor LCD
Monitor LCD
LL-T19D1
OPERATION MANUAL
BEDIENUNGSANLEITUNG
MODE D
'
EMPLOI
MANUALE D
'
USO
MANUAL DE FUNCIONAMIENTO