Sharp UX-P200 UX-P200 Operation Manual - Page 57
Scanning glass and rollers - imaging film
 |
View all Sharp UX-P200 manuals
Add to My Manuals
Save this manual to your list of manuals |
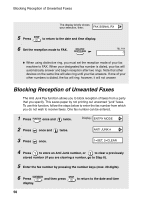
Page 57 highlights
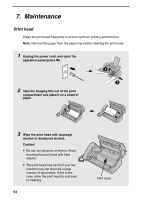
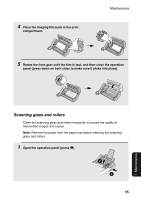
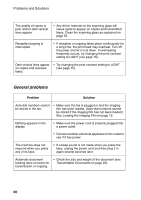
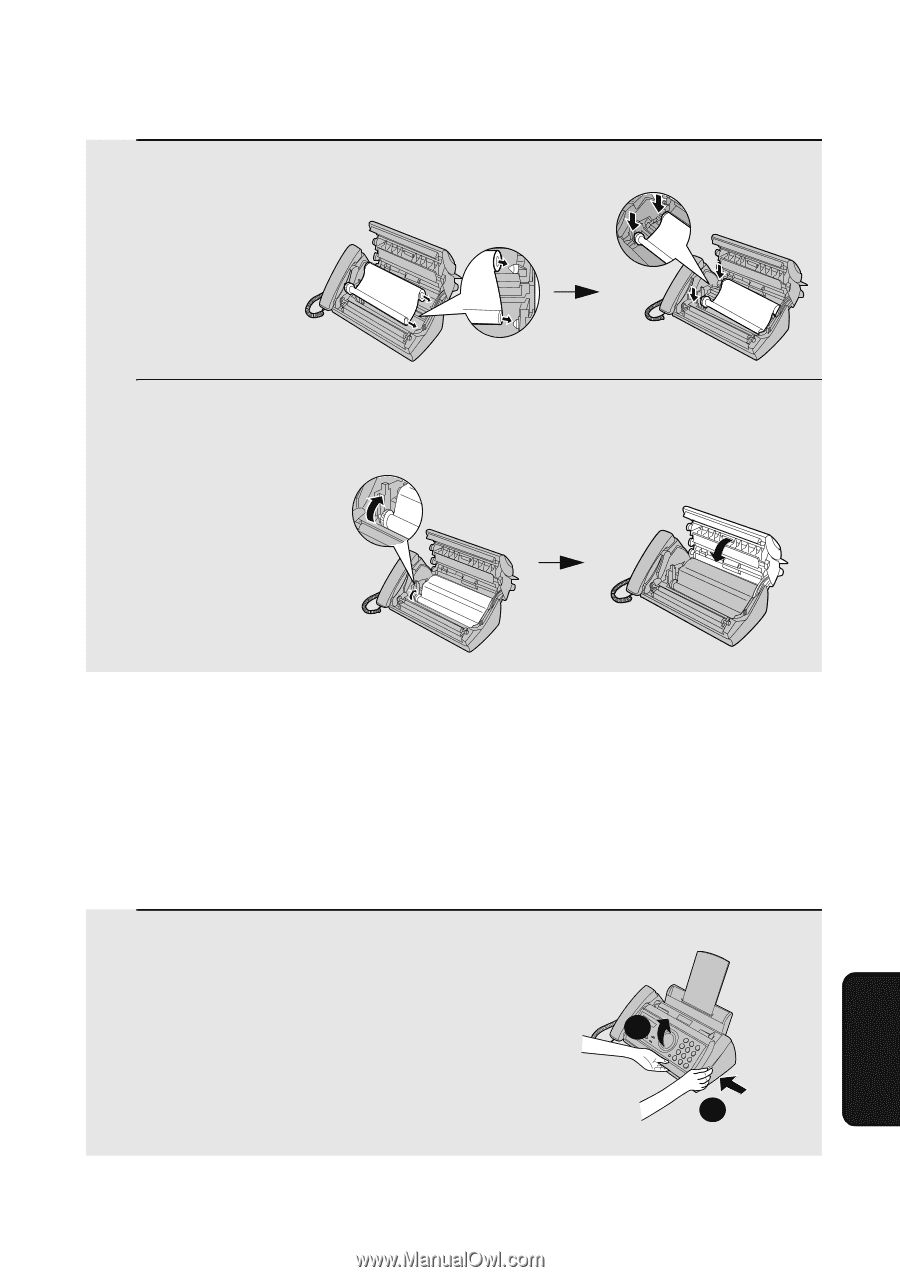
4 Place the imaging film back in the print compartment. Maintenance 5 Rotate the front gear until the film is taut, and then close the operation panel (press down on both sides to make sure it clicks into place). Scanning glass and rollers Clean the scanning glass and rollers frequently to ensure the quality of transmitted images and copies. Note: Remove the paper from the paper tray before cleaning the scanning glass and rollers. 1 Open the operation panel (press –). 2 1 55 7. Maintenance
-
 1
1 -
2
-
3
-
4
-
5
-
6
-
7
-
8
-
9
-
10
-
11
-
12
-
13
-
14
-
15
-
16
-
17
-
18
-
19
-
20
-
21
-
22
-
23
-
24
-
25
-
26
-
27
-
28
-
29
-
30
-
31
-
32
-
33
-
34
-
35
-
36
-
37
-
38
-
39
-
40
-
41
-
42
-
43
-
44
-
45
-
46
-
47
-
48
-
49
-
50
-
51
-
 52
52 -
 53
53 -
 54
54 -
 55
55 -
 56
56 -
 57
57 -
 58
58 -
 59
59 -
 60
60 -
 61
61 -
 62
62 -
63
-
64
-
65
-
66
-
67
-
68
-
69
-
70
-
71
-
72
-
73
-
74
-
75
-
76
-
77
-
78
-
79
-
80
 |
 |
Maintenance
55
7. Maintenance
4
Place the imaging film back in the print
compartment.
5
Rotate the front gear until the film is taut, and then close the operation
panel (press down on both sides to make sure it clicks into place).
Scanning glass and rollers
Clean the scanning glass and rollers frequently to ensure the quality of
transmitted images and copies.
Note:
Remove the paper from the paper tray before cleaning the scanning
glass and rollers.
1
Open the operation panel (press
➊
).
1
2