Sharp VLAH150U Operation Manual - Page 16
Preparation
 |
UPC - 074000352735
View all Sharp VLAH150U manuals
Add to My Manuals
Save this manual to your list of manuals |
Page 16 highlights
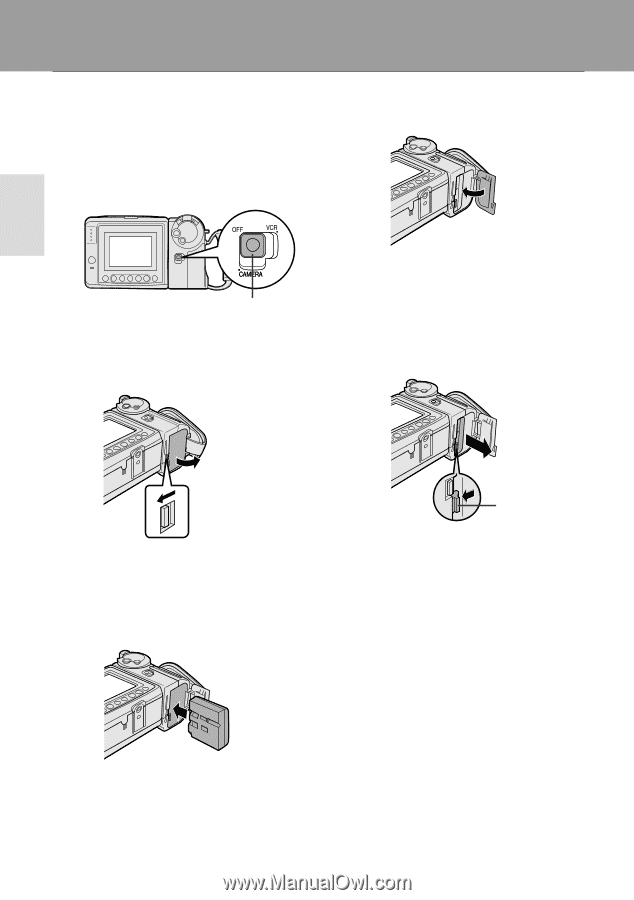
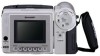
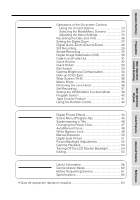
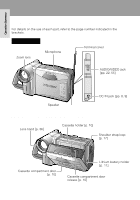
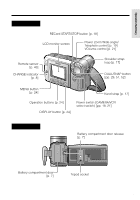
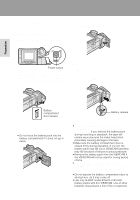
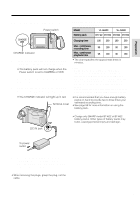
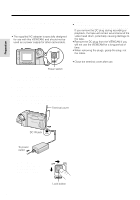
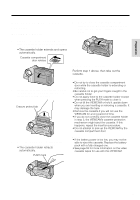
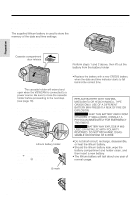
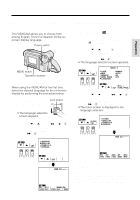
Preparation PPrerpearpataionration Inserting and Removing the Battery Pack Inserting the Battery Pack 1 Make sure that the Power switch is set to OFF. 4 Close the door, pressing it firmly in the center until it clicks. Power switch 2 Slide the battery compartment door release on the bottom of the VIEWCAM in the direction of the arrow to open the battery compartment door. Removing the Battery Pack 1 Perform steps 1 and 2 above. 2 Press the battery release as shown to remove the battery pack. Battery compartment door release 3 Insert the battery pack into the com- partment as shown, and push it in completely until it locks into place. Caution: • Do not force the battery pack into the battery compartment if it does not go in easily. Battery release Cautions: • BEFORE REMOVING THE BATTERY PACK, ALWAYS STOP THE TAPE AND TURN THE POWER OFF. If you remove the battery pack during recording or playback, the tape will remain wound around the video head drum, potentially causing damage to the tape. • Make sure the battery compartment door is closed firmly during operation. If it is not, the battery pack may fall out or VIEWCAM operation may fail because of the poor contact pressure. • Remove the battery pack from the VIEWCAM if the VIEWCAM will not be used for a long period of time. • When removing the battery pack, do not tilt the VIEWCAM so that the battery compartment faces down. The battery pack may fall out. • Do not expose the battery compartment door to strong force, as it may come off. • Use only SHARP model BT-H22 or BT-H32 battery packs with this VIEWCAM. Use of other batteries may present a risk of fire or explosion. 7
-
 1
1 -
2
-
3
-
4
-
5
-
6
-
7
-
8
-
9
-
10
-
 11
11 -
 12
12 -
 13
13 -
 14
14 -
 15
15 -
 16
16 -
 17
17 -
 18
18 -
 19
19 -
 20
20 -
 21
21 -
22
-
23
-
24
-
25
-
26
-
27
-
28
-
29
-
30
-
31
-
32
-
33
-
34
-
35
-
36
-
37
-
38
-
39
-
40
-
41
-
42
-
43
-
44
-
45
-
46
-
47
-
48
-
49
-
50
-
51
-
52
-
53
-
54
-
55
-
56
-
57
-
58
-
59
-
60
-
61
-
62
-
63
-
64
-
65
-
66
-
67
-
68
-
69
-
70
-
71
-
72
-
73
-
74
-
75
-
76
-
77
-
78
-
79
-
80
 |
 |