Sharp VLAH150U Operation Manual - Page 28
Zooming, Tips on Recording Positions
 |
UPC - 074000352735
View all Sharp VLAH150U manuals
Add to My Manuals
Save this manual to your list of manuals |
Page 28 highlights
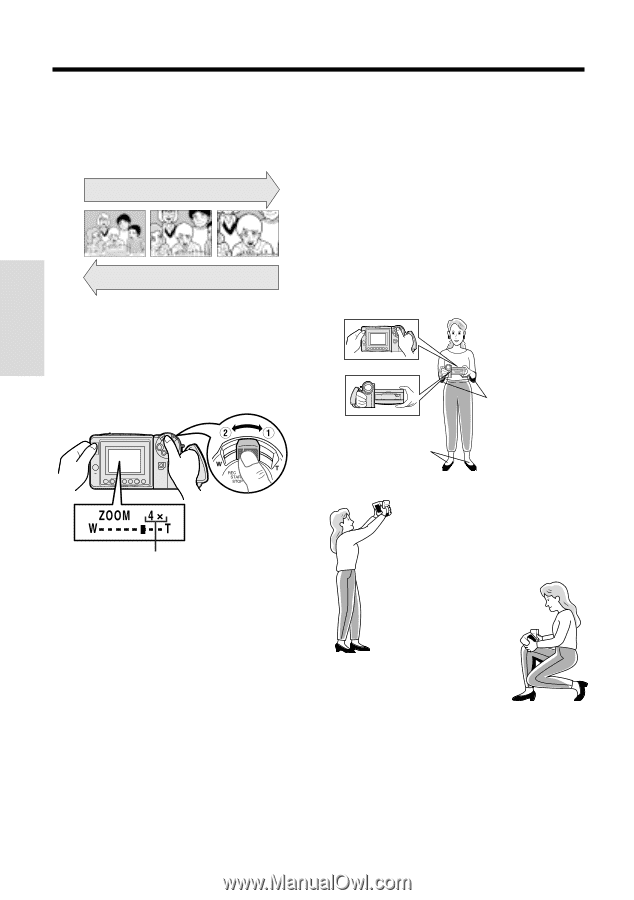
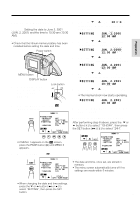
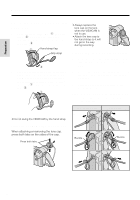
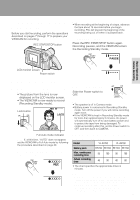
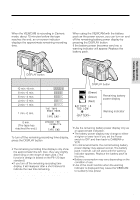
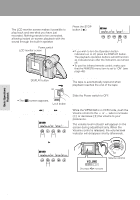
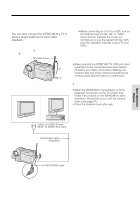
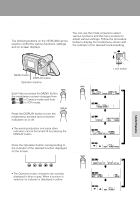
Basic Operations Camera Recording Basic Operations Camera Recording Zooming Tips on Recording Positions Zooming allows you to move visually closer to or farther from a subject without physically changing your position. Zooming in (when you want to center attention on the subject) Wide angle Telephoto Zooming out (when you want to show the surroundings) To Zoom In Push the Power Zoom control to the T (telephoto) side to get a close-up view (Q). The rotating LCD monitor screen lets you enjoy easy video recording in a more relaxed posture without having to hold the VIEWCAM up to your eye. The LCD monitor also makes it easier to record high-angle and low-angle shots. Holding the VIEWCAM Put the fingers of your right hand through the hand strap, and place your right thumb close to the REC START/STOP button and Power Zoom control. Place your left thumb on the thumb rest on the left side of the LCD monitor. Basic Posture To Zoom Out Push the Power Zoom control to the W (wide angle) side to get a wide field of view (W). Place your feet at a 45° angle and balance your weight on both legs. Press your elbows against your sides. Power Zoom control Zoom range indicator • The on-screen display shows you the current zoom setting. • The zoom speed changes depending on how far you push the Power Zoom control. Notes: • The VIEWCAM is unable to focus when zooming in on subjects within 5 feet (1.5 m). The VIEWCAM will automatically zoom out until it is able to focus on the subject. (See page 36 for recording macro shots.) • See page 27 for use of the digital zoom. High Angle You can record while still viewing the screen. This is convenient when you want to record over a crowd. Low Angle Put one knee on the ground for the best stability. Notes: • In hand-held recording, the VIEWCAM has to be steadied to prevent image shakes. For very stable recording, use a tripod. • Take care not to touch the microphone with your fingers during recording. It will cause noise on the audio track. 19
-
 1
1 -
2
-
3
-
4
-
5
-
6
-
7
-
8
-
9
-
10
-
11
-
12
-
13
-
14
-
15
-
16
-
17
-
18
-
19
-
20
-
21
-
22
-
 23
23 -
 24
24 -
 25
25 -
 26
26 -
 27
27 -
 28
28 -
 29
29 -
 30
30 -
 31
31 -
 32
32 -
 33
33 -
34
-
35
-
36
-
37
-
38
-
39
-
40
-
41
-
42
-
43
-
44
-
45
-
46
-
47
-
48
-
49
-
50
-
51
-
52
-
53
-
54
-
55
-
56
-
57
-
58
-
59
-
60
-
61
-
62
-
63
-
64
-
65
-
66
-
67
-
68
-
69
-
70
-
71
-
72
-
73
-
74
-
75
-
76
-
77
-
78
-
79
-
80
 |
 |