Sharp XE-A406 XE-A406 Operation Manual in English and Spanish - Page 11
Installing paper rolls, Preparing the cash register
 |
UPC - 074000049536
View all Sharp XE-A406 manuals
Add to My Manuals
Save this manual to your list of manuals |
Page 11 highlights
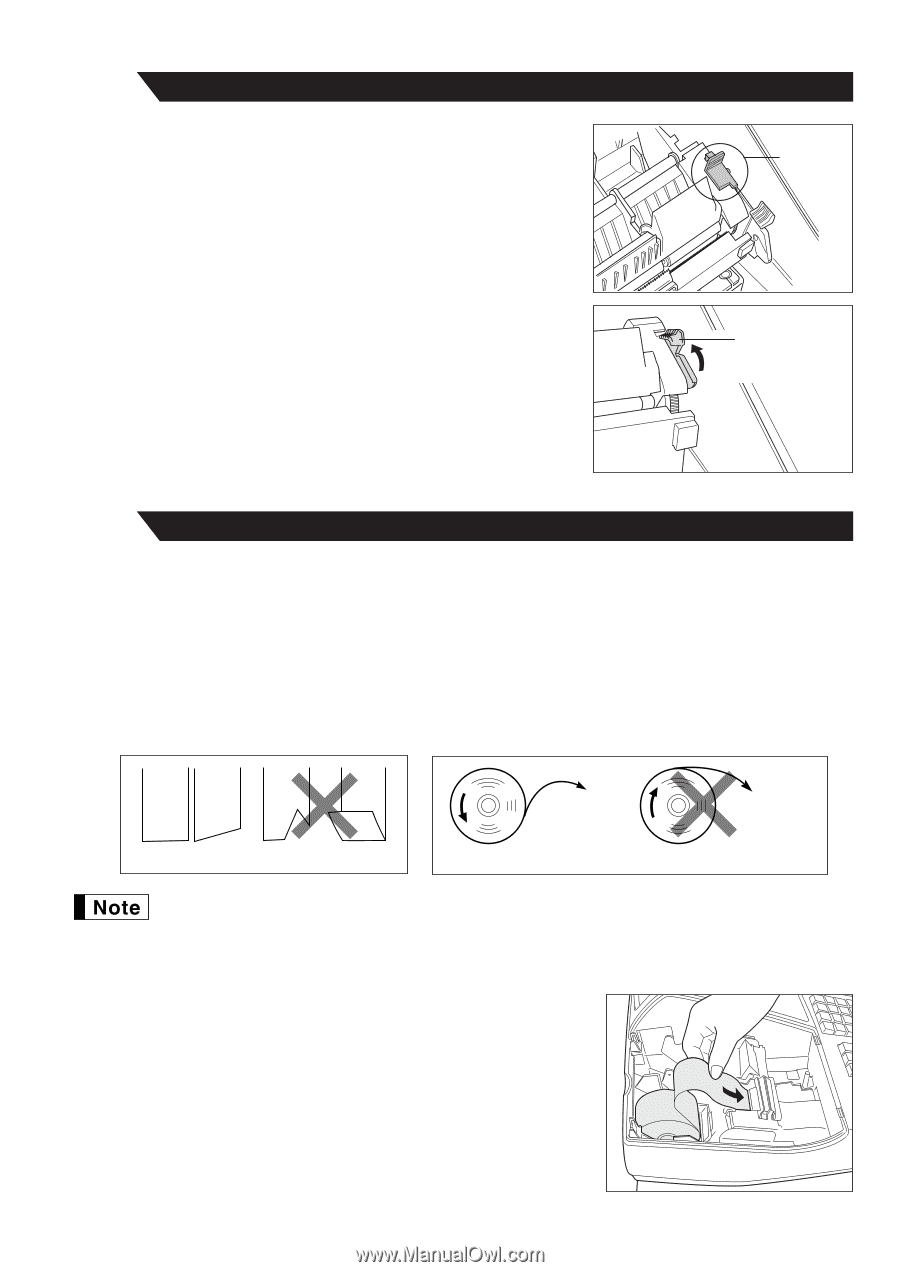
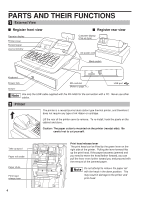
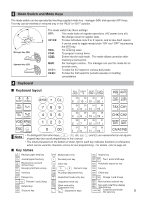
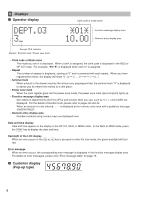
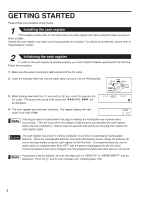
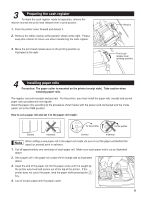
3 Preparing the cash register To make the cash register ready for operation, remove the retainer and set the print head release lever in print position. 1. Push the printer cover forward and detach it. 2. Remove the white retainer at the position shown at the right. Please keep this retainer for future use when transferring the cash register. 3. Move the print head release lever to the printing position as illustrated at the right. Retainer Print head release lever (printing position) 4 Installing paper rolls Precaution: The paper cutter is mounted on the printer (receipt side). Take caution when installing paper rolls. The register can print receipts and journals. For the printer, you must install the paper rolls (receipt and journal paper rolls) provided with the register. Install the paper rolls according to the procedure shown below with the power cord connected and the mode switch set to the PGM position: How to cut a paper roll and set it in the paper roll cradle: To the printer To the printer Correct Incorrect Correct Incorrect When setting a new paper roll in the paper roll cradle, be sure to cut the paper end behind the taped (or pasted) point in advance. 1. Cut off approximately one revolution of each paper roll. Make sure each paper end is cut as illustrated above. 2. Set a paper roll in the paper roll cradle of the receipt side as illustrated above. 3. Insert the end of the paper roll into the paper chute until it is caught by the printer auto-feed and comes out of the top of the printer. If the { printer does not catch the paper, feed the paper while pressing the key. 4. Cut off excess paper with the paper cutter. 9
-
 1
1 -
2
-
3
-
4
-
5
-
 6
6 -
 7
7 -
 8
8 -
 9
9 -
 10
10 -
 11
11 -
 12
12 -
 13
13 -
 14
14 -
 15
15 -
 16
16 -
17
-
18
-
19
-
20
-
21
-
22
-
23
-
24
-
25
-
26
-
27
-
28
-
29
-
30
-
31
-
32
-
33
-
34
-
35
-
36
-
37
-
38
-
39
-
40
-
41
-
42
-
43
-
44
-
45
-
46
-
47
-
48
-
49
-
50
-
51
-
52
-
53
-
54
-
55
-
56
-
57
-
58
-
59
-
60
-
61
-
62
-
63
-
64
-
65
-
66
-
67
-
68
-
69
-
70
-
71
-
72
-
73
-
74
-
75
-
76
-
77
-
78
-
79
-
80
-
81
-
82
-
83
-
84
-
85
-
86
-
87
-
88
-
89
-
90
-
91
-
92
-
93
-
94
-
95
-
96
-
97
-
98
-
99
-
100
-
101
-
102
-
103
-
104
-
105
-
106
-
107
-
108
-
109
-
110
-
111
-
112
-
113
-
114
-
115
-
116
-
117
-
118
-
119
-
120
-
121
-
122
-
123
-
124
-
125
-
126
-
127
-
128
-
129
-
130
-
131
-
132
 |
 |