Sharp XE-A407 XE-A407 XE-A43S Operation Manual in English - Page 69
Personnel Programming
 |
View all Sharp XE-A407 manuals
Add to My Manuals
Save this manual to your list of manuals |
Page 69 highlights
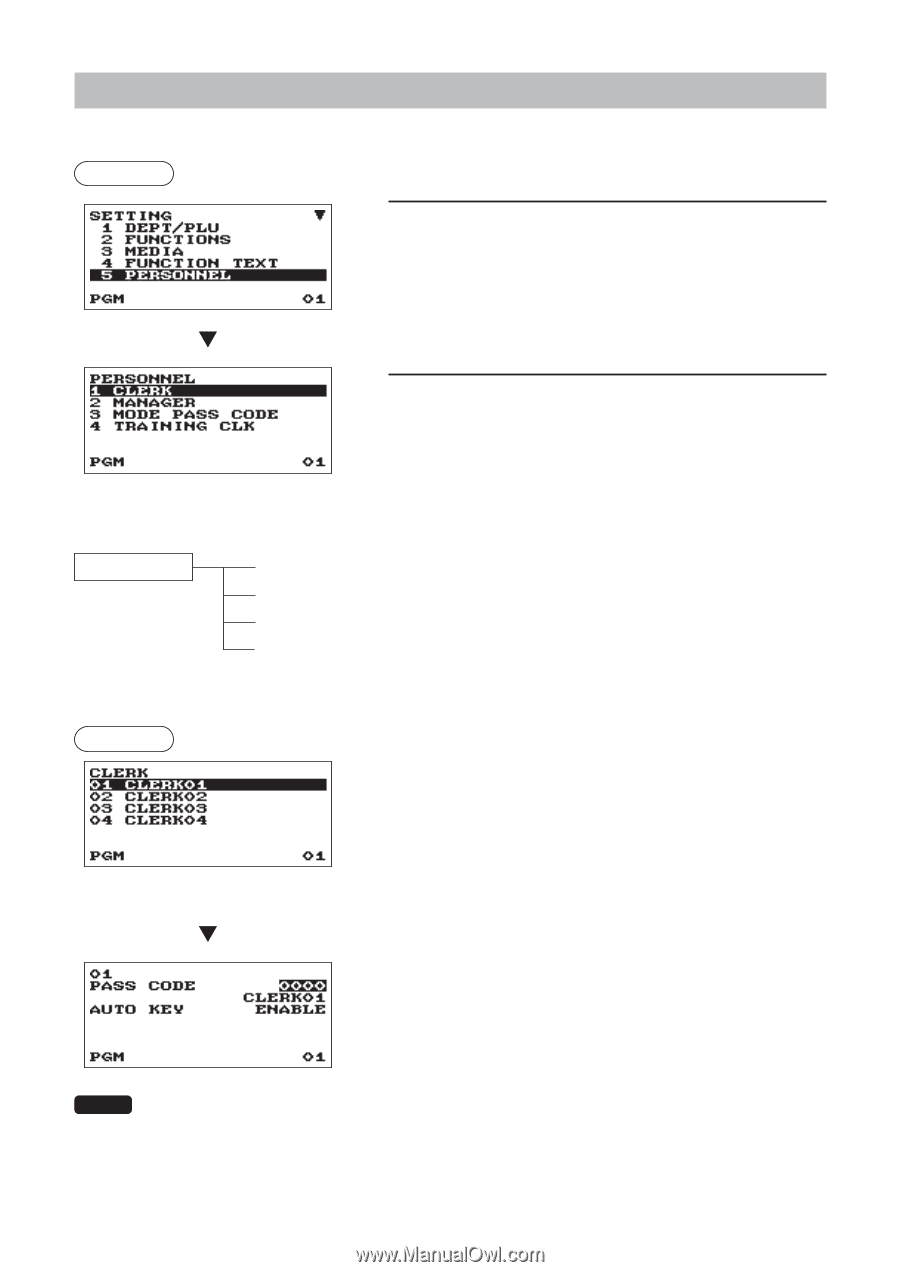
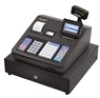
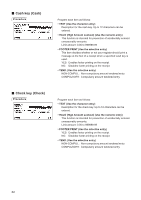
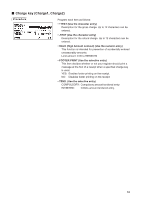
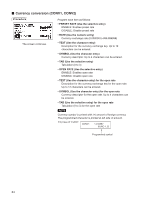
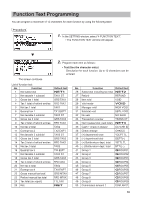
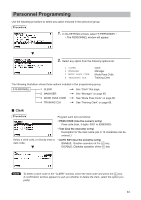
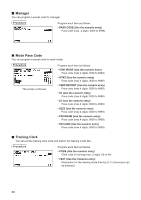
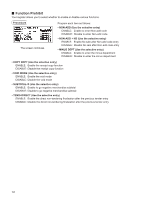
Personnel Programming Use the following procedure to select any option included in the personnel group: Procedure 1. In the SETTING window, select "5 PERSONNEL." • The PERSONNEL window will appear. 2. Select any option from the following options list. 1 CLERK 2 MANAGER 3 MODE PASS CODE 4 TRAINING CLK Clerk Manager Mode Pass Code Training Clerk The following illustration shows those options included in this programming group. 5 PERSONNEL 1 CLERK 2 MANAGER 3 MODE PASS CODE 4 TRAINING CLK l See "Clerk" this page. l See "Manager" on page 68. l See "Mode Pass Code" on page 68. l See "Training Clerk" on page 68. ■■ Clerk Procedure Select a clerk code, or directly enter a clerk code. Program each item as follows: • PASS CODE (Use the numeric entry) Pass code (max. 4 digits: 0001 to 9999/0000) • Text (Use the character entry) Description for the clerk name (Up to 16 characters can be entered.) • AUTO KEY (Use the selective entry) a ENABLE: Enables operation of the key. a DISABLE: Disables operation of the key. NOTE D To delete a clerk code in the "CLERK" window, select the clerk code and press the key. A confirmation window appears to ask you whether to delete the clerk, select the option you prefer. 67
-
 1
1 -
2
-
3
-
4
-
5
-
6
-
7
-
8
-
9
-
10
-
11
-
12
-
13
-
14
-
15
-
16
-
17
-
18
-
19
-
20
-
21
-
22
-
23
-
24
-
25
-
26
-
27
-
28
-
29
-
30
-
31
-
32
-
33
-
34
-
35
-
36
-
37
-
38
-
39
-
40
-
41
-
42
-
43
-
44
-
45
-
46
-
47
-
48
-
49
-
50
-
51
-
52
-
53
-
54
-
55
-
56
-
57
-
58
-
59
-
60
-
61
-
62
-
63
-
 64
64 -
 65
65 -
 66
66 -
 67
67 -
 68
68 -
 69
69 -
 70
70 -
 71
71 -
 72
72 -
 73
73 -
 74
74 -
75
-
76
-
77
-
78
-
79
-
80
-
81
-
82
-
83
-
84
-
85
-
86
-
87
-
88
-
89
-
90
-
91
-
92
-
93
-
94
-
95
-
96
-
97
-
98
-
99
-
100
-
101
-
102
-
103
-
104
-
105
-
106
-
107
-
108
-
109
-
110
-
111
-
112
-
113
-
114
-
115
-
116
 |
 |