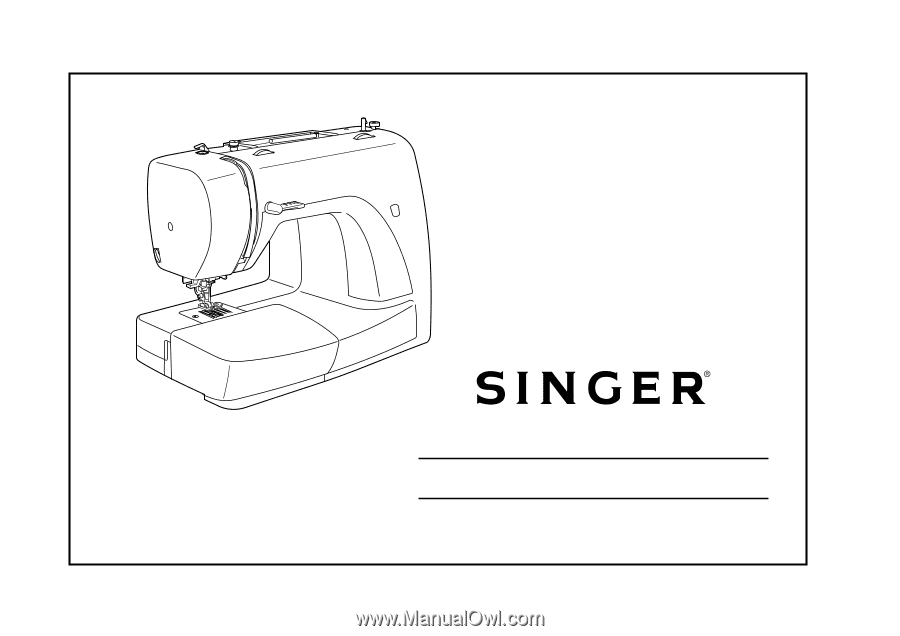
Singer 3116 Simple Instruction Manual
Singer 3116 Simple Manual
 |
View all Singer 3116 Simple manuals
Add to My Manuals
Save this manual to your list of manuals |
Singer 3116 Simple manual content summary:
- Singer 3116 Simple | Instruction Manual - Page 1
Instruction Manual Manual de Instrucciones Manuel d'Instruction - Singer 3116 Simple | Instruction Manual - Page 2
area, such as threading needle, changing needle, threading bobbin, or changing presser foot, and the like. 10.Always unplug sewing machine from the electrical outlet when removing covers, lubricating, or when making any other user servicing adjustments mentioned in the instruction manual. 11.Never - Singer 3116 Simple | Instruction Manual - Page 3
ón de la máquina de coser y el dispositivo de control de pedal libre de acumulacion de suciedad, polvo y ropa suelta. 5. Mantener engrase o cuando se haga cualquier otro ajuste por el usuario mencionado en el manual de instrucciones. 11.Nunca dejar caer ni insertar ningún objeto a través - Singer 3116 Simple | Instruction Manual - Page 4
, de lubrifier ou de faire tout réglage spécifié dans le manuel d'instructions. 11.Ne jamais laisser tomber ou introduire tout objet dans une ouverture de la machine. 12.Ne pas utiliser à l'extérieur. 13.Ne pas utiliser la machine dans des endroits ou des aérosols sont pulvérisés ou de l'oxygène - Singer 3116 Simple | Instruction Manual - Page 5
on one of the easiest to use sewing machines ever made. May we recommend that, before you start to use your sewing machine, you discover the many advantages and the ease of operation by going through this instruction book, step by step, seated at your machine. To ensure that you are always provided - Singer 3116 Simple | Instruction Manual - Page 6
-in sewing table 8 Connecting machine to power source 10 Changing the bulb 12 Two-step presser foot lifter/ Adjusting presser foot pressure 14 Attaching the presser foot shank 16 Winding the bobbin 18 Inserting the bobbin 20 Inserting and changing needles 22 Threading the upper thread 24 - Singer 3116 Simple | Instruction Manual - Page 7
E Indice Detalles de la máquina 3/5 Accessories 7 Instalación de la mesa de coser convertible 9 Conexión de la máquina a la fuente de alimentación eléctrica 11 Cambio de la bombilla 13 Elevador del prensatelas de dos tiempos/ Ajuste de la presión del prensatelas 15 Montaje del - Singer 3116 Simple | Instruction Manual - Page 8
de la machine à une source d'alimentation..........11 Chagement de l'ampoule 13 Levier de levage du pied presseur à deux niveaux/ Réglage de la pression du pied-presseur 15 Fixation du support de pied 77 Fronçage 79 Pied double entraînement 81 Entretien de la machine 83 Guide de dépannage 86 - Singer 3116 Simple | Instruction Manual - Page 9
Principal parts of the machine 8 1 1. Thread tension dial 9 2. Presser foot pressure adjustment 2 3. Thread take-up lever 10 4. Thread cutter 3 5. Presser foot 11 6. Needle plate 7. Removable sewing table/ accessory storage 4 8. Reverse sewing lever 9. Bobbin stopper 5 10. Stitch - Singer 3116 Simple | Instruction Manual - Page 10
12. Palanca para bajar los dientes de alimentación 13. Palanca de un paso coser ojales 14. Enhebrador automático F Composants principaux de la machine à coudre 1. Molette de commande de tension 2. Commande de réglage de pression du pied-presseur 3. Manette de relevage du fil 4. Coupe-fil 5. Pied - Singer 3116 Simple | Instruction Manual - Page 11
Principal parts of the machine 15. Horizontal spool pin 16. Bobbin winder 17. Handwheel 18. Pattern selector dial 19. Power and light switch 20. Main plug socket 21. Bobbin thread guide 22. Upper thread guide 23. Face plate 24. Handle 25. Presser foot lever 26. Buttonhole stitch balance adjustment - Singer 3116 Simple | Instruction Manual - Page 12
F Composants principaux de la machine à coudre 15. Axe horizontal et porte-bobine 16. Bobineur 17. Volant 18. Sélecteur règle-point 19 . Interrupteur d'alimentation et d'éclairage 20. Prise de branchement du fil d'alimentation 21. Butée du bobineur 22. Guide-fil - Singer 3116 Simple | Instruction Manual - Page 13
j d 006914008 g GB Accessories Standard accessories (1) a. All purpose foot b. Zipper foot c. Buttonhole foot d. Button sewing foot e. Seam ripper/ brush f. Seam guide g. Pack of needles h. Spool holder i . Bobbin (3x) j. L-screwdriver 2 k l m n o 006804008 006803008 006800008 006810008 - Singer 3116 Simple | Instruction Manual - Page 14
pose de bouton e. Brosse/ Outil à découdre f. Guide de couture g. Étui à aiguilles h. Support de bobine i. Canette (3x) j. Tournevis L Accesorios 10 accessoires ne sont pas fournis avec la machine. cependant, ils sont disponibles chez votre dépositaire Singer) k. Second axe de bobine l. Pied - Singer 3116 Simple | Instruction Manual - Page 15
GB Installing the snap-in sewing table Keep the snap-in sewing table horizontal, and push it in the direction of the arrow. (1) 1 The inside of the snap-in sewing table can be utilized as an accessory box. To open, lift up at the point of the arrow. (2) 2 8 - Singer 3116 Simple | Instruction Manual - Page 16
E Instalación de la mesa de coser convertible Mantenga horizontal la mesa de coser convertible y empújela en la dirección de la flecha. (1) F Installation de la tablette de couture amovible Maintenir la tablette en position horizontale et la pousser dans la direction de la flèche. (1) El interior - Singer 3116 Simple | Instruction Manual - Page 17
Attention: Unplug power cord when machine is not in use. Foot control The foot control pedal regulates the sewing speed. (3) Attention: Consult a qualified electrician if in doubt as to connect machine to power source. Unplug power cord when machine is not in use. The foot control must be used with - Singer 3116 Simple | Instruction Manual - Page 18
de alimentación cuando la máquina no esté en uso. El control de pedal debe utilizarse con la máquina mediante 4C316B (tensión de 110-120V área) machine. (3) Attention: Consulter un électricien qualifié en cas de doute pour brancher la machine. Débrancher la machine quand celle-ci n'est pas en service - Singer 3116 Simple | Instruction Manual - Page 19
B A 1 C 2 GB Changing the bulb Disconnect the machine from the power supply by removing the plug from the main socket! Replace bulb with - Unscrew the bulb and install a new one (C). (2) - Replace the face plate and tighten screw. Should there be any problem, ask your local dealer for advice. 12 - Singer 3116 Simple | Instruction Manual - Page 20
- Volver a colocar la placa frontal y apretar el tornillo. Si surge algún problema, consulte con su distribuidor local. F Changement de l'ampoule Débrancher la machine de l'alimentation électrique en enlevant la prise! Remplacez cette dernière par une ampoule de 10 watts (110120V area) ou 15 watts - Singer 3116 Simple | Instruction Manual - Page 21
GB Two-step presser foot lifter When sewing several layers or thick fabrics, the presser foot can be raised to a high rise position for easy positioning of the work. (A) A Adjusting presser foot pressure The presser foot pressure of the machine has been pre-set and requires no particular - Singer 3116 Simple | Instruction Manual - Page 22
E Elevador del prensatelas de dos tiempos Cuando se cose varias capas de tela gruesa, el prensatelas puede elevarse a una posición alta para facilitar la colocación de la labor (A). F Levier de levage du pied presseur à deux niveaux Lorsque vous cousez plusieurs épaisseurs de tissus épais, le pied- - Singer 3116 Simple | Instruction Manual - Page 23
(d). (2) Raise the lever (e). Lower the presser foot shank (b) and the presser foot (f) will engage automatically. Removing the presser foot Raise the presser foot. (3) Raise the lever (e) and the foot disengages. Attaching the seam guide Attach the seam guide (g) in the slot as illustrated. Adjust - Singer 3116 Simple | Instruction Manual - Page 24
("O") cuando realice cualquiera de las anteriores operaciones. F Fixation du support de pied presseur Soulever la tige du pied-presseur (a) avec gager le pied-presseur (3). Lever le pied-presseur. Fixation du guide de couture Placer le guide de couture dans l'encoche (g) tel qu'illustré. Régler en - Singer 3116 Simple | Instruction Manual - Page 25
and place on spindle. (5) - Push bobbin to right. (6) - Hold thread end (7). Step on foot control pedal. (8) - Cut thread (9). Press bobbin to left (10) and remove. Please Note: When the bobbin winder spindle is in "bobbin winding" position, the machine will not sew and the hand wheel will not - Singer 3116 Simple | Instruction Manual - Page 26
- Sujete el extremo del hilo (7). - Pise el pedal de control del prensatelas (8). - Corte el hilo (9). la bobine (2). - Glisser le fil dans le guide (3). - Enrouler le fil dans le sens horaire Appuyer le pied sur la pédale de commande de la machine (8). - Couper le fil (9). Pousser la canette vers la - Singer 3116 Simple | Instruction Manual - Page 27
raised. - Open the hinged cover (1) - Pull the bobbin case tab (a) and remove the bobbin case. (2) - Hold the bobbin case with one hand. Insert the bobbin so that the thread runs in a clockwise direction (arrow) (3). - Pull the thread through the slit and under the finger (4). 1 2 - Hold - Singer 3116 Simple | Instruction Manual - Page 28
E Colocación de la canilla La aguja tiene que estar siempre arriba del todo al poner y sacar la canilla. - Abrir la tapa con charnela. (1) - Abrir tapa de la caja de bobina (a) y quitar la caja de bobina. (2) - Sujetar el porta-canilla con una mano. Poner la canilla de manera que el hilo se devane - Singer 3116 Simple | Instruction Manual - Page 29
C 1 GB Inserting and changing needles Change the needle regularly, especially if it is showing signs of wear and causing problems. For best sewing results always use SINGER Brand Needles. Insert the needle as illustrated as follows: A. Loosen the needle clamp screw and tighten again after inserting - Singer 3116 Simple | Instruction Manual - Page 30
aguja nueva. (1) B. El lado plano de eje debe quedar hacia la parte posterior. C/D. Inserte la aguja lo más arriba posible. Atención: Gire el obtenir les meilleurs résultats, toujours utiliser des aiguilles fabriquées par Singer. Insérer l'aiguille tel qu'illustré ci-dessous: A. Desserrer - Singer 3116 Simple | Instruction Manual - Page 31
wire needle clamp guide and then down to the needle which should be threaded from front to back. Pull about 6-8 inches of thread to the rear beyond the needle eye. (9) Note: If your sewing machine is equipped with the factory installed optional automatic needle threader, instructions for use can - Singer 3116 Simple | Instruction Manual - Page 32
ère. Tirer le fil sur une longueur approximative de 15-20 cm (6 à 8 pouces) vers l'arrière au delà de l'oeilleton de l'aiguille. (9) Note: Si votre machine à coudre est équipée d'un enfileur automatique déjà installé en sortie d'usine, tournez à page 27 pour instructions d'usage. 25 - Singer 3116 Simple | Instruction Manual - Page 33
the needle to its highest position. - Press lever (A) down as far as it will go. - The threader automatically swings to the threading position (B). - Pass thread around thread guide (C). - Pass the thread in front of the needle around the hook (D) from bottom to top. - Release lever (A). - Pull the - Singer 3116 Simple | Instruction Manual - Page 34
- Pasa el hilo enfrente de la aguja alrededor del garfio (D) desde la parte inferior a la superior. - Libere la palanca. (A) - Tire del hilo a coudra automatiquement à la position d'enfilage (B). - Passer le fil au tour du guide de fil (C). - Passer le fil devant l'aiguille au tour du crochet (D) - Singer 3116 Simple | Instruction Manual - Page 35
tight for straight stitch sewing. Turn dial to lower number. D. Normal thread tension for zig zag and decorative sewing. Correct thread tension is when a small amount of the upper thread appears on the bottom side of fabric. 1 2 Lower thread tension To test the bobbin thread tension, remove the - Singer 3116 Simple | Instruction Manual - Page 36
E Tensión del hilo F Tension du fil Tensión del hilo superior Adjuste de la tensión del hilo básica: "4" Para aumentar la tensión, girar el disco al siguiente número más alto. Para reducir la tensión, girar el disco al siguiente número más bajo. A. Tensión normal del hilo para cosido de puntos - Singer 3116 Simple | Instruction Manual - Page 37
the bobbin thread Hold the upper thread with the left hand. Turn the handwheel (1) towards you (counterclockwise) lowering, then raising needle. 1 Gently pull on the upper thread to bring the bobbin thread up through the needle plate hole (2). Lay both threads to the back under the presser foot - Singer 3116 Simple | Instruction Manual - Page 38
hilo uperior para llevar el hilo de la canilla hacia arriba a través del orificio de la placa de la aguja (2). Dejar ambos hilos en la parte posterior bajo el prensatelas (3). Tirer doucement vers le haut sur le fil supérieur de la bobine pour le faire passer au travers de l'orifice - Singer 3116 Simple | Instruction Manual - Page 39
seam, press down the reverse sewing lever (A). Sew a few reverse stitches. Release the lever and the machine will sew forwards again. (1) Removing the work Turn the handwheel counterclockwise to bring the thread take up lever to its highest position, raise the presser foot and remove work behind the - Singer 3116 Simple | Instruction Manual - Page 40
la fin d'une couture, mettre en position basse la commande d'inversion de couture. Faire quelques points en sens inverse. Lâcher la commande et la machine reprend la couture vers l'avant (A). (1) Cómo sacar la labor Gire el volante en sentido contrario a las agujas del reloj para llevar la palanca - Singer 3116 Simple | Instruction Manual - Page 41
be purchased for utility and decorative work. 2. When sewing with twin needles, the stitch width dial should be set at less than "3". 3. For best sewing results always use genuine SINGER needles. 4. Replace needle often (approximately every other garment ) and/ or at first thread breakage or skipped - Singer 3116 Simple | Instruction Manual - Page 42
mismo hilo en el las partes superior e inferior. 18(110) Tejidos de lana cardada 18 (110). entrelazados, tricots, puntos simples y dobles. También puntos de jerseys, licra, tejidos para trajes de baño, tejidos elásticos. SINGER 2025 Aguja doble. Tejido entrecruzado y tejidos de punto. SINGER - Singer 3116 Simple | Instruction Manual - Page 43
correspondance de l'aiguille, du tissu et du fil GUIDE DE SÉLECTION DE L'AIGUILLE, DU TISSU ET DU 18 (110). jerseys doubles. SINGER 2045 Aiguille à pointe ronde. 9 (70) à 18 (110). Tissus naturels et synthétiques tissés, mélanges polyester, tricots en polyester, tissus interlock, jerseys simples - Singer 3116 Simple | Instruction Manual - Page 44
37 - Singer 3116 Simple | Instruction Manual - Page 45
To obtain any of the other patterns shown on the d stitch selection panel, select the stitch with the pattern selector dial. Adjust the stitch length with the stitch length dial. ABCDE FGH I J K LMNOPQ a. Reverse lever b. Stitch length dial c. Stitch display d. Stitch pattern selector dial 38 - Singer 3116 Simple | Instruction Manual - Page 46
E ¿Cómo seleccionar su dibujo? Para punto recto, seleccione el dibujo " " con el disco selector de dibujo. Ajuste el largo de la puntada con el disco correspondiente. Para punto en zig-zag, seleccione el dibujo " " con el disco selector de dibujo. Ajuste el largo de la puntada de acuerdo con la tela - Singer 3116 Simple | Instruction Manual - Page 47
, the thicker the fabric, thread and needle, the longer the stitch should be. For a fine stitch set length at "1" or "2". For gathering set to straight stitch, with stitch length at "4". Do 2 rows of stitching ¼ of an inch apart. Remove from machine, hold bobbin thread and gather fabric to desired - Singer 3116 Simple | Instruction Manual - Page 48
E Punto recto Gire el disco selector de la puntada, de modo que la pantalla de la puntada indique la posición del punto recto. En terminos generales, cuanto más grosor tenga la tela, el hilo y la aguja, más larga debería ser la puntada. Para puntada delgada seleccione la longitud del punto entre "1" - Singer 3116 Simple | Instruction Manual - Page 49
does not, adjust the stitch width accordingly (2). If using the optional blindhem foot, adjust the guide (3) by turning the knob (4) so that the guide just rests against the fold. Sew slowly, guiding the fabric carefully along the edge of the guide. It takes practice to sew blind hems. Always make - Singer 3116 Simple | Instruction Manual - Page 50
ilustra, con el lado incorrecto en la parte más alta (1). Coloque la tela bajo el machine. Pour ourlet, rideaux, pantalons, jupes, etc. Ourlets invisible/ lingerie pour tissu ferme. Régler la machine Si vous travaillez avec le pied invisible, régler le guide (3) en tournant le bouton (4) de façon à - Singer 3116 Simple | Instruction Manual - Page 51
stitches * The overcasting foot is an optional accessory not supplied with your machine. Seams, neatening, visible hems. Standard overlock: For fine knits, jerseys, neck edges, ribbing. (a) Double overlock stitch: For fine knits, handknits, seams. (b) All overedge stitches are suitable for sewing - Singer 3116 Simple | Instruction Manual - Page 52
de punto esférica para evitar. F Point surfil * Le pied pour surfil est un accessoire optionnel qui n'est pas fourni avec votre machine. Coutures, finitions, ourlets visibles. Surjet Traditionnel: Pour les tricots fins, jerseys, les cols. (a) Point double surjet: Pour les tricots fins, jerseys, les - Singer 3116 Simple | Instruction Manual - Page 53
to right side to lower the feed dogs. (1) Change presser foot to button sewing foot. (2) Position the work under the foot. Place the button in the desired position and lower the foot. Set the pattern selector knob on " " sew a few securing stitches. Select one of the two narrow zig zag patterns - Singer 3116 Simple | Instruction Manual - Page 54
de dibujo en " " y coser unas pocas puntadas de fijación. (3) Si se precisa coser un tallo de botón, utilizar una aguja de zurcir en la parte superior del botón y coser (4). Para botones con cuatro agujeros, coser primero a través de los dos agujeros frontales (3), empujar la labor hacia delante - Singer 3116 Simple | Instruction Manual - Page 55
the upper thread, start the machine. 7. Buttonhole stitching is done in the order (D). 8. Stop the machine when the buttonhole is sewn. Making a Buttonhole on Stretch Fabrics (E) When sewing buttonholes on stretch fabric, hook heavy thread or cord under the buttonhole foot. When the buttonhole is - Singer 3116 Simple | Instruction Manual - Page 56
luego los dos extremos del hilo grueso en la parte frontal del prensatelas, insértelos en las ranuras y ) La pose de boutonnière est un processus simple qui assure des résultats fiables. Néanmoins, il la machine. 7. La pose de la boutonnière se déroule dans l'ordre indiqué (D). 8. Arrêter la machine - Singer 3116 Simple | Instruction Manual - Page 57
usually be in a neutral position. (between "+" and "") If the stitches on the left side of the buttonhole are too close together, turn the dial to the left (+). * Turning dial to the left opens left side. If the stitches on the left side of the buttonhole are too open, turn the dial to the right - Singer 3116 Simple | Instruction Manual - Page 58
a la derecha (). * El giro del disco a la derecha cierra el lado izquierdo. F Équilibrage gauche et droit pour boutonnière La densité des points de part et d'autre de la boutonnière peut être réglée au moyen du sélecteur d'équilibrage de boutonnière. Normalement, le sélecteur doit être placé dans - Singer 3116 Simple | Instruction Manual - Page 59
selector on " ". Set machine as illustrated on the left. Set stitch length control between "1" - "4" (according to thickness of fabric). Change to zipper foot. (1) The zipper foot can be attached right or left, depending on which side of the foot you are going to sew. (2) To sew past the zipper - Singer 3116 Simple | Instruction Manual - Page 60
E Cremalleras y ribetes Coloque el disco selector de dibujo a " ". Cambie al prensatelas para cremalleras. (1) Ajuste el control del largo de la puntada entre "1" - "4" (de acuerdo con el grueso de la tela). El prensatelas para cremalleras puede incorporarse a la derecha o a la izquierda (2) - Singer 3116 Simple | Instruction Manual - Page 61
hem, turn under the edge twice by about 3 mm (1/8") and sew 4-5 stitches to secure. Pull the thread slightly towards the back. Insert the needle into the fabric, raise the presser foot and guide the fold into the scroll on the foot (1). Gently pull the fabric edge towards you and lower the presser - Singer 3116 Simple | Instruction Manual - Page 62
cosa 4-5 puntadas para su fijación. Tire del hilo ligeramente hacia la parte posterior. Inserte la aguja en la tela, eleve el dobladillador y gu ourlet rouletté est un accessoire optionnel qui n'est pas fourni avec votre machine. Effets décoratifs, coussins, nappes, etc. Régler le sélecteur de mod - Singer 3116 Simple | Instruction Manual - Page 63
to add triple reinforcement to stretch and hardwearing seams. Set the stitch length dial to "4". Ric Rac stitch (2) Set the stitch pattern dial to " ". Used primarily as a decorative stitch. Set the stitch length dial to "4". Ric Rac stitch is suitable for firm fabrics like denim, poplin, duck, etc - Singer 3116 Simple | Instruction Manual - Page 64
E Selección de puntos Triple punto recto (1) Ponga el disco selector de dibujo en " ". Para resistente de costura. Gira la longitud del punto marcar a "4". La máquina cose dos puntos adelantes y un punto atrás. Esto dar triple reforzamiento. Zig-zag elástico (2) Ponga el disco selector de dibujo en - Singer 3116 Simple | Instruction Manual - Page 65
, hems, T-shirts, underwear, etc. Set stitch pattern selector on " ". Set machine as illustrated on left. This stitch can be used for all types of jersey and woven fabrics. When using honeycomb stitch pattern for hemming sew at 1cm (1/4") from the fabric edge and trim the surplus fabric. 1 2 58 - Singer 3116 Simple | Instruction Manual - Page 66
E Punto en nido de abeja Para costuras, dobladillos, camisetas de manga corta, ropa interior, etc. Ajuste la máquina según se ilustra. Ponga el disco selector de dibujo en " ". Este punto puede utilizarse para todos los tipos de jerseys y telas trenzadas. Al utilizar el modelo de puntada de nido de - Singer 3116 Simple | Instruction Manual - Page 67
GB Multi-stitch zig-zag Sewing on lace and elastic, darning, mending, reinforcing edges. Set the stitch pattern dial to " ". Set machine as illustrated on left. Place patch in position. The stitch length can be shortened to produce very close stitches. (1) When mending tears, it is advisable to use - Singer 3116 Simple | Instruction Manual - Page 68
puntada en: "1" - "1.5" Esta función se usa para asegurar la parte de arriba de los pliegues, así como las aberturas de los bolsillos. Primero, use la puntada recta atravesando la parte de arriba del bolsillo o el pliegue. Esta costura debe ser - Singer 3116 Simple | Instruction Manual - Page 69
with the optional cording foot * The cording foot is an optional accessory not supplied with your machine. Decorative effects, cushions, tablecloths, etc. In addition to zig zag, various other stitches are suitable for sewing on cord, e.g. blindhem, multi-stitch zig zag,and selected decorative - Singer 3116 Simple | Instruction Manual - Page 70
aide du pied pour cordon optionnel * Le pied pour cordon est un accessoire optionnel qui n'est pas fourni avec votre machine. Effets décoratifs, coussins, nappes, etc. A part les points zigzag, plusieurs autre points sont à votre disposition pour la couture en cordon, e.g. ourlets invisible, zigzag - Singer 3116 Simple | Instruction Manual - Page 71
edge of the hole (to secure the threads) (3). First row: Always work from left to right. Turn work by 1/4 and oversew. A darning ring is recommended for easier sewing and better results. Note: Free motion darning is accomplished without the sewing machine internal feed system. Movement of the fabric - Singer 3116 Simple | Instruction Manual - Page 72
tour de rotation à votre travail et recommencer à coudre. Note: Le raccommodage avec mouvement libre se fait sans utiliser le système d'alimentation interne de la machine à coudre. L'opérateur contrôle le mouvement du tissu. Il est nécessaire de coordonner la vitesse d'exécution de la couture et le - Singer 3116 Simple | Instruction Manual - Page 73
GB Practical stitches Set the machine as illustrated. Turn the switch width dial and stitch length dial to suit the fabric and application. Shell stitch (a) For decorative edges. Suitable for edges on sheer, fine and stretch fabrics. The wider part of the stitch should go just over the folded edge - Singer 3116 Simple | Instruction Manual - Page 74
E Puntadas de utilidad Seleccione el dibujo deseado con el disco selector de dibujo. Gire el disco del largo de la puntada que se ajuste a la tela y a la aplicación. Punto de dobladillo de concha (a) Para orillas decorativas. Adecuado para arillas en tejidos transparentes, finos y elásticos. El - Singer 3116 Simple | Instruction Manual - Page 75
to be darned under the presser foot together with the under laying fabric to be used. - Lower the presser foot and alternately sew forward or reverse using the lever. - Repeat this motion until the area to be darned is filled with rows of stitching. For reverse sewing instructions, see page 32. 68 - Singer 3116 Simple | Instruction Manual - Page 76
que se va a utilizar. - Baje prensatelas y de manera alternativa, cosa adelante o atrás usando la palanca. - Repita este movimiento hasta que la parte a zurcir se rellene con hileras de cosido. Para las instrucciones sobre cómo coser hacia atrás, vea página 33. F Raccommedage - Régler le sélecter - Singer 3116 Simple | Instruction Manual - Page 77
length. - Turn the stitch selector to straight stitch, center needle position. - Fold in the edge of the fabric (approximately 6 mm 1/4"). - Place the lace under the folded edge of the fabric allowing it to under lap the fabric slightly as required by the pattern of the lace. - Sew on the edge of - Singer 3116 Simple | Instruction Manual - Page 78
E Cómo pegar encajes - Gire el disco selector del largo de puntada al largo deseado. - Gire el selector al punto recto, posición central de la aguja. - Pliegue el borde de la tela (aproximadamente 6 mm, 1/4") - Coloque el encaje debajo del borde plegado de la tela dejando que solape ligeramente la - Singer 3116 Simple | Instruction Manual - Page 79
the edge of the applique. You may need to adjust the position of the guide to bring it closer or further from the edge of the applique, by using the thumbscrew located at the right of the foot. Begin sewing following the edge of your applique. To pivot for curves or corners, leave - Singer 3116 Simple | Instruction Manual - Page 80
. Aligner l'aiguille et abaisser-la dans le tissu au bord de l'appliqué. Abaisser le pied presseur. Si vous utilisez le pied invisible, placer le guide pour qu'il soit positionné sous le bord de l'appliqué. Il sera peut-être nécessaire d'ajuster (rapprocher ou éloigner) le guidedu bord en utilisant - Singer 3116 Simple | Instruction Manual - Page 81
as possible. - Place the fabric under the needle. Make sure the presser foot bar is down in its lowest position. - Turn the balance wheel towards you to bring up the lower thread through the fabric. Sew a few securing stitches at the starting point. - Hold the hoop with thumb and forefingers of - Singer 3116 Simple | Instruction Manual - Page 82
ée avec le sélecteur) - Positionnez la machine tel qu'illustré. - Retirez le pied presseur et son support. - Abaissez le pied presseur avant de au travers du tissu. - Pîquez quelques points de sécurité au point de départ. - Maintenez le cercle entre le pouce et l'index des deux mains. - Veillez - Singer 3116 Simple | Instruction Manual - Page 83
GB Quilting functions * The quilting foot is an optional accessory not supplied with this machine. Stippling is free motion quilting where you hoop the fabric and guide it by hand, allowing you to stitch in any direction. For template quilting transfer a design from a template (plastic stencil) to - Singer 3116 Simple | Instruction Manual - Page 84
como el pie para zurcir y bordar. F Fonctions de courtepointe * Le pied double entraînement est un accessoire optionnel qui n'est pas vendu avec cette machine. Pour Piqûre Libre, placer le tissu dans un cerceau et piquer à main lever dans la direction que vous désiré. Pour le point Templet, transf - Singer 3116 Simple | Instruction Manual - Page 85
accessory not supplied with this machine. Set the pattern selector as illustrated. 1. Attach the gathering foot. 2. Sew a single row or multiple rows of straight stitches. 3. If more gathering is required, loosen the upper thread tension to below 2 so that the lower thread lies on the under side - Singer 3116 Simple | Instruction Manual - Page 86
çage * Le pied double entraînement est un accessoire optionnel qui n'est pas vendu avec cette machine. Régler le sélecteur de points tel qu'illustré. 1. Fixer le pied fronceur. 2. Coudre une rangée simple ou des rangées multiples de points droits. 3. S'il est nécessaire d'avoir davantage de fronçage - Singer 3116 Simple | Instruction Manual - Page 87
guide the fabric and you have a better view of the seam when using the standard, regular foot on your machine. Your sewing machine offers excellent stitch secured. 5. Draw the bobbin thread up and place both the bobbin thread and the needle thread behind the walking foot attachment. a.Arm b. - Singer 3116 Simple | Instruction Manual - Page 88
de guider le tissu et de plus, vous voyez mieux la couture. Votre machine à coudre permet d'exécuter des points d'excellente qualité pour une vaste gamme pied presseur afin de relever la barre du pied presseur (1). 2. Retirer le support du pied presseur en dévissant (sens anti-horaire) la vis de la - Singer 3116 Simple | Instruction Manual - Page 89
drops) with sewing machine oil. Turn the handwheel until the hook race (7) is in the left position. Replace the hook (5). Replace the hook race cover and snap back the two hook retaining arms. Insert the bobbin case and bobbin and replace the needle plate. Important: Fabric lint and threads must be - Singer 3116 Simple | Instruction Manual - Page 90
de nuestros centros de servicio técnico. F Entretien de la machine Pour retirer la plaque à aiguillé, mettre l'aiguille en position haute machine. Pour maintenir votre machine en parfait état de marche, faites-la reviser régulièrement par notre service après-vente. Attention: Débrancher la machine - Singer 3116 Simple | Instruction Manual - Page 91
GB Trouble shooting guide Problem Upper thread breaks Lower thread breaks Cause 1.The machine is not threaded correctly. 2.The thread tension is too tight. 3.The thread is too thick for the needle. 4.The needle is not inserted correctly. 5.The thread is wound around the spool holder pin. 6.The - Singer 3116 Simple | Instruction Manual - Page 92
E Eliminación de averías Problema El hilo superior se rompe Falta de puntos La aguja se rompe Suelto los puntos La costura se encoge, la tela se frunce Puntadas desguales, arraste no uniforme La máquina hace ruido Máquina obstruida Causa 1.La máquina está mal enhebrada. 2La tensión del hilo es - Singer 3116 Simple | Instruction Manual - Page 93
F Guide de dépannage Problème Bris du fil supérieur Points manqués Bris de l'aiguille Points lâches La couture fronce Points irréguliers, alimentation Irrégulière La machine est bruyante La machine se bloque Cause 1. La machine n'est pas correctement enfiler. 2. La tension du fil est trop élevée. - Singer 3116 Simple | Instruction Manual - Page 94
021G2D0101( ) Dec/05 SINGER 3116(970CB4)
-
 1
1 -
 2
2 -
 3
3 -
 4
4 -
 5
5 -
 6
6 -
 7
7 -
8
-
9
-
10
-
11
-
12
-
13
-
14
-
15
-
16
-
17
-
18
-
19
-
20
-
21
-
22
-
23
-
24
-
25
-
26
-
27
-
28
-
29
-
30
-
31
-
32
-
33
-
34
-
35
-
36
-
37
-
38
-
39
-
40
-
41
-
42
-
43
-
44
-
45
-
46
-
47
-
48
-
49
-
50
-
51
-
52
-
53
-
54
-
55
-
56
-
57
-
58
-
59
-
60
-
61
-
62
-
63
-
64
-
65
-
66
-
67
-
68
-
69
-
70
-
71
-
72
-
73
-
74
-
75
-
76
-
77
-
78
-
79
-
80
-
81
-
82
-
83
-
84
-
85
-
86
-
87
-
88
-
89
-
90
-
91
-
92
-
93
-
94
 |
 |
Manuel d'Instruction
Instruction Manual
Manual de Instrucciones