Singer 5400 Sew Mate Instruction Manual - Page 25
Changing The Needle
 |
View all Singer 5400 Sew Mate manuals
Add to My Manuals
Save this manual to your list of manuals |
Page 25 highlights
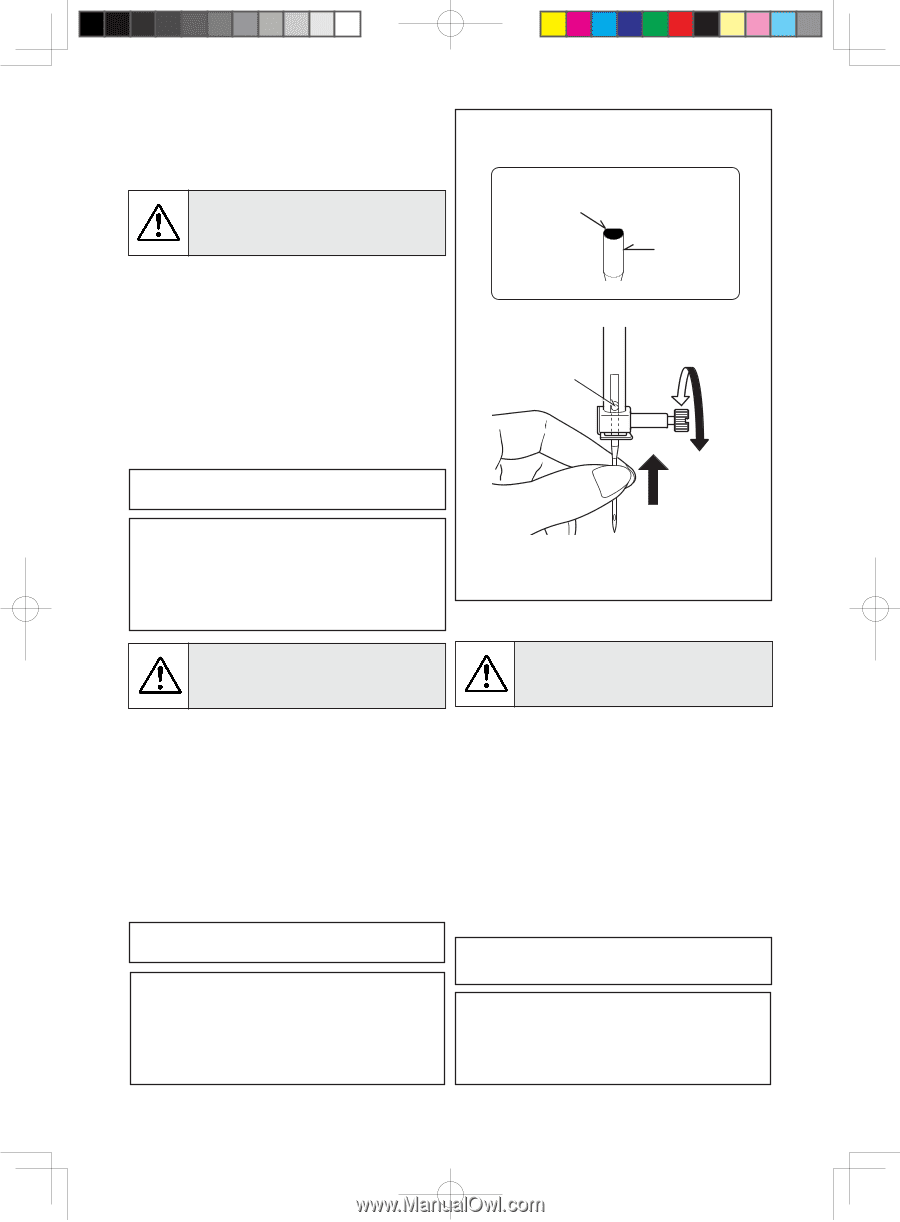
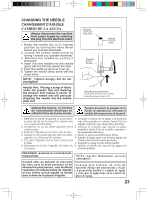
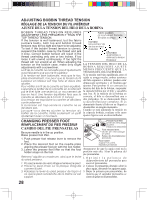
CHANGING THE NEEDLE CHANGEMENT D'AIGUILLE CAMBIO DE LA AGUJA Always disconnect the machine from power supply by removing the plug from the electrical outlet. 1. Raise the needle bar to its highest position by turning the hand wheel toward you (counter-clockwise). 2. Loosen the needle clamp screw by turning it toward you (counter-clockwise). 3. Remove the needle by pulling it downward. 4. Insert the new needle into the needle clamp with the flat side toward the back. 5. Push the needle up as far as it can go. 6. Tighten the needle clamp screw with the screw driver. NOTE: Tighten snugly, but do not overtighten. Helpful Hint: Placing a scrap of fabric under the presser foot and lowering the presser foot makes it easier to change the needle and will preclude dropping the needle into the needle plate slot. Flat side Côté plat Lado plano Needle Aiguille Aguja Stop pin Butée Pasador Flat side toward the back Côté plat orienté vers l'arrière Lado plano hacia fuera de Vd. Débranchez toujours. La machine de l'alimentation électrique en retirant la fiche de la prise murale. Siempre desconecte la máquina de la fuente de alimentación retirando el enchufe del tomacorriente de la pared. 1. Relevez la barre d'aiguille à sa position 1. Levantar la barra de la aguja a la posición la plus haute en tournant le volant vers más alta girando el volante hacia Ud (en vous (sens antihoraire). sentido contrario a las manecillas del reloj). 2. Desserrez la vis du serre-aiguille (sens 2. Aflojar el tornillo que sujeta la aguja antihoraire). girándolo hacia Ud (en sentido contrario a 3. Enlever l'aiguille en la tirant vers le bas. las manecillas del reloj). 4. Insérez la nouvelle aiguille dans le serre- 3. Quitar la aguja sacándola hacia abajo. aiguille, le côté plat à l'arrière. 4. Insertar la aguja nueva en la barra aguja con 5. Poussez l'aiguille vers le haut, jusqu'à la el lado plano hacia la parte posterior. butée. 5. Empujar la aguja lo más arriba posible. 6. Resserrez la vis de l'aiguille à l'aide du 6. Apriete el tornillo de sujeción de aguja con tournevis. el destornillador. REMARQUE: resserrez-la correctement, mais pas trop. Conseil utile: en plaçant un morceau de tissu sous le pied presseur et en abaissant le pied presseur, vous faciliterez l'opération de remplacement de l'aiguille, et ceci évitera qu'une aiguille ne tombe dans la fente de la plaque d'aiguille. NOTA: Apriete firmemente, pero no sobreapriete. Consejo útil: Colocar un resto de material debajo del prensatelas y bajar el prensatelas facilita el cambio de aguja y evita que la aguja baje en la ranura de placa de aguja. 23
-
 1
1 -
2
-
3
-
4
-
5
-
6
-
7
-
8
-
9
-
10
-
11
-
12
-
13
-
14
-
15
-
16
-
17
-
18
-
19
-
 20
20 -
 21
21 -
 22
22 -
 23
23 -
 24
24 -
 25
25 -
 26
26 -
 27
27 -
 28
28 -
 29
29 -
 30
30 -
31
-
32
-
33
-
34
-
35
-
36
-
37
-
38
-
39
-
40
-
41
-
42
-
43
-
44
-
45
-
46
-
47
-
48
-
49
-
50
-
51
-
52
-
53
-
54
-
55
-
56
-
57
-
58
-
59
-
60
-
61
-
62
-
63
-
64
 |
 |