Singer 5500 Fashion Mate Instruction Manual - Page 43
Zig-zag De Tres Puntadas, Puntada De Lenceria
 |
View all Singer 5500 Fashion Mate manuals
Add to My Manuals
Save this manual to your list of manuals |
Page 43 highlights
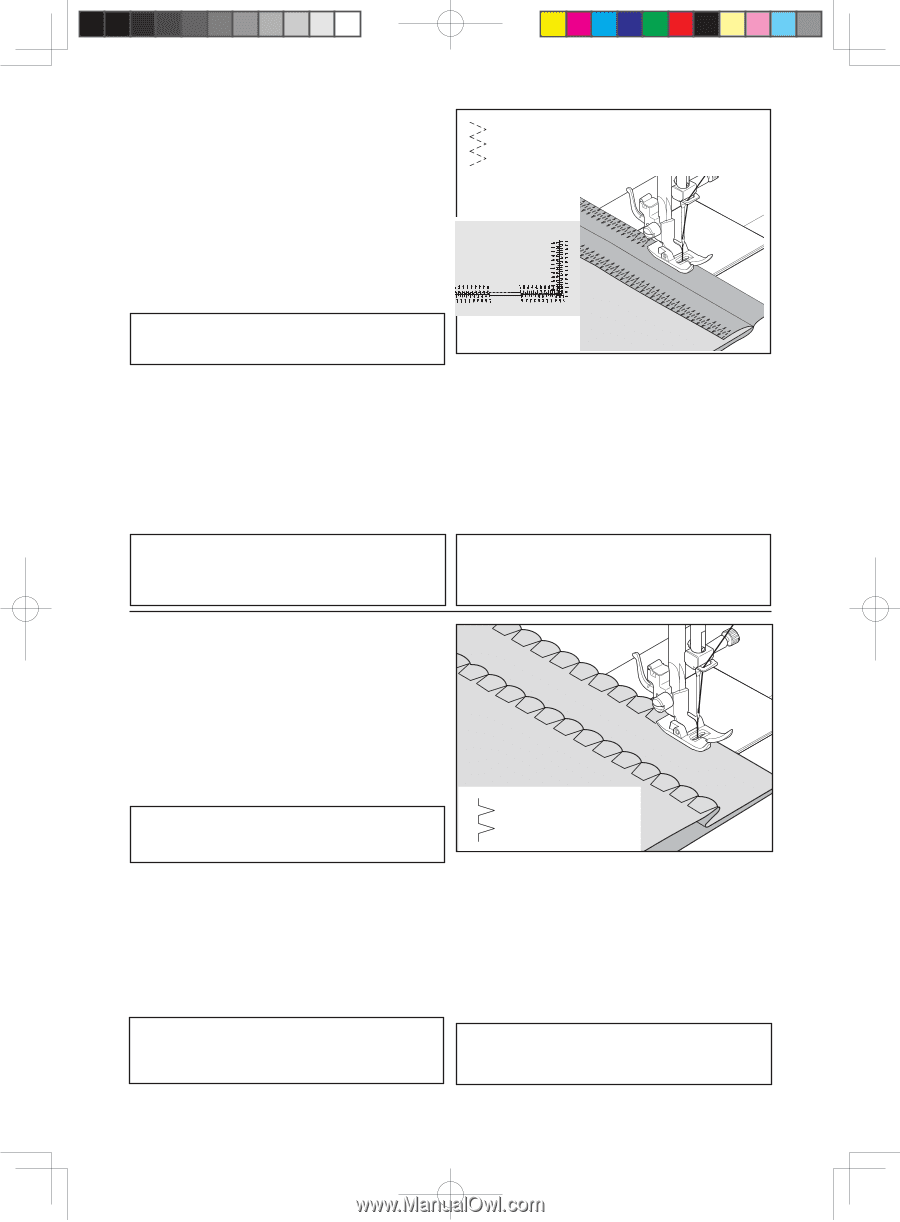
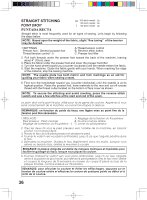
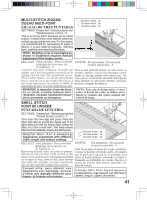
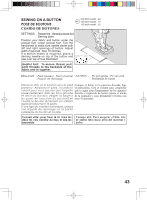
MULTI-STITCH ZIGZAG ZIGZAG MULTI-POINT ZIG-ZAG DE TRES PUNTADAS SETTINGS :Presser foot - General purpose foot :Thread tension control - 5 100 stitch model : 06 80 stitch model : 06 60 stitch model : 06 This is a strong stitch because as its name implies, it makes three short stitches where the normal zig-zag makes only one. For this reason it is recommended for overcasting all types of fabrics. It is also ideal for bartacks, mending tears, patching, and attaching flat elastic. NOTE: Mending a tear or overedging as shown in illustration requires manual adjustment of the length control. RÉGLAGES :Pied presseur - Pied universel AJUSTES :Pie prensatelas - Pie universal :Réglage de la tension du :Control tensión hilo - 5 fil supérieur - 5 Comme son nom l'indique, le point est Esta es una puntada fuerte, ya que como su solide, car il fait trois points courts là où le nombre implica, realiza tres puntadas cortas zigzag normal n'en fait seulement qu'un. donde el zig-zag normal sólo realiza una. Por Pour cette raison, on le recommande esta razón se recomienda sobrehilar todo tipo de pour surjeter tous les types de tissus. Il telas.También es ideal para remates, zurcidos, est aussi idéal pour les points d'arrêt, le parches, y pegado de elásticos. reprisage et pour la pose d'élastique plat. REMARQUE: la réparation d'une déchirure ou un surjet, comme indiqué dans l'illustration, nécessite l'ajustement manuel de la commande sur la longueur. NOTA: Para zurcir desgarrones o coser sobre el borde tal como se indica en la figura se requiere del ajuste manual del control de largo. SHELL STITCH POINT DE LINGERIE PUNTADA DE LENCERIA SETTINGS :Presser foot - General purpose foot :Thread tension control - 5 Turn under the raw edge and press. Place the fabric right side up so that the zigzag part of the stitch sews just over the folded edge, pulling the fabric in to form a shell hem. Trim away excess fabric from the backside, close to the stitching line. Helpful Hint: For a pleasing appearance experiment with different width, length and tension settings. 100 stitch model : 08 80 stitch model : 08 60 stitch model : 08 RÉGLAGES :Pied presseur - Pied universel AJUSTES :Réglage de la tension du :Pie prensatelas - Pie universal :Control tensión hilo - 5 fil supérieur - 5 Girar hacia abajo el borde del tejido y planchar. Retournez le bord, faire un ourlet et presser. Colocar el derecho del tejido arriba, de manera Placez le tissu le bon côté en haut, de que la parte del zig-zag de la puntada cosa façon à ce que le point de zigzag se réalise sobre el borde doblado, estirando el tejido y sur le repli du tissu, tirez le tissu pour former formando un dobladillo de concha. Recorte el une sorte de coquille. Coupez l'excès de exceso de tela del lado trasero, aproxime a la tissu au dos, près de la ligne de couture. línea de costura. Conseil utile: pour obtenir une apparence plus agréable, essayez d'utiliser des réglages différents pour largeur, la longueur et la tension. Consejo útil: Para lograr mejores terminaciones experimente con diferentes anchos, largos y ajustes de tensión. 41
-
 1
1 -
2
-
3
-
4
-
5
-
6
-
7
-
8
-
9
-
10
-
11
-
12
-
13
-
14
-
15
-
16
-
17
-
18
-
19
-
20
-
21
-
22
-
23
-
24
-
25
-
26
-
27
-
28
-
29
-
30
-
31
-
32
-
33
-
34
-
35
-
36
-
37
-
 38
38 -
 39
39 -
 40
40 -
 41
41 -
 42
42 -
 43
43 -
 44
44 -
 45
45 -
 46
46 -
 47
47 -
 48
48 -
49
-
50
-
51
-
52
-
53
-
54
-
55
-
56
-
57
-
58
-
59
-
60
-
61
-
62
-
63
-
64
 |
 |