Singer 5511 SCHOLASTIC Instruction Manual
Singer 5511 SCHOLASTIC Manual
 |
View all Singer 5511 SCHOLASTIC manuals
Add to My Manuals
Save this manual to your list of manuals |
Singer 5511 SCHOLASTIC manual content summary:
- Singer 5511 SCHOLASTIC | Instruction Manual - Page 1
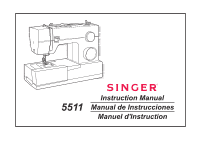
Instruction Manual 5511 Manual de Instrucciones Manuel d'Instruction - Singer 5511 SCHOLASTIC | Instruction Manual - Page 2
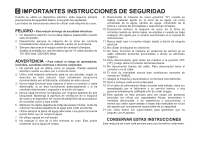
bobbin, or changing presser foot, and the like. 10. Always unplug sewing machine from the electrical outlet when removing covers, lubricating, or when making any other user servicing adjustments mentioned in the instruction manual. 11. Never drop or insert any object into any opening. 12. Do - Singer 5511 SCHOLASTIC | Instruction Manual - Page 3
de coser de la toma de corriente cuando se retiren tapas, se engrase o cuando se haga cualquier otro ajuste por el usuario mencionado en el manual de instrucciones. 11. Nunca dejar caer ni insertar ningún objeto a través de ninguna abertura. 12. No utilizar la máquina en exteriores. 13. No hacer - Singer 5511 SCHOLASTIC | Instruction Manual - Page 4
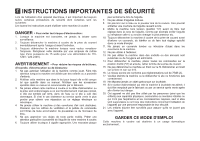
Si le cordon d'alimentation qui relie la machine à la pédale est abîmé, il doit être remplacé par le fabricant ou par un service après vente agrée afin d'éviter , sauf si elles sont supervisées ou ont reçu des instructions concernant l'utilisation de l'appareil par une personne responsable de leur - Singer 5511 SCHOLASTIC | Instruction Manual - Page 5
instruction book, step by step, seated at your machine. To ensure that you are always provided with the most modern sewing capabilities, the manufacturer reserves the right to change the appearance, design or accessories of this sewing machine when considered necessary. SINGER este manual de - Singer 5511 SCHOLASTIC | Instruction Manual - Page 6
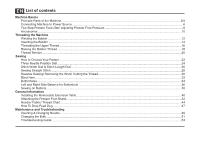
Side Balance for Buttonhole ...36 Sewing on Buttons ...38 General Information Installing the Removable Extension Table...40 Attaching the Presser Foot Shank...42 Needle/ Fabric/ Thread Chart ...44 How To Drop Feed Dog ...47 Maintenance and Troubleshooting Inserting & Changing Needle ...49 Changing - Singer 5511 SCHOLASTIC | Instruction Manual - Page 7
E Indice Partes de la máquina Partes de la máquina ...3/5 Conexión de la máquina a la fuente de alimentación eléctrica 7 Elevador del prensatelas de dos tiempos/ Ajuste de la presión del prensatelas 9 Accesorios ...11 Enhebrado de la máquina Devanado de la bobina ...13 Colocación de la bobina ... - Singer 5511 SCHOLASTIC | Instruction Manual - Page 8
de la pression du pied-presseur 9 Accessoires ...11 Enfilage de la machine Remplissage de la canette ...13 Insertion de la canette ...15 Enfilage sup ...39 Informations générales Installation du bras amovible ...41 Installer le support du pied presseur ...43 Table de correspondance de l'aiguille, du - Singer 5511 SCHOLASTIC | Instruction Manual - Page 9
EN Principal Parts of the Machine 1. Thread tension dial 2. Presser foot pressure adjustment 3. Thread take-up lever 4. Reverse sewing lever 5. Thread cutter 1 9 6. Presser foot 2 10 11 7. Needle plate cover 3 8. Removable extension table/ accessory storage 4 12 9. Three needle - Singer 5511 SCHOLASTIC | Instruction Manual - Page 10
11. Disco selector de ancho de puntada 12. Disco selector de largo de puntada 13. Disco selector de puntadas F Les composantes principales de la machine à coudre 1. Réglage de la tension 2. Commande de réglage de pression du pied-presseur 3. Releveur du fil 4. Levier de couture arrière 5. Coupe fil - Singer 5511 SCHOLASTIC | Instruction Manual - Page 11
Parts of the Machine 14. Horizontal spool pin 15. Bobbin winding spindle 14 16. Hole for auxiliary spool pin 15 17. Handwheel 18. Buttonhole stitch balance adjustment slot 16 19. Power and light switch 17 20. Main plug socket 21. Bobbin thread guide 22. Upper thread guide 23. Face plate - Singer 5511 SCHOLASTIC | Instruction Manual - Page 12
de la velocidad 28. Cable de alimentación F Les composantes principales de la machine à coudre 14. Porte bobine horizontal 15. Axe du bobineur 16. Trou pour d'éclairage 20. Prise de branchement du fil d'alimentation 21. Guide-fil du bobineur 22. Guide-fil supérieur 23. Plaque frontale 24. Poignée de - Singer 5511 SCHOLASTIC | Instruction Manual - Page 13
is not in use. Foot control The foot control pedal regulates the sewing speed. (3) Attention: Consult a qualified electrician if in doubt of how to connect machine to power source. Unplug power cord when machine is not in use. The foot control must be used with the appliance by FC1902A (110 - Singer 5511 SCHOLASTIC | Instruction Manual - Page 14
de corriente polarizada solamente en una dirección. Si no se obtiene una salida adecuada, invertir la polaridad. Brancher la machine comme indiqué ci-contre. (1) La fiche de la machine est dotée de broches normalisées et doit être utilisée avec une prise de courant conforme aux normes en vigueur - Singer 5511 SCHOLASTIC | Instruction Manual - Page 15
foot pressure of the machine has been pre-set and requires no particular readjustment according to the type of fabric (light-or-heavy weight). However, if you need to adjust the presser foot pressure, turn the presser adjusting screw with a coin. For sewing very thin - Singer 5511 SCHOLASTIC | Instruction Manual - Page 16
E Elevador del prensatelas de dos tiempos F Levier du pied presseur à deux niveaux Cuando se cose varias capas de tela gruesa, el prensatelas puede elevarse a una posición alta para facilitar la colocación de la tela (A). Lorsque vous cousez plusieurs épaisseurs de tissus épais, le pied presseur - Singer 5511 SCHOLASTIC | Instruction Manual - Page 17
b. Zipper foot c. Buttonhole foot d. Button sewing foot e. Seam ripper/ brush f. Edge/ quilting guide g. Pack of needles h. Spool holders i. Optional accessories (2) (These 10 accessories are not supplied with this machine; they are, however, available for purchase from your authorized retailer.) - Singer 5511 SCHOLASTIC | Instruction Manual - Page 18
pour boutonnière d. Pied pour pose de bouton e. Brosse/ Découseur f. Guide couture/ matelassage g. Étui à aiguilles h. Chapeau pour bobine (2) i. Canette 10 accessoires ne sont pas livrés avec votre machine mais sont disponibles dans votre magasin SINGER®.) n. Pied bourdon o. Pied pour surfilage p. - Singer 5511 SCHOLASTIC | Instruction Manual - Page 19
corresponding spool holder on to spool pin. (1/2) - Snap thread into thread guide. (3) - Wind thread clockwise around bobbin winder tension discs. (4) - is in "bobbin winding" position, the machine will not sew and the handwheel turn. To start sewing, push the bobbin winder spindle to the left - Singer 5511 SCHOLASTIC | Instruction Manual - Page 20
la canette - Placer le fil et le support correspondant sur le porte bobine. (1/2) - Glisser le fil dans le guide. (3) - Enrouler le fil dans le sens du bobineur de canette est en position de remplissage de la canette, la machine ne pourra coudre et le volant ne tournera pas. Pour débuter une couture - Singer 5511 SCHOLASTIC | Instruction Manual - Page 21
EN Inserting the Bobbin When inserting or removing the bobbin, the needle must be fully raised. 1. Insert the bobbin in the bobbin case with the thread running counterclockwise direction (arrow). 2. Pull the thread through the slit (A). 3. Draw the thread clockwise until it slips into the notch (B). - Singer 5511 SCHOLASTIC | Instruction Manual - Page 22
E Colocación de la bobina Cuando se inserte o retire la canilla, la aguja debe estar completamente elevada. 1. Inserte la canilla en su cápsula con el hilo girando a la izquierda (sentido de la flecha). 2. Pase el hilo a través de la hendidura (A). 3. Introduzca el hilo a la izquierda hasta que se - Singer 5511 SCHOLASTIC | Instruction Manual - Page 23
is important to carry out correctly as by not doing so several sewing problems could result. - Start by raising the needle to its highest During this process it is helpful to hold the thread between the spool and thread guide. - At the top of this movement pass thread from right to left through - Singer 5511 SCHOLASTIC | Instruction Manual - Page 24
raisons de sécurité, il est fortement recommandé d'éteindre la machine avant de l'enfiler. - Soulevez le porte bobine horizontale. Placez fil à nouveau vers le bas. (6) - Maintenant passer le fil derrière le guide fil horizontal puis derrière le pince-aiguille (7) et enfin jusqu'à l'aiguille qui - Singer 5511 SCHOLASTIC | Instruction Manual - Page 25
EN Raising the Bobbin Thread Hold the upper thread with the left hand. Turn the handwheel (1) towards you (counterclockwise) lowering, then raising needle. Note: If it is difficult to raise the bobbin thread, check to make sure the thread is not trapped by the hinged cover or the Removable Extension - Singer 5511 SCHOLASTIC | Instruction Manual - Page 26
E Elevación del hilo de la bobina Sujete el hilo superior con la mano izquierda. Gire el volante (1) hacia usted hasta que baje totalmente la aguja, siga girando hasta volver a subir la aguja. Nota: Si es dificil subir el hilo de la bobina, revise y asegurese que el hilo no este atrapado en la placa - Singer 5511 SCHOLASTIC | Instruction Manual - Page 27
turn the dial to the next number down. A. Normal thread tension for straight stitch sewing. B. Thread tension too loose for straight stitch sewing. Turn dial to higher number. C. Thread tension too tight for straight stitch sewing. Turn dial to lower number. D. Normal thread tension for zig zag and - Singer 5511 SCHOLASTIC | Instruction Manual - Page 28
E Tensión del hilo F Tension du fil Tensión del hilo superior Ajuste de la tensión del hilo básica: "4". (1) Para aumentar la tensión, girar el disco al siguiente número más alto. Para reducir la tensión, girar el disco al siguiente número más bajo. A. Tensión normal del hilo para cosido de puntos - Singer 5511 SCHOLASTIC | Instruction Manual - Page 29
on this page display the stitch patterns available on the machine. Turn the Pattern Selector Dial (e) to select the Pattern Selector Dial may be turned in either direction. a b c d e a. Reverse Sewing Lever b. Three Needle Position Dial c. Stitch Width Dial d. Stitch Length Dial e. Pattern - Singer 5511 SCHOLASTIC | Instruction Manual - Page 30
en cualquier dirección: F Comment choisir votre motif Le diagramme sur la page précédente présente les motifs de point disponibles sur la machine. Tournez le Bouton Sélecteur de Point (e) pour sélectionner le point désiré. Utilisez le Bouton de la Longueur du Point (d) pour ajuster la longueur - Singer 5511 SCHOLASTIC | Instruction Manual - Page 31
needle position can be altered with the "Three needle position dial". For normal work, the needle position is middle. For edge stitching or sewing parallel lines of top stitch, select needle position left or right. For twin needle stitching, needle position is middle. a. Straight b. Zig-zag L. Left - Singer 5511 SCHOLASTIC | Instruction Manual - Page 32
E Guía de cambio de posición de la aguja La posición de la aguja puede ser cambiada utilizando el Guía de Cambio de Posición de la Aguja. Para trabajo normal, la posición de la aguja es en el centro. Para puntadas al borde de la tela o para costuras de líneas paralelas, seleccione la posición - Singer 5511 SCHOLASTIC | Instruction Manual - Page 33
or below. (2) Dense zig-zag stitches are called satin stitches. (2) Function of stitch length dial for when straight stitching For straight stitch sewing, turn the Pattern Selector Dial to 1 the straight stitch setting. Turn the Stitch Length Dial, and the length of the individual stitches will - Singer 5511 SCHOLASTIC | Instruction Manual - Page 34
E Selector de ancho de puntada y Selector de largo de puntada Función del selector de ancho de puntada El ancho máximo del zigzag es de 6mm. Sin embargo, el ancho se puede modificar en cualquier puntada. El ancho aumenta cuando se mueve el selector desde "0" - "6". (1) Función de largo de puntada - Singer 5511 SCHOLASTIC | Instruction Manual - Page 35
EN Sewing Straight Stitch To begin sewing, set the machine for straight stitch. (1) Place the fabric under the presser foot with the fabric edge lined up with the desired seam guide line on the needle plate. (2) Lower the presser foot lifter, and then step on the foot controller to start sewing. (3) - Singer 5511 SCHOLASTIC | Instruction Manual - Page 36
velocidades para comenzar a coser. (3) F Couture au points droits Pour commencer à coudre, régler la machine sur le point droit. (1) Placer le tissu sous le pied presseur avec le bord du tissu aligné au guide de couture souhaité sur la plaque à aiguilles. (2) Abaisser le releveur du pied presseur - Singer 5511 SCHOLASTIC | Instruction Manual - Page 37
seam, press down the reverse sewing lever (A). Sew a few reverse stitches. A Release the lever and the machine will sew forward again. (1) Removing the Work the Thread Pull the threads under and behind the presser foot. Guide the threads to the side of the face plate and into thread cutter (B). Pull threads - Singer 5511 SCHOLASTIC | Instruction Manual - Page 38
le début et la fin d'une couture, abaisser le bouton marche arrière. Faire quelques points en marche arrière. Lâcher le bouton (A) et la machine reprendra la couture vers l'avant. (1) Cómo sacar la tela Gire el volante hacia usted para llevar la palanca tira-hilo a su posición más alta, eleve el - Singer 5511 SCHOLASTIC | Instruction Manual - Page 39
fabrics, and a wider stitch is used for heavier weight fabrics. Sew a test first to make sure the machine settings are appropriate for the fabric. Blind Hem: Turn up make blind hem sewing even easier, use a blind hem foot, available from your SINGER® retailer. (See page 10 for part number) 32 - Singer 5511 SCHOLASTIC | Instruction Manual - Page 40
plus large est utilisé pour les tissus plus lourds. Faire un test en premier pour vous assurez que les réglages de la machine conviennent au tissu. Ourlet invisible : Rabattre l'ourlet à la ourlet invisible, disponible auprès de votre revendeur SINGER®. (Voir page 10 pour le numéro de pièce) 33 - Singer 5511 SCHOLASTIC | Instruction Manual - Page 41
, sew a test first to determine this. Note: Density varies according to the fabric. Always test sew a buttonhole on the fabric you are using to sew the - It is advisable to use heavy thread or cord for stretch or knit fabrics. The zig-zag should sew over the heavy thread or cord. (A) 34 M (a) - Singer 5511 SCHOLASTIC | Instruction Manual - Page 42
E Ojales F Boutonnières Preparación 1. Quite el prensatelas de usos múltiples y coloque el prensatelas para hacer ojales. 2. Medir el diámetro y grosor del botón y añadir 0.3 cm (1/8") para remates y obtener la longitud correcta del ojal; marcar el largo del ojal en la tela (a). 3. Coloque la tela - Singer 5511 SCHOLASTIC | Instruction Manual - Page 43
EN Left and Right Side Balance for Buttonhole Stitch density on right and left sides of buttonhole can be adjusted by buttonhole balance control dial. This dial should usually be in a neutral position (between "+" and "-") If the stitches on the left side of buttonhole are too close together, turn - Singer 5511 SCHOLASTIC | Instruction Manual - Page 44
E Balance a izquierda y derecha para coser ojales La densidad de la puntada en los lados derecho e izquierdo del ojal puede ajustarse por el mando de control del balance del ojal. Este selector debe estar normalmente en una posición neutral. (entre "+" y "-") Si las puntadas en la lado izquierdo del - Singer 5511 SCHOLASTIC | Instruction Manual - Page 45
to lower the feed dogs. (1) Change the all purpose foot to the button sewing foot. (2) Set the stitch length to "0". LR Place the button and fabric under the Button Sewing foot, as illustrated in (3). Set the machine for zig-zag stitch, then set the width to number "3" - "6". Turn the handwheel - Singer 5511 SCHOLASTIC | Instruction Manual - Page 46
environ 10 points. Relever l'aiguille du tissu. Régler à nouveau la machine sur point droit, coudre quelques points de fixation pour finir. Si precisa adelante y luego cosa a través de los dos agujeros posteriores. Si un support est nécessaire, placer une aiguille à repriser en haut du bouton et - Singer 5511 SCHOLASTIC | Instruction Manual - Page 47
EN Installing the Removable Extension Table Hold the removable extension table horizontally, and push it in the direction of the arrow. (1) To remove the extension table, pull it toward the left. 1 The inside of the removable extension table can be utilized as an accessory box. To open, flip cover - Singer 5511 SCHOLASTIC | Instruction Manual - Page 48
E Instalación de la cubierta removible Coloque la máquina en una superficie estable, empuje la cubierta removible como indica la flecha, y luego jale hacia afuera. (1) F Installation du bras amovible Maintenir le bras amovible en position horizontal et le pousser dans la direction de la flèche. (1) - Singer 5511 SCHOLASTIC | Instruction Manual - Page 49
the presser foot using the presser foot lifter. (3) Raise the lever (e) and the foot disengages. b Attaching the edge/ quilting guide Attach the edge/ quilting guide (g) in the slot as illustrated. 1 Adjust as needed for hems, pleats, quilting, etc. (4) Attention: Turn power switch to off - Singer 5511 SCHOLASTIC | Instruction Manual - Page 50
(f) se enganchará automáticamente. Installer le pied presseur Abaisser le support du pied presseur (b) à l'aide du releveur de pied presseur, a sus necesidades de costura. (4) Installer le guide-bord/guide pour quilting Installer le guide-bord/guide pour quilting (g) dans la rainure, comme illustr - Singer 5511 SCHOLASTIC | Instruction Manual - Page 51
Heavy woolen, overcoat fabrics, upholstery fabrics, some Heavy duty thread, carpet thread. leathers and vinyls. IMPORTANT: Match needle size to thread size and weight of fabric. NEEDLE, FABRIC SELECTION NEEDLES EXPLANATION TYPE OF FABRIC SINGER best sewing results always use genuine SINGER® - Singer 5511 SCHOLASTIC | Instruction Manual - Page 52
: Hay que adaptar el tamaño de la aguja al tamaño del hilo y al peso del la tela. SELECCIÓN DE AGUJA Y DE TELA AGUJAS SINGER® 2020 SINGER® 2045 SINGER® 2032 EXPLICACION Agujas de afilado normal. Gama de tamaño desde delgada a grande: 9 (70) a 18 (110). Agujas de punta semiesférica, biselada. 9 (70 - Singer 5511 SCHOLASTIC | Instruction Manual - Page 53
de correspondance de l'aiguille, du tissu et du fil GUIDE DE SÉLECTION DE L'AIGUILLE, DU TISSU ET DU FIL fil et à la qualité du tissu. SÉLECTION DE L'AIGUILLE ET DU TISSU AIGUILLES SINGER® 2020 SINGER® 2045 EXPLICATIONS Aiguille pointue réglementaire. La dimension varie de fine à grande. 9 (70 - Singer 5511 SCHOLASTIC | Instruction Manual - Page 54
EN How To Drop Feed Dog For ordinary sewing, keep the feed dog up, for freehand embroidery, sewing on buttons and darning, drop the feed dog. To raise (a) and lower (b) feed dog. (2) 1 2 47 a ba b - Singer 5511 SCHOLASTIC | Instruction Manual - Page 55
E Ocultacion del transportador Los dientes de arrastre están en posición arriba para los trabajos de costura habituales. Colocar la palanca (a) hacia la izquierda. El transportador se coloca automaticamente arriba desde la primera puntada. Es necesario bajar los dientes de arrastre para ciertos - Singer 5511 SCHOLASTIC | Instruction Manual - Page 56
EN Inserting & Changing Needles Change the needle regularly, especially if it is showing signs of wear and causing problems. For best sewing results always use SINGER® Brand Needles. Insert the needle as illustrated as follows: A. Loosen the needle clamp screw and tighten again after inserting the - Singer 5511 SCHOLASTIC | Instruction Manual - Page 57
èrement si elle indique des signes d'usure et cause des problèmes. Pour obtenir les meilleurs résultats, toujours utiliser des aiguilles fabriquées par SINGER®. Inserta la aguja como se ilustra: Insérer l'aiguille tel qu'indiqué page 49. (1) A. Afloje el tornillo de la abrazadera de la aguja y vu - Singer 5511 SCHOLASTIC | Instruction Manual - Page 58
EN Changing the Bulb Disconnect the machine from the power supply by removing the plug from the main socket! Replace bulb with - Unscrew the bulb and install a new one (C). (2) - Replace the face plate and tighten screw. B A Should there be any problem, consult your SINGER® retailer. 1 C 2 51 - Singer 5511 SCHOLASTIC | Instruction Manual - Page 59
120V área / 220-240V área). F Changement de l'ampoule Débrancher la machine de l'alimentation électrique en retirant la prise! Remplacer l'ampoule par une ampoule . En caso de cualquier duda, consulte a su Distribuidor Autorizado SINGER®. - Desserrer la vis (A) comme indiqué. (1) - Enlever la - Singer 5511 SCHOLASTIC | Instruction Manual - Page 60
EN Troubleshooting Guide Problem Upper thread breaks Cause 1. The machine is not threaded correctly. 2. The thread tension 2. Remove bobbin case, thread and insert correctly. 3. Do not pull on the fabric while sewing, let the feed dogs pull the fabric under the foot. 1. Clean the hook and feed - Singer 5511 SCHOLASTIC | Instruction Manual - Page 61
E Problemas y soluciones Problema Causa Solución El hilo superior se rompe 1. La máquina está mal enhebrada. 2. La tensión del hilo es demasiado fuerte. 3. El hilo es demasiado grueso para la aguja. 4. La aguja no está colocada correctamente. 5. El hilo se ha enredado en la caja bobina. 6. La - Singer 5511 SCHOLASTIC | Instruction Manual - Page 62
F Guide de dépannage Problème Cause Le fil supérieur casse 1. La machine n'est pas correctement enfilée. 2. La tension du fil tirer le tissu en dessous du pied presseur. 1. Demander un entretien à un magasin SINGER® . 2. Remplacer. Retirer le fil supérieur et la bobine, tourner manuellement le - Singer 5511 SCHOLASTIC | Instruction Manual - Page 63
021Q2D0105(A)( ) Feb/11 SINGER 5511(Q25DST)/A5
-
 1
1 -
 2
2 -
 3
3 -
 4
4 -
 5
5 -
 6
6 -
 7
7 -
8
-
9
-
10
-
11
-
12
-
13
-
14
-
15
-
16
-
17
-
18
-
19
-
20
-
21
-
22
-
23
-
24
-
25
-
26
-
27
-
28
-
29
-
30
-
31
-
32
-
33
-
34
-
35
-
36
-
37
-
38
-
39
-
40
-
41
-
42
-
43
-
44
-
45
-
46
-
47
-
48
-
49
-
50
-
51
-
52
-
53
-
54
-
55
-
56
-
57
-
58
-
59
-
60
-
61
-
62
-
63
 |
 |
5511
Manuel d'Instruction
Instruction Manual
Manual de Instrucciones