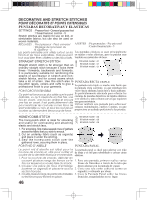
Singer 6180 Brilliance Instruction Manual 3 - Page 44
Satin Stitch, Placement Of Patterns
 |
View all Singer 6180 Brilliance manuals
Add to My Manuals
Save this manual to your list of manuals |
Page 44 highlights
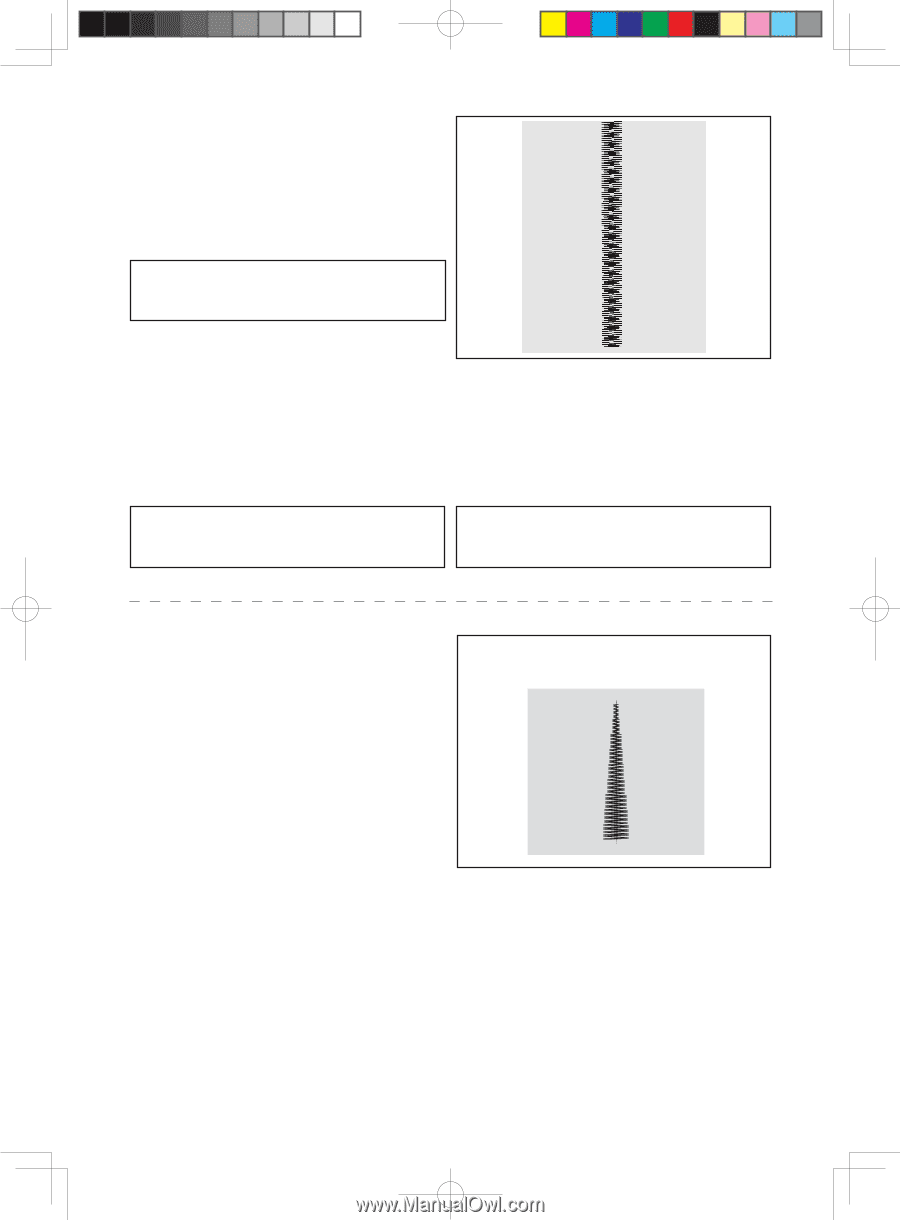
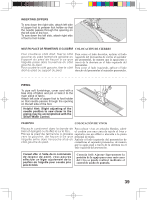
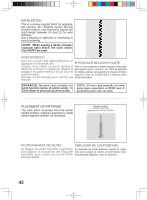
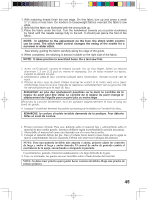
SATIN STITCH This is a closely spaced stitch for appliqué, bar tacking, etc. Slightly loosen the top thread tension and manually adjust the stitch length between 0.5 and 2.0 for satin stitching. Use a backing of stabilizer or interfacing to avoid puckering. NOTE: When sewing a dense (closely spaced) satin stitch, the satin stitch foot MUST be used. POINT BOURDON Ceci est un point très rapproché pour appliqué et une bride, etc. un PUNTADA DE RELLENO O SATÍN Lorsque vous utilisez ce point, pensez à Esta es una puntada compactamente espaciada diminuer la tension supérieure. Réglez la para aplicaciones, remates, etc. Para la puntada longueur du point entre 0.5 et 2.0. pour le de relleno aflojar ligeramente la tensión del hilo point bourdon. superior. Usar un estabilizador o cubierta para U t i l i s e z u n e n t o i l a g e p o u r é v i t e r l e s evitar fruncidos. fronces. REMARQUE: lorsque vous cousez un point bourdon dense (à points serrés), IL FAUT utiliser le pied pour point bourdon. NOTA: Al coser una puntada en satín densa (poco espaciada), se DEBE usar el prensatelas para coser en satén. PLACEMENT OF PATTERNS The satin stitch increases from the center needle position, making it possible to create center-tapered stitches, as illustrated. Center position Position centrale Aguja posicionada en el centro POSITIONNEMENT DES MOTIFS UBICACION DE LOS PATRONES La largeur du point bourdon augmente La puntada de satín aumenta cuando la aguja par rapport à la position de l'aiguille está posicionada al centro; posibilitando crear centrale; pour créer un centre effilé una puntada delgada, como se muestra. comme illustré. 42
-
 1
1 -
2
-
3
-
4
-
5
-
6
-
7
-
8
-
9
-
10
-
11
-
12
-
13
-
14
-
15
-
16
-
17
-
18
-
19
-
20
-
21
-
22
-
23
-
24
-
25
-
26
-
27
-
28
-
29
-
30
-
31
-
32
-
33
-
34
-
35
-
36
-
37
-
38
-
 39
39 -
 40
40 -
 41
41 -
 42
42 -
 43
43 -
 44
44 -
 45
45 -
 46
46 -
 47
47 -
 48
48 -
 49
49 -
50
-
51
-
52
-
53
-
54
-
55
-
56
-
57
-
58
-
59
-
60
-
61
-
62
-
63
-
64
 |
 |