Singer 7470 Confidence Instruction Manual - Page 74
A. Stitch Width And Length Settings
 |
View all Singer 7470 Confidence manuals
Add to My Manuals
Save this manual to your list of manuals |
Page 74 highlights
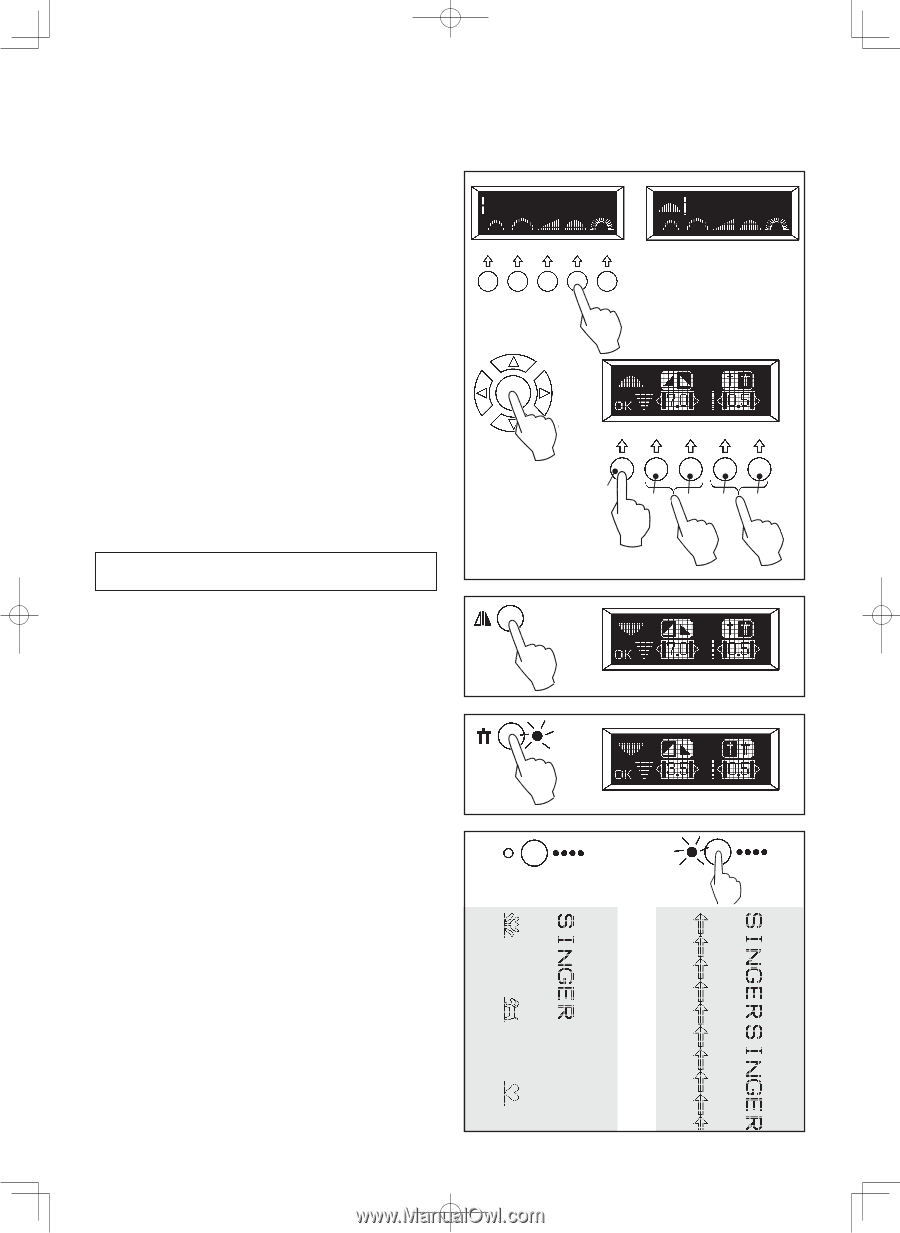
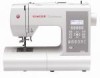
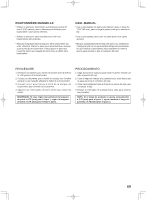
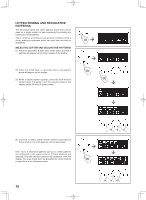
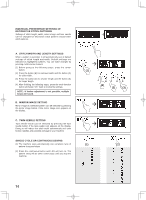
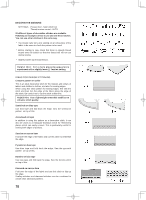
INDIVIDUAL PREFERENCE SETTINGS OF DECORATIVE STITCH PATTERNS Settings of stitch length, width, mirror image and twin needle can be changed for decorative stitch patterns except letter stitch patterns: A. STITCH WIDTH AND LENGTH SETTINGS When a pattern is selected, it will automatically sew at default settings of stitch length and width. Default settings are indicated as highlighted numbers. You can make changes by pressing multi-function buttons: (1) Before going to the following steps, press the center button. (2) Press the button (B) for narrower width and the button (C) for wider width. (3) Press the button (D) for shorter length and the button (E) for longer length. (4) After finishing the following steps, press the multi-function button (A) below "OK" mark to memorize settings. NOTE: *If further adjustment is not possible, multiple beeps will sound. B. MIRROR IMAGE SETTING Mirror image of a selected pattern can be selected by pressing the mirror image button, if the mirror image icon appears on the display. C. TWIN NEEDLE SETTING Twin needle mode can be selected by pressing the twin needle button, if the twin needle icon appears on the display. Doing so will reduce the stitch width automatically and save broken needles and possible damage to your machine. SINGLE CYCLE OR CONTINUOUS SEWING (1) The machine sews automatically one complete cycle of pattern string and stops. (2) Press the continuous button and LED will turn on. The pattern string will be sewn continuously until you stop the machine. (1) A BC DE (4) (2) (3) (1) (2) 74
-
 1
1 -
2
-
3
-
4
-
5
-
6
-
7
-
8
-
9
-
10
-
11
-
12
-
13
-
14
-
15
-
16
-
17
-
18
-
19
-
20
-
21
-
22
-
23
-
24
-
25
-
26
-
27
-
28
-
29
-
30
-
31
-
32
-
33
-
34
-
35
-
36
-
37
-
38
-
39
-
40
-
41
-
42
-
43
-
44
-
45
-
46
-
47
-
48
-
49
-
50
-
51
-
52
-
53
-
54
-
55
-
56
-
57
-
58
-
59
-
60
-
61
-
62
-
63
-
64
-
65
-
66
-
67
-
68
-
 69
69 -
 70
70 -
 71
71 -
 72
72 -
 73
73 -
 74
74 -
 75
75 -
 76
76 -
 77
77 -
 78
78 -
 79
79 -
80
-
81
-
82
-
83
-
84
-
85
-
86
-
87
-
88
-
89
-
90
-
91
-
92
-
93
-
94
 |
 |