Singer 9970 Instruction Manual - Page 18
Starting To Sew
 |
View all Singer 9970 manuals
Add to My Manuals
Save this manual to your list of manuals |
Page 18 highlights
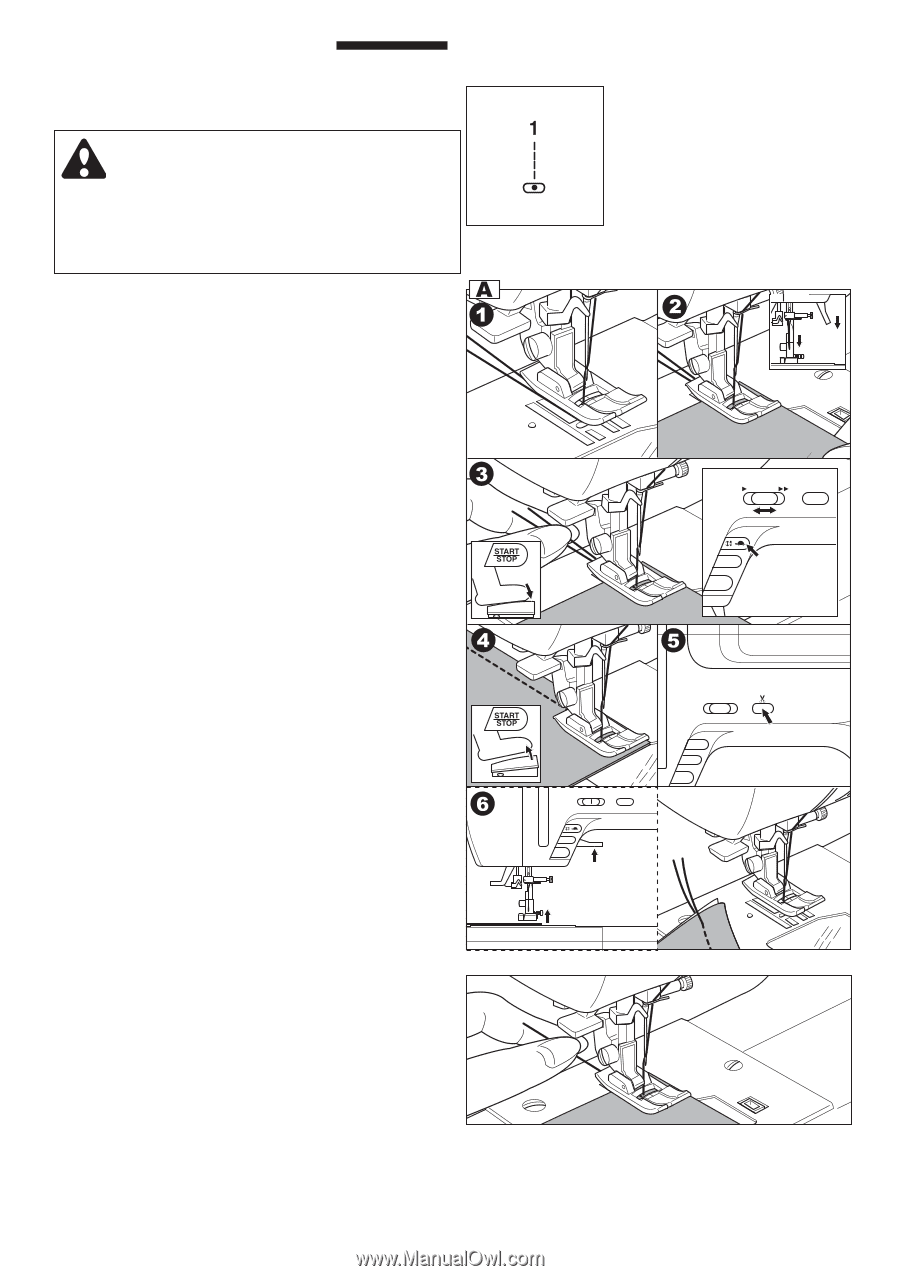
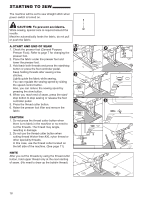
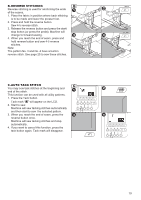
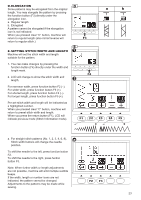
STARTING TO SEW The machine will be set to sew straight stitch when power switch is turned on. CAUTION: To prevent accidents. While sewing, special care is required around the needle. Machine automatically feeds the fabric, do not pull or push the fabric. A. START AND END OF SEAM 1. Check the presser foot (General Purpose Presser Foot). Refer to page 7 for changing the presser foot. 2. Place the fabric under the presser foot and lower the presser foot. 3. Hold back both threads and press the start/stop button or press the foot controller pedal. Keep holding threads after sewing a few stitches. Lightly guide the fabric while sewing. You can regulate the sewing speed by sliding the speed control button. Also, you can reduce the sewing speed by pressing the slow button. 4. When you reach end of seam, press the start/ stop button to stop sewing or release the foot controller pedal. 5. Press the thread cutter button. 6. Raise the presser foot lifter and remove the fabric. CAUTION 1. Do not press the thread cutter button when there is no fabric in the machine or no need to cut the threads. The thread may tangle, resulting in damage. 2. Do not use the thread cutter button when cutting thread thicker than #30, nylon thread or other speciality threads. In this case, use the thread cutter located on the left side of the machine. (See page 11) NOTE After you cut the threads by using the thread cutter button, hold upper thread only at the next starting of seam. (No need to draw up the bobbin thread) 18
-
 1
1 -
2
-
3
-
4
-
5
-
6
-
7
-
8
-
9
-
10
-
11
-
12
-
 13
13 -
 14
14 -
 15
15 -
 16
16 -
 17
17 -
 18
18 -
 19
19 -
 20
20 -
 21
21 -
 22
22 -
 23
23 -
24
-
25
-
26
-
27
-
28
-
29
-
30
-
31
-
32
-
33
-
34
-
35
-
36
-
37
-
38
-
39
-
40
-
41
-
42
-
43
-
44
-
45
-
46
-
47
-
48
-
49
-
50
-
51
-
52
-
53
-
54
-
55
-
56
-
57
-
58
-
59
-
60
 |
 |