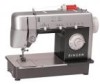
Singer CG-500 Commercial Grade Instruction Manual
Singer CG-500 Commercial Grade Manual
 |
View all Singer CG-500 Commercial Grade manuals
Add to My Manuals
Save this manual to your list of manuals |
Singer CG-500 Commercial Grade manual content summary:
- Singer CG-500 Commercial Grade | Instruction Manual - Page 1
MODEL CG-500 COMMERCIAL GRADE SEWING MACHINE WORKBOOK - Singer CG-500 Commercial Grade | Instruction Manual - Page 2
Congratulations on the purchase of your new SINGER® Sewing Machine! This commercial grade sewing machine is ideal for all types of sewing, including fashion sewing, home decorating, quilting and crafts. Your machine is designed to deliver the ultimate combination of power, performance and durability - Singer CG-500 Commercial Grade | Instruction Manual - Page 3
-Stitch Zigzag 26 Crazy Quilting 27 Seam Allowence with Stretch Blindstitch 28 Attaching Elastic 29 Sewing with a Wing Needle 30 Twin Needle Sewing 31 Applying Ribbon with a Twin Needle 32 Sewing on Leather 33 Narrow Hem 34 Gathering with the Cording Foot 35 Applying Trims, Cords - Singer CG-500 Commercial Grade | Instruction Manual - Page 4
Heavy Duty Commercial Grade CG-500 Up to 1100 Stitches-PerMinute Sewing Speed Electronic Foot Control 60% Stronger Motor Steel Plate on Machine Bed Duratec™ Frame Double Insulated Finger Guard Utility Stitches 6mm Stitch Width Automatic Built-In Four Step Buttonhole Balance Adjustment Dial - Singer CG-500 Commercial Grade | Instruction Manual - Page 5
. Peace of mind knowing the machine has a 25 year limited warranty. Machine has a built-in carry handle, making it easy to transport the machine. Machine can be mounted into a cabinet. SINGER® is a registered trademark of the Singer Company Ltd. © 2004 Singer Sewing Company. All Rights Reserved. - Singer CG-500 Commercial Grade | Instruction Manual - Page 6
used. For a longer stitch or for thicker fabrics, lengthen the Stitch Length. Machine Set-Up: Stitch: Pattern Selector: Stitch Width: Stitch Length: Presser Foot: foot, matching the raw edges with the ⅝" seam guide. Sew the length of the fabric. Use the Reverse Button to reinforce the seam. 1 - Singer CG-500 Commercial Grade | Instruction Manual - Page 7
decorative touch while holding the seam allowances flat. It is also sturdy and durable. Machine Set-Up: Stitch: Pattern Selector: Stitch Width: Stitch Length: Presser Foot: Needle of the edge. Align the folded edge to the edge of the foot. Sew. Use the Reverse Button to reinforce the seam. 2 - Singer CG-500 Commercial Grade | Instruction Manual - Page 8
to plain fabric by just adding consecutive rows of straight stitches! Machine Set-Up: Stitch: Pattern Selector: Stitch Width: Stitch Length: with batting between the two fabrics, creating a quilt-type sample Procedure: Sew diagonally from the top left corner to the bottom right corner. Use the - Singer CG-500 Commercial Grade | Instruction Manual - Page 9
stitch can easily be removed with a seam ripper or simply pulled out. Machine Set-Up: Stitch: Pattern Selector: Stitch Width: Stitch Length: Presser : Place under the foot, matching the raw edges with the ⅝" seam guide. Sew the length of the fabric. Use the seam ripper to remove a portion - Singer CG-500 Commercial Grade | Instruction Manual - Page 10
's edge. Only the Straight Stitch can be used when sewing with the Zipper Foot. Machine Set-Up: Stitch: Pattern Selector: Stitch Width: Stitch . Place piping inside of the fold. On the right side of the fabric, sew a straight stitch close to the piping. Note: The Zipper Foot can be attached - Singer CG-500 Commercial Grade | Instruction Manual - Page 11
make a bold finish on home decorating projects, crafts or garments. Machine Set-up: Stitch: Pattern Selector: Stitch Width: Stitch Length: Edges Stitching Line Raw Edge of Fabric On the wrong side of the fabric, sew a straight stitch close to the piping. Note: The Zipper Foot can be attached - Singer CG-500 Commercial Grade | Instruction Manual - Page 12
and type of zipper to use. Most applications require a zipper foot. Machine Set-Up: Stitch: Straight Stitch Pattern Selector: A Stitch Width: 1, : Place fabric under the foot, matching the raw edges with the ⅝" seam guide. Starting at the top of the fabric, baste 7". Then change the stitch - Singer CG-500 Commercial Grade | Instruction Manual - Page 13
. Place the zipper face-down, so that the zipper's coils or teeth are directly over the machine-basted seam. Pin in place, if necessary. Spread fabric flat, right side up and place ½" , using the edge of the tape as a guide. Turn fabric to right side and remove the tape and the basting. Press. 8 - Singer CG-500 Commercial Grade | Instruction Manual - Page 14
a smooth satin-like appearance. Try a rayon thread for a smoother looking finish. Machine Set-Up: Stitch: Pattern Selector: Stitch Width: Stitch Length: Presser Foot: Needle and half on the base fabric. Sew around the applique. Widen the stitch width to 4 and change the stitch length to below 1. - Singer CG-500 Commercial Grade | Instruction Manual - Page 15
Sewing around the applique again, covering the previous stitching. . Sewing over an applique twice is not always necessary, however, it does give a beautiful full-covered effect. 10 - Singer CG-500 Commercial Grade | Instruction Manual - Page 16
garment or a home decorating project to create a beautiful heirloom keepsake. Machine Set-Up: Stitch: Pattern Selector: Stitch Width: Stitch Length: Presser Foot lengthwise on batiste. Stitch lace to fabric by sewing a zigzag stitch down both edges of the lace. Try to just clear the heading of - Singer CG-500 Commercial Grade | Instruction Manual - Page 17
lace down the center. Back side of fabric Lace Turn these raw edges back away from the lace, then finger press. Finish fabric's edges by sewing a small zigzag through all layers, being careful not to catch too much lace. Turn fabric over and trim excess fabric seam allowances away. Note: A nice - Singer CG-500 Commercial Grade | Instruction Manual - Page 18
Dogs with the Feed Dog Cover. (See your manual for more information.) Fold fabric in half and place under presser foot. Position the button on the fabric so that the holes in the button are between the toes of the foot. *The Button Sewing Foot is optional. Check with your SINGER® Retailer. 13 - Singer CG-500 Commercial Grade | Instruction Manual - Page 19
opposite hole. Recheck the swing of the needle into the opposite hole and then use the foot control to sew 5-6 stitches. Before removing the button and fabric from the machine, set machine to straight stitch. Leave width at current setting and stitch in place for three stitches. This forms a tie-off - Singer CG-500 Commercial Grade | Instruction Manual - Page 20
: Buttonhole Foot Needle Position: Changes automatically (See manual for complete machine set-up for buttonholes.) Materials: Home décor and bottom of the button. This will establish the starting and ending point of the buttonhole. Place the fabric under the foot, matching the foot's red mark - Singer CG-500 Commercial Grade | Instruction Manual - Page 21
bottom of the buttonhole. Turn Pattern Selection knob to Step Three of the Four-Step buttonhole. Sew, and the machine will stitch in reverse, making the left side of the buttonhole. Stop sewing when the needle reaches the fabric mark which indicates the top of the buttonhole. Turn Pattern Selection - Singer CG-500 Commercial Grade | Instruction Manual - Page 22
and craft projects. When monogramming, the feed dogs are covered, allowing for free-motion sewing. Machine Set-Up: Stitch: Pattern Selector: Stitch Width: Stitch Length: Feet Dogs: Presser under the foot, positioning the needle over the starting point of the monogram. Lower the presser foot. 17 - Singer CG-500 Commercial Grade | Instruction Manual - Page 23
up the bobbin thread though the fabric. Sew a few securing stitches at the starting point. Firmly hold the hoop with both hands. Press the foot controller and guide the hoop so that the needle stitches on the drawn letter. Maintain a consistent sewing speed and move the fabric slowly. Coordinate - Singer CG-500 Commercial Grade | Instruction Manual - Page 24
It also can be as simple as a row of flowers on kitchen linens. Machine Set-Up: Stitch: Pattern Selector: Stitch Width: Stitch Length: Feet Dogs: Presser under the foot, positioning the needle over the starting point of the design. Lower the presser foot. Turn the hand wheel forward to bring - Singer CG-500 Commercial Grade | Instruction Manual - Page 25
and guide the hoop so that the needle stitches on the drawn letter. Maintain a consistent speed and move the fabric slowly. Coordinate sewing speed and movement of hoop. Note: When the feed dogs are covered, the fabric will not automatically feed. Feeding of fabric is controlled manually - Singer CG-500 Commercial Grade | Instruction Manual - Page 26
thread to help the stitches blend into the fabric, hence becoming "blind" or invisible. Machine Set-Up: Set-up for Step 1 (to finish raw edges) Stitch: Zigzag Needle Position: Center Materials: Medium weight woven fabric Procedure: Sew a Zigzag to finish one of the fabric's raw edges. 21 - Singer CG-500 Commercial Grade | Instruction Manual - Page 27
Fold under 1" and baste in place. Position fabric with wrong side facing up, and turn the hem back to the right side, creating a soft fold at the top edge of the hem. The bulk of the fabric is to the left of the foot. Begin stitching, making sure the forward stitches fall near the ¼" fold, and the - Singer CG-500 Commercial Grade | Instruction Manual - Page 28
to help the stitches blend into the fabric, hence becoming "blind" or invisible. Machine Set-Up: Set-up for Step 1 (to finish raw edges) Stitch: Zigzag Stitch Needle Position: Center Materials: Medium weight woven fabric Procedure: Sew a Zigzag to finish one of the fabric's raw edges. 23 - Singer CG-500 Commercial Grade | Instruction Manual - Page 29
Fold under 1" and baste in place. Position fabric with wrong side facing up, and turn the hem back to the right side, creating a soft fold at the top edge of the hem. The bulk of the fabric is to the left of the foot. Begin stitching, making sure the forward stitches fall near the ¼" fold, and the - Singer CG-500 Commercial Grade | Instruction Manual - Page 30
Position: Multi-Stitch Zigzag D 4-5 3 Special Purpose Foot (J) Center Materials: Beaded trim Home décor fabric Procedure: Press and sew a 1" hem in the fabric, using a straight stitch. Place fabric on machine with wrong side facing up. Place trim header on fabric's edge, right side facing down - Singer CG-500 Commercial Grade | Instruction Manual - Page 31
reinforcing a seam, darning, applying elastic and many other techniques. It is ideal when mending tears. Machine Set-Up: Stitch: Pattern Selector: Stitch Width: Stitch Length: Presser Foot: Needle Position: Multi- Turn handwheel to lower needle into the fabric. Pivot 180 degrees and sew again. 26 - Singer CG-500 Commercial Grade | Instruction Manual - Page 32
stitches, often done with decorative threads. This technique is popular and can be used in wearable art, home decorator projects and more. Machine Set-Up: Stitch: Pattern Selector: Stitch Width: Stitch Length: Presser Foot: Needle Position: Zigzag Stitch , Blindstitch Hem, or Multi-Stitch Zigzag - Singer CG-500 Commercial Grade | Instruction Manual - Page 33
fabric and makes a professional finish on woven and knit fabrics. Machine Set-Up: Stitch: Pattern Selector: Stitch Width: Stitch Length: that the stitch forms just on the edge of the fabric. Sew. Change to the Standard Foot and set machine for a straight stitch. With right sides together, join the - Singer CG-500 Commercial Grade | Instruction Manual - Page 34
or less, the elastic can be placed into the General Purpose Foot's opening, making it easier to evenly stretch the elastic while sewing. Machine Set-Up: Stitch: Pattern Selector: Stitch Width: Stitch Length: Presser Foot: Needle Position: Multi-Stitch Zigzag D 5 2-3 General Purpose Foot Center - Singer CG-500 Commercial Grade | Instruction Manual - Page 35
movement, so that the needle penetrates the same hole more than once. Machine Set-Up: Stitch: Pattern Selector: Stitch Width: Stitch Length: Presser spray-starched for added firmness 60-80 weight sewing thread 60-80 weight sewing thread in bobbin Procedure: Pull one or two your SINGER® Retailer. 30 - Singer CG-500 Commercial Grade | Instruction Manual - Page 36
sewing creates a sporty hem on knit wear, a sophisticated top-stitch or a decorative embellishment. Machine . Thread each needle separately. Slowly sew a row of stitching on the right side of consistent speed to ensure accurate stitching. Note: When sewing with a stitch that has width (such as - Singer CG-500 Commercial Grade | Instruction Manual - Page 37
parallel rows of stitches can be used to attach a ribbon while stitching. Machine Set-Up: Stitch: Pattern Selector: Stitch Width: Stitch Length: Presser Foot the ribbon under the foot and then to the back of the foot. Slowly sew a row of stitching on the right side of the fabric. Maintain a slow - Singer CG-500 Commercial Grade | Instruction Manual - Page 38
width 3 Special Purpose Foot (J) or General Purpose Foot Leather Needle* SINGER PN#260-203286089S198, Wedge Point Needle Center Materials: Fashion leather Procedure: Finger press a 1" hem in the leather. Sew, using the seam guides to ensure straight stitching. NOTE: The optional Roller Foot or - Singer CG-500 Commercial Grade | Instruction Manual - Page 39
and creating a small professional finish hem. Soft fabrics roll best. Machine Set-Up: Stitch: Pattern Selector: Stitch Width: Stitch Length: Presser , but lift the presser foot. Guide the fabric into the scroll of the foot. Lower foot and continue to sew, holding the thread tails firmly. Hold - Singer CG-500 Commercial Grade | Instruction Manual - Page 40
the cord will break in the middle of the project. Machine Set-Up: Stitch: Pattern Selector: Stitch Width: Stitch Place the fabric under the foot. Sew a test to ensure that the Zigzag stitches are sewing over the cord, not into the cord cord. Sew a straight stitch to secure the gathers into place. * - Singer CG-500 Commercial Grade | Instruction Manual - Page 41
, each creating a different effect. Experiment with various cords and stitches! Machine Set-Up: Stitch: Pattern Selector: Stitch Width: Stitch Length: Presser of the foot by tying a knot. Place the fabric under the foot and sew. The foot will hold all the cords in place as they are sewn into the - Singer CG-500 Commercial Grade | Instruction Manual - Page 42
into even folds under the needle. The stitch then holds the fabric folds securely. Machine Set-Up: Stitch: Pattern Selector: Stitch Width: Stitch Length: Tension: Presser Foot on the fabric's crosswise grain, to create a guide for straight stitching. *The Gathering Foot is optional. Check with your - Singer CG-500 Commercial Grade | Instruction Manual - Page 43
positioned. It should line up with the Gathering Foot's needle opening. Sew a row on top of the "pulled" line. Use the foot's edge as a guide to sew the next row of stitching. Rows will be ¼" apart if the foot is used as a guide. Sew 3 or 4 more rows. Do not clip thread ends until it is - Singer CG-500 Commercial Grade | Instruction Manual - Page 44
in conjunction with the machine's feeding system to improve the flow of the fabric. This is particularly important when sewing several layers of fabric, Procedure: Sew from one edge to the other. Top Fabric Batting Bottom Fabric The Even Feed Foot is optional. Check with your SINGER® Retailer. - Singer CG-500 Commercial Grade | Instruction Manual - Page 45
Using the Even Feed Foot to Sew Plaid Fabrics Machine Set-Up: Stitch: Pattern Selector: Stitch Width: Stitch Length: fabric Procedure: Match plaids, right sides together Sew the two pieces together using the built-in seam guide on the machine to maintain a consistent seam allowance. *The - Singer CG-500 Commercial Grade | Instruction Manual - Page 46
The Even Feed Foot is great for sewing on fake fur for coat accents, costumes or stuffed animals. Machine Set-Up: Stitch: Pattern Selector: x 5" pieces of fake-fur Procedure: Sew the two pieces together using the built-in seam guide on the machine to maintain a consistent seam allowance. Push - Singer CG-500 Commercial Grade | Instruction Manual - Page 47
Side Cutter The side cutter is an attachment that will trim the excess fabric while sewing. A Zigzag-type stitch must be used. Machine Set-Up: Stitch: Pattern Selector: Stitch Width: Stitch Length: Presser Foot: Needle be adjusted. *The Side Cutter is optional. Check with your SINGER® Retailer. 42 - Singer CG-500 Commercial Grade | Instruction Manual - Page 48
Slowly sew and gently guide the fabric. Adjust the stitch length according to fabric. Certain fabrics will cut better or more cleanly than others. This is due to the nature of the fabric. The cutter works best if not more than 1" is being trimmed away. 43 - Singer CG-500 Commercial Grade | Instruction Manual - Page 49
Sewing with the Ruffler The Ruffler attachment quickly and easily produces professional looking ruffles on garments, home decorating projects and craft items. Machine Set-Up: Stitch: Pattern Selector: Stitch Width: depth of the ruffles. *The Ruffler is optional. Check with your SINGER® Retailer. 44 - Singer CG-500 Commercial Grade | Instruction Manual - Page 50
. Place fabric in the guide plate. Remember to lower the presser foot lever. Lightly push the cloth feed plate towards the back of the machine. Place the longer piece of fabric under the foot and beneath the shorter piece of fabric. Place right sides together. Slowly sew. Watch the Ruffler feed
-
 1
1 -
 2
2 -
 3
3 -
 4
4 -
 5
5 -
 6
6 -
 7
7 -
8
-
9
-
10
-
11
-
12
-
13
-
14
-
15
-
16
-
17
-
18
-
19
-
20
-
21
-
22
-
23
-
24
-
25
-
26
-
27
-
28
-
29
-
30
-
31
-
32
-
33
-
34
-
35
-
36
-
37
-
38
-
39
-
40
-
41
-
42
-
43
-
44
-
45
-
46
-
47
-
48
-
49
-
50
 |
 |

MODEL CG-500
COMMERCIAL GRADE
SEWING MACHINE
WORKBOOK