Singer M3330 User Manual
Singer M3330 Manual
 |
View all Singer M3330 manuals
Add to My Manuals
Save this manual to your list of manuals |
Singer M3330 manual content summary:
- Singer M3330 | User Manual - Page 1
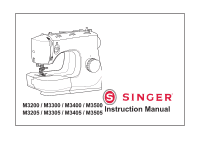
M3200 M3205 / / M3300 M3305 / / M3400 M3405 / / M3500 M3505 Instruction Manual - Singer M3330 | User Manual - Page 2
- Singer M3330 | User Manual - Page 3
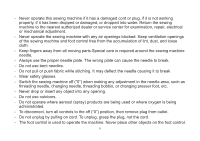
in should be easily accessible. Always unplug this sewing machine from the electric outlet immediately after using and before cleaning, removing covers, lubricating or when making any other user servicing adjustments mentioned in the instruction manual. WARNING - To reduce the risk of burns, fire - Singer M3330 | User Manual - Page 4
not pull or push fabric while stitching. It may deflect the needle causing it to break. -- Wear safety glasses. -- Switch the sewing machine off ("0") when making any adjustment in the needle area, such as threading needle, changing needle, threading bobbin, or changing presser foot, etc. -- Never - Singer M3330 | User Manual - Page 5
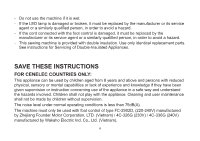
a similarly qualified person, in order to avoid a hazard. -- This sewing machine is provided with double insulation. Use only identical replacement parts. See instructions for Servicing of Double-Insulated Appliances. SAVE THESE INSTRUCTIONS FOR CENELEC COUNTRIES ONLY: This appliance can be used by - Singer M3330 | User Manual - Page 6
they have been given supervision or instruction concerning use of the sewing machine by a person responsible for their safety 4C-336G (240V) manufactured by Wakaho Electric Ind. Co., Ltd. (Vietnam). SERVICING OF DOUBLE INSULATED PRODUCTS In a double-insulated product, two systems of insulation are - Singer M3330 | User Manual - Page 7
the Machine Winding the Bobbin...6 Inserting the Bobbin...7 Thread Tension...8 Threading the Upper Thread...9 Automatic Needle Threader ...10 Raising the Bobbin Thread...11 Sewing How to Choose Your Pattern ...12 Stitch Width Dial & Stitch Length Dial ...13 Sewing Straight Stitch...14 Reverse Sewing - Singer M3330 | User Manual - Page 8
13 Principal Parts of the Machine 1. Thread tension dial 2. Thread take-up lever 3. Reverse sewing lever 4. Thread cutter 5. Presser foot 10 6. Needle plate 7. Removable extension table/ accessory storage 8. Stitch width dial 9. Bobbin stopper 10. Stitch length dial 11. Pattern selector - Singer M3330 | User Manual - Page 9
Principal Parts of the Machine 1. Horizontal spool pin 2. Bobbin winder spindle 3. Hole for auxiliary spool pin 4. Handwheel 5. Power and light switch 6. Main plug socket 7. Bobbin thread guide 8. Upper thread guide 9. Face plate 10. Handle 11. Presser foot lifter 12. Foot speed control 13. Power - Singer M3330 | User Manual - Page 10
is not in use. Foot control The foot control pedal regulates the sewing speed. (3) Attention: Consult a qualified electrician if in doubt of how to connect machine to power source. Sewing light Press main switch (A) to " l " for power and light. IMPORTANT NOTICE For appliance with a polarized - Singer M3330 | User Manual - Page 11
Two Step Presser Foot Lifter When sewing several layers or thick fabrics, the presser foot can be raised to a higher position for easy positioning of the work. (A) Attention: Your SINGER® machine is adjusted to provide the best stitch result at normal room temperature. Extreme hot and cold - Singer M3330 | User Manual - Page 12
M3200/ M3205) d. 1-Step buttonhole foot (Model M3300/ M3305/ M3400/ M3405/ M3500/ M3505) e. Button sewing foot f. L-screwdriver g. Seam ripper/ brush h. Pack of needles i. SINGER Class 15 bobbins (4x) j. Edge/ quilting guide k. Darning plate l. Spool holder m. Soft cover Optional Accessories: For - Singer M3330 | User Manual - Page 13
it rotates slowly. Release the pedal and cut thread. (9) -- Push bobbin spindle to left (10) and remove. Please Note: When the bobbin winder spindle is in "bobbin winding" position, the machine will not sew and the hand wheel will not turn. To start sewing, push the bobbin winder spindle to the left - Singer M3330 | User Manual - Page 14
runs in a clockwise direction (arrow). (3) -- Pull the thread through the slit and under the finger. Leave a 6 inch tail of thread. (4) -- Hold the bobbin case by the hinged latch. (5) -- Insert it into the shuttle. (6) Attention: Turn power switch to off ("O") before inserting or removing the - Singer M3330 | User Manual - Page 15
tension too tight for straight stitch sewing. Turn dial to lower number. 4. Normal thread tension for zig zag and decorative sewing. Correct thread tension is when a small amount of the upper thread appears on the bottom side of fabric. Lower thread tension The bobbin tension has been set correctly - Singer M3330 | User Manual - Page 16
is important to carry out correctly as by not doing so several sewing problems could result. -- Raise the needle to its highest position by then downwards again. (6) -- Now pass thread behind the thin wire needle clamp guide (7) and then down to the needle which should be threaded from front to back - Singer M3330 | User Manual - Page 17
Automatic Needle Threader -- Raise the needle to its highest position. -- Pass thread around thread guide (A). (1) -- Press lever (B) down as far as it will go. (2) -- The threader automatically swings to the threading position (C). -- Pass the thread in front of the needle - Singer M3330 | User Manual - Page 18
the upper thread with the left hand. (1) Turn the handwheel towards you (counterclockwise) lowering, then raising needle. Note: If it is difficult to raise the bobbin thread, check to make sure the thread is not trapped by the hinged cover or the Removable Extension Table. Gently pull on the upper - Singer M3330 | User Manual - Page 19
Sewing Model M3200/ M3205 Model M3300/ M3305 M3400/ M3405 Model M3500/ M3505 c d How to Choose Your Pattern To select a stitch, simply turn the pattern selector dial. The pattern selector dial may be turned in either direction. For straight stitch, select pattern " selector dial. " with the - Singer M3330 | User Manual - Page 20
achieved at "2.5" or below. Dense zig-zag stitches are called satin stitches. Function of stitch length dial for when straight stitching (4) For straight stitch sewing, turn the Pattern Selector Dial to the straight stitch setting. Turn the Stitch Length Dial, and the length of the individual - Singer M3330 | User Manual - Page 21
Sewing Straight Stitch To begin sewing, set the machine for straight stitch. (1) Place the fabric under the presser foot with the fabric edge lined up with the desired seam guide line on the needle plate. (2) Lower the presser foot lifter, and then step on the foot control to start sewing. (3) 14 - Singer M3330 | User Manual - Page 22
of a seam, press down the reverse sewing lever (A). Sew a few reverse stitches. Release the lever and the machine will sew forward again. (1) Removing the Work Turn Pull the threads under and behind the presser foot. Guide the threads to the side of the face plate and into thread cutter (B). Pull threads - Singer M3330 | User Manual - Page 23
add triple reinforcement to stretch and hardwearing seams. The machine sews two stitches forward and one stitch backwards. Ric Rac (2) Set the pattern selector dial to " ". Adjust the stitch width dial to between "3" and "5". Ric rac stitch is suitable for firm fabrics like denim, corduroy, poplin - Singer M3330 | User Manual - Page 24
practice to sew blind hems. Always make a sewing test first. Set the stitch length dial stitch is used for lighter weight fabrics, and a wider stitch is used for heavier weight fabrics. Sew a test first to make sure the machine side of the folded fabric. Start to sew slowly on the fold, making sure - Singer M3330 | User Manual - Page 25
buttonhole process, be sure that the needle is raised before turning the Pattern Selector Dial to the next step. Take care not to sew too many stitches in steps 2 and 4. Use seam ripper and cut buttonhole open from both ends towards the middle. Tips: -- Slightly reducing upper thread tension will - Singer M3330 | User Manual - Page 26
1-Step Buttonhole Stitch (Model M3300/ M3305/ M3400/ M3405/ M3500/ M3505) Buttonhole sewing is a simple process that provides machine. 7. Buttonhole stitching is done in the order (D). 8. Stop the machine when the buttonhole cycle has completed. Making a Buttonhole on Stretch Fabrics (E) When sewing - Singer M3330 | User Manual - Page 27
, as needed, according to the distance between the holes of the button. Slowly sew on the button with about 10 stitches. Raise the needle out of the fabric. Set the machine for straight stitch again, then sew a few securing stitches to finish. If a shank is required, place a darning needle on top of - Singer M3330 | User Manual - Page 28
Zippers and Piping Set the machine as illustrated. Change to zipper foot. The zipper foot can be attached right or left, depending on which side of the foot you are going to sew. (1) To sew past the zipper tab, lower the needle into the fabric, raise the presser foot and push the zipper tab - Singer M3330 | User Manual - Page 29
General Information Installing the Removable Extension Table Hold the removable extension table horizontally, and push it in the direction of the arrow. (1) To remove the extension table, pull it toward the left. The inside of the removable extension table can be utilized as an accessory box. To - Singer M3330 | User Manual - Page 30
presser bar (a) with the presser foot lifter. Remove and attach the presser foot shank (b) as illustrated. (3) Attaching the edge/ quilting guide Attach the edge/quilting guide (f) in the slot as illustrated. Adjust as needed for hems, pleats, quilting, etc. (4) Attention: Turn power switch to off - Singer M3330 | User Manual - Page 31
THREAD SELECTION GUIDE NEEDLE SIZE fabric. NEEDLE, FABRIC SELECTION NEEDLES EXPLANATION SINGER® 2020 Standard sharp needles. Sizes range double knits. SINGER® 2045 Ball point needle, scarfed. 9 (70) to 18 (110). SINGER® 2032 1. For best sewing results always use genuine SINGER® needles. 2. - Singer M3330 | User Manual - Page 32
types of work, (e.g. darning or free-hand embroidery), the darning plate must be used. Install the darning plate as illustrated. For normal sewing, remove the darning plate. For free-motion sewing it is recommended to use a darning/ embroidery foot, available as an optional accessory from authorized - Singer M3330 | User Manual - Page 33
Maintenance and Troubleshooting Inserting the Needle Change the needle regularly, especially if it is showing signs of wear and causing problems. For best sewing results always use SINGER® Brand Needles. Insert the needle as illustrated as follows: A. Loosen the needle clamp screw and tighten again - Singer M3330 | User Manual - Page 34
. Lubricate at the point (6) (1-2 drops) with sewing machine oil. Turn the handwheel until the hook race (7) is in the left position. Replace the hook (5). Replace the hook race cover and snap back the two hook retaining arms. Insert the bobbin case and bobbin and replace the needle plate. Important - Singer M3330 | User Manual - Page 35
Troubleshooting Guide Problem Cause Correction Upper thread breaks 1. The machine is not threaded correctly. 2. The thread tension is too tight. 3. The thread is too thick for the needle. 4. The needle is not inserted correctly. 5. The - Singer M3330 | User Manual - Page 36
29 - Singer M3330 | User Manual - Page 37
30 - Singer M3330 | User Manual - Page 38
31 - Singer M3330 | User Manual - Page 39
- Singer M3330 | User Manual - Page 40
your health and well-being. We reserve the right to change the machine equipment and the assortment of accessories without prior notice, or make Singer, and the Cameo "S" Design are exclusive trademarks of The Singer Company Limited S.à.r.l. or its Affiliates. 471061726 • English ©2019 The Singer
-
 1
1 -
 2
2 -
 3
3 -
 4
4 -
 5
5 -
 6
6 -
 7
7 -
8
-
9
-
10
-
11
-
12
-
13
-
14
-
15
-
16
-
17
-
18
-
19
-
20
-
21
-
22
-
23
-
24
-
25
-
26
-
27
-
28
-
29
-
30
-
31
-
32
-
33
-
34
-
35
-
36
-
37
-
38
-
39
-
40
 |
 |
Instruction Manual
M3200 / M3300 / M3400 / M3500
M3205 / M3305 / M3405 / M3505