Singer PIXIE PLUS Instruction Manual
Singer PIXIE PLUS Manual
 |
View all Singer PIXIE PLUS manuals
Add to My Manuals
Save this manual to your list of manuals |
Singer PIXIE PLUS manual content summary:
- Singer PIXIE PLUS | Instruction Manual - Page 1
Mini Multi-Purpose Crafting & Mending Machine Mini máquina para reparaciones y manualidades de usos múltiples Mini machine à coudre tout-usage New & Improved Instruction Manual! ¡Nuevo manual de instrucciones actualizado! Nouveau manuel d'instructions amélioré! Please read all instructions carefully - Singer PIXIE PLUS | Instruction Manual - Page 2
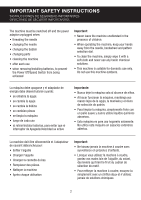
important safety instructions INSTRUCCIONES DE SEGURIDAD IMPORTANTES DIRECTIVES DE SÉCURITÉ IMPORTANTES The machine must be switched off and the power adaptor unplugged when: • threading the needle • changing the needle • changing the bobbin • changing parts • cleaning the machine • after each use - Singer PIXIE PLUS | Instruction Manual - Page 3
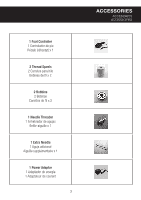
1 Foot Controller 1 Controlador de pie Pédale (réhostat) x 1 2 Thread Spools 2 Carretes para hilo Bobines de fil x 2 2 Bobbins 2 Bobinas Canettes de fil x 2 1 Needle Threader 1 Enhebrador de agujas Enfile-aiguille x 1 1 Extra Needle 1 Aguja adicional Aiguille supplémentaire x 1 1 Power Adaptor 1 - Singer PIXIE PLUS | Instruction Manual - Page 4
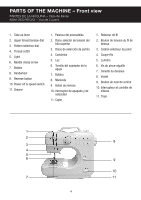
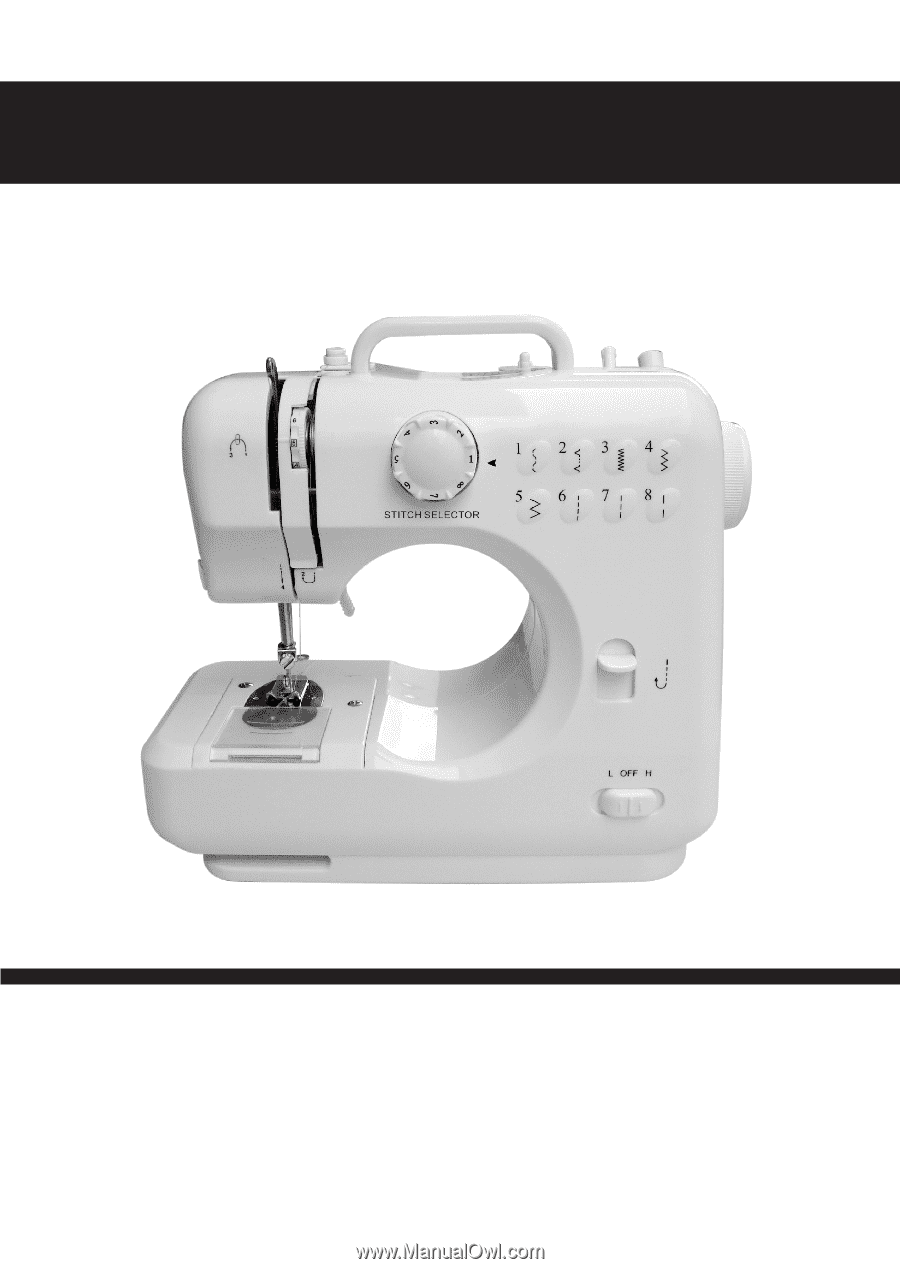
OF THE MACHINE - Front view PARTES DE LA MÁQUINA - Vista de frente NOM DES PIÈCES - Vue de L'avant 1. Take up lever 2. Upper thread tension dial 3. Pattern selection dial 4. Thread cutter 5. Light 6. Needle clamp screw 7. Bobbin 8. Handwheel 9. Reverse button 10. Power off & speed switch 11. Drawer - Singer PIXIE PLUS | Instruction Manual - Page 5
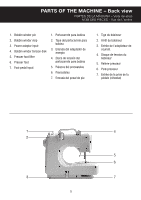
OF THE MACHINE - Back view PARTES DE LA MÁQUINA - Vista de atrás NOM DES PIÈCES - Vue de L'arrière 1. Bobbin winder pin 2. Bobbin winder stop 3. Power adaptor input 4. Bobbin winder tension disk 5. Presser foot lifter 6. Presser foot 7. Foot pedal input 1. Portacarrete para bobina 2. Tope del - Singer PIXIE PLUS | Instruction Manual - Page 6
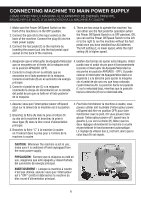
the foot pedal (C) to the machine by inserting the power jack into the foot pedal input socket on the back of the machine. 4. There are two ways to operate the machine. You can either use the foot pedal for operation (when the Power Off/Speed Switch is in OFF position), OR, you can set the Power - Singer PIXIE PLUS | Instruction Manual - Page 7
ÍAS INSTALLATION DES PILES 1. Make sure the Power Off/Speed Switch is in the OFF position. 2. Turn the machine over onto a flat surface and remove the battery compartment cover. 3. Insert four AA batteries into the compartment and then replace the battery cover. 1. Asegúrese que el interruptor de - Singer PIXIE PLUS | Instruction Manual - Page 8
of the machine. around the bobbin several times. (Fig. 3) (Fig. 1) 6. Set the Power Off/Speed Switch to the left (or set 1. Turn the machine so that you are facing the back the switch to the OFF position and press the foot of it. pedal) to start winding. (Fig. 4) 2. Place a spool of thread on - Singer PIXIE PLUS | Instruction Manual - Page 9
WINDING THE BOBBIN CÓMO BOBINAR EL CARRETE EMBOBINAGE DE LA CANETTE Fig. 1 Fig. 2 Fig. 3 Fig. 4 Fig. 5 9 - Singer PIXIE PLUS | Instruction Manual - Page 10
MACHINE À COUDRE 1. Set the Power Off/Speed Switch to the OFF position. 2. Raise the presser foot lifter. 3. Turn the handwheel counter-clockwise until the needle is in its highest position. 4. Set the thread spool on the spool pin. 5. Bring the thread under the thread guide en la parte superior de - Singer PIXIE PLUS | Instruction Manual - Page 11
THREADING THE MACHINE CÓMO ENHEBRAR LA MÁQUINA ENFILAGE DE LA MACHINE À COUDRE 11 - Singer PIXIE PLUS | Instruction Manual - Page 12
needle thread and pick up 3. Place the filled bobbin into the bobbin case (Fig. 7), and pull about 4" of thread from the the bobbin thread which will appear through the needle plate slot. Then pull both threads to the new bobbin. Make sure that the bobbin turns back of the machine la plus haute - Singer PIXIE PLUS | Instruction Manual - Page 13
MO ENHEBRAR LA BOBINA REMPLACEMENT DE LA CANETTE IMPORTANT: Always use a metal bobbin, or the magnetized bobbin case will not be able to function properly, resulting in a lack of tension on the bobbin thread. IMPORTANTE: Siempre use una bobina de metal o el portabobina magnetizado no podrá funcionar - Singer PIXIE PLUS | Instruction Manual - Page 14
remove the fabric from the machine (Fig. 13) press your foot down on the pedal. Stop sewing any time by releasing your foot from the pedal. 6. Cut the threads with the thread cutter at the side of the machine. b) To operate the machine without the foot pedal, set the Power Off/Speed Switch to - Singer PIXIE PLUS | Instruction Manual - Page 15
SEWING COSTURAS COUTURE CAUTION: When the machine is running, do not touch or adjust the Pattern Selection Dial. PRECAUCIÓN: Cuando la máquina esté en funcionamiento, no toque ni ajuste el disco de selección de patrón. AVERTISSEMENT : Lorsque la machine à coudre fonctionne, ne touchez pas au cadran - Singer PIXIE PLUS | Instruction Manual - Page 16
the appearance of a straight line (Figure B), this indicates that the upper thread is too loose. Turn the Thread Tension Dial to a higher number to increase tension until the stitching is balanced. 3. If the upper thread gives the appearance of a straight line (Figure C), this indicates that the - Singer PIXIE PLUS | Instruction Manual - Page 17
côté plat vers l'arrière. Poussez l'aiguille vers le haut le plus loin possible. (Fig.15) 4. Resserrez la vis du pince-aiguille. CAUTION: Remove the batteries and disconnect the power adaptor before starting to replace the needle. PRECAUCIÓN: Retire las baterías y desconecte el adaptador de energ - Singer PIXIE PLUS | Instruction Manual - Page 18
on the upper thread while sewing in reverse. Turn the 1. To select the stitch you want to sew, look at the upper thread tension dial to the normal setting for diagrams numbered 1 through 8 on the front of the sewing stitch patterns as normal. machine. Choose the corresponding number on the dial - Singer PIXIE PLUS | Instruction Manual - Page 19
Débutez la couture. 'L', la vitesse sera lente. 3. Lorsque vous souhaitez changer le type de point, tournez le volant sur le côté de la machine à coudre afin d'élever l'aiguille à la plus haute position et mettre le cadran de la sélection de motif de la même façon LUMIÈRE DE TRAVAIL (Fig.19) Si - Singer PIXIE PLUS | Instruction Manual - Page 20
presser foot Bobbin thread cannot Bobbin is empty; be drawn up Needle is threaded incorrectly Replace with full bobbin; Rethread the needle making sure it is threaded from front to back Thread keeps breaking Needle is bent; Needle shank not properly seated; Thread tension dial or thread guide - Singer PIXIE PLUS | Instruction Manual - Page 21
SOLUCIÓN DE PROBLEMAS PROBLEMA Causa del problema Solución No hay energía o la máquina funciona despacio Las baterías están mal colocadas; las baterías están gastadas; adaptador de energía inadecuado Volver a colocar las baterías asegurándose de insertarlas correctamente; usar baterías nuevas; - Singer PIXIE PLUS | Instruction Manual - Page 22
PROBLÈME CAUSE CORRECTION Pas d'alimentation ou la machine fonctionne lentement Les piles sont installées incorrectement; la tige de l'aiguille n'est pas positionnée correctement; le cadran pour la tension, guide-fil ou barre qui tire le fil trop serré Enlevez et remettez une nouvelle aiguille - Singer PIXIE PLUS | Instruction Manual - Page 23
- Singer PIXIE PLUS | Instruction Manual - Page 24
-
 1
1 -
 2
2 -
 3
3 -
 4
4 -
 5
5 -
 6
6 -
 7
7 -
8
-
9
-
10
-
11
-
12
-
13
-
14
-
15
-
16
-
17
-
18
-
19
-
20
-
21
-
22
-
23
-
24
 |
 |
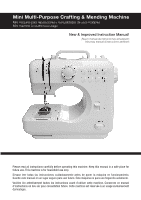
Mini Multi-Purpose Crafting & Mending Machine
Mini máquina para reparaciones y manualidades de usos múltiples
Mini machine à coudre tout-usage
New & Improved Instruction Manual!
¡Nuevo manual de instrucciones actualizado!
Nouveau manuel d’instructions amélioré!
Please read all instructions carefully before operating this machine. Keep this manual in a safe place for
future use. This machine is for household use only.
Sírvase leer todas las instrucciones cuidadosamente antes de poner la máquina en funcionamiento.
Guarde este manual en un lugar seguro para uso futuro. Esta máquina es para uso hogareño solamente.
Veuillez lire attentivement toutes les instructions avant d’utiliser cette machine. Conservez ce manuel
d’instructions en lieu sûr pour consultation future. Cette machine est réservée à un usage exclusivement
domestique.