Snapper RE100 Operater's Manual
Snapper RE100 Manual
 |
View all Snapper RE100 manuals
Add to My Manuals
Save this manual to your list of manuals |
Snapper RE100 manual content summary:
- Snapper RE100 | Operater's Manual - Page 1
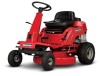
Operator's Manual REAR ENGINE RIDING MOWER SERIES 24 Model No. Description 7800784 2811524BV 7800785 2812524BVE 7800786 3014524BVE 7800787 3317524BVE RNeoptrfoodruction ! Manual No. 7104742 (Rev. '-') - Snapper RE100 | Operater's Manual - Page 2
Snapper brand. When operated and maintained according to the instructions in this manual, your Snapper product will provide many years of dependable service. This manual established lawns and is not intended for any other purpose. It is important that you read and understand these instructions - Snapper RE100 | Operater's Manual - Page 3
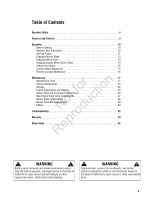
and Component Adjustments 24 Rear Engine Rider Drive Components 27 t c Mower Blade Replacement 28 o Mower Drive Belt Replacement 29 u Battery 30 N d Troubleshooting 32 ro Warranty 34 Rep Slope Guide 35 ! WARNING ! Battery posts, terminals and related accessories contain lead and lead - Snapper RE100 | Operater's Manual - Page 4
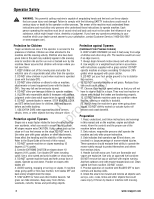
Service (1-800-935-2967 or www.snapper 11. Choose a low enough speed setting so that you will going down slopes. DO NOT shift to neutral (or actuate hydro roll release) and coast downhill. Preparation 1. Read, understand, and follow instructions and warnings in this manual and on the machine, engine - Snapper RE100 | Operater's Manual - Page 5
11. Know how to STOP blades and engine quickly in prepa- mower from thrown objects going through weak or worn turning. 10. Watch out for traffic when near or crossing roadways. 11. STOP engine accessories approved by the manufacturer. than a gasoline dispenser nozzle. See manufacturer's instructions - Snapper RE100 | Operater's Manual - Page 6
engine. 14. Have machine serviced by an authorized dealer at least once a year and have the dealer install any new safety devices. 15. Maintain or replace safety and instruction labels as necessary. 16. Use only factory authorized replacement parts or like parts when making repairs. 6 www.snapper - Snapper RE100 | Operater's Manual - Page 7
Decal Identification Operator Safety Remove Battery - 7101109 Before Starting - 7101112 Amputation and thrown objects hazard • Keep hands and feet away from deck. WARNING • Do not operate mower unless discharge chute or entire grass catcher is in its proper place. 7101110 - Snapper RE100 | Operater's Manual - Page 8
(sealed) non-spillable batteries in this product. Battery must be factory approved part or equivalent. Do not overcharge. for tion Non-Spillable Battery - 7105102 WARNING Not duc AVOID SERIOUS INJURY OR DEATH Read Operator's Manual before o working with battery. Always wear goggles when - Snapper RE100 | Operater's Manual - Page 9
figures and illustrations in this manual are provided for reference only and may differ from your specific model. Contact your dealer if you have questions. Features and Controls I J H G F E RNeopt rfoodr uctiBonA C D Features and Controls A. Engine Speed Control B. Cutting Height Lever - Snapper RE100 | Operater's Manual - Page 10
lever must not go into r reverse. 7. Clean the exterior surfaces of the cutting deck and p engine of any accumulation of dirt, grass, oil, etc. Keep the engine air intake screen and cooling fins clear at all e times. 8. Add fuel to the fuel tank after pushing the Rear Engine R Rider outside where - Snapper RE100 | Operater's Manual - Page 11
) IMPORTANT: When the ignition key is turned to "START", the engine will turn over, but will not start unless the Clutch/Brake pedal is pressed all the way down, and the Blade Lever is in the "OFF" position. The operator should be in the seat. Start the engine as follows: 1. Move the transmission - Snapper RE100 | Operater's Manual - Page 12
with a fuel shut-off solenoid. If the battery is dead, the engine can be started with the recoil back-up starter if the engine speed control is in the choke position (HOT engine or COLD engine). Engine (Manual Start) B IMPORTANT: When the key is turned to "ON", and the recoil Figure 8: Setting - Snapper RE100 | Operater's Manual - Page 13
11: Engaging the clutch/brake pedal Not fodruction B pro Figure 10: Engaging the mower blade Re Wheel Drive A 1. With the engine running, adjust the engine slow forward speed and the engine speed control to a fast position. This combination will allow the mower blades to lift the grass while - Snapper RE100 | Operater's Manual - Page 14
ctio Figure 13: Turning key to 'Off' N du Wheel Drive 1. Stop motion of the Rear Engine Rider by pushing the o clutch/brake pedal (A, Figure 14) all the way down to r apply the brake. Figure 15: Stopping the mower blade ! WARNING ! Figure 14: Engaging the clutch/brake pedal 14 www.snapper.com - Snapper RE100 | Operater's Manual - Page 15
Stopping - Engine, Wheel Drive, Blade (Continued) Park Brake 1. To set the park brake, press the clutch/brake pedal (A, Figure 16) all the way down, slide the park brake latch (B) all the way in to the engaged position, and release the clutch/brake pedal. A detent in the park brake latch will keep - Snapper RE100 | Operater's Manual - Page 16
! This riding mower has a Reverse Lockout Mechanism. This mechanism prevents the mower from being turn blade off. The Override will reset to Reverse Lockout. running. As the Safety Instructions Indicate, DO NOT oper- Check the Reverse Lockout Mechanism frequently for proper ate blades in reverse - Snapper RE100 | Operater's Manual - Page 17
Annually * Check tire pressure Clean engine air filter and pre-cleaner ** Check mower blade stopping time Every 50 Hours or Annually * Check tractor/mower for loose hardware Change engine oil Every 50 Hours or Annually * Replace oil filter Clean battery and cables Annually Check tractor - Snapper RE100 | Operater's Manual - Page 18
WEAR LIMITS". the correct part or information for a particular Rear Engine 5. Check the blade for straightness. Refer to the section Riding Mower, always mention the model and serial number. entitled "ADJUSTING MOWER BLADE". We recommend returning the Rear Engine Rider to an authorized dealer - Snapper RE100 | Operater's Manual - Page 19
service or repairs with the engine running. STOP engine. STOP blade. Engage parking brake. Remove key. Remove spark plug wire from spark plug and secure away from plug. Engine and components are HOT. Avoid serious burns, allow all B parts blade has been turned off. DO NOT MENT". SNAPPER dealer - Snapper RE100 | Operater's Manual - Page 20
must not o u go into reverse. N d ! WARNING ! o DO NOT operate machine if Reverse Lockout Mechanism is r not functioning properly. Contact your SNAPPER dealer immediately for assistance. ep Lubrication - Grease Fittings The following components on the Rear Engine Rider are R equipped with - Snapper RE100 | Operater's Manual - Page 21
the Rear Engine Rider on the rear o u bumper. (See statement below.) 3. Lubricate the spindle grease fitting (A, Figure 24) with N d three shots of general purpose grease from a grease gun. ro IMPORTANT: If the unit will be on its rear bumper for longer p than two hours, remove the battery. Refer - Snapper RE100 | Operater's Manual - Page 22
: If the unit will be on its rear bumper for longer than two hours, remove the battery. Refer to the Section B entitled "BATTERY REMOVAL". Figure 29: Chain case lubricant check Engine Service Check the maintenance section of the Engine Manual for additional engine service. 22 www.snapper.com - Snapper RE100 | Operater's Manual - Page 23
in the Maintenance Chart in this manual. Storage (Out of Season) If desired, the Rear Engine Rider can be stored on the rear Fuel Filter bumper. Perform the following procedures to insure the Rear Engine Rider will operate properly when taken out of storage. IMPORTANT: Service the fuel filter on - Snapper RE100 | Operater's Manual - Page 24
, take machine immediately to an authorized Snapper dealer. Engine Adjustments and Repair Refer to the engine manual for those adjustments and/or A repairs that can be made by the owner. Mower Deck and Component C Adjustments The following mower deck and component adjustments and repairs - Snapper RE100 | Operater's Manual - Page 25
key. Remove spark plug wire from spark plug and secure away from plug. Engine and components are HOT. Avoid serious burns, allow all parts to cool before working on machine. Fuel Filler Cap must be closed securely to prevent fuel spillage. Levelness) 28" and 33" Decks With the Rear Engine Rider - Snapper RE100 | Operater's Manual - Page 26
Remove key. Remove spark plug wire from spark plug and secure away from plug. Engine and components are HOT. Avoid serious burns, allow all parts to cool before working on machine. Fuel Filler Cap must be closed securely to prevent fuel spillage. B A Mower Drive Belt Adjustment (For 28" & 30 - Snapper RE100 | Operater's Manual - Page 27
F, Figure 39) are noted for reference purposes only. E Rear Engine Rider Drive Components Service Brake / Park Brake Adjustment Test the wheel brake on a dry concrete surface. When prop- C erly adjusted, the Rear Engine Rider will stop within 5 feet from fastest speed. If stopping distance - Snapper RE100 | Operater's Manual - Page 28
Engine Rider on its rear bumper. 3. Remove the bolts (B, Figure 42), washers (C) and nuts (D) securing the mower blade (A) to the spindle. 4. Inspect the condition of the blade (Figure 41). 5. If the blade is in good condition, sharpen at 22 to 28 degrees (B, Figure 43). DO NOT sharpen beyond - Snapper RE100 | Operater's Manual - Page 29
on this page. fo tio 2. Carefully stand the Rear Engine Rider on its rear bumper. 3. Route the new belt through the engine belt guide (B, t c Figure 44) up to the engine pulley (A). No du A A C Figure 45: Belt routing for 28 and 30 inch decks E D A pro B B C Re Figure 46: Belt routing for - Snapper RE100 | Operater's Manual - Page 30
any adjustments, maintenance, service or repairs with the engine running. Stop engine. Stop blade. Engage parking brake. Remove key. Remove spark plug wire from spark plug and secure away from plug. Engine and components are HOT. Avoid serious burns, allow all parts to cool before working - Snapper RE100 | Operater's Manual - Page 31
charger may result in damage to the battery. DO NOT use "BOOST" chargers on the battery. DO NOT attempt to charge the battery while installed on the unit. Battery Storage If the mower is to be stored out of season on its rear bumper, it is recommended the battery be removed, charged and stored - Snapper RE100 | Operater's Manual - Page 32
"STOP" 1. Set throttle control to "SLOW" and allow engine to idle. Then, turn key to "OFF". Excessive Vibration 1. Damaged, out of balance or bent mower blades. 1. Service mower blade(s). 2. Loose blade components. 2. Service and tighten loose parts. 3. Loose or missing air lift (if equipped - Snapper RE100 | Operater's Manual - Page 33
Troubleshooting PROBLEM Rider Will Not Move Or Loss of Traction Blade(s) Not Cutting Cutting Grass Improperly Poor Grass Discharge Oil Leaking PROBABLE CAUSE CORRECTIVE ACTION 1. Drive disc worn or - Snapper RE100 | Operater's Manual - Page 34
OWNER WARRANTY POLICY LIMITED WARRANTY Briggs & Stratton Power Products Group, LLC will repair and/or replace, free of charge, any part Equipment Engine* Battery Manual, and serviced or repaired using genuine Briggs & Stratton parts. Damage caused by lack of maintenance or use of non-original parts - Snapper RE100 | Operater's Manual - Page 35
Slope Guide RNeopt rfoodr uction 35 - Snapper RE100 | Operater's Manual - Page 36
REAR ENGINE RIDING MOWER SERIES 24 Product Specifications 2811524BV 2812524BVE 3014524BVE 3317524BVE Deck Size (inches) 28 28 30 33 Height of Cut (inches) 1.5 - 4.0 1.5 - 4.0 1.5 - 4.0 1.5 - 4.0 Transmission Type Ground Speed-Fwd/Rev (mph) r n Engine Power (hp) Engine Displacement (cc)
-
 1
1 -
 2
2 -
 3
3 -
 4
4 -
 5
5 -
 6
6 -
 7
7 -
8
-
9
-
10
-
11
-
12
-
13
-
14
-
15
-
16
-
17
-
18
-
19
-
20
-
21
-
22
-
23
-
24
-
25
-
26
-
27
-
28
-
29
-
30
-
31
-
32
-
33
-
34
-
35
-
36
 |
 |
Operator's Manual
Manual No.
7104742 (Rev. ‘-’)
REAR ENGINE RIDING MOWER
SERIES 24
Model No.
Description
7800784
2811524BV
7800785
2812524BVE
7800786
3014524BVE
7800787
3317524BVE
!
Not for
Reproduction