Sony Ericsson Xperia neo V User Guide - Page 44
Email, Using e-mail
 |
View all Sony Ericsson Xperia neo V manuals
Add to My Manuals
Save this manual to your list of manuals |
Page 44 highlights
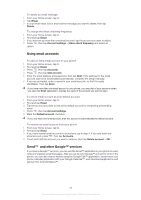
Email Use the Email application in your phone to send and receive emails through your regular email account or through your corporate account. Or you can do both. Your phone can handle several email accounts at the same time. You can set up these accounts to run through one combined inbox, or through separate inboxes. Note that emails you receive to your Gmail™ account can be accessed in the phone from both the Email and the Gmail™ applications. Your corporate Microsoft® Outlook® email messages have to be stored on a Microsoft® Exchange server for the functionality described above to work. See Synchronizing your corporate email, calendar and contacts on page 61 for more information. To set up an email account in your phone 1 From your Home screen, tap . 2 Find and tap Email. 3 Enter your email address and password, then tap Next. 4 If the settings for the email account cannot be downloaded automatically, complete the setup manually. 5 If you are prompted, enter a name for your email account, so that it is easily identifiable. Then tap Done. If you need to enter the settings manually, contact your email service provider for the correct email account settings. For corporate email, select Exchange Active Sync as the account type. You can set up more than one email account. See To add an extra email account in your phone on page 46. Using e-mail To create and send an email message 1 From your Home screen, tap . 2 Tap Email. 3 If you are using several email accounts, tap the account you want to send the message from. 4 Tap New mail. 5 Tap To and start typing the recipient's address. Matches are displayed in a dynamic list. Tap the relevant match or continue typing the complete email address. To add more recipients, enter a comma ( , ) or a semi colon ( ; ) and start typing another name. To delete a recipient, tap the key. 6 Tap Subject and enter the email subject. 7 In the message area, enter your message text. 8 To attach a file, tap Add attachment. Select the type of file, then tap the file you want to attach from the list that appears. 9 Tap Send. To receive email messages 1 From your Home screen, tap . 2 Tap Email. 3 If you are using several email accounts, tap the account that you want to check. If you want to check all your email accounts at once, tap Combined Inbox. 4 To download new messages, press , then tap Refresh. For corporate accounts set to push mode, you do not have to refresh the inbox. When push mode is enabled, your phone is updated automatically when new emails are received. 44 This is an Internet version of this publication. © Print only for private use.
-
 1
1 -
2
-
3
-
4
-
5
-
6
-
7
-
8
-
9
-
10
-
11
-
12
-
13
-
14
-
15
-
16
-
17
-
18
-
19
-
20
-
21
-
22
-
23
-
24
-
25
-
26
-
27
-
28
-
29
-
30
-
31
-
32
-
33
-
34
-
35
-
36
-
37
-
38
-
 39
39 -
 40
40 -
 41
41 -
 42
42 -
 43
43 -
 44
44 -
 45
45 -
 46
46 -
 47
47 -
 48
48 -
 49
49 -
50
-
51
-
52
-
53
-
54
-
55
-
56
-
57
-
58
-
59
-
60
-
61
-
62
-
63
-
64
-
65
-
66
-
67
-
68
-
69
-
70
-
71
-
72
-
73
-
74
-
75
-
76
-
77
-
78
-
79
-
80
-
81
-
82
-
83
-
84
-
85
-
86
-
87
-
88
-
89
-
90
-
91
-
92
-
93
-
94
-
95
-
96
-
97
-
98
-
99
-
100
-
101
-
102
-
103
-
104
-
105
-
106
-
107
-
108
-
109
-
110
-
111
-
112
-
113
-
114
-
115
-
116
-
117
-
118
-
119
-
120
-
121
-
122
 |
 |