Sony AITE200-UL Operating Instructions
Sony AITE200-UL Manual
 |
View all Sony AITE200-UL manuals
Add to My Manuals
Save this manual to your list of manuals |
Sony AITE200-UL manual content summary:
- Sony AITE200-UL | Operating Instructions - Page 1
2-067-134-13(1) AIT Drive Operating Instructions AIT-2 Turbo TAPE DRIVE AITe200-UL/AITe200T-UL AIT-2 TAPE DRIVE AITe130V-UL AIT-1 Turbo TAPE DRIVE AITe100-UL/AITe100T-UL AIT-1 TAPE DRIVE AITe90V-UL ©2004 Sony Corporation - Sony AITE200-UL | Operating Instructions - Page 2
servicing to qualified personnel only. MODEL No. for Regulatory Compliance Your AITe200-UL or AITe200T-UL is assigned the MODEL No. ATDEA3A (respectively) for regulatory compliance certifications. Your AITe130V-UL, AITe100-UL, AITe100T-UL or AITe90V-UL accordance with the instructions, may cause - Sony AITE200-UL | Operating Instructions - Page 3
Use the power cord set approved by the appropriate testing organization for the specific countries where this unit is to be used. HINWEIS Zum Netzanschluß dieses Sony contact in the instruction manual. DECLARATION OF CONFORMITY Trade Name: SONY Model: ATDEA2A, ATDEA3A Responsible Party: Sony - Sony AITE200-UL | Operating Instructions - Page 4
, EMC and R&TTE the manufacturer of this product is Sony Corporation, 1-7-1 Konan Minato-ku Tokyo, 108-0075 Japan. The Authorised Representative is Sony Deutschland GmbH, Hedelfinger Strasse 61,70327 Stuttgart, Germany. For any service or guarantee matters please refer to the addresses given in - Sony AITE200-UL | Operating Instructions - Page 5
completely before operating the appliance, and keep this manual for future reference. Carefully observe all warnings, precautions and instructions on the appliance, or the one described in the operating instructions and adhere to them. USE Power Sources - This unit should be operated only - Sony AITE200-UL | Operating Instructions - Page 6
operating instructions. Improper adjustment of other controls may result in damage and will often require extensive work by a qualified technician to restore the unit to normal operation. • When the unit exhibits a distinct change in performance - this indicates a need for service. Servicing - Do - Sony AITE200-UL | Operating Instructions - Page 7
Table of Contents How To Use This Guide 8 Chapter 1 Introduction Chapter 2 Preparation Chapter 3 Operation Chapter 4 Care 27 Storage Precautions 27 Cleaning 28 How To Clean 28 Specifications 29 Sony Contacts 33 • Sony cannot accept liability for data written to cartridges lost as - Sony AITE200-UL | Operating Instructions - Page 8
AITe200-UL, AITe200T-UL, AITe130V-UL, AITe100-UL, AITe100T-UL or AITe90V-UL. Please read it carefully before using the drives and save it for future reference. The guide logo " " are trademarks of Sony Corporation. • All other system names, products, and services are either registered trademarks or - Sony AITE200-UL | Operating Instructions - Page 9
using data cartridges that conform to the AIT-1 Turbo, AIT-1, and AIT-E Turbo formats. The AITe90V-UL is an external AIT drive using data cartridges that conform to the AIT-1 format. The AITe200-UL drive has the following features. • Uses the Advanced Intelligent Tape (AIT) format AIT-2 Turbo, AIT - Sony AITE200-UL | Operating Instructions - Page 10
52 GB on an AIT-E Turbo data cartridge (98-m tape).*1 The AITe90V-UL drive has the following features. • Uses the Advanced Intelligent Tape (AIT) format to your computer. Note You cannot use the USB and i.LINK interfaces simultaneously. The drives support Hot Plug, which means that you can connect - Sony AITE200-UL | Operating Instructions - Page 11
the 1Safe™: Windows XP, Windows 2000, Windows Me, or Windows 98 SE • CD-ROM drives (to install the software necessary to the drives) • i.LINK and/or USB interface Compatible Data Cartridges The AITe200-UL can be used with data cartridges marked with the AIT-2 Turbo, AIT-2, AIT-1 Turbo, AIT-1, or AIT - Sony AITE200-UL | Operating Instructions - Page 12
-20N 20 GB AIT Cleaning Cartridges Name Description SDX1-CL AIT drive cleaning cartridge Notes • Be sure to use only data cartridges designed specifically for AIT. • Do not use anything but AIT cartridges with this system, as doing so can damage the AIT drive. Although commercially available - Sony AITE200-UL | Operating Instructions - Page 13
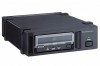
Part Names and Functions Front Panel 1 2 Advanced Intelligent Tape 34 5 6 1 AIT Data Cartridge Receptacle See page 21 to 22 for information on inserting and removing a AIT data cartridge. 2 POWER Indicator Lights while the drive is on. 3 Dust Cover This cover protects the AIT data cartridge - Sony AITE200-UL | Operating Instructions - Page 14
drive on or off. 1 23 4 1 AC IN Connector Connect the supplied power cable here. 2 i.LINK Connectors ( ) Connects to the i.LINK connector of the host computer. 3 USB Connector ( ) Connects to the USB connector of the host computer or a USB hub. 4 Cooling Fan 14 Chapter 1 Introduction - Sony AITE200-UL | Operating Instructions - Page 15
• Operating instructions CD-ROM • 1Safe™ CD-ROM (excluding AITe200-UL/AITe200T-UL) • USB 2.0 cable • i.LINK cables (6-pin to 6-pin, 6-pin to 4-pin, 1 each) • Power cable • Warranty card* • Safety regulations *Warranty coverage may vary from region to region. *The supplied items are listed on the - Sony AITE200-UL | Operating Instructions - Page 16
Interconnections Connecting to the USB Interface Connect the USB connector of the host computer or USB hub to the USB connector of the drives with the USB cable. Connecting to the i.LINK Interface Connect the i.LINK connector of the host computer to the i.LINK connector of the drives with the one of - Sony AITE200-UL | Operating Instructions - Page 17
Option Switches (DIP Switch) Remove the two slotted screws by using a slotted screwdriver. Remove the access cover to change the DIP switch settings. (Refer to the following figure for details changing the DIP switch settings.) After changing the DIP switch settings, replace access cover and tighten - Sony AITE200-UL | Operating Instructions - Page 18
Drive Mode 3 Drive Mode 4 Drive Mode 5 Reserved 6 Periodic Cleaning Req (ON) 7 DC Control (1) 8 DC Control (2) Emulation Mode* (only for AITe130V-UL and AITe90V-UL) To enable Emulation Mode, set position 1 - 4 Drive Mode switches to ON. ON OFF 12345678 1 Drive Mode (ON) 2 Drive Mode (ON) 3 Drive - Sony AITE200-UL | Operating Instructions - Page 19
can be controlled, depends on the characteristics and specifications of the individual device. Note i.LINK, the internationally popular name for the IEEE 1394 interface standard, is a Sony trademark. IEEE 1394 is an international standard established by the Institute of Electrical and Electronics - Sony AITE200-UL | Operating Instructions - Page 20
be turned on to relay data to other i.LINK devices. When connecting an i.LINK device, refer to the instructions accompanying the device. • The maximum data transfer rate supported by any given i.LINK device is indicated near the i.LINK connector. The maximum i.LINK data transfer rates are defined - Sony AITE200-UL | Operating Instructions - Page 21
When the three indicators stop blinking, open the dust cover and insert a data cartridge as shown below. The TAPE MOTION indicator lights. 3 Computer software controls the reading and writing of tapes. While reading or writing, the TAPE MOTION indicator blinks. 4 Close the dust cover. Caution Do not - Sony AITE200-UL | Operating Instructions - Page 22
Cartridge Removal 1 Press the EJECT button. 2 The cartridge is ejected automatically. Caution Do not push the EJECT button while the TAPE MOTION indicator is blinking. To do so may destroy data on the tape. 3 Remove the cartridge from the receptacle, and then close the dust cover. 22 Chapter 3 - Sony AITE200-UL | Operating Instructions - Page 23
Attaching the Dust Cover If the dust cover comes loose, attach it as described below. Note We recommend that you use the drive with the dust cover. 1 Align the dust cover's hinge clips (one on each side) with the pins of the drive bezel. • The dust cover should be positioned so that the magnets* on - Sony AITE200-UL | Operating Instructions - Page 24
2 Press down at an angle on each side in turn until you hear the hinge clips click into place. Caution Do not press the dust cover in horizontally from the front. Doing so could cause the dust cover to break. 3 Close the dust cover. This completes attachment of the dust cover. 24 Chapter 3 Operation - Sony AITE200-UL | Operating Instructions - Page 25
Chapter 4 Care and Maintenance Taking Care of the Drives Safety Considerations ■ Power • 100 V to 240 V AC. • Avoid plugging into the same outlet as high-current equipment like copiers or shredders. ■ Power Cable Precautions • Do not crush the cable or place heavy items on it. If the cable - Sony AITE200-UL | Operating Instructions - Page 26
■ Avoid sudden changes in temperature If the drives are moved from a cool place to a warm place, or if the room temperature suddenly rises, moisture may condense inside the case. After a sudden change in temperature, wait at least one hour before turning the drives on. Inserting a cartridge with - Sony AITE200-UL | Operating Instructions - Page 27
Taking Care of Cartridges Usage Precautions • Avoid dropping the cartridges and high vibrations. • The lid on the face of the cartridge opens automatically when it is inserted into the drives. Do not open the lid by hand, as touching the tape may damage it. • The cartridge is precisely aligned. Do - Sony AITE200-UL | Operating Instructions - Page 28
Cleaning To keep the AIT drive in top condition, clean the drive unit as needed using a cleaning cartridge with the AIT logo. When the drive unit needs cleaning, the CLEANING REQUEST indicator lights. How To Clean 1 Load the cleaning cartridge (SDX1-CL) into the AIT drive. Cleaning starts - Sony AITE200-UL | Operating Instructions - Page 29
Appendix Specifications AITe200-UL ■ Performance Storage Capacity Data Transfer guide 1 AIT data cartridge 1 Operating instructions CD-ROM 1 USB 2.0 cable 1 i.LINK cables (6-pin to 6-pin, 6-pin to 4-pin, 1 each) 2 Power cable 1 Warranty card 1 Safety regulations 1 Specifications - Sony AITE200-UL | Operating Instructions - Page 30
UL 6 MB/s uncompressed (with 230 m AIT-2 data cartridge) 480 Mbps maximum (USB) 400 Mbps maximum (i.LINK) less than 10-17 average of 14 seconds*2 average × 246 mm (W × H × D) (excluding projections) 2.4 kg Specifications may be subject to change, in the interest of technological improvement, without - Sony AITE200-UL | Operating Instructions - Page 31
H × D) (excluding projections) 2.4 kg Quick start guide 1 AIT data cartridge 1 Operating instructions CD-ROM 1 USB 2.0 cable 1 i.LINK cables (6-pin to 6-pin, 6-pin to 4-pin, 1 each) 2 Power cable 1 Warranty card 1 Safety regulations 1 Specifications may be subject to change, in the - Sony AITE200-UL | Operating Instructions - Page 32
UL ■ Performance Storage Capacity Data Transfer Rate (TAPE) Burst Data Transfer Rate Bit Error Rate Load Time Unload Time Rewind Time 35 GB uncompressed (with 230 m AIT-1 data cartridge) 91 GB compressed (with 230 m AIT-1 data cartridge*1) 4 MB/s uncompressed 480 Mbps maximum (USB Specifications - Sony AITE200-UL | Operating Instructions - Page 33
& Marketing Div. 8/F, One Corporate Avenue, 222 Hu Bin Road. Luwan District, Shanghai. P.R.C. Postcode 200021 TEL: 86-21-6121-6878 URL: http://www.sony.com.cn/ed/cp/ait/ Sony Brasil Ltda. Rua Inocéncio Tobias, 125, Barra Funda São Paulo-SP, Brasil 01144-000 TEL: (55) 11-2196-9000 FAX: (55) 11-2196 - Sony AITE200-UL | Operating Instructions - Page 34
, World Trade Center, 159-1, Samsung-Dong, Kangnam-Ku, Seoul, 135-798, Korea TEL: 82-2-6001-4249 FAX: 82-2-6001-4115 URL: http://www.sony.co.kr/cp/ Sony Gulf FZE Computer Display & Peripheral Div. P.O.BOX 16871, Jebel Ali, Dubai, U.A.E. TEL: 971-4-8815488 or 8816912 FAX: 971-4-8817210 or 8816259 - Sony AITE200-UL | Operating Instructions - Page 35
-
 1
1 -
 2
2 -
 3
3 -
 4
4 -
 5
5 -
 6
6 -
 7
7 -
8
-
9
-
10
-
11
-
12
-
13
-
14
-
15
-
16
-
17
-
18
-
19
-
20
-
21
-
22
-
23
-
24
-
25
-
26
-
27
-
28
-
29
-
30
-
31
-
32
-
33
-
34
-
35
 |
 |

2-067-134-
13
(1)
©2004 Sony Corporation
Operating Instructions
AIT Drive
AIT-2 Turbo TAPE DRIVE
AITe200-UL/AITe200T-UL
AIT-2 TAPE DRIVE
AITe130V-UL
AIT-1 Turbo TAPE DRIVE
AITe100-UL/AITe100T-UL
AIT-1 TAPE DRIVE
AITe90V-UL