Sony CCD TRV68 Operating Instructions - Page 21
After recording, Adjusting the LCD screen, Recording a picture, To set the counter to 0:00:00
 |
UPC - 027242586130
View all Sony CCD TRV68 manuals
Add to My Manuals
Save this manual to your list of manuals |
Page 21 highlights
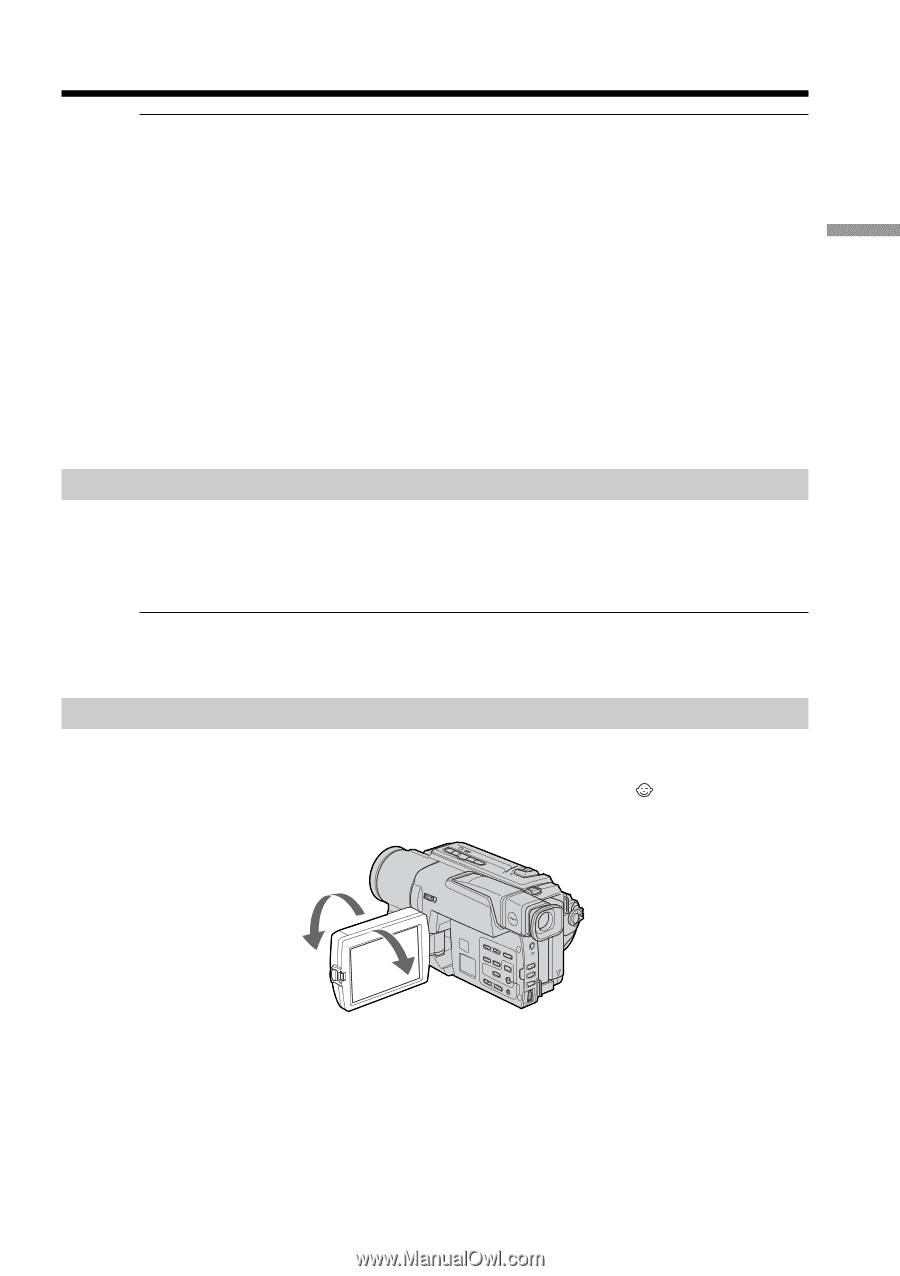
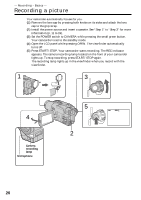
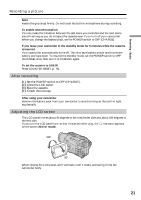
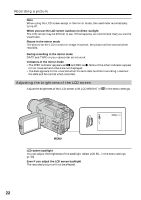
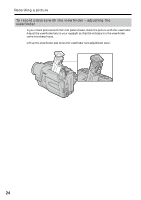
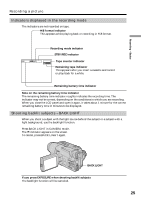
Recording - Basics Recording a picture Note Fasten the grip strap firmly. Do not touch the built-in microphone during recording. To enable smooth transition You can make the transition between the last scene you recorded and the next scene smooth as long as you do not eject the cassette even if you turn off your camcorder. When you change the battery pack, set the POWER switch to OFF (CHARGE). If you leave your camcorder in the standby mode for 5 minutes while the cassette is inserted Your camcorder automatically turns off. This is to save battery power and to prevent battery and tape wear. To resume the standby mode, set the POWER switch to OFF (CHARGE) once, then turn it to CAMERA again. To set the counter to 0:00:00 Press COUNTER RESET (p. 76). After recording (1) Set the POWER switch to OFF (CHARGE). (2) Close the LCD panel. (3) Eject the cassette. (4) Attach the lens cap. After using your camcorder Remove the battery pack from your camcorder to avoid turning on the built-in light accidentally. Adjusting the LCD screen The LCD panel moves about 90 degrees to the viewfinder side and about 180 degrees to the lens side. If you turn the LCD panel over so that it faces the other way, the indicator appears on the screen (Mirror mode). 180° 90° When closing the LCD panel, set it vertically until it clicks, and swing it into the camcorder body. 21
-
 1
1 -
2
-
3
-
4
-
5
-
6
-
7
-
8
-
9
-
10
-
11
-
12
-
13
-
14
-
15
-
 16
16 -
 17
17 -
 18
18 -
 19
19 -
 20
20 -
 21
21 -
 22
22 -
 23
23 -
 24
24 -
 25
25 -
 26
26 -
27
-
28
-
29
-
30
-
31
-
32
-
33
-
34
-
35
-
36
-
37
-
38
-
39
-
40
-
41
-
42
-
43
-
44
-
45
-
46
-
47
-
48
-
49
-
50
-
51
-
52
-
53
-
54
-
55
-
56
-
57
-
58
-
59
-
60
-
61
-
62
-
63
-
64
-
65
-
66
-
67
-
68
-
69
-
70
-
71
-
72
-
73
-
74
-
75
-
76
-
77
-
78
-
79
-
80
 |
 |