Sony DAV-HDX285 Operating Instructions - Page 53
Selecting the slide show duration of JPEG image files
 |
UPC - 027242753495
View all Sony DAV-HDX285 manuals
Add to My Manuals
Save this manual to your list of manuals |
Page 53 highlights
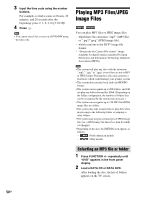
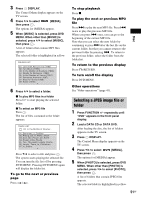
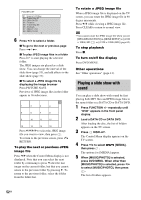
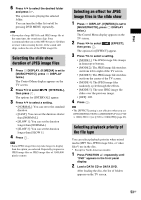
Disc 6 Press X/x to select the desired folder and press H. The system starts playing the selected folder. You can turn the folder list on/off by pressing DVD MENU repeatedly. Note • If you play a large MP3 file and JPEG image file at the same time, the sound may skip. Sony recommends that you set the MP3 bit rate to 128 kbps or lower when creating the file. If the sound still skips, reduce the size of the JPEG image file. Selecting the slide show duration of JPEG image files 1 Press DISPLAY. (If [MEDIA] is set to [MUSIC/PHOTO], press DISPLAY twice.) The Control Menu display appears on the TV screen. 2 Press X/x to select then press . [INTERVAL], The options for [INTERVAL] appear. 3 Press X/x to select a setting. • [NORMAL]: You can set to the standard duration. • [FAST]: You can set the duration shorter than [NORMAL]. • [SLOW 1]: You can set the duration longer than [NORMAL]. • [SLOW 2]: You can set the duration longer than [SLOW 1]. 4 Press . Note • Some JPEG image files may take longer to display than the option you selected. Especially progressive JPEG image files or JPEG image files of 3,000,000 pixels or more. Selecting an effect for JPEG image files in the slide show 1 Press DISPLAY. (If [MEDIA] is set to [MUSIC/PHOTO], press DISPLAY twice.) The Control Menu display appears on the TV screen. 2 Press X/x to select then press . [EFFECT], The options for [EFFECT] appear. 3 Press X/x to select a setting. • [MODE 1]: The JPEG image file sweeps in from top to bottom. • [MODE 2]: The JPEG image file stretches out from left to right of the TV screen. • [MODE 3]: The JPEG image file stretches out from the center of the TV screen. • [MODE 4]: The JPEG image files randomly cycle through the effects. • [MODE 5]: The next JPEG image file slides over the previous image. • [OFF]: Off. 4 Press . Note • The [EFFECT] setting is not effective when you set [JPEG RESOLUTION] in [HDMI SETUP] to [(1920 × 1080i) HD ] or [(1920 × 1080i) HD] (page 62). Selecting playback priority of the file type You can select playback priority when mixed media (MP3 files, JPEG image files, or video files*) are in the disc. * Except for North American models. 1 Press FUNCTION +/- repeatedly until "DVD" appears in the front panel display. 2 Load a DATA CD or DATA DVD. After loading the disc, the list of folders appears on the TV screen. 53GB
-
 1
1 -
2
-
3
-
4
-
5
-
6
-
7
-
8
-
9
-
10
-
11
-
12
-
13
-
14
-
15
-
16
-
17
-
18
-
19
-
20
-
21
-
22
-
23
-
24
-
25
-
26
-
27
-
28
-
29
-
30
-
31
-
32
-
33
-
34
-
35
-
36
-
37
-
38
-
39
-
40
-
41
-
42
-
43
-
44
-
45
-
46
-
47
-
 48
48 -
 49
49 -
 50
50 -
 51
51 -
 52
52 -
 53
53 -
 54
54 -
 55
55 -
 56
56 -
 57
57 -
 58
58 -
59
-
60
-
61
-
62
-
63
-
64
-
65
-
66
-
67
-
68
-
69
-
70
-
71
-
72
-
73
-
74
-
75
-
76
-
77
-
78
-
79
-
80
-
81
-
82
-
83
-
84
-
85
-
86
-
87
-
88
-
89
-
90
-
91
-
92
-
93
-
94
-
95
-
96
-
97
-
98
-
99
-
100
-
101
-
102
-
103
-
104
-
105
-
106
-
107
-
108
-
109
-
110
-
111
-
112
-
113
-
114
-
115
-
116
 |
 |