Sony DAVHDX585 Operating Instructions
Sony DAVHDX585 - BRAVIA Theater System Manual
 |
UPC - 027242764828
View all Sony DAVHDX585 manuals
Add to My Manuals
Save this manual to your list of manuals |
Sony DAVHDX585 manual content summary:
- Sony DAVHDX585 | Operating Instructions - Page 1
4-122-238-13(1) DVD Home Theatre System Operating Instructions DAV-HDX285 / HDX585 / HDX685 ©2009 Sony Corporation - Sony DAVHDX585 | Operating Instructions - Page 2
countries with separate collection systems) This symbol on service or the shop where you purchased the product. Precautions On power operating and maintenance (servicing) instructions in the literature accompanying your Sony dealer regarding this product. Model No. DAV-HDX285/DAV-HDX585 Serial - Sony DAVHDX585 | Operating Instructions - Page 3
apparatus during lightning storms or when unused for long periods of time. 14) Refer all servicing to qualified service personnel. Servicing is required when the apparatus has been damaged in any way, such as power-supply cord or plug is damaged, liquid has been spilled or objects have fallen into - Sony DAVHDX585 | Operating Instructions - Page 4
Instructions • The instructions in these Operating Instructions describe the controls on the remote. You can also use the controls on the unit if they have the same or similar names as those on the remote . "BRAVIA" is a trademark of Sony Corporation. "PLAYSTATION" is a trademark of Sony Computer - Sony DAVHDX585 | Operating Instructions - Page 5
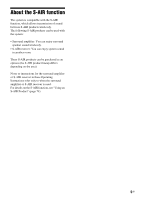
• Surround amplifier: You can enjoy surround speaker sound wirelessly. • S-AIR receiver: You can enjoy system sound in another room. These S-AIR products can be purchased as an options (the S-AIR product lineup differs depending on the area). Notes or instructions for the surround amplifier or S-AIR - Sony DAVHDX585 | Operating Instructions - Page 6
89 Additional Information Precautions 90 Notes about the Discs 91 Troubleshooting 92 Self-diagnosis Function 99 Specifications 100 Glossary 102 Playback priority of file types 105 Language Code List 106 Index to Parts and Control 107 Guide to the Control Menu Display ... 111 Index 114 6GB - Sony DAVHDX585 | Operating Instructions - Page 7
MPEG1 Audio Layer 3 format. 2)JPEG image files must conform to the DCF image file format. (DCF "Design rule for Camera File system": Image standards for digital cameras regulated by Japan Electronics and Information Technology Industries Association (JEITA).) 3)Except for North American models. 7GB - Sony DAVHDX585 | Operating Instructions - Page 8
part of CD-Extra • CD Graphics disc • DVD Audio • DATA CD/DATA DVD that does not contain MP3 files, JPEG image files, DivX video files*, or MPEG4 video files* • DVD-RAM • Blu-ray Disc * Except for North American models. Also, the system refer to the operating instructions for the recording device - Sony DAVHDX585 | Operating Instructions - Page 9
DVD or VIDEO CD may be intentionally set by software producers. Since this system will play a DVD or VIDEO CD according to the disc contents the software producers designed, some playback features may not be available. Be sure to read the operating instructions supplied with the DVD or VIDEO CD. 9GB - Sony DAVHDX585 | Operating Instructions - Page 10
Getting Started Unpacking DAV-HDX285 • Front speakers (2) • Center speaker (1) • Surround speakers (2) • FM wire antenna (aerial) (1) • Foot pads (1 set) or • Speaker cords (6, red/white/ green/gray/blue/purple) • Video cord (1) • Operating Instructions • Quick Setup Guide For U.S. and Australian - Sony DAVHDX585 | Operating Instructions - Page 11
Started DAV-HDX585 • Front speakers (2) • Center speaker (1) • Surround speakers (2) • Subwoofer (1) • FM wire antenna (aerial) (1) • Posts (2) or • Bases (2) • Speaker cords (6, red/white/ green/gray/blue/purple) • Screws (black) (4) • Video cord (1) • Screws (with washer) (4) • Remote - Sony DAVHDX585 | Operating Instructions - Page 12
pads (1 set) or • Posts (4) • Speaker cords (6, red/white/ green/gray/blue/purple) • Bases (4) • Video cord (1) • Screws (black) (8) • Remote commander (remote) (1) • Screws (with washer) (8) • R6 (size AA) batteries (2) • Operating Instructions • Quick Setup Guide • Setup Disc (DVD) 12GB - Sony DAVHDX585 | Operating Instructions - Page 13
) batteries (supplied) by matching the 3 and # ends on the batteries to the markings inside the compartment. To use the remote, point it at the remote sensor on the unit. Note • Do not leave the remote in an extremely hot or humid place. • Do not use a new battery with an old one. • Do not - Sony DAVHDX585 | Operating Instructions - Page 14
Step 1: Installing the System Positioning the system For the best possible surround sound, place all speakers at the same distance from the listening position (A). The distance can be between 1.0 to 7.0 meters. If you cannot place the center speaker and surround speakers at the same distance - Sony DAVHDX585 | Operating Instructions - Page 15
Getting Started Attaching the foot pads to the subwoofer Attach the foot pads (supplied) to the bottom of the subwoofer to stabilize the subwoofer and prevent it from slipping. , Remove the foot pads from the protective cover. 15GB - Sony DAVHDX585 | Operating Instructions - Page 16
Assembling the speakers (DAV-HDX585/DAV-HDX685 only) Before connecting the speakers, attach the speaker stand to the speaker. (For the front speakers of DAV-HDX585, and the front and surround speakers of DAV-HDX685) Use the parts as follows: DAV-HDX585 • Front speakers (2) • Speaker cords (2, red - Sony DAVHDX585 | Operating Instructions - Page 17
so that the screw on the post faces the front of the speaker. Speaker Screw , Post 2 Adjust the height of the speaker, then secure the post with two screws (with washer). You can change the height of the speaker depending on the screw positions. Adjust the screw holes of the post to the holes - Sony DAVHDX585 | Operating Instructions - Page 18
as the label of the jacks to be connected. Use the speaker cords as follows: • Front left speaker (L): White • Front right speaker (R): Red • Surround left speaker (L): Blue (DAV-HDX685 only) • Surround right speaker (R): Gray (DAV-HDX685 only) Be careful with the orientation of the post. Thread - Sony DAVHDX585 | Operating Instructions - Page 19
#. Color tube Front left speaker (L): White Front right speaker (R): Red Surround left speaker (L): Blue (DAV-HDX685 only) Surround right speaker (R): Gray (DAV-HDX685 only) Rear of the speaker 5 Attach the post to the base. Insert the post so that the slot on the lower part of the post aligns with - Sony DAVHDX585 | Operating Instructions - Page 20
slack. Take up slack in the speaker cord by pulling from the bottom of the base. Secure the speaker cord by running it through the slot. Adjust the length of the cord. Fully-assembled illustration DAV-HDX585 Front left speaker (L): White label Front right speaker (R): Red label White Red 20GB - Sony DAVHDX585 | Operating Instructions - Page 21
Getting Started DAV-HDX685 Front left speaker (L): White label Front right speaker (R): Surround left speaker (L): Surround right speaker (R): Red label Blue label Gray label White Red Blue Gray 21GB - Sony DAVHDX585 | Operating Instructions - Page 22
a beam. Install the speakers on a vertical and flat wall where reinforcement is applied. • Sony is not responsible for inch) Hole on the back of the speaker 2 Fasten the screws to the wall. DAV-HDX285 For the center speaker 145 mm (5 3/4 inches) For the other speakers 8 to 10 mm (11/32 to - Sony DAVHDX585 | Operating Instructions - Page 23
Getting Started DAV-HDX585 For the center speaker 145 mm (5 3/4 inches) For the front speakers 8 to 10 mm (11/32 to 13/32 inch) For the surround speakers 8 to 10 mm (11/32 to 13/32 inch) 101.6 mm (4 inches) 8 to 10 mm (11/32 to 13/32 inch) DAV-HDX685 For the center speaker 145 mm (5 3/4 - Sony DAVHDX585 | Operating Instructions - Page 24
Getting Started 3 Hang the speakers on the screws. 5 mm (7/32 inch) 10 mm (13/32 inch) Hole on the back of the speaker Rear of the speaker 24GB - Sony DAVHDX585 | Operating Instructions - Page 25
Getting Started Step 2: Connecting the System For connecting the system, read the information on the following pages. Do not connect the AC power cord (mains lead) of the unit to a wall outlet (mains) until all the other connections are made. Note • When you connect another component with a volume - Sony DAVHDX585 | Operating Instructions - Page 26
DIGITAL IN OPTICAL COAXIAL SPEAKER FRONT R SUR R FRONT L HDMI OUT SUR L DMPORT 0D.C7A5VMAX B HDMI cable (not supplied) COMPONENT VIDEO OUT VOIDUETO PR/CR PB/CB Y TV/VIDEO R AUDIO IN L A Video cord (supplied) To the HDMI IN jack of the TV. To the component video input jacks of the TV - Sony DAVHDX585 | Operating Instructions - Page 27
models is PAL. The initial setting of the system for Asian models is NTSC. 1 Turn off the system by pressing "/1. 2 Turn on the system by pressing "/1 on the unit while pressing . on the unit. Each time you perform this operation, the color system toggles between PAL and NTSC. "NTSC" lights up - Sony DAVHDX585 | Operating Instructions - Page 28
an audio signal to the unit from the TV. To listen to TV sound via the system, perform this connection. SPEAKER CENTER SUBWOOFER TV DIGITAL IN OPTICAL COAXIAL E Digital optical cord (not supplied) SPEAKER FRONT R SUR R FRONT L HDMI OUT SUR L DMPORT 0D.C7A5VMAX EZW-T100 ANTENNA AM FM - Sony DAVHDX585 | Operating Instructions - Page 29
PORT adapters.) G Stereo mini-plug cord (not supplied) To a portable audio source EZW-T100 slot (See "Wireless system options".) SPEAKER CENTER SUBWOOFER TV DIGITAL IN OPTICAL COAXIAL SPEAKER FRONT R SUR R FRONT L HDMI OUT SUR L DMPORT D0.C7A5VMAX EZW-T100 ANTENNA AM FM COAXIAL 75 - Sony DAVHDX585 | Operating Instructions - Page 30
Started If your TV has multiple audio/video inputs You can enjoy sound with the speakers of the system through the connected TV. Connect the components as follows. TV VCR, digital satellite receiver, PlayStation, etc. System VCR, digital satellite receiver, PlayStation, etc. :Signal flow - Sony DAVHDX585 | Operating Instructions - Page 31
Started To connect the antenna (aerial) ANTENNA AM AM FM COAXIAL 75 or AM loop antenna (aerial) (supplied) FM wire antenna (aerial) (supplied) Note • Keep the AM loop antenna (aerial) and cord away from the system or other AV components, as noise may result. • Be sure to fully extend the FM - Sony DAVHDX585 | Operating Instructions - Page 32
area. About the demonstration After connecting the AC power cord (mains lead), the demonstration appears in the front panel display. Setting the demonstration mode to on/off 1 Press [/1 on the unit. The system turns on. 2 Press SYSTEM MENU. 3 Press X/x repeatedly until "DEMO" appears in the front - Sony DAVHDX585 | Operating Instructions - Page 33
system. Displayed items vary depending on the area. "/1 5 Press X/x to select a language, then press the input selector on your TV so that the signal from the system appears on the TV screen. [Press 1920x1080p) ON ON OFF OFF SD 7 Press X/x to select the setting, then press . • [ON]: The Control for - Sony DAVHDX585 | Operating Instructions - Page 34
the room in which the system is installed may affect measurements. When the measurements differ considerably from the status of the speaker installation, perform the speaker settings manually by following "Settings for the speakers" (page 64). 11 Unplug the calibration mic, press C/c to select [YES - Sony DAVHDX585 | Operating Instructions - Page 35
from the HDMI OUT jack. For details, refer also to the operating instructions supplied with the TV/projector, etc. 1 Press FUNCTION +/- repeatedly until "DVD" appears in the front panel display. 2 Press DISPLAY while the system is in stop mode. The Control Menu display appears on the TV screen - Sony DAVHDX585 | Operating Instructions - Page 36
a progressive signal for 5 seconds. Check that the screen is displayed correctly. 9 Press C/c to select [YES], then press . The system outputs a progressive signal. When you select [NO], the system does not output a progressive signal. Step 4: Selecting the Source You can select the playback - Sony DAVHDX585 | Operating Instructions - Page 37
's pre-programmed decoding modes. They bring the exciting and powerful sound of movie theaters into your home. X/x/c, SYSTEM MENU Enjoying TV sound with the 5.1 channel surround sound effect 1 Press SYSTEM MENU. 2 Press X/x repeatedly until "DEC. MODE" appears in the front panel display, then - Sony DAVHDX585 | Operating Instructions - Page 38
MULTI" (AUTO FORMAT DIRECT MULTI) • 2 channel source: The system outputs 2 channel sound from the front and surround speakers by assigning the 2 channel sound to the surround left and right channels. • Multi-channel source: The system outputs sound from the speakers depending on the number of - Sony DAVHDX585 | Operating Instructions - Page 39
Effect The system outputs the sound from the headphones by adding a surround effect regardless of sound format or number of channels. To turn . • You cannot select the decoding mode while the system is loading a disc. • Depending on the input stream, the decoding mode may not be effective. • - Sony DAVHDX585 | Operating Instructions - Page 40
to the operating instructions supplied with your disc. Adjust the volume "/1 DISC 1-5/indicators 4 Press DISC 1-5. Press the button of TV. 2 Switch the input selector on the TV to this system. 3 Press "/1. The system turns on. Unless the system is set to "DVD," press FUNCTION +/- to select " - Sony DAVHDX585 | Operating Instructions - Page 41
Disc To turn the system off Press "/1 while the system is on. The system enters standby mode. To save power in standby mode Press "/1 while the system is on. To enter power saving mode, make sure that the system is in the following status. - "DEMO" is set to "OFF" (page 32). - [CONTROL FOR HDMI] is - Sony DAVHDX585 | Operating Instructions - Page 42
for North American models). Changing the sound When the system is playing a DVD VIDEO or DATA CD/DATA DVD channel and listen to the sound of the selected channel through both the right and left speakers. You cannot change the sound for a Super Audio CD. * Except for North American models. Press - Sony DAVHDX585 | Operating Instructions - Page 43
of audio track 2 (monaural). • [2:2/R]: The sound of the right channel of audio track 2 (monaural). Checking the audio signal format * * * Except for North American models. If you press AUDIO repeatedly during playback, the format of the current audio signal (PCM, Dolby Digital, DTS, etc - Sony DAVHDX585 | Operating Instructions - Page 44
2 channel playback area and a multi-channel playback area. You can select the playback area you want to listen to. 1 Press DISPLAY while the system is press CLEAR to cancel the number. 3 Press . 4 Follow the instructions in the menu for interactive operations. Refer to the operating instructions - Sony DAVHDX585 | Operating Instructions - Page 45
Step 3 may appear as [Press SELECT] in the operating instructions supplied with the disc. In this case, press H. Tip • To play without using the PBC function, press ./ > or the number buttons while the system is in stop mode to select a track, then press H or . The system starts playback. You cannot - Sony DAVHDX585 | Operating Instructions - Page 46
displayed on the TV screen, or select [OFF] in Step 3. To play the same program again, select [ON] in Step 3 and press . To turn off the Control Menu display Press DISPLAY repeatedly until the Control Menu display is turned off. To change or cancel a program 1 Follow Steps 1 to 3 of "Creating your - Sony DAVHDX585 | Operating Instructions - Page 47
to select [REPEAT], then press . The options for [REPEAT] appear. 3 Press X/x to select the item to be repeated. x DVD VIDEO/DVD-VR • [OFF]: Off. • [ALL DISCS]: You can repeat all of the discs. • [ONE DISC]: You can repeat all of the titles on the current disc. (When the system is playing a DVD - Sony DAVHDX585 | Operating Instructions - Page 48
select [OFF] in Step 3. To turn off the Control Menu display Press DISPLAY repeatedly until the Control Menu display is turned off. Note • You cannot use Repeat Play with a VIDEO CD or Super VCD with PBC playback. • When the system is playing a DATA CD/DATA DVD which contains MP3 files and JPEG - Sony DAVHDX585 | Operating Instructions - Page 49
or the number buttons to select the desired number of the title, chapter, track, index, scene, etc. If you make a mistake, press CLEAR to cancel the number. 5 Press . The system starts playback from the selected number. Tip • When the Control Menu display is turned off, you can search for a chapter - Sony DAVHDX585 | Operating Instructions - Page 50
Input the time code using the number buttons. For example, to find a scene at 2 hours, 10 minutes, and 20 seconds after the beginning: press 2, 1, 0, 2, 0 ([2:10:20]). 4 Press could damage your speaker system. • The system does not play back audio in MP3PRO format. • The system can recognize up - Sony DAVHDX585 | Operating Instructions - Page 51
the Middle of Nowher... 01_Geronimo_s_Cadillac 02_Riding_On_A_White_Swan 03_Give_Me_Peace_On_Earth 04_Sweet_Little_Shella 05_Ten_Thousand_Lonely_Drums 06_Lonely_Tears_In_Chinatown 07_In_Shaire Press X/x to select a file and press . The system starts playing the selected file. You can turn the file - Sony DAVHDX585 | Operating Instructions - Page 52
play a slide show with sound by first placing both MP3 files and JPEG image files in the same folder on a DATA CD or DATA DVD. 1 Press FUNCTION +/- repeatedly until "DVD" appears in the front panel display. 2 Load a DATA CD or DATA DVD. After loading the disc, the list of folders appears - Sony DAVHDX585 | Operating Instructions - Page 53
X/x to select the desired folder and press H. The system starts playing the selected folder. You can turn the folder list on/off by pressing DVD MENU repeatedly. Note • If you play a large MP3 file and JPEG image file at the same time, the sound may skip. Sony recommends that you set the MP3 bit - Sony DAVHDX585 | Operating Instructions - Page 54
has priority. You can play JPEG image files as a slide show. 6 Press . For details of the playback priority of file types under the [MEDIA] system only plays a DATA CD of format ISO 9660 Level 1/Level 2 or Joliet, and a DATA DVD of Universal Disk Format (UDF). Refer to the operating instructions - Sony DAVHDX585 | Operating Instructions - Page 55
video files appears. The selected folder is highlighted in yellow. FOLDER LIST SUMMER 2003 NEW YEAR'S DAY MY FAVOURITES 6 Press X/x to select the folder you want to play. 7 Press H. The system starts playing the selected folder. To select video files, see "Selecting a video file" (page 55). To go to - Sony DAVHDX585 | Operating Instructions - Page 56
when the system is turned off. - when another file is played. Press X/x to select then press . [A/V SYNC], The options for [A/V SYNC] appear. 3 Press X/x to select a setting. • [OFF]: Off. • [ON]: You can adjust the delay between picture and sound. 4 Press . Note • Depending on the input - Sony DAVHDX585 | Operating Instructions - Page 57
. The options for [SETUP] appear. 4 Press X/x to select [CUSTOM], then press . The Setup Display appears. 5 Press X/x to select [SYSTEM SETUP], then press . The options for [SYSTEM SETUP] appear. 6 Press X/x to select [PARENTAL CONTROL t], then press . x If you have not entered a password The - Sony DAVHDX585 | Operating Instructions - Page 58
using the number buttons, then press . If you make a mistake entering your password Press C before you press , then input the correct number. Changing the password 1 Press FUNCTION +/- repeatedly until "DVD" appears in the front panel display. 2 Press DISPLAY while the system is in stop mode. The - Sony DAVHDX585 | Operating Instructions - Page 59
X/x to select [CUSTOM], then press . The Setup Display appears. 5 Press X/x to select the setup item, then press . • [LANGUAGE SETUP] (page 59) • [VIDEO SETUP] (page 60) • [HDMI SETUP] (page 62) • [AUDIO SETUP] (page 63) • [SYSTEM SETUP] (page 64) • [SPEAKER SETUP] (page 64) Example: [VIDEO - Sony DAVHDX585 | Operating Instructions - Page 60
this when you connect a 4:3 standard TV. The system displays a wide picture with bands on the upper when you connect a 4:3 standard TV. The system automatically displays a wide picture on the entire screen [OFF]: The system outputs interlace signals. [ON]: The system outputs progressive signals. - Sony DAVHDX585 | Operating Instructions - Page 61
outputs a progressive signal for 5 seconds. Check that the screen is displayed correctly. 3 Press C/c to select [YES], then press . The system outputs a progressive signal. If you select [NO], the system will not output a progressive signal. Note • [PROGRESSIVE (COMPONENT OUT)] is effective only - Sony DAVHDX585 | Operating Instructions - Page 62
Function for "BRAVIA" Sync" (page 70). [ON]: On. You can operate mutually between components that are connected with an HDMI cable. [OFF]: Off. x [VOLUME LIMIT] If you change the output method of the TV to the system speakers via the TV menu (or by pressing THEATER/THEATRE*), the System 62GB Audio - Sony DAVHDX585 | Operating Instructions - Page 63
] (page 59). (Depending on the disc, this function may not work.) • If PCM, DTS, Dolby Digital sound, and MPEG audio have the same number of channels, the system selects PCM, DTS, Dolby Digital sound, and MPEG audio in this order. 63GB - Sony DAVHDX585 | Operating Instructions - Page 64
(ghosting). Press any button (e.g., H) to cancel the screen saver. [ON]: The screen saver image appears if you do not operate the system for about 15 ). Settings for the speakers [SPEAKER SETUP] To obtain the best possible surround sound, set connection of the speakers and their distance from - Sony DAVHDX585 | Operating Instructions - Page 65
distance from your listening position, set the distance according to the closest speaker. • Do not place the surround speakers farther away from your listening position than the front speakers. • Depending on the input stream, the [DISTANCE] setting may not be effective. x [LEVEL (FRONT)] You can - Sony DAVHDX585 | Operating Instructions - Page 66
C/X/x/c repeatedly to set [TEST TONE] to [OFF] after adjusting the speaker level. Tip • To adjust the volume of all the speakers at one time, turn the VOLUME control on the unit, or press VOLUME +/- on the remote. • To return to the default setting when changing a setting, select the item, then - Sony DAVHDX585 | Operating Instructions - Page 67
and preset number FM FM 10 : 88.00 MHz SONY RADIO Station name 1 Press FUNCTION +/- repeatedly until "TUNER FM" or "TUNER AM" appears in the front panel display. 2 Press and hold TUNING +/- until the auto scanning starts. Scanning stops when the system tunes in a station. "TUNED" and "ST" (stereo - Sony DAVHDX585 | Operating Instructions - Page 68
TUNING +/-. The automatic tuning stops automatically when the system receives the radio station. To stop the automatic tuning manually, press TUNING +/- or x. To listen to radio stations when you know the frequencies Press D.TUNING in Step 2, press the number buttons to select the frequencies, then - Sony DAVHDX585 | Operating Instructions - Page 69
to select the desired character. To erase the character, press C/c repeatedly until the character to be erased flashes, then press CLEAR. 7 Press . "COMPLETE" appears in the front panel display, and the station name is stored. 8 Press SYSTEM MENU. The system menu turns off. When the station name is - Sony DAVHDX585 | Operating Instructions - Page 70
system's remote for operating the TV, such as THEATER/THEATRE*, ONE-TOUCH PLAY, TV [/1. For details, see "Controlling the TV with the Supplied Remote" (page 82) and refer to the operating instructions of the TV. * The button name differs depending on the area. ONE-TOUCH TV THEATER PLAY BRAVIA Sync - Sony DAVHDX585 | Operating Instructions - Page 71
output from the system's speakers automatically by pressing THEATER/THEATRE*. * The button name differs depending on the area. Watching a DVD by a single button press (One-Touch Play) By only pressing ONE-TOUCH PLAY, the TV turns on, the TV is set for DVD input mode, and the system starts playing - Sony DAVHDX585 | Operating Instructions - Page 72
(Volume Limit) If you change the output method of the TV to the system speakers via the TV menu (or by pressing THEATER/THEATRE*), loud sound may be output depending on the volume level of the system. You can prevent this by limiting the maximum level of the volume. For details, see "[VOLUME LIMIT - Sony DAVHDX585 | Operating Instructions - Page 73
on the system 1 Press FUNCTION +/- repeatedly until "DMPORT" appears in the front panel display. 2 Start playback of the connected component. The sound and images from the connected component are played on the system or connected TV. For operation details, refer to the operating instructions of the - Sony DAVHDX585 | Operating Instructions - Page 74
surround speaker sound wirelessly. - S-AIR receiver: You can enjoy system sound wireless transmitter/transceiver, make sure that the AC power cord (mains lead) is not connected to a wall outlet (mains). • Do not touch the terminals of the wireless transmitter/ transceiver. To insert the wireless - Sony DAVHDX585 | Operating Instructions - Page 75
establish sound transmission. To set the ID of the unit 1 Press "/1 on the unit. The system turns on. 2 Press SYSTEM MENU. 3 Press X/x repeatedly until "S-AIR ID" appears in the front panel display, then press or c. Note • When the wireless transmitter is not inserted in the unit, "S-AIR ID" cannot - Sony DAVHDX585 | Operating Instructions - Page 76
instructions of the S-AIR receiver. 1 Press SYSTEM MENU. 2 Press X/x repeatedly until "S-AIR MODE" appears in the front panel display, then press or c. Note • When the wireless than 2 channel stereo, multichannel sound is downmixed to 2 channel. To set "S-AIR MODE" via the remote Press S-AIR MODE - Sony DAVHDX585 | Operating Instructions - Page 77
from the S-AIR receiver by using the following buttons. Press H, X, x, ./> S-AIR CH Operation Share the same operations on the remote and unit. Change the function of the system. For details, refer to the operating instructions of the S-AIR receiver. Enjoying the S-AIR receiver while the unit - Sony DAVHDX585 | Operating Instructions - Page 78
set the ID of the S-AIR sub unit, refer to the operating instructions of the S-AIR sub unit. 3 Press SYSTEM MENU. 4 Press X/x repeatedly until "PAIRING" appears in the front panel display, then press or c. Note • When the wireless transmitter is not inserted in the unit, "PAIRING" cannot be selected - Sony DAVHDX585 | Operating Instructions - Page 79
channel for IEEE 802.11b/g channel 6 - S-AIR ID C: equivalent channel for IEEE 802.11b/g channel 11 • The transmission may be improved by changing the transmission channel (frequency) of the other wireless system(s). For details, refer to the operating instructions of the other wireless system - Sony DAVHDX585 | Operating Instructions - Page 80
of the room, you cannot install some speakers. For better surround sound, Sony recommends that first you decide the position of the speakers. 1 Press FUNCTION +/- repeatedly until "DVD" appears in the front panel display. 2 Press DISPLAY while the system is in stop mode. The Control Menu display - Sony DAVHDX585 | Operating Instructions - Page 81
of the room in which the system is installed may affect measurements. When the measurements differ considerably from the status of the speaker installation, perform the speaker settings manually by following "Settings for the speakers" (page 64). 10 Press C/c to select [YES] or [NO], then - Sony DAVHDX585 | Operating Instructions - Page 82
in [SPEAKER SETUP] returns to the default setting when you perform [AUTO CALIBRATION]. Controlling the TV with the Supplied Remote You can control the TV (Sony only) by using the following buttons. Use these buttons (other than TV [/1, THEATER/THEATRE*, TV INPUT, and TV VOL +/-) while pressing the - Sony DAVHDX585 | Operating Instructions - Page 83
dialogue, as you would in a movie theater, even at low volume. It is useful for watching movies at night. Press NIGHT. "NIGHT ON" appears in the from the center speaker, or you are using the headphones, the system optimally adjusts the volume. To turn off the sound effect Press NIGHT again. - Sony DAVHDX585 | Operating Instructions - Page 84
music. Press SOUND MODE repeatedly during playback until the desired mode appears in the front panel display. • "AUTO": The system automatically the digital output mode of the TV or other component to Dolby Digital. Press AUDIO repeatedly until the desired signal appears in the front panel display. • - Sony DAVHDX585 | Operating Instructions - Page 85
to select a setting. • "ATT ON": You can attenuate the input level. The output level is changed. • "ATT OFF": Normal input level. 5 Press . The setting is made. 6 Press SYSTEM MENU. The system menu turns off. Using the Sleep Timer You can set the system to turn off at a preset time, so you can fall - Sony DAVHDX585 | Operating Instructions - Page 86
": The front panel display is dark. 4 Press . The setting is made. 5 Press SYSTEM MENU. The system menu turns off. 86GB Viewing Information About the an ID3 tag, the system will display an album name or title name from the ID3 tag information. The system can support ID3 ver 1.0/1.1/2.2/2.3. ID3 ver - Sony DAVHDX585 | Operating Instructions - Page 87
the current file 2 Current file name 3 Current album and file number Note • The system can only display the first level of the DVD/CD text, such as the disc information of the disc To check DVD/Super Audio CD/CD text Press DISPLAY repeatedly during playback to display text recorded in the DVD/Super - Sony DAVHDX585 | Operating Instructions - Page 88
an MP3 file has the ID3 tag, the system will display an album name or title name from the ID3 tag information. The system can support ID3 ver 1.0/1.1/2.2/2.3. ID3 ver 2.2/2.3 tag information JPEG image file. Press DISPLAY during playback. The Control Menu display appears on the TV screen. 88GB - Sony DAVHDX585 | Operating Instructions - Page 89
same time. "COLD RESET" appears in the front panel display and the system returns to default settings. 5 Press X/x to select [SYSTEM SETUP], then press . The options for [SYSTEM SETUP] appear. 6 Press X/x to select [RESET] and press c. 7 Press C/c to select [YES]. You can also quit the process and - Sony DAVHDX585 | Operating Instructions - Page 90
system. The system is equipped with a high power amplifier. If the ventilation slots are blocked, the system can overheat and malfunction. • Do not place the system low level inputs or no audio signals. If you do, the speakers may problems concerning your system, please consult your nearest Sony - Sony DAVHDX585 | Operating Instructions - Page 91
center out. • Do not use solvents such as benzine, thinner, commercially available cleaners, or anti-static spray intended for vinyl LPs. This system can only play back a standard circular disc. Using neither standard nor circular discs (e.g., card, heart, or star shape) may cause a malfunction. Do - Sony DAVHDX585 | Operating Instructions - Page 92
the following difficulties while using the system, use this troubleshooting guide to help remedy the problem before requesting repairs. Should any problem persist, consult your nearest Sony dealer. Note that if service personnel changes some parts during repair, these parts may be retained. When you - Sony DAVHDX585 | Operating Instructions - Page 93
TV's video input directly (page 26). Even though you set the aspect • The aspect ratio on the disc is fixed. ratio in [TV TYPE] of [VIDEO SETUP], the picture does not fill the TV screen. Color irregularity occurs on the TV screen. The system's speakers contain magnet parts, so magnetic distortion - Sony DAVHDX585 | Operating Instructions - Page 94
speaker cord is not connected securely. • Press MUTING on the remote if "MUTING ON" is displayed in the front panel display. • The system is in pause mode or in Slow-motion Play mode. Press DVD, the output signal may not be the entire 5.1 channel. It may be monaural or stereo even if the sound track - Sony DAVHDX585 | Operating Instructions - Page 95
64). • Check the "DEC. MODE" setting (page 37). • Depending on the source, the effect of the surround speakers may be less noticeable. • A 2 channel source is being played. • The sampling frequency of the input stream is more than 48 kHz. • Check the location of the AM loop antenna (aerial) and cord - Sony DAVHDX585 | Operating Instructions - Page 96
press x on the unit or the remote and then start playback (page 45). • The title, DVD or PBC menu automatically appears on the TV screen. The system starts playing the disc automatically. • The DVD features and • Contact your Sony dealer or local authorized Sony service facility. "LOCKED" appears - Sony DAVHDX585 | Operating Instructions - Page 97
the System Audio Control System Audio Control function. function. • For details, see "Using the Control for HDMI Function for "BRAVIA" are separated from other wireless devices. • Avoid using any other wireless devices. • The S-AIR sub unit is turned off. Make sure the AC power cord (mains lead) - Sony DAVHDX585 | Operating Instructions - Page 98
electromagnetic energy, such as a microwave oven. • Place so that the S-AIR main unit and S-AIR sub unit are separated from other wireless devices. • Avoid using any other wireless devices. • Change the "RF CHANGE" setting (page 78). • Change the S-AIR ID settings of the S-AIR main unit and S-AIR - Sony DAVHDX585 | Operating Instructions - Page 99
appear on the TV screen. Although this is not a malfunction and for Sony service use only, normal system operation will not be possible. Turn off the system, and then turn on the system again to operate. VER.X.XX First 3 characters of the service number C 13 C 31 E XX (XX is a number) Cause and/or - Sony DAVHDX585 | Operating Instructions - Page 100
Specifications AUDIO POWER SPECIFICATIONS for the U.S. model POWER OUTPUT AND TOTAL HARMONIC DISTORTION: With 3 ohms loads, both channels driven, from 180 - 20,000 Hz; rated 84 watts per channel minimum RMS power, with no more than 0.7% total harmonic distortion from 250 milli watts to rated output - Sony DAVHDX585 | Operating Instructions - Page 101
) cone type 3 ohms 265 mm × 94 mm × 77 mm (10 1/2 in × 3 3/4 in × 3 1/8 in) (w/h/d) 0.7 kg (1 lb 9 oz) Surround DAV-HDX285/DAV-HDX585 (SS-TS92) Speaker system Full range Bass reflex Speaker unit 65 mm (2 5/8 in) cone type Rated impedance 3 ohms Dimensions (approx.) 103 mm × 164 mm × 94 mm - Sony DAVHDX585 | Operating Instructions - Page 102
adjust the speaker settings to your listening environment in a short period of time. Digital Direct Twin Drive Subwoofer Utilizing Sony proprietary S-master technology, the Digital Direct Twin Drive Subwoofer features two S-master Digital Amplifiers that provide dedicated power to a strategically - Sony DAVHDX585 | Operating Instructions - Page 103
all channel data being recorded discretely and processed digitally. HDMI (High-Definition Multimedia Interface) HDMI is an interface that supports both video and audio on a single digital connection, allowing you to enjoy high quality digital picture and sound. The HDMI specification supports HDCP - Sony DAVHDX585 | Operating Instructions - Page 104
CD layer consists of the 2 channel area or the multi-channel area. • 2 channel area: An area in which 2 channel stereo tracks are recorded • Multi-channel area: An area in which multichannel (up to 5.1 channels) tracks are recorded 2 channel area4) Multi-channel area4) Super Audio CD layer 1)You - Sony DAVHDX585 | Operating Instructions - Page 105
Playback priority of file types The table below describes the playback priority of file types under the [MEDIA] setting. File type [MEDIA] setting [VIDEO]* [MUSIC/PHOTO] [PHOTO] Video files only* Video files* Video files* Video files* JPEG image files only JPEG image files JPEG image files - Sony DAVHDX585 | Operating Instructions - Page 106
Language Code List The language spellings conform to the ISO 639: 1988 (E/F) standard. Code Language 1027 Afar 1028 Abkhazian 1032 Afrikaans 1039 Amharic 1044 Arabic 1045 Assamese 1051 Aymara 1052 Azerbaijani 1053 Bashkir 1057 Byelorussian 1059 Bulgarian 1060 Bihari 1061 Bislama 1066 Bengali; - Sony DAVHDX585 | Operating Instructions - Page 107
Index to Parts and Control For more information, refer to the pages indicated in parentheses. Front panel A "/1 (on/standby) (33, 89) B DISC 1-5 buttons/indicators (40) C Front panel display (109) D (remote sensor) (13) E MOVIE/MUSIC indicator (84) F VOLUME control (40) G DMPORT BOOSTER (83) H - Sony DAVHDX585 | Operating Instructions - Page 108
SUR L DMPORT DC5V 0.7A MAX EZW-T100 ANTENNA FM AM COAXIAL 75 COMPONENT VIDEO OUT VIDEO OUT TV/VIDEO Y PB/CB PR/CR R AUDIO IN L A SPEAKER jacks (25) B EZW-T100 slot (74) C COAXIAL 75Ω FM jack (31) D AM terminal (31) E TV/VIDEO (AUDIO IN R/L) jacks (28) F VIDEO OUT jack (26) G COMPONENT - Sony DAVHDX585 | Operating Instructions - Page 109
to HDCP (Highbandwidth Digital Content Protection) compliant device with HDMI or DVI (Digital Visual Interface) input. (26) H Current surround format (Except for JPEG image file) I Lights up when the color system is set to NTSC. (Asian, Australian, and Middle Eastern models only) J Lights up when - Sony DAVHDX585 | Operating Instructions - Page 110
Remote control ALPHABETICAL ORDER A - O P - Z ANGLE 3 (42) AUDIO qh (42) CLEAR es (46 (85) SOUND MODE 5 (84) SUBTITLE ws (42) SYSTEM MENU wf (32, 37, 67, 74, 85) THEATER/THEATRE2) qk (70) TOOLS wh (82) TUNING +/- 0 (67) TV wl (82) TV CH +/-3) wj (82) TV INPUT w; (82) TV VOL +/- ef (82) VOLUME +/- - Sony DAVHDX585 | Operating Instructions - Page 111
Additional Information Guide to the Control Menu Display You can use the Control Menu display to select a function and to view related information. DISPLAY Press DISPLAY repeatedly. Each time you press DISPLAY, the Control Menu display changes: 1 t 2 t ... t 1 t ... 1 Control Menu display 1 2 - Sony DAVHDX585 | Operating Instructions - Page 112
time Current setting Options Operation message To turn off the display Press DISPLAY. List of Control Menu items Item Item Name, Function, elapsed time and the remaining playback time. You can play from a desired point by inputting the time code (DVD VIDEO/DVD-VR only). [MULTI/2CH] (page 44) - Sony DAVHDX585 | Operating Instructions - Page 113
] indicator lights up in yellow when you select [PLAY LIST] (default setting). The [MULTI/2CH] indicator lights up in yellow when you select the multi-channel playback area on a Super Audio CD. 113GB - Sony DAVHDX585 | Operating Instructions - Page 114
33 R Rear panel 108 Region Code 9 Remote 13 Repeat Play 47 RESET 64, 89 Resume Play 45 RF CHANGE 79 RF POWER 79 S S-AIR 103 S-AIR ID 75 Show 52 SPEAKER FORMATION 63, 80 SPEAKER SETUP 64 CONNECTION 64 DISTANCE 65 LEVEL 65, 66 SUBTITLE 42, 60 Super Audio CD 44, 103 Surround amplifier 74 SYSTEM MENU 32, - Sony DAVHDX585 | Operating Instructions - Page 115
T TEST TONE 66 TIME 49 TRACK SELECTION 63 TV TYPE 60 V VIDEO SETUP 60 VOLUME LIMIT 62 115GB - Sony DAVHDX585 | Operating Instructions - Page 116
(1) Sony Corporation Printed in China
-
 1
1 -
 2
2 -
 3
3 -
 4
4 -
 5
5 -
 6
6 -
 7
7 -
8
-
9
-
10
-
11
-
12
-
13
-
14
-
15
-
16
-
17
-
18
-
19
-
20
-
21
-
22
-
23
-
24
-
25
-
26
-
27
-
28
-
29
-
30
-
31
-
32
-
33
-
34
-
35
-
36
-
37
-
38
-
39
-
40
-
41
-
42
-
43
-
44
-
45
-
46
-
47
-
48
-
49
-
50
-
51
-
52
-
53
-
54
-
55
-
56
-
57
-
58
-
59
-
60
-
61
-
62
-
63
-
64
-
65
-
66
-
67
-
68
-
69
-
70
-
71
-
72
-
73
-
74
-
75
-
76
-
77
-
78
-
79
-
80
-
81
-
82
-
83
-
84
-
85
-
86
-
87
-
88
-
89
-
90
-
91
-
92
-
93
-
94
-
95
-
96
-
97
-
98
-
99
-
100
-
101
-
102
-
103
-
104
-
105
-
106
-
107
-
108
-
109
-
110
-
111
-
112
-
113
-
114
-
115
-
116
 |
 |
©2009 Sony Corporation
4-122-238-
13
(1)
DVD Home Theatre
System
Operating Instructions
DAV-HDX285 / HDX585 / HDX685