Sony DCR-DVD650 Operating Guide - Page 97
Importing movies on a disc to a, computer, Performing with Your Computer
 |
UPC - 027242763111
View all Sony DCR-DVD650 manuals
Add to My Manuals
Save this manual to your list of manuals |
Page 97 highlights
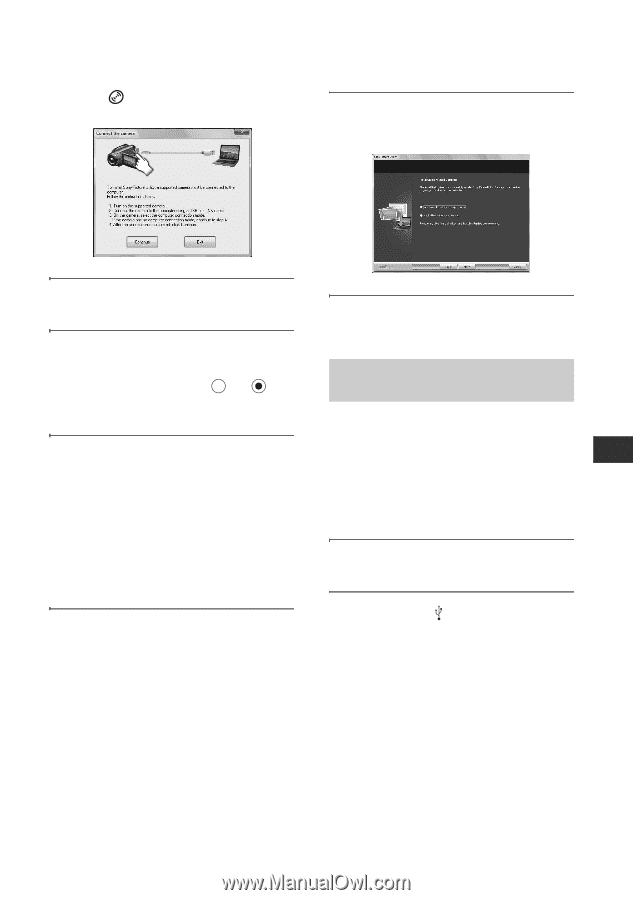
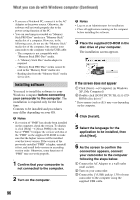
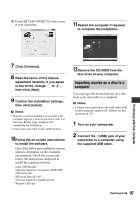
4 Touch [ USB CONNECT] on the screen of your camcorder. 11Restart the computer if required to complete the installation. Performing with Your Computer 7 Click [Continue]. 8 Read the terms of the license agreement carefully. If you agree to the terms, change to , then click [Next]. 9 Confirm the installation settings, then click [Install]. b Notes • Even if a screen prompting you to restart your computer appears, you do not need to restart it at this time. Restart your computer after completing the installation. • It may take some time for the authentication. 10Follow the on-screen instructions to install the software. One of the following installation screens appears, depending on the computer environment. Check the screen and follow the instructions displayed to install the required software. - Sonic UDF Reader* Software required to recognize a DVD-RW (VR mode) disc - Microsoft DirectX 9.0c* Software required to handle movies * Windows XP only 12Remove the CD-ROM from the disc drive of your computer. Importing movies on a disc to a computer You can copy the desired movies on a disc from your camcorder to a computer. b Notes • Connect your camcorder to the wall outlet (wall socket) using the supplied AC Adaptor for this operation (p. 23). 1 Turn on your camcorder. 2 Connect the (USB) jack of your camcorder to a computer using the supplied USB cable. Continued , 97
-
 1
1 -
2
-
3
-
4
-
5
-
6
-
7
-
8
-
9
-
10
-
11
-
12
-
13
-
14
-
15
-
16
-
17
-
18
-
19
-
20
-
21
-
22
-
23
-
24
-
25
-
26
-
27
-
28
-
29
-
30
-
31
-
32
-
33
-
34
-
35
-
36
-
37
-
38
-
39
-
40
-
41
-
42
-
43
-
44
-
45
-
46
-
47
-
48
-
49
-
50
-
51
-
52
-
53
-
54
-
55
-
56
-
57
-
58
-
59
-
60
-
61
-
62
-
63
-
64
-
65
-
66
-
67
-
68
-
69
-
70
-
71
-
72
-
73
-
74
-
75
-
76
-
77
-
78
-
79
-
80
-
81
-
82
-
83
-
84
-
85
-
86
-
87
-
88
-
89
-
90
-
91
-
 92
92 -
 93
93 -
 94
94 -
 95
95 -
 96
96 -
 97
97 -
 98
98 -
 99
99 -
 100
100 -
 101
101 -
 102
102 -
103
-
104
-
105
-
106
-
107
-
108
-
109
-
110
-
111
-
112
-
113
-
114
-
115
-
116
-
117
-
118
-
119
-
120
-
121
-
122
-
123
-
124
-
125
-
126
-
127
-
128
-
129
-
130
-
131
-
132
-
133
-
134
-
135
-
136
-
137
-
138
-
139
-
140
-
141
-
142
-
143
-
144
-
145
-
146
-
147
-
148
-
149
-
150
-
151
-
152
-
153
-
154
-
155
-
156
-
157
-
158
-
159
 |
 |