Sony DCR-DVD710 Operating Guide - Page 123
On the pickup lens, About care and storage of the lens, Cleaning inside the viewfinder
 |
UPC - 027242727694
View all Sony DCR-DVD710 manuals
Add to My Manuals
Save this manual to your list of manuals |
Page 123 highlights
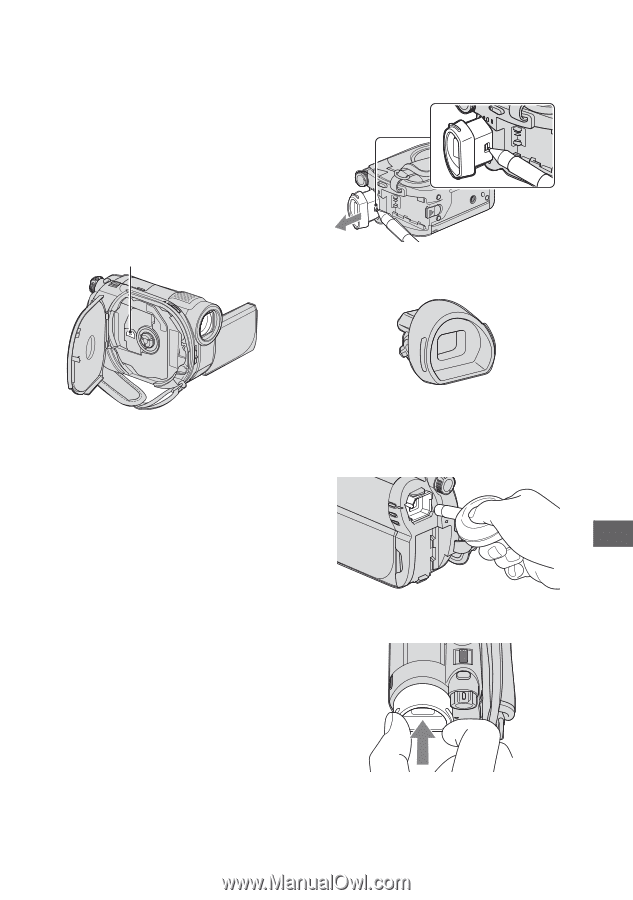
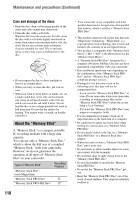
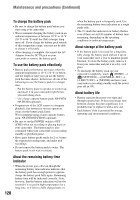
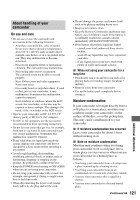
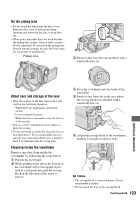
On the pickup lens • Do not touch the lens inside the disc cover. Keep the disc cover closed except when inserting and removing the disc, to keep dust out. • When your camcorder does not work because the pickup lens is dirty, clean it with a camera blower (optional). Do not touch the pickup lens directly during cleaning, because this may cause the camcorder to malfunction. Pickup lens 3 Remove dust from the eyecup block with a camera blower, etc. About care and storage of the lens • Wipe the surface of the lens clean with a soft cloth in the following instances: - When there are fingerprints on the lens surface. - In hot or humid locations - When the lens is exposed to salty air such as at the seaside. • Store in a well-ventilated location subject to little dirt or dust. • To prevent mold, periodically clean the lens as described above. It is recommended that you operate your camcorder about once a month to keep it in optimum state for a long time. Cleaning inside the viewfinder Remove any dust from inside the viewfinder by following the steps below. 1 Pull out the viewfinder. 2 While pushing in the tab on the bottom of the viewfinder with a fine-tipped object such as a ball point pen, pull the eyecup block in the direction of the arrow to remove. 4 Press the viewfinder onto the body of the camcorder. 5 Remove dust from the inside area where the eyecup block was attached with a camera blower, etc. 6 Attach the eyecup block to the viewfinder, pushing it straight on until it clicks. b Notes • The eyecup block is a precision part. Do not disassemble it further. • Do not touch the lens of the eyecup block. Continued , 123 Additional Information
-
 1
1 -
2
-
3
-
4
-
5
-
6
-
7
-
8
-
9
-
10
-
11
-
12
-
13
-
14
-
15
-
16
-
17
-
18
-
19
-
20
-
21
-
22
-
23
-
24
-
25
-
26
-
27
-
28
-
29
-
30
-
31
-
32
-
33
-
34
-
35
-
36
-
37
-
38
-
39
-
40
-
41
-
42
-
43
-
44
-
45
-
46
-
47
-
48
-
49
-
50
-
51
-
52
-
53
-
54
-
55
-
56
-
57
-
58
-
59
-
60
-
61
-
62
-
63
-
64
-
65
-
66
-
67
-
68
-
69
-
70
-
71
-
72
-
73
-
74
-
75
-
76
-
77
-
78
-
79
-
80
-
81
-
82
-
83
-
84
-
85
-
86
-
87
-
88
-
89
-
90
-
91
-
92
-
93
-
94
-
95
-
96
-
97
-
98
-
99
-
100
-
101
-
102
-
103
-
104
-
105
-
106
-
107
-
108
-
109
-
110
-
111
-
112
-
113
-
114
-
115
-
116
-
117
-
 118
118 -
 119
119 -
 120
120 -
 121
121 -
 122
122 -
 123
123 -
 124
124 -
 125
125 -
 126
126 -
 127
127 -
 128
128 -
129
-
130
-
131
-
132
-
133
-
134
-
135
-
136
-
137
-
138
-
139
-
140
-
141
-
142
-
143
-
144
-
145
-
146
-
147
-
148
-
149
-
150
-
151
-
152
-
153
-
154
-
155
-
156
-
157
-
158
-
159
 |
 |