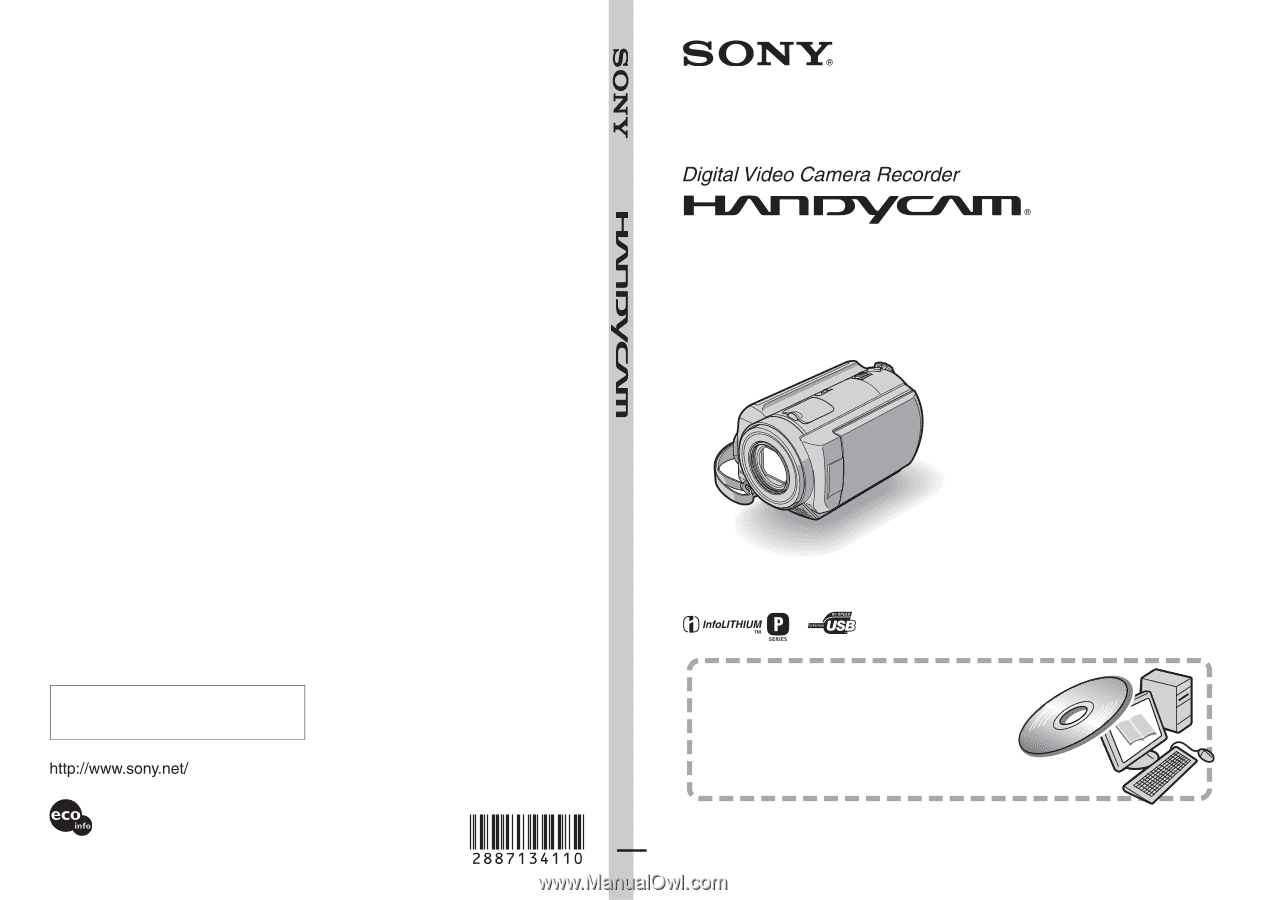
Sony DCR-SR80 Operating Guide
Sony DCR-SR80 - 60GB 1MP Hard Disk Drive Handycam Manual
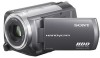 |
UPC - 027242702950
View all Sony DCR-SR80 manuals
Add to My Manuals
Save this manual to your list of manuals |
Sony DCR-SR80 manual content summary:
- Sony DCR-SR80 | Operating Guide - Page 1
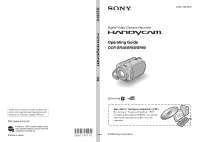
Guide DCR-SR40/SR60/SR80 US Additional information on this product and answers to frequently asked questions can be found at our Customer Support Website. Printed on 100% recycled paper using VOC (Volatile Organic Compound)-free vegetable oil based ink. Printed in Japan Also refer to "Handycam - Sony DCR-SR80 | Operating Guide - Page 2
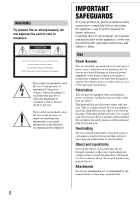
servicing) instructions in the literature accompanying the appliance. IMPORTANT SAFEGUARDS For your protection, please read these safety instructions completely before operating the appliance, and keep this manual from battery power, or other sources, refer to the operating instructions. - Sony DCR-SR80 | Operating Guide - Page 3
Accessories cable system. This will prevent damage to the set due to lightning and power-line surges. Service Damage Requiring Service Unplug the set from the wall outlet and refer servicing to qualified service instructions. Adjust only those controls that are specified in the operating instructions - Sony DCR-SR80 | Operating Guide - Page 4
that may cause undesired operation. Notes DCR-SR40, DCR-SR60 and DCR-SR80 are to be used with the Handycam Station Model DCRAC162 and AC Adaptor Model AC-L25A/L25B. CAUTION You are cautioned that any changes or modifications not expressly approved in this manual could void your authority to operate - Sony DCR-SR80 | Operating Guide - Page 5
and used in accordance with the instructions, may cause harmful interference to an experienced radio/TV technician for help. The supplied interface cable must be used with the equipment in order to comply to Subpart B of Part 15 of FCC Rules. Battery pack THIS DEVICE COMPLIES WITH PART 15 OF THE FCC - Sony DCR-SR80 | Operating Guide - Page 6
prevent the hard disk from being broken or recorded images from being lost, do not remove the battery pack or AC Adaptor from the camcorder when either protected software on your camcorder. Save all your recorded image data • In the case of your image data being damaged, save all your recorded images - Sony DCR-SR80 | Operating Guide - Page 7
and functions used for the camcorder 16 Indicators displayed during recording/playback 18 Deleting images 20 Playing the image on a TV 20 Performing with a computer 21 Performing various functions - Setup 24 Troubleshooting Troubleshooting 27 Warning indicators 29 Additional Information - Sony DCR-SR80 | Operating Guide - Page 8
Handycam Station (1) (p.10) Lens Cap (1) (p.12) (DCR-SR40) To attach the lens cap A/V connecting cable (1) (p.20) USB cable (1) Thread the grip belt through the lens cap ring. CD-ROM (1) (p.21) - "ImageMixer for HDD Camcorder" (Software) - "Handycam Handbook" (PDF) "Operating Guide" (This manual - Sony DCR-SR80 | Operating Guide - Page 9
other than the CR2025. • When the lithium battery becomes weak, the operating distance of the Remote Commander may shorten, or the Remote Commander may not function properly. In this case, replace the battery with a Sony CR2025 lithium battery. Use of another battery may present a risk of fire or - Sony DCR-SR80 | Operating Guide - Page 10
starts. The CHG (charge) lamp turns off when the battery pack is fully charged. Remove the camcorder from the Handycam Station. To remove the battery pack Slide the POWER switch to OFF (CHG). Slide the BATT (battery) release lever and remove the battery pack. 4 Connect the power cord to the AC - Sony DCR-SR80 | Operating Guide - Page 11
/Playback time: Approximate time (min.) available when you use a fully charged battery pack. (Unit:min.) DCR-SR40 DCR-SR60/ SR80 Charging time 125 Recording time*1 Continuous 125 recording time Typical recording time*4 65 Playback time 140 125 100*2 105*3 55*2 55*3 115*2 *1 When - Sony DCR-SR80 | Operating Guide - Page 12
belt (DCRSR40). 2 camcorder, or to edit/delete them 4 Set [DST], [Y] (year), [M] (month), [D] (day), hour and minute. The clock starts. • The recording date and time are not displayed during recording but are automatically recorded onto the hard disk and displayed during playback (see "Handycam - Sony DCR-SR80 | Operating Guide - Page 13
up. (Movie):To record movies (Still):To record still images • When you turn on (Still), the screen aspect ratio is changed to 4:3 automatically. 3 Press WIDE SELECT repeatedly to select the desired screen aspect ratio (DCR-SR60/SR80). 4 Fasten the grip belt and hold your camcorder correctly. 13 - Sony DCR-SR80 | Operating Guide - Page 14
Recording Lens cover Opens in accordance with the setting of the POWER switch (DCR-SR60/SR80 recording is finished, it means data is still being written onto the hard disk. Do not apply shock or vibration to your camcorder, and do not remove the battery pack or AC Adaptor. • You cannot record movies - Sony DCR-SR80 | Operating Guide - Page 15
recorded/played back movie is marked with i. Also, when you touch i, you can play back the movie from the point you have stopped previously. (Movie) tab (Still) tab (Playlist) tab 2 Start playback. Movies Touch (Movie) tab and the movie read from the hard disk drive of the camcorder. To adjust - Sony DCR-SR80 | Operating Guide - Page 16
and functions used for the camcorder Handycam Station Recording 1 NIGHTSHOT PLUS switch To record in dark places, set the Recording lamp (DCR-SR60/SR80) The recording lamp lights up red during recording. The lamp flashes when the remaining capacity for the battery or the hard disk of the camcorder - Sony DCR-SR80 | Operating Guide - Page 17
connecting cable. ql REMOTE jack (DCR-SR60/SR80) Connect other optional accessories. w; DVD BURN button Create a DVD by connecting the camcorder to a computer. wa Interface connector Connect with the camcorder and the Handycam Station. ws (USB) jack Connect with the USB cable. 17 Recording/Playback - Sony DCR-SR80 | Operating Guide - Page 18
images 60min 112 P-MENU 1 Remaining battery (approx.) 2 Recording mode (HQ / SP / LP) 3 Recording status ([STBY] (standby) / [REC] (recording)) 4 Counter (hour: minute: second) 5 Remaining recordable time of movies 6 Review button 7 Personal Menu button Viewing movies 60min 100/112 01:01:00 - Sony DCR-SR80 | Operating Guide - Page 19
center Upper right 60min STBY 00:01:00 [60min] Bottom P-MENU Center Upper left Indicator Meaning Self-timer recording Continuous photo recording /Bracket recording Flash light MICREF LEVEL low Upper center Indicator Meaning Repeat of Slide show Upper right Indicator Meaning Fader LCD - Sony DCR-SR80 | Operating Guide - Page 20
[YES]. Playing the image on a TV Connect your camcorder to the input jack of TV or VCR using A/V connecting cable 1 (supplied) or A/V connecting cable with S VIDEO 2 (optional). For details, see "Handycam Handbook" (PDF). A/V jack To delete all movies or still images at once Touch [EDIT] t [DELETE - Sony DCR-SR80 | Operating Guide - Page 21
computer Recording/Playback In the supplied CD-ROM, the following items are contained: - "ImageMixer for HDD Camcorder" (Software) Software to help you view/edit/create DVD on a computer connected to the camcorder. - "Handycam Handbook" (PDF) Handbook to introduce how to use the camcorder. Install - Sony DCR-SR80 | Operating Guide - Page 22
.1 (USB full speed). Disc Drive : A DVD writable drive • Operations are not guaranteed on any computers fulfilling the above system requirements. x Installing software You need to install the software to your Windows computer. The installation is only required once. 22 1 Confirm that your camcorder - Sony DCR-SR80 | Operating Guide - Page 23
], then click [Next]. 3Click [Finish]. Recording/Playback qa Click [Install] on the [Ready to Install the Program] screen. qd Make sure [Yes, I want to restart my computer now.] is checked, then click [Finish]. The installation for "ImageMixer for HDD Camcorder" starts. qs If the [Installing - Sony DCR-SR80 | Operating Guide - Page 24
the arrow repeatedly until the respective lamp lights up. : Settings for movies : Settings for still images : Settings for PLAY/EDIT 2 Touch -cuts for frequently used setup items are added. • For details, see "Handycam Handbook" (PDF). 1 Touch . 60min STBY SETUP EXPOSURE SPOT FOCUS FADER - Sony DCR-SR80 | Operating Guide - Page 25
self-timer for recording a movie. Selects the zoom USB SELECT *3: DEMO MODE: Selects whether to fade in/out adding various effects. Records additional digital effects. Records adding special picture effects. Displays operating buttons when recording an image saved on other device on the camcorder - Sony DCR-SR80 | Operating Guide - Page 26
a time difference without stopping the clock abroad. Selects whether to set summer time. Selects the language to be used on the LCD screen. *1 DCR-SR60/SR80 *2 DCR-SR40 *3 [USB SELECT] appears automatically when your camcorder is connected to a computer or other device with the USB cable. 26 - Sony DCR-SR80 | Operating Guide - Page 27
following table to troubleshoot them. If your problem persists, remove the power source and contact with your Sony dealer. Note before sending your camcorder for repair • Your camcorder may be required to initialize or change the current hard disk of the camcorder, depending on the problem. In the - Sony DCR-SR80 | Operating Guide - Page 28
Pressing START/STOP or PHOTO does not record movies/still images. • Slide the POWER switch to light up the (Movie) or the (Still) lamp (p.12). • Your camcorder is recording the image you have just shot on the hard disk of the camcorder. You cannot press PHOTO while [CAPTURE] or appears on the LCD - Sony DCR-SR80 | Operating Guide - Page 29
authorized Sony service facility. C:04:00 C:(or E:) ss:ss (Self-diagnosis display) C:04:ss • The battery pack is not an "InfoLITHIUM" battery pack. Use an "InfoLITHIUM" battery pack (p.10). • Connect the DC plug of the AC Adaptor to the DC IN jack of the Handycam Station or your camcorder securely - Sony DCR-SR80 | Operating Guide - Page 30
amount of lights is not sufficient, so camera-shake easily occurs. Use the flash. • The camcorder is unsteady, so camerashake easily occurs. Hold the camcorder steady with both hands and record the image. However, note that the camerashake warning indicator does not disappear. * You hear a melody - Sony DCR-SR80 | Operating Guide - Page 31
sunlight. This damages the inside of the LCD screen. • Operate your camcorder on DC 7.2 V (battery pack) or DC 8.4 V (AC Adaptor). • For DC or AC operation, use the accessories recommended in this instruction manual. • Do not let your camcorder get wet, for example, from rain or sea water. If your - Sony DCR-SR80 | Operating Guide - Page 32
about 3 months if you do not use your camcorder at all. However, even if the pre-installed rechargeable battery is not charged, the camcorder operation will not be affected as long as you are not recording the date. x Procedures Connect your camcorder to a wall outlet using the AC Adaptor supplied - Sony DCR-SR80 | Operating Guide - Page 33
images) Hard Disk DCR-SR40/SR60 30 GB DCR-SR80 60 GB When measuring media capacity, 1GB equals 1 billion bytes, a portion of which is used for data management. Audio compression format Dolby Digital 2ch Dolby Digital Stereo Creator Video signal NTSC color, EIA standards Recording format Movie MPEG2 - Sony DCR-SR80 | Operating Guide - Page 34
the NP-FP50 rechargeable battery pack Supplied accessories See page 8. Handycam Station Input/Output connectors DCRA-C162 (DCR-SR40) Audio/Video output 10 (kilohms)), Output impedance less than 2.2 kΩ (kilohms) USB jack mini-B DCRA-C162 (DCR-SR60/SR80) Audio/Video input/output 10 pin connector Input - Sony DCR-SR80 | Operating Guide - Page 35
for other specifications. Rechargeable battery pack NP-FP50 Maximum output Handycam" and are registered trademarks of Sony Corporation. • "InfoLITHIUM" is a trademark of Sony Corporation. • "Memory Stick Duo" is a trademark of Sony Corporation. • "ImageMixer for HDD Camcorder this manual.
-
 1
1 -
 2
2 -
 3
3 -
 4
4 -
 5
5 -
 6
6 -
 7
7 -
8
-
9
-
10
-
11
-
12
-
13
-
14
-
15
-
16
-
17
-
18
-
19
-
20
-
21
-
22
-
23
-
24
-
25
-
26
-
27
-
28
-
29
-
30
-
31
-
32
-
33
-
34
-
35
 |
 |
2-887-134-
11
(1)
Printed in Japan
Operating Guide
DCR-SR40/SR60/SR80
© 2006 Sony Corporation
Printed on 100% recycled paper using
VOC (Volatile Organic Compound)-free
vegetable oil based ink.
Additional information on this product and
answers to frequently asked questions can be
found at our Customer Support Website.
Also refer to “Handycam Handbook” (PDF)
By referring to “Handycam Handbook” (PDF)
contained in the supplied CD-ROM, you can find
more detailed information on how to use the
camcorder.
US