Sony DCR-SX65 Handycam® Handbook - Page 73
Clock, Power Settings, Clock Set, Area Set, Dst Set/summertime, Language Set, A.shut Off Auto Shut Off
 |
UPC - 027242819900
View all Sony DCR-SX65 manuals
Add to My Manuals
Save this manual to your list of manuals |
Page 73 highlights
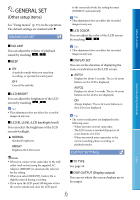
Table of contents LCD PANEL Shows displays such as the time code on the LCD screen. V-OUT/PANEL Shows displays such as the time code on the LCD screen, and on the TV screen. CLOCK/ LANG CLOCK SET See page 15. AREA SET You can adjust a time difference without stopping the clock. Set your local area when using your camcorder in other time zones. Refer to the world time difference on page 86. DST SET/SUMMERTIME You can change this setting without stopping the clock. Set to [ON] to move the time forward 1 hour. OFF Does not set the summertime. ON Sets the summertime. LANGUAGE SET You can select the language to be used on the LCD screen. Tips Your camcorder offers [ENG[SIMP]] (simplified English) for when you cannot find your native tongue among the options. 5min The camcorder turns off automatically. NEVER The camcorder does not turn off automatically. Notes When you connect your camcorder to a wall outlet (wall socket), [A.SHUT OFF] is automatically set to [NEVER]. POWER ON BY LCD You can set your camcorder to turn on and off when you open and close the LCD screen. ON The camcorder turns on and off when the LCD screen opens and closes. OFF The camcorder does not turn on and off when the LCD screen opens and closes. OTHER SETTINGS DEMO MODE When your camcorder is connected to a wall outlet (wall socket), a demonstration movie appear about 10 minutes after you turn on the (Movie) lamp by pressing MODE. ON The demonstration appears. OFF The demonstration does not appear. Useful recording techniques Index POWER SETTINGS A.SHUT OFF (Auto shut off ) You can set your camcorder to turn off automatically when you do not operate your camcorder for more than about 5 minutes. Tips When you set this item to [ON] and touch , the demonstration starts playing. The demonstration will be suspended: When you press START/STOP When you touch the screen during the demonstration (The demonstration starts again after about 10 minutes) When you turn on the (Photo) lamp US 73
-
 1
1 -
2
-
3
-
4
-
5
-
6
-
7
-
8
-
9
-
10
-
11
-
12
-
13
-
14
-
15
-
16
-
17
-
18
-
19
-
20
-
21
-
22
-
23
-
24
-
25
-
26
-
27
-
28
-
29
-
30
-
31
-
32
-
33
-
34
-
35
-
36
-
37
-
38
-
39
-
40
-
41
-
42
-
43
-
44
-
45
-
46
-
47
-
48
-
49
-
50
-
51
-
52
-
53
-
54
-
55
-
56
-
57
-
58
-
59
-
60
-
61
-
62
-
63
-
64
-
65
-
66
-
67
-
 68
68 -
 69
69 -
 70
70 -
 71
71 -
 72
72 -
 73
73 -
 74
74 -
 75
75 -
 76
76 -
 77
77 -
 78
78 -
79
-
80
-
81
-
82
-
83
-
84
-
85
-
86
-
87
-
88
-
89
-
90
-
91
-
92
-
93
-
94
-
95
-
96
-
97
-
98
 |
 |