Sony DCR-SX65 Operating Guide - Page 45
Customizing your camcorder, Using menus - handycam manual
 |
UPC - 027242819900
View all Sony DCR-SX65 manuals
Add to My Manuals
Save this manual to your list of manuals |
Page 45 highlights
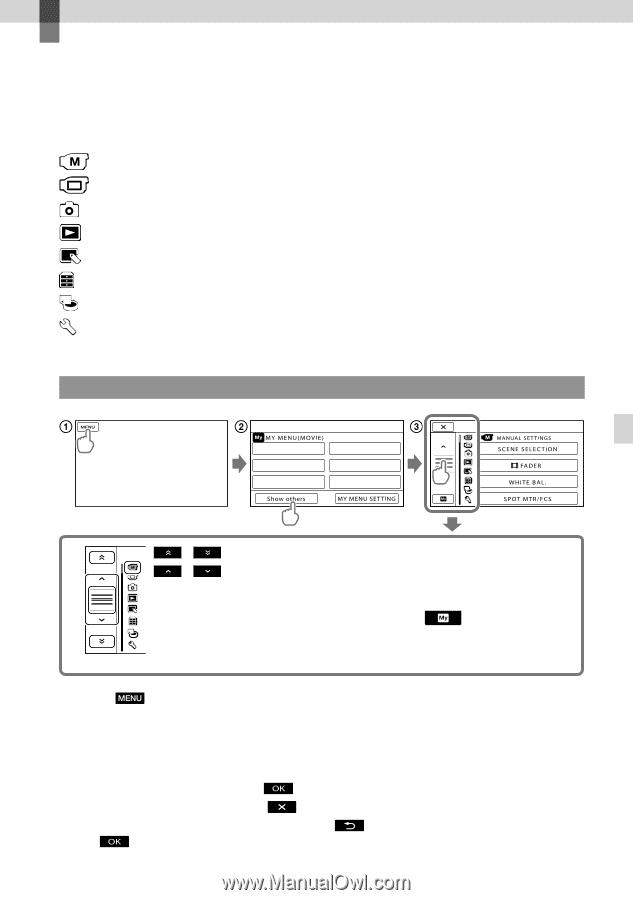
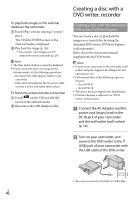
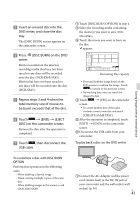
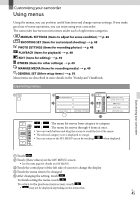
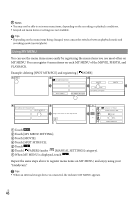
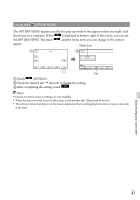
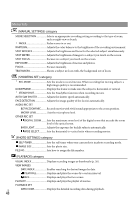
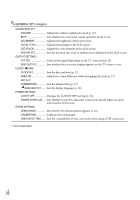
Customizing your camcorder Using menus Using the menus, you can perform useful functions and change various settings. If you make good use of menu operations, you can enjoy using your camcorder. The camcorder has various menu items under each of eight menu categories. MANUAL SETTINGS (Items to adjust for scene condition) p. 48 SHOOTING SET (Items for customized shooting) p. 48 PHOTO SETTINGS (Items for recording photos) p. 48 PLAYBACK (Items for playback) p. 48 EDIT (Items for editing) p. 49 OTHERS (Items for other settings) p. 49 MANAGE MEDIA (Items for recording media) p. 49 GENERAL SET (Other setup items) p. 50 Menu items are described in more details in the "Handycam" Handbook. Operating menus Customizing your camcorder / : The menu list moves from category to category. / : The menu list moves through 4 items at once. You can touch buttons and drag the screen to scroll the list of the menu. The selected category icon is displayed in orange. You can return to the MY MENU screen by touching when displayed. Touch . Touch [Show others] on the MY MENU screen. See the next page for details on MY MENU. Touch the central part of the left side of screen to change the display. Touch the menu item to be changed. After changing the setting, touch . To finish setting the menu, touch . To return to the previous menu screen, touch . may not be displayed depending on the menu item. US 45
-
 1
1 -
2
-
3
-
4
-
5
-
6
-
7
-
8
-
9
-
10
-
11
-
12
-
13
-
14
-
15
-
16
-
17
-
18
-
19
-
20
-
21
-
22
-
23
-
24
-
25
-
26
-
27
-
28
-
29
-
30
-
31
-
32
-
33
-
34
-
35
-
36
-
37
-
38
-
39
-
 40
40 -
 41
41 -
 42
42 -
 43
43 -
 44
44 -
 45
45 -
 46
46 -
 47
47 -
 48
48 -
 49
49 -
 50
50 -
51
-
52
-
53
-
54
-
55
-
56
-
57
-
58
-
59
-
60
-
61
-
62
-
63
-
64
-
65
-
66
-
67
-
68
-
69
-
70
-
71
-
72
-
73
-
74
-
75
-
76
-
77
-
78
-
79
-
80
-
81
-
82
-
83
-
84
-
85
-
86
-
87
-
88
-
89
-
90
-
91
-
92
-
93
-
94
-
95
-
96
-
97
-
98
-
99
-
100
-
101
-
102
-
103
-
104
-
105
-
106
-
107
-
108
-
109
-
110
-
111
-
112
-
113
-
114
-
115
-
116
-
117
-
118
-
119
-
120
-
121
-
122
-
123
-
124
-
125
-
126
-
127
-
128
-
129
-
130
-
131
 |
 |