Sony DCR-TRV22 PIXELA ImageMixer v1.5 Instruction Manual - Page 38
Recording music files, Click the [Stop]
 |
View all Sony DCR-TRV22 manuals
Add to My Manuals
Save this manual to your list of manuals |
Page 38 highlights
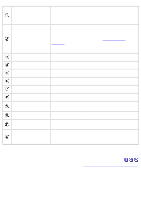
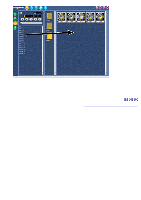
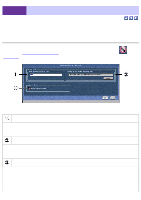
2-4-3 Audio CD Recording Mode Recording music files Follow these steps to record music from an audio CD. The size of recorded sound files is approximately 10MB per minute of CD audio. 1. Insert the music CD in the CD drive. If the CD plays automatically, stop playback and close the audio software. 2. Select an album. Designate an album from the album list window into which to save the recorded sound files. 3. In Windows, select the CD drive from the select CD drive menu. 4. Select a track from the track list window. 5. If you wish to record only one portion of a track, cue up the track according to the instructions below. To record an entire track, go directly to the next step. 6. Click the [Play] button. Click the [Pause] button at the point you wish to begin recording. (Tracks may also be played by double-clicking the track number in the track list window.) You may also choose to drag the slider to the desired record position. 7. Click the [Record] button. ImageMixer will begin recording and stop at the end of the track. To record another track, repeat the process. To stop recording, and thereby record only a portion of the track, see below. 8. Click the [Stop] button at the point you wish to stop recording. This step is necessary only if you wish to record a portion of the track. The audio format of digitally recorded files is PCM, the sampling rate is 44.1KHz, and the bit rate is 16bit stereo. In Windows, the file type of recorded files is WAVE. In Mac, AIFF files are created. Files are saved in the save location designated in the Capturing/Recording Preferences, but are, of course, added directly to the album selected in step 2. To confirm successful recording of sound files, double-click their thumbnail icon in the thumbnail list window. Macintosh Files are recorded is by dragging & dropping the track number from the track list window to the thumbnail list window. Tracks are recorded individually.
-
 1
1 -
2
-
3
-
4
-
5
-
6
-
7
-
8
-
9
-
10
-
11
-
12
-
13
-
14
-
15
-
16
-
17
-
18
-
19
-
20
-
21
-
22
-
23
-
24
-
25
-
26
-
27
-
28
-
29
-
30
-
31
-
32
-
 33
33 -
 34
34 -
 35
35 -
 36
36 -
 37
37 -
 38
38 -
 39
39 -
 40
40 -
 41
41 -
 42
42 -
 43
43 -
44
-
45
-
46
-
47
-
48
-
49
-
50
-
51
-
52
-
53
-
54
-
55
-
56
-
57
-
58
-
59
-
60
-
61
-
62
-
63
-
64
-
65
-
66
-
67
-
68
-
69
-
70
-
71
-
72
-
73
-
74
-
75
-
76
-
77
-
78
-
79
-
80
-
81
-
82
-
83
-
84
-
85
-
86
-
87
-
88
-
89
-
90
-
91
-
92
-
93
-
94
-
95
-
96
-
97
-
98
-
99
-
100
-
101
-
102
-
103
-
104
-
105
-
106
-
107
-
108
-
109
-
110
-
111
-
112
-
113
-
114
-
115
-
116
-
117
-
118
-
119
-
120
-
121
-
122
-
123
-
124
-
125
-
126
-
127
-
128
-
129
-
130
-
131
-
132
-
133
-
134
-
135
-
136
-
137
-
138
-
139
-
140
-
141
-
142
-
143
-
144
-
145
-
146
-
147
-
148
-
149
-
150
-
151
-
152
-
153
-
154
-
155
-
156
-
157
-
158
-
159
-
160
-
161
-
162
-
163
-
164
-
165
-
166
-
167
-
168
-
169
-
170
-
171
-
172
-
173
-
174
-
175
-
176
-
177
-
178
-
179
-
180
-
181
-
182
-
183
-
184
-
185
-
186
-
187
-
188
-
189
-
190
-
191
-
192
-
193
-
194
-
195
-
196
-
197
-
198
-
199
-
200
-
201
-
202
-
203
-
204
-
205
-
206
-
207
-
208
-
209
-
210
-
211
-
212
-
213
-
214
-
215
-
216
-
217
-
218
-
219
-
220
-
221
-
222
-
223
-
224
-
225
-
226
-
227
-
228
-
229
-
230
-
231
-
232
-
233
-
234
-
235
-
236
-
237
 |
 |