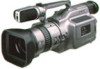
Sony DCR-VX1000 Operation Manual
Sony DCR-VX1000 - Digital Video Camera Recorder Manual
 |
View all Sony DCR-VX1000 manuals
Add to My Manuals
Save this manual to your list of manuals |
Sony DCR-VX1000 manual content summary:
- Sony DCR-VX1000 | Operation Manual - Page 1
this manual thoroughly, and retain it for future reference. Owner's Record The model and serial numbers are located on the bottom. Record the serial number in the space provided below. Refer to these numbers whenever you call upon your Sony dealer regarding this product. Model No. DCR-VX1000 - Sony DCR-VX1000 | Operation Manual - Page 2
USE THIS POLARIZED AC PLUG WITH AN EXTENSION CORD, RECEPTACLE OR OTHER OUTLET UNLESS THE BLADES CAN BE FULLY INSERTED TO PREVENT BLADE EXPOSURE. As you read through this manual, buttons and settings on the camcorder are shown in capital letters. e.g. Set the POWER switch to CAMERA. The beep sound - Sony DCR-VX1000 | Operation Manual - Page 3
Abroad 57 Replacing the Lithium Battery in the Camcorder 58 Resetting the Date and Time 60 Video Cassettes 61 Tips for Using the Battery Pack 63 Maintenance Information and Precautions 65 Trouble Check 68 Specifications 71 Identifying the Parts 72 Warning Indicators 82 Glossary 83 - Sony DCR-VX1000 | Operation Manual - Page 4
(p. 57). Precaution on Copyright Television programs, films, video tapes, and other materials may be copyrighted. Unauthorized recording of the unit to malfunction and sometimes the malfunction cannot be repaired. [b] • Never leave the camcorder under temperatures above 140 °F (60° C), such as in - Sony DCR-VX1000 | Operation Manual - Page 5
NP-720/F730 Battery Pack (1) (p.6) 3 AC-V615 AC power adaptor and DK-715 connecting cord (1) (p. 6) 4 A/V connecting cable (1) (p. 15) 5 S video connecting cable (1) (p. 15) 6 Shoulder strap (1) (p. 76) 7 R6 (size AA) batteries for Remote Commander (2) (p. 77) 8 Eyecup (1) (p. 11) 9 Mini DV cassette - Sony DCR-VX1000 | Operation Manual - Page 6
pack. To charge the battery pack, use the supplied AC power adaptor. This digital camcorder does not interface with "InfoLITHIUM" batteries. The remaining time (minutes) indication does not appear when using "InfoLITHIUM" batteries. Charging the Battery Pack Charge the battery pack on a flat place - Sony DCR-VX1000 | Operation Manual - Page 7
is removed and the power cord is unplugged after charging the battery pack. This is normal. • If the POWER lamp does not light, disconnect the AC power cord. After about one minute, reconnect the AC power cord again. • You cannot operate the camcorder using the AC power adaptor while charging the - Sony DCR-VX1000 | Operation Manual - Page 8
Charging and Inserting the Battery Pack To Remove the Battery Pack Slide the RELEASE knob leftward. RELEASE Note on battery pack You cannot use NP-520/500H/F750 battery pack. 8 - Sony DCR-VX1000 | Operation Manual - Page 9
a Cassette You can use mini DV cassette with logo* only. Make sure that a power source is inserted. (1) camcorder is still writing information to the mini DV cassette-mounted cassette memory (p. 83). In this case, tape. To rerecord on this tape, slide and close the tab to cover the red mark. - Sony DCR-VX1000 | Operation Manual - Page 10
While pressing the centre button on the POWER switch, set it to CAMERA. (3) Turn STANDBY up. (4) Press START/STOP. The camcorder starts recording. The "REC" indicator appears /STOP to stop recording. Turn the POWER switch to OFF. Then, eject the cassette and battery (p. 8, 9). [a] LOCK STANDBY PHOTO - Sony DCR-VX1000 | Operation Manual - Page 11
5 minutes or more with a cassette inserted in Standby mode, the camcorder goes off automatically. This prevents wearing down the battery and wearing out the tape. To resume Standby mode, turn the POWER switch to OFF once and then to CAMERA. To start recording, press START/ STOP. Notes on the time - Sony DCR-VX1000 | Operation Manual - Page 12
Camera Recording Using the Zoom Feature Zooming is a recording technique that zoom, set the D ZOOM function to OFF in the menu system (p. 20). • The horizontal bar in the power zoom indicator separates the digital zooming zone (above the bar [a]) and the optical zooming zone (under the bar [b]). - Sony DCR-VX1000 | Operation Manual - Page 13
your left hand under the camcorder to support it. • Keep your fingers guide to determine the horizontal plane. • You can record in a low position to get an interesting recording angle. Lift the viewfinder up to record from a low position (you can turn it up to about 80 degrees.) [b]. In this case - Sony DCR-VX1000 | Operation Manual - Page 14
POWER switch, turn it to CAMERA. (2) Turn STANDBY up. (3) Press the - (Œ) side of EDITSEARCH momentarily; the last few seconds of the recorded portion plays back (Rec Review). You can also monitor the sound by using headphones (not supplied). Hold down the - side of EDITSEARCH until the camcorder - Sony DCR-VX1000 | Operation Manual - Page 15
recommended to use the house current as the power source (p. 18). Connecting Directly to a TV Connect the camcorder to your TV by using the supplied A/V quality pictures in DV format, connect the camcorder to your TV using the S video cable. If you are going to connect the camcorder using the S - Sony DCR-VX1000 | Operation Manual - Page 16
also watch it on a TV screen, after connecting the camcorder to a TV or VCR (p. 15). You can control playback using the supplied Remote Commander (p. 76). (1) While pressing the center button on the POWER switch, turn it to VTR. (2) Insert the recorded tape with the window facing out. (3) Press 0 to - Sony DCR-VX1000 | Operation Manual - Page 17
scene may appear like mosaic noise during slow playback or playback pause. This is not a malfunction. To display the indicators Press DISPLAY (p. 76). Tape counter, remaining battery indicator and other indicators appear on the connected TV screen. To erase the indicators, press DISPLAY again. 17 - Sony DCR-VX1000 | Operation Manual - Page 18
tape. If this happens, restore the power supply again immediately. Using the House Current To use the supplied AC power adaptor: (1) Connect the AC power cord to a wall outlet. (2) Connect the camcorder and the AC power adaptor using the supplied connecting cord. 1 2 You can charge the battery - Sony DCR-VX1000 | Operation Manual - Page 19
at the rear of the camcorder. Notes on the POWER lamp • The POWER lamp will remain lit for a while even if the unit is unplugged after use. This is normal. • If the POWER lamp does not light, disconnect the AC power cord. After about one minute, try again. Using a Car Battery Use the DC-V515/V700 - Sony DCR-VX1000 | Operation Manual - Page 20
system to further enjoy the features and function of the camcorder. (1) Slide OPEN and open the battery cover. (2) Press MENU to display the menu in the Each Item Select RETURN to return to main menu (item select). Items in CAMERA and VTR Modes COMMANDER • Normally select VTR4. - Sony DCR-VX1000 | Operation Manual - Page 21
Normally select OFF. • Select ON for cut recording. When you remove the power source, the setting becomes OFF. INT REC • AE SHIFT/GAINSHIFT(0dB/-3dB)/RESET> • Normally select OFF. Select ON for camera recording based on the setting mode preset in the CUSTOM menu. • Select - Sony DCR-VX1000 | Operation Manual - Page 22
memory search function. • Select OFF otherwise. In this case, the recorded picture is searched without cassette memory function. Power switch is set to OFF or VTR. • Power source is disconnected. • PHOTO button is pressed. Other settings retains as long as lithium battery is installed even if power - Sony DCR-VX1000 | Operation Manual - Page 23
gradually fades in over a still picture of the last scene recorded. Using the Fader and Overlap Function When Fading in [a] (1) While the camcorder is in Standby mode, press FADER/OVERLAP. The fade indicator starts flashing. (2) Press START/STOP to start recording. The fade indicator stops flashing - Sony DCR-VX1000 | Operation Manual - Page 24
using Overlap (1) Slide OPEN and open the battery cover. (2) Set DIGITAL MODE on the rear of battery cover to OVERLAP. (3) Press FADER/OVERLAP repeatedly using overlap. In other cases, this camcorder starts Rec Review automatically to store the picture on the tape before it overlaps the scene being shot - Sony DCR-VX1000 | Operation Manual - Page 25
You can re-record a scene in the middle of a recorded tape by setting the starting [a] and ending [b] points. The previously recorded . The insert recording stops automatically at the counter zero point, and the camcorder enters Standby mode again. Zero set memory resumes automatically. To change the - Sony DCR-VX1000 | Operation Manual - Page 26
the end of the inserted portion when it is played back. • Zero set memory may not function when there is a blank portion between pictures on a tape. • You can re-record without using the zero set memory. Skip steps 2 and 3. Press START/STOP to stop recording. To use the insert recording repeatedly - Sony DCR-VX1000 | Operation Manual - Page 27
is automatically adjusted up to 1/1000 depending on the exposure. (1) instruction manual of the video printer as well. • The recorded date is automatically printed as well. The present date, however, may not be printed if you try to print when the POWER switch is turned to CAMERA and the camcorder - Sony DCR-VX1000 | Operation Manual - Page 28
, etc., with this function. (1) Slide OPEN and open the battery cover while the camcorder is in Standby mode. Press MENU to display the menu in tape ends Press START/STOP. To cancel the interval recording • Set the INT REC mode to OFF in the menu system. • Turn STANDBY down to LOCK. • Turn the power - Sony DCR-VX1000 | Operation Manual - Page 29
camcorder and use the Remote Commander for effective cut recording. (1) Slide OPEN and open the battery cover while the camcorder menu system. • Turn STANDBY down to LOCK. • Turn the power switch to OFF or VTR. Notes on cut recording • The tape indicator may not be accurate if you do - Sony DCR-VX1000 | Operation Manual - Page 30
so that disappears from the viewfinder while the camcorder is in Standby mode. Self-timer recording mode is canceled when • Self-timer recording is finished. • Power switch is set to OFF or VTR. • if you keep pressing PHOTO lightly. In this case, release PHOTO once and start from step 1 again. 30 - Sony DCR-VX1000 | Operation Manual - Page 31
A/M Recording Level A M M M M M A: Automatic adjustment M:Manual adjustment S: Select *: You can select automatic or manual to adjust focusing at any mode. Using Automatic Mode Set HOLD/AUTO LOCK selector to AUTO LOCK. In automatic mode, the camcorder adjusts the exposure, shutter speed**, white - Sony DCR-VX1000 | Operation Manual - Page 32
, first focus in telephoto before recording, and then reset the shot length. (1) Set FOCUS to MANUAL while the camcorder is recording or in Standby mode. f appears in the viewfinder. (2) Keep pressing the "T" (telephoto) side of the zoom button until the zooming stops. (3) Turn the - Sony DCR-VX1000 | Operation Manual - Page 33
the wide-angle position. Focusing to Infinity Focus to infinity when the camcorder focuses on a nearby subject while you want on focus to a distant subject focus to infinity. When you release FOCUS, manual focus resumes. FOUCUS AUTO MANUAL INFINITY PUSH AUTO Shooting with Auto Focusing Momentarily - Sony DCR-VX1000 | Operation Manual - Page 34
AE repeatedly to select the desired mode. The mode changes: AEA (Priority to iris) → AES (Priority to shutter speed) → Å (Twilight) → No indication (Manual), cyclically in the viewfinder. 1 HOLD AUTO LO CK 2 AEA PROGRAM AE AES Giving Priority to Iris AEA, A You can select the exposure (iris - Sony DCR-VX1000 | Operation Manual - Page 35
and 1/10000. When you select a faster shutter speed, movement appears clearer with less shaking when the tape is played back in still or slow mode. This mode is most effective in the following cases: • A golf swing or a tennis match in fine weather with the ball movement captured clearly • Playing - Sony DCR-VX1000 | Operation Manual - Page 36
an out-of-focus picture due to a small iris) Shutter speed 1/500 to 1/1000 1/125 to 1/500 1/100 1/90 to 1/100 To return to automatic mode Set . Press PROGRAM AE repeatedly so that Å appears in the display while the camcorder is in Standby mode or recording. PROGRAM AE To return to automatic mode - Sony DCR-VX1000 | Operation Manual - Page 37
SPEED, WHT BAL, REC LEVEL, PROGRAM AE buttons, and CONTROL, EXPOSURE dials do not function. HOLD AUTO LO About the previous settings The lithium battery must be installed to temporarily save manual settings if you detach the battery. The settings are saved for five minutes. 37 Advanced Operations - Sony DCR-VX1000 | Operation Manual - Page 38
LOCK selector to the center (auto lock release) position while the camcorder is in Standby mode. (2) Press EXPOSURE. The exposure is locked a higher level. 1 HOLD AUTO LO CK 2 EXPOSURE 3 To lock the manual settings Set HOLD/AUTO LOCK to HOLD after making the settings. The EXPOSURE, SHUTTER - Sony DCR-VX1000 | Operation Manual - Page 39
the menu system. Note on iris/gain value indicator The information of the EXPOSURE dial does not appear even if you press EXPOSURE while the camcorder is in PROGRAM AE mode (AEA, AES, or Å). Notes on while adjusting the exposure • CONTROL dial and SHUTTER SPEED button do not function. • The setting - Sony DCR-VX1000 | Operation Manual - Page 40
auto lock release) position while the camcorder is in Standby mode. (2) Press . As you press SHUTTER SPEED the speed changes 1/100 and 1/1000. (4) Turn CONTROL dial to select the desired speed. As you 3 SHUTTER SPEED 4 CONTROL To lock the manual settings Set HOLD/AUTO LOCK to HOLD after making - Sony DCR-VX1000 | Operation Manual - Page 41
Using the ND Filter Using the ND filter (correspond to one-tenth the quantity of light), you can record a picture clearly, preventing the picture from going out of focus under bright conditions. When ND ON flashes in the viewfinder [a] Set ND FILTER to ON. When ND OFF flashes in the viewfinder [b] - Sony DCR-VX1000 | Operation Manual - Page 42
pattern. Use the zebra pattern as a guide for adjusting the exposure (iris) and shutter speed so that you can get the desired picture. Before you start recording, set ZEBRA to ON in the menu system. (1) Slide OPEN and open the battery cover while the camcorder is in Standby mode. (2) Press MENU - Sony DCR-VX1000 | Operation Manual - Page 43
camera recording. Normally white balance is automatically adjusted. You can obtain better results by adjusting the white balance manually HOLD/AUTO LOCK selector to the center (auto lock release) position while the camcorder is in Standby mode. (2) Press WHT BAL repeatedly to select the appropriate - Sony DCR-VX1000 | Operation Manual - Page 44
mode, the setting is locked and maintained even if lighting conditions change, and saved for one hour after power sources such as the battery are detached if the lithium battery is inserted. You can achieve recording with natural colors without being affected by ambient light. (1) Set HOLD/AUTO - Sony DCR-VX1000 | Operation Manual - Page 45
the camcorder is in Standby mode. This button does not function during recording. • When you adjust the exposure (iris) and shutter speed manually, and or vice-versa, or detach the battery for replacement while shooting in automatic white balance mode, point the camcorder at a white subject about 10 - Sony DCR-VX1000 | Operation Manual - Page 46
. To adjust the recording sound automatically Set HOLD/AUTO LOCK selector to AUTO LOCK. CK CK HOLD AUTO LO To adjust the recording sound manually (1) Set HOLD/AUTO LOCK selector to the center position. (2) Press REC LEVEL to display " in the viewfinder. (3) Turn CONTROL dial to adjust the sound - Sony DCR-VX1000 | Operation Manual - Page 47
level setting is retained as long as the power is on and for about five minutes after the power turns off. After that the level is set display " in the viewfinder. • Though the DV recording system records two stereo sounds to stereo 1 and 2, this camcorder records the sound to stereo 1 only. You - Sony DCR-VX1000 | Operation Manual - Page 48
you shoot, the Ó indicator appears in the viewfinder. This indicates that the Steady Shot function is working and the camcorder compensates for camera-shake. (1) Slide OPEN and open the battery cover. (2) Set STEADY SHOT to OFF so that the Ó indicator disappears. STEADY SHOT ON OFF To activate the - Sony DCR-VX1000 | Operation Manual - Page 49
, adjust the picture by shooting a subject and checking the picture displayed on a TV using the menu system. (1) Slide OPEN and open the battery cover while the camcorder is in Standby mode. (2) Press MENU to display the menu in the viewfinder. (3) Press > or . to select CUSTOM, then press EXECUTE - Sony DCR-VX1000 | Operation Manual - Page 50
You can display and check the custom preset setting in the viewfinder while recording. Press CP CHECK located on the top of the camcorder while the camcorder is in Standby mode or recording. Custom preset setting appears in the viewfinder. About the gain-shift setting Use the gain-shift function - Sony DCR-VX1000 | Operation Manual - Page 51
Recorded Picture When you use a cassette memory-mounted mini DV cassette which can store the recorded date or time, with the date or time - Cassette memory search (1) Turn the POWER switch to VTR. (2) Slide OPEN and open the battery cover. (3) Press MENU to display the menu in the viewfinder. - Sony DCR-VX1000 | Operation Manual - Page 52
POWER MERA OFF VT 3~5 6 SEARCH SELECT 2 7 To stop searching Press πSTOP. When you use a recorded tape which has blank portions between pictures The camcorder may not search for the recorded picture or data may not be stored. Notes on searching • Be sure to install the lithium battery when - Sony DCR-VX1000 | Operation Manual - Page 53
time → various settings → No indication, cyclically in the viewfinder. Press DATA CODE again to erase the display. DATA CODE appears when • the camcorder cannot read the data code because of a damaged tape or noise. • the tape was recorded without setting the date and time. 53 Advanced Operations - Sony DCR-VX1000 | Operation Manual - Page 54
editing with any other DV, mini DV, h 8 mm, H Hi8, j VHS, k S-VHS, VHSC, K S-VHSC, l Betamax, or ¬ ED Beta VCR that has video/audio inputs. You can edit with little deterioration of picture and sound quality when using the DV connecting cable. Before Editing Connect the camcorder to the VCR using - Sony DCR-VX1000 | Operation Manual - Page 55
this camcorder as a player. Notes on editing when using the DV connecting cable • You can connect one VCR only. • When using the DCR-VX1000 as playback pause picture via the DV jack, the recorded picture becomes rough. • You can use this camcorder as a recorder. In this case, you do not need to - Sony DCR-VX1000 | Operation Manual - Page 56
, recording date/time, camera information, etc., from a VCR onto your originally recorded tape by specifying and ending points. Connection is the same as in "Using the DV connecting cable" on page 54. Refer to the instruction manual of the connected equipment also. (1) Turn the POWER switch to VTR - Sony DCR-VX1000 | Operation Manual - Page 57
and TV color systems. Before using your camcorder abroad, check the following points: Power Sources You can use your camcorder in any country with the supplied AC power adaptor within 100 V to 240 V AC, 50/60 Hz. Use a commercially available AC plug adaptor, if necessary, depending on the - Sony DCR-VX1000 | Operation Manual - Page 58
the Lithium Battery in the Camcorder Your camcorder is supplied with the lithium battery installed. When the battery becomes weak or dead, I indicator flashes in the viewfinder for about 5 seconds when you set the POWER switch to CAMERA. In this case, replace the battery with the Sony CR2025 or - Sony DCR-VX1000 | Operation Manual - Page 59
When replacing the lithium battery, keep the battery pack or other power source attached. Otherwise, you will need to reset the date and time. (1) Slide OPEN and open the battery cover. (2) Push the battery down once and pull it out from the holder. (3) Install the lithium battery with the positive - Sony DCR-VX1000 | Operation Manual - Page 60
date or time in the menu system. (1) Slide OPEN and open the battery cover. (2) Press MENU to display the menu in the viewfinder. (3) n 2025 n 1995 Note on the time indicator The internal clock of the camcorder operates on a 12-hour cycle. 12:00:00 AM stands for midnight. 12:00:00 PM stands for - Sony DCR-VX1000 | Operation Manual - Page 61
Usable Cassettes You can use the mini DV cassette only. You cannot use any other h 8 mm, H Hi8, j VHS, k SVHS, VHSC, K S-VHSC , l Betamax or ¬ ED Beta cassette. Copyright Signal When You Play Back Using this camcorder, you cannot play back a tape that has recorded a copyright control signals - Sony DCR-VX1000 | Operation Manual - Page 62
label on only the location as illustrated below so as not to cause malfunction of the camcorder. [c] After using the mini DV cassette Rewind the tape to the beginning, put the cassette in its case, and store it in an upright position. [a] [b] To record Slide out to prevent accidental erasure. [c] 62 - Sony DCR-VX1000 | Operation Manual - Page 63
slow flashing to rapid flashing while you are recording, set the POWER switch to OFF on the camcorder and replace the battery pack. Leave the tape in the camcorder to obtain smooth transition between scenes after the battery pack is replaced. [a] LOCK STANDBY PHOTO STANDBY START/ STOP [b] Notes - Sony DCR-VX1000 | Operation Manual - Page 64
pack. This is not cause for concern. Battery Care • Remove the battery pack from the camcorder after using the battery pack, and keep it in a cool place. When the battery pack is attached to the camcorder, a small amount of current flows to the camcorder even if the POWER switch is set to OFF, which - Sony DCR-VX1000 | Operation Manual - Page 65
. If the { indicator does not light up when you turn on the power, you can use the camcorder again. On the Surface of the Tape If there is moisture on the surface of the tape, when you insert cassette and press a tape transport button (·PLAY, etc.), the 6 indicator flashes in the viewfinder. If this - Sony DCR-VX1000 | Operation Manual - Page 66
flashes in the viewfinder or mosaic noise appears on the playback picture or part of the picture remains, the video heads may be dirty. [a] [b] Critical contamination If this happens, clean the video heads with the Sony DVM12CL cleaning cassette (not supplied). After checking the picture, if it - Sony DCR-VX1000 | Operation Manual - Page 67
Camcorder Operation • Operate the camcorder using 7.2 V (battery pack), or 8.4 V (AC power adaptor). • For DC or AC operation, use only the accessories recommended in this manual. • Should any solid object or liquid fall into the casing, unplug the camcorder and have it checked by your nearest Sony - Sony DCR-VX1000 | Operation Manual - Page 68
. m Remove the cassette and leave the camcorder for at least an hour. (p. 65) • Set the POWER switch to VTR. (p. 16) • Rewind the tape or use a new one. (p. 16) • The camcorder is updating the cassette memory data (The cassette memory mounted mini-DV cassette only). m Eject the cassette after - Sony DCR-VX1000 | Operation Manual - Page 69
indicates full ı, when you insert the charged battery pack. While editing using the DV connecting cable, recording picture cannot be monitored. Cause and/or Corrective Actions • Adjust the viewfinder lens. (p. 11) • Select the channel or input for the camcorder correctly on the TV. (p. 15) • The - Sony DCR-VX1000 | Operation Manual - Page 70
/or Corrective Actions • Disconnect the AC power cord. After about one minute, try again. (p.18) • See the following chart. When the CHARGE Lamp Flashes Check through the following chart. Remove the battery pack from the AC power adaptor. Then attach the same battery pack again. 4 4 4 When the - Sony DCR-VX1000 | Operation Manual - Page 71
240 V AC, 50/60 Hz Power consumption 25 W Output voltage DC OUT: 8.4 V, 1.8 A in operating mode Battery charge terminal: 8.4 V, 1.4 A in charging mode Application Sony battery packs NP-720/ F730 lithium ion type Operating temperature/ Storage temperature Same specifications as video camera recorder - Sony DCR-VX1000 | Operation Manual - Page 72
Parts Camcorder 1 2 !º 3 !¡ 4 !™ 5 !£ 6 !¢ !∞ 7 !§ 8 !¶ 9 !• 1 Remote sensor (p. 79) 2 CP CHECK button (p. 49) 3 EDITSEARCH buttons (p. 14) 4 RELEASE knob (p. 8) 5 POWER buttons (p. 20) !¢ Lithium battery cover (p. 59) !∞ DIGITAL MODE switch (p. 24) !§ DV IN/OUT jack (p. 54) - Sony DCR-VX1000 | Operation Manual - Page 73
!ª @™ @º @¡ @£ @¢ @∞ @§ !ª Accessory shoe @º Display window (p. 81) @¡ EJECT switch (p. 9) @™ Zoom button (p. 12) @£ REC LEVEL (recording level) button (p. 46) @¢ WHT BAL (white balance) button (p. 43) @∞ SHUTTER SPEED button (p. 40) @§ - Sony DCR-VX1000 | Operation Manual - Page 74
Identifying the Parts @¶ @• #£ @ª #¢ #º #∞ #¡ #§ #¶ #™ #• #ª @¶ Carrying handle @• Microphone @ª Camera recording lamp #º Remote sensor (p. #¢ Tape transport buttons (p. 16) - Sony DCR-VX1000 | Operation Manual - Page 75
The l control jack is used for controlling the tape transport of video equipment and peripherals connected to it. This jack has the same function as the jack indicated as CONTROL L or REMOTE. $£ 2 (headphones) jack (p. 16) $¢ PEAK lamp $∞ MIC (PLUG IN POWER) jack Connect an external microphone (not - Sony DCR-VX1000 | Operation Manual - Page 76
the Parts Attaching the shoulder strap Attach the supplied shoulder strap to the hooks for the shoulder strap (!¡ and #¡ on page 72and 74). 1 2 3 Remote Commander 1 2 3 4 5 6 7 8 9 !º !¡ 1 Transmitter Point toward the remote sensor to control the camcorder after turning on the POWER - Sony DCR-VX1000 | Operation Manual - Page 77
!º Tape transport buttons (p. 16) 0REW (rewind), ·PLAY (playback), )FF (fast-forward), πSTOP, '/7 ( size AA (R6) batteries with correct polarity. (3) Put the battery cover back onto the Remote Commander. 1 2 3 To avoid damage from possible battery leakage Remove the batteries when you will not - Sony DCR-VX1000 | Operation Manual - Page 78
Parts ID, you do not need to do again. (1) Slide OPEN and open the battery cover. (2) Press MENU to display the menu in the viewfinder. (3) Press > on the Remote Commander to ID. (6) Point the Remote Commander at the camcorder and press STOP on the Remote Commander. After the beep sound, the ID - Sony DCR-VX1000 | Operation Manual - Page 79
commander modes (VTR 4 or ID) are used to distinguish this camcorder from other Sony VCRs to avoid remote control misoperation. If you use another Sony VCR at commander mode ID, we recommend you change the commander mode not erased even if you replace the lithium battery. 79 Additional Information - Sony DCR-VX1000 | Operation Manual - Page 80
Identifying the Parts In the Viewfinder 1 !º 2 !¡ 3 !™ ND ON CP STBY T 1000 !£ 4 F2 . 8 0 dB 16BIT !¢ PHOTO !∞ FADER C MEMORY !§ 5 W 6 7 48) 9 Time code (p. 11) !º Recording/battery indicator !¡ Custom presetting (p. 50) !™ Tape transport mode !£ Self-timer indicator (p. 30) - Sony DCR-VX1000 | Operation Manual - Page 81
indicators (p. 82) 4 Remaining battery indicator (p. 63) 5 Lights up while cassette is inserted 6 Remaining tape indicator 7 Audio recording level indicator (p. 46) 8 PROGRAM AE mode indicator (p. 34) 9 Lights up while displaying the date and time !º Manual - Sony DCR-VX1000 | Operation Manual - Page 82
heads may be contaminated. (p. 66) 8 Some other trouble has occurred. Eject the cassette. If it remains lit, disconnect the power source and contact your Sony dealer or local authorized facility. 9 The lithium battery is weak or the lithium battery is not installed. (p. 58) This indicator flashes - Sony DCR-VX1000 | Operation Manual - Page 83
camcorder records sound in stereo 1 in 12-bit mode only, but can play back a tape recorded in both modes. Cassette memory (p. 51) Cassette memory-mounted DV format cassette can store: - Index information such as recorded date or time, - Camera other parts of the world. An NTSC-recorded tape cannot - Sony DCR-VX1000 | Operation Manual - Page 84
tape as a serial number of hour, minute, second, and frame. As the picture and counter reading are identical, you can locate a desired scene precisely with the counter. This camcorder white subjects look white. In this camcorder, automatic adjustment, manual adjustment, w(outdoor), and e(indoor) are - Sony DCR-VX1000 | Operation Manual - Page 85
85 Additional Information - Sony DCR-VX1000 | Operation Manual - Page 86
86 - Sony DCR-VX1000 | Operation Manual - Page 87
87 Additional Information - Sony DCR-VX1000 | Operation Manual - Page 88
Index A,B AC power adaptor 6 Adjusting the sound 46 Adjusting viewfinder 11 A/V connecting cable 15 Battery pack 6 Beep sound 10 Brightness 49 C Camera recording 10 Cassette memory 51 Charging battery 6 Cleaning video heads 66 Clock set 60 Close ups 33 Color intensity 49 COMMANDER 20
-
 1
1 -
 2
2 -
 3
3 -
 4
4 -
 5
5 -
 6
6 -
 7
7 -
8
-
9
-
10
-
11
-
12
-
13
-
14
-
15
-
16
-
17
-
18
-
19
-
20
-
21
-
22
-
23
-
24
-
25
-
26
-
27
-
28
-
29
-
30
-
31
-
32
-
33
-
34
-
35
-
36
-
37
-
38
-
39
-
40
-
41
-
42
-
43
-
44
-
45
-
46
-
47
-
48
-
49
-
50
-
51
-
52
-
53
-
54
-
55
-
56
-
57
-
58
-
59
-
60
-
61
-
62
-
63
-
64
-
65
-
66
-
67
-
68
-
69
-
70
-
71
-
72
-
73
-
74
-
75
-
76
-
77
-
78
-
79
-
80
-
81
-
82
-
83
-
84
-
85
-
86
-
87
-
88
 |
 |

3-798-762-
24
(1)
1995 by Sony Corporation
DCR-VX1000
Operation Manual
Before operating the unit, please read this manual thoroughly,
and retain it for future reference.
Owner’s Record
The model and serial numbers are located on the bottom.
Record the
serial number in the space provided below.
Refer to these numbers
whenever you call upon your Sony dealer regarding this product.
Model No.
DCR-VX1000
Model No.
AC-V615
Serial No.
Serial No.
Digital Video
Camera
Recorder