Sony DCRHC38 Operating Guide
Sony DCRHC38 - Handycam DCR HC38 Camcorder Manual
 |
UPC - 027242701809
View all Sony DCRHC38 manuals
Add to My Manuals
Save this manual to your list of manuals |
Sony DCRHC38 manual content summary:
- Sony DCRHC38 | Operating Guide - Page 1
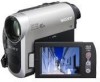
Digital Video Camera Recorder Operating Guide DCR-HC38 Getting Started 10 Recording/ Playback 17 Using the Menu 27 Dubbing/Editing 42 Using a Computer 46 Troubleshooting 50 Additional Information 57 Quick Reference 67 Spanish Quick Guide/ Guía rápida en español 74 © 2007 Sony Corporation - Sony DCRHC38 | Operating Guide - Page 2
magnitude to constitute a risk of electric shock to persons. This symbol is intended to alert the user to the presence of important operating and maintenance (servicing) instructions in the literature accompanying the appliance. 2 - Sony DCRHC38 | Operating Guide - Page 3
For those sets designed to operate from battery power, or other sources, refer to the operating instructions. Polarization This set may be equipped plugs, receptacles, and the point where the cord exits from the appliance. Accessories Do not place the set on an unstable cart, stand, tripod, bracket - Sony DCRHC38 | Operating Guide - Page 4
cable system. This will prevent damage to the set due to lightning and power-line surges. Service Damage Requiring Service Unplug the set from the wall outlet and refer servicing to qualified service operating instructions. Adjust only those controls that are specified in the operating instructions. - Sony DCRHC38 | Operating Guide - Page 5
manual thoroughly, and retain it for future reference. CAUTION Replace the battery with the specified type only. Otherwise, fire or injury may result. For customers in the U.S.A. and CANADA RECYCLING LITHIUM-ION BATTERIES Lithium-Ion batteries SONY Model No.: DCR-HC38 Responsible Party: Sony - Sony DCRHC38 | Operating Guide - Page 6
Sony dealer regarding this product. Model No. DCR-HC38 manuals - "Operating Guide" (This manual) - "First Step Guide" for connecting the camcorder to a computer and using the supplied software (stored on the supplied CD-ROM) Type of cassette you can use in your camcorder • You can use mini DV - Sony DCRHC38 | Operating Guide - Page 7
the picture and sound are recorded without any problems. • Compensation for the contents of recordings cannot accessories are subject to change without notice. About the Carl Zeiss lens Your camcorder is equipped with a Carl Zeiss lens, which was developed jointly by Carl Zeiss, in Germany, and Sony - Sony DCRHC38 | Operating Guide - Page 8
Dubbing to VCR or DVD/HDD recorders 42 Recording pictures from a TV or VCR, etc 44 Using a Computer What you can do with Windows computer 46 Installing the "First Step Guide" and software 47 Viewing "First Step Guide 49 Troubleshooting Troubleshooting 50 Warning indicators and messages 55 8 - Sony DCRHC38 | Operating Guide - Page 9
abroad ...... 57 Maintenance and precautions ...... 58 Usable cassette tapes 58 About the "InfoLITHIUM" battery pack 59 About i.LINK 60 On using your camcorder 61 Specifications 64 Quick Reference Identifying parts and controls ........ 67 Indicators displayed during recording/playback - Sony DCRHC38 | Operating Guide - Page 10
camcorder. The number in the parentheses indicates the number of that item supplied. AC Adaptor (1) (p. 11) Power cord (1) (p. 11) A/V connecting cable (1) (p. 26, 42) Rechargeable battery pack NP-FH30 (1) (p. 11, 59) CD-ROM "Handycam Application Software" (1) (p. 46) Operating Guide (This manual - Sony DCRHC38 | Operating Guide - Page 11
pack (H series) (p. 59) after attaching it to your camcorder. b Notes • You cannot attach any "InfoLITHIUM" battery pack other than the H series to your camcorder. 1 Align the terminals of the battery pack and your camcorder 1, then attach the battery pack and click it into place 2. 2 Slide the - Sony DCRHC38 | Operating Guide - Page 12
use an outside power source You can operate your camcorder using the power from the wall outlet by making the same connections as you do when charging the battery pack. The battery pack will not lose its charge in this case. To remove the battery pack 1 Turn off the power, then press PUSH. 2 Remove - Sony DCRHC38 | Operating Guide - Page 13
, such as between a wall and furniture. • Do not short-circuit the DC plug of the AC Adaptor or battery terminal with any metallic objects. This may cause a malfunction. • Even if your camcorder is turned off, AC power (house current) is still supplied to it while connected to the wall outlet via - Sony DCRHC38 | Operating Guide - Page 14
camcorder for about 3 months, the built-in rechargeable battery battery power ([A.SHUT OFF], p. 41). z Tips • The date and time are not displayed while recording, but they are automatically recorded on the tape, and can be displayed during playback (see page 32 for [DATA CODE] (During Easy Handycam - Sony DCRHC38 | Operating Guide - Page 15
viewfinder You can view pictures using the viewfinder to avoid wearing down the battery, or when the picture seen on the LCD screen is poor. Viewfinder the lens cover. The LCD panel Open the LCD panel 90 degrees to the camcorder (1), then rotate it to the best angle to record or play (2). 180 degrees - Sony DCRHC38 | Operating Guide - Page 16
a Cassette You can use mini DV (p. 58). cassettes only 1 Slide and hold the OPEN/ EJECT lever in the direction of the arrow and open the lid. OPEN/EJECT lever Lid The cassette compartment automatically comes out and opens up. 2 Insert a cassette with its window facing outwards, then press - Sony DCRHC38 | Operating Guide - Page 17
Recording/Playback Easy Recording/Playback (Easy Handycam) With this Easy Handycam operation, most of the camera settings are To stop recording, press REC START/ STOP again. 60min REC 0:00:00 A GUIDE FN * During Easy Handycam operation, you can only record in the SP mode. Continued , 17 - Sony DCRHC38 | Operating Guide - Page 18
it while pressing the green button. Touch , then touch to start playback. A D B C A GUIDE (p. 23) B Stop C Play/Pause toggles as you touch it D Rewind/Fast forward x To cancel Easy Handycam operation Press EASY C again. disappears from the screen D. x Adjustable menu settings during Easy - Sony DCRHC38 | Operating Guide - Page 19
Recording/Playback Recording Open the lens cover (p. 15). POWER switch REC START/ STOP A REC START/STOP B Slide the POWER switch in the direction of the arrow repeatedly to turn on the CAMERA lamp. If the POWER switch is set to OFF(CHG), slide it while pressing the green button. Press REC START/ - Sony DCRHC38 | Operating Guide - Page 20
with the zoom buttons on the LCD frame. • The minimum possible distance between camcorder and subject while maintaining sharp focus is about 1 cm (about 13/32 in.) the conversion lens (optional) if it is attached. • Adjust the focus manually ([FOCUS], p. 28) when it is hard to focus automatically. • - Sony DCRHC38 | Operating Guide - Page 21
LIGHT to display .. To cancel the back light function, press BACK LIGHT again. Recording in mirror mode Open the LCD panel 90 degrees to the camcorder (1), then rotate it 180 degrees to the lens side (2). z Tips • A mirror-image of the subject appears on the LCD screen, but the image will be - Sony DCRHC38 | Operating Guide - Page 22
Playback Slide the POWER switch in the direction of the arrow repeatedly to turn on the PLAY/EDIT lamp. If the POWER switch is set to OFF(CHG), slide it while pressing the green button. Start playing back. Touch to rewind the tape to the desired point, then touch Play/Pause* toggles as you touch it - Sony DCRHC38 | Operating Guide - Page 23
) You can easily select the desired setting screens by using the guide functions (USAGE GUIDE). Your camcorder has 2 guide functions as shown below. SHOOT GUIDE: DISP GUIDE: Takes you to the setting screens related to recording. Enables you to check the meaning of each indicator that appears - Sony DCRHC38 | Operating Guide - Page 24
SPOT FOCUS SPOT DISP FOCUS METER GUIDE MENU SCENE END EXPO- SEL. about 5 seconds, and the camcorder enters the standby mode at the point is set to PLAY/EDIT. Searching manually (EDIT SEARCH) You can search recording to start. Reviewing the most recently recorded scenes (Rec review) You can view - Sony DCRHC38 | Operating Guide - Page 25
3 Select [EDITSEARCH] with / , then touch [EXEC]. 4 Select [ON] with / , then touch [EXEC] t . 60min STBY 0:00:00 EDIT GUIDE FN 5 Touch . The last few seconds of the most recently recorded scene are played back. Then, your camcorder is set to standby. Recording/Playback 25 - Sony DCRHC38 | Operating Guide - Page 26
jack of a TV or a VCR using the A/V connecting cable (1) or the A/V connecting cable with S VIDEO (2). Connect your camcorder to the wall outlet using the supplied AC Adaptor for this operation (p. 11). Refer also to the instruction manuals supplied with the devices to be connected. Device without - Sony DCRHC38 | Operating Guide - Page 27
settings, touch (close) to hide the menu screen. Each touch of [ RET.] takes you to the previous screen. x To use menu items during Easy Handycam operation 1 Touch . 2 Select the desired button. 3 Change your item setting. After finishing the settings, touch (close). b Notes • Cancel Easy - Sony DCRHC38 | Operating Guide - Page 28
The available functions during Easy Handycam operation are marked with "*". FOCUS] is automatically set to [MANUAL]. FOCUS You can adjust the focus manually. You can select this function b Notes • The minimum possible distance between camcorder and subject while maintaining sharp focus is about 1 - Sony DCRHC38 | Operating Guide - Page 29
If you set [SPOT METER], [EXPOSURE] is automatically set to [MANUAL]. DISP GUIDE (Display Guide)* See page 71. MENU See page 35. SCENE SEL. You clearly. This setting also prevents your camcorder from focusing on glass or metal mesh in windows between the camcorder and the subject. PORTRAIT (Soft - Sony DCRHC38 | Operating Guide - Page 30
. Adjust the brightness when the subject is too bright or too dark. 60min STBY 0:00:00 OK AUTO EXPOSURE 1 MANU- AL 2 1 Touch [MANUAL]. appears. 2 Adjust the exposure by touching / . To return the setting to automatic exposure, touch [AUTO]. [PAGE2] FADER You can add the following effects - Sony DCRHC38 | Operating Guide - Page 31
not be set. • When [ONE PUSH] was selected, if keeps flashing after touching , set [WHT BAL] to [AUTO]. z Tips • If you have changed the battery pack while [AUTO] was selected, or taken your camcorder outdoors after inside use with the [EXPOSURE] set (or vice versa), select [AUTO] and aim your - Sony DCRHC38 | Operating Guide - Page 32
Volume) See page 22. END SCH (END SEARCH) See page 24. DISP GUIDE (Display Guide)* See page 71. [PAGE2] DATA CODE* During playback, displays information ( picture without setting the clock and [--:--:--] will appear. • During Easy Handycam operation, you can set [DATE/TIME] only. BEEP* See page 31 - Sony DCRHC38 | Operating Guide - Page 33
malfunction. **Pictures output from the DV Interface (i.LINK) cannot be camcorder is connected via an i.LINK cable. - When the tape has been recorded in 4CH MIC mode on other camcorders camcorders (including other DCR-HC38 camcorders). Recording sound Insert a recorded cassette into your camcorder - Sony DCRHC38 | Operating Guide - Page 34
Operation button items (Continued) To check the recorded sound 1 Play back the tape on which you have recorded audio (p. 22). 2 Touch t [PAGE1] t [MENU]. 3 Select (VCR SET), then touch / to select [AUDIO MIX], then touch [EXEC]. VCR SET AUDIO MIX ST1 ST2 EXEC RET. 4 Touch / to - Sony DCRHC38 | Operating Guide - Page 35
• During Easy Handycam operation, the following settings are automatically applied (p. 17). CAMERA PLAY/EDIT Easy Handycam MANUAL SET menu (p. z SP AUDIO MODE z - 12BIT REMAIN z z AUTO SETUP MENU menu (p. 40) USB STREAM z z OFF LANGUAGE z z z DEMO MODE z - ON OTHERS menu (p. - Sony DCRHC38 | Operating Guide - Page 36
MANUAL SET menu - P EFFECT The default setting is marked with B. The indicators Not available during playback. b Notes • Effects added to the playback pictures are not output via the DV Interface (i.LINK). Only the original pictures can be output. • You cannot add effects to externally input - Sony DCRHC38 | Operating Guide - Page 37
picture in a ratio suitable for the screen on which it will be displayed. Refer also to the operating instructions supplied with your TV for details. * Picture appears in full screen mode when the wide-screen TV switches , and enables the EDIT SEARCH function and Rec review (p. 24). Continued , 37 - Sony DCRHC38 | Operating Guide - Page 38
CAMERA SET menu (Continued) N.S.LIGHT (NightShot Light) When using the NightShot plus (p. 20) function to record, you can record clearer pictures by setting [N.S.LIGHT], which emits infrared light (invisible), to [ON] (the default setting). b Notes • Do not cover the infrared port with your fingers - Sony DCRHC38 | Operating Guide - Page 39
NORMAL Standard brightness. BRIGHT Brightens the LCD screen. b Notes • When you connect your camcorder to outside power sources, [BRIGHT] is automatically selected for the setting. • When you select [BRIGHT], battery life is slightly reduced during recording. LCD COLOR You can adjust the color on - Sony DCRHC38 | Operating Guide - Page 40
/LANGUAGE, etc. See page 27 for details on selecting menu items. USB STREAM You can view the pictures displayed on the screen of your camcorder on your computer (USB Streaming) via the USB cable. See "First Step Guide" in the supplied CDROM for details (p. 49). LANGUAGE You can select the language - Sony DCRHC38 | Operating Guide - Page 41
menu - WORLD TIME, etc. The default settings are marked with B. See page 27 for details on selecting menu items. WORLD TIME When using your camcorder abroad, you can set the time difference by touching / , the clock will be adjusted in accordance with the time difference. If you set the - Sony DCRHC38 | Operating Guide - Page 42
cable (3). Connect your camcorder to the wall outlet using the supplied AC Adaptor for this operation (p. 11). Refer also to the instruction manuals supplied with the devices to be connected. Device without an S VIDEO jack Device with an S VIDEO jack (Black) 1 A/V OUT jack A/V OUT DV (Yellow - Sony DCRHC38 | Operating Guide - Page 43
with S VIDEO (optional) 2 or an i.LINK cable (optional) 3. Connect your camcorder to the input jacks of the recording device. 4 Start playback on the camcorder, and recording on the recording device. Refer to the operating instructions supplied with your recording device for details. 5 When dubbing - Sony DCRHC38 | Operating Guide - Page 44
to a TV, VCR or an i.LINK-compatible device using the i.LINK cable (optional). Connect your camcorder to the wall outlet using the supplied AC Adaptor for this operation (p. 11). Refer also to the instruction manuals supplied with the devices to be connected. b Notes • You cannot record pictures - Sony DCRHC38 | Operating Guide - Page 45
at the point you want to start recording. 7 Stop recording. Touch (Stop) or [REC PAUSE]. 8 Touch [ RET.] t . b Notes • The indicator appears when you connect your camcorder and other devices via an i.LINK cable. (This indicator may also appear on the connected device.) Dubbing/Editing 45 - Sony DCRHC38 | Operating Guide - Page 46
The "First Step Guide" is an instruction manual you can refer to on your computer. This describes basic operations, from initial hookup of your camcorder and computer and making settings, to general operation the first time you use the software "Picture Motion Browser" stored on the CD-ROM (supplied - Sony DCRHC38 | Operating Guide - Page 47
color) Others: USB port (This must be provided as standard), DV Interface (IEEE1394, i.LINK) (to connect via an i.LINK cable), disc drive (You need a CD-ROM drive to Guide" and software You need to install the "First Step Guide" and software to your Windows computer before connecting your camcorder - Sony DCRHC38 | Operating Guide - Page 48
desktop. 7 Remove the CD-ROM from the disc drive of your computer. After you install the software, a shortcut icon for the customers registration website is created on the desktop. • Once you register on the website, you can get secure and useful customer support. http://www.sony.net/registration/di - Sony DCRHC38 | Operating Guide - Page 49
You can also start by selecting [Start] t [Programs] ([All Programs] for Windows XP) t [Sony Picture Utility] t [FirstStepGuide] t Your camcorder's folder t "First Step Guide" in HTML. • To view "First Step Guide" in HTML without installing, copy the desired language folder from the [FirstStepGuide - Sony DCRHC38 | Operating Guide - Page 50
If you run into any problems using your camcorder, use the following table to troubleshoot the problem. If the problem persists, disconnect the power source and contact your Sony dealer. • Overall operations/Easy Handycam ..... 50 • Batteries/Power sources 50 • LCD screen/viewfinder 51 - Sony DCRHC38 | Operating Guide - Page 51
(p. 12). The CHG (charge) lamp flashes while the battery pack is being charged. • Attach the battery pack to the camcorder correctly (p. 11). If the problem persists, disconnect the AC Adaptor from the wall outlet and contact your Sony dealer. The battery pack may be worn-out. The remaining - Sony DCRHC38 | Operating Guide - Page 52
Troubleshooting (Continued) The Cassette Memory indicator or title display does not appear while using a cassette with Cassette Memory. • This camcorder does not support compared with battery operation) MANUAL] of [EXPOSURE] - [SPOT METER] • The BACK LIGHT function does not work during Easy Handycam - Sony DCRHC38 | Operating Guide - Page 53
Your camcorder is not compatible with 4ch microphone recording. Dubbing/Editing/Connecting to other devices Time code and other information appear on the display of the connected device. • Set [DISP OUT] to [LCD] while connected with an A/V connecting cable (p. 41). Continued , 53 Troubleshooting - Sony DCRHC38 | Operating Guide - Page 54
the (USB) jack on the computer. • Disconnect the cable from the computer and camcorder, restart the computer, then connect them again correctly. You cannot install the supplied software, "Picture Motion Browser," on a Macintosh computer. • You can install "Picture Motion Browser" only on a Windows - Sony DCRHC38 | Operating Guide - Page 55
the cassette. Press RESET (p. 68), and operate your camcorder again. E:61:ss / E:62:ss • Contact your Sony dealer or local authorized Sony service facility. Inform them of the 5-digit code, which starts from "E." E (Battery level warning) • The battery pack is nearly used up. • Depending on the - Sony DCRHC38 | Operating Guide - Page 56
Warning indicators and messages (Continued) Examples of warning messages If messages appear on the screen, follow the instructions. %Z Moisture condensation. Eject the cassette (p. 61) % Moisture condensation. Turn off for 1H. (p. 61) Z Reinsert the cassette. (p. 16) • Check if the cassette is - Sony DCRHC38 | Operating Guide - Page 57
any country/region using the AC Adaptor supplied with your camcorder within the AC 100 V to 240 V, 50/60 menu, then set the time difference (p. 41). AC-L200/L200B [a] [b] On TV color systems Your camcorder is NTSC system, so its picture can only be viewed on a NTSC system TV with an AUDIO/VIDEO - Sony DCRHC38 | Operating Guide - Page 58
cassette tapes You can use mini DV format cassettes only. Use a cassette with the mark. Your camcorder is not compatible with the your camcorder. x When you record You cannot record software on your camcorder that contains copyright control signals for copyright protection of software. [Cannot - Sony DCRHC38 | Operating Guide - Page 59
pack while the AC Adaptor is connected to your camcorder, after charging is complete, disconnect the cable from the DC IN jack on your camcorder or remove the battery pack. To use the battery pack effectively • Battery pack performance decreases when the surrounding temperature is 10 °C (50 °F) or - Sony DCRHC38 | Operating Guide - Page 60
can be connected using an i.LINK cable. Possible applications are operations and data transactions DV device or not. For details on precautions and compatible application software, refer also to the operating instructions for the device to be connected. b Notes • When connecting your camcorder - Sony DCRHC38 | Operating Guide - Page 61
cable Use the Sony i.LINK 4-pin-to-4-pin cable (during DV dubbing). On using your camcorder On use and care • Do not use or store the camcorder and accessories contacts clean. • If the battery electrolytic liquid has leaked, - consult your local authorized Sony service facility. - wash off any - Sony DCRHC38 | Operating Guide - Page 62
the following problem occurs, clean the video heads for 10 seconds with the Sony DVM12CLD cleaning Sony dealer or local authorized Sony service facility to have the video heads replaced. LCD screen • Do not exert excessive pressure on the LCD screen, as it may cause damage. • If your camcorder - Sony DCRHC38 | Operating Guide - Page 63
location subject to little dirt or dust. • To prevent mold, periodically clean the lens as described above. It is recommended that you operate your camcorder about once a month to keep it in optimum state for a long time. To remove dust from inside the viewfinder 1 Pull out the viewfinder. 2 While - Sony DCRHC38 | Operating Guide - Page 64
block. On charging the pre-installed rechargeable battery Your camcorder has a pre-installed rechargeable battery to retain the date, time, and Fs 48 kHz, stereo) Video signal NTSC color, EIA standards Usable cassette Mini DV cassette with the mark printed Tape speed SP: Approx. 18.81 mm/s - Sony DCRHC38 | Operating Guide - Page 65
USB jack mini-B DV input/output i.LINK Interface (IEEE1394, 4-pin connector S100) LCD screen Picture 6.2 cm (2.5 type) Total dot number 123 200 (560 × 220) General Power requirements DC 6.8 V/7.2 V (battery the NP-FH30 rechargeable battery pack and DVM60 cassette. Supplied accessories See page 10. AC - Sony DCRHC38 | Operating Guide - Page 66
Specifications (Continued) Rechargeable battery pack (NP-FH30) Handycam" and are registered trademarks of Sony Corporation. • "InfoLITHIUM" is a trademark of Sony Corporation. • i.LINK and are trademarks of Sony Corporation. • is a trademark. • Microsoft, Windows, and Windows manual. 66 - Sony DCRHC38 | Operating Guide - Page 67
Quick Reference Identifying parts and controls The numbers in ( ) are reference pages. A NIGHTSHOT PLUS switch (20) B Power zoom lever (20) C OPEN/EJECT lever (16) D Hooks for a shoulder belt Attach a shoulder belt (optional). E Grip belt (15) F Lens (Carl Zeiss Lens) (7) G LENS COVER switch (15) H - Sony DCRHC38 | Operating Guide - Page 68
(20) F REC START/STOP button (17, 19) G Speaker Playback sounds comes out from the speaker. For how to adjust the volume, see page 22. H BATT (battery release) PUSH button (12) I CHG (charge) lamp (11) J (USB) jack K BACK LIGHT button (21) 68 - Sony DCRHC38 | Operating Guide - Page 69
Quick Reference A POWER switch (14) B Viewfinder (15) C Eyecup (63) D Viewfinder lens adjustment lever (15) E DV interface (42, 44) F DC IN jack (11) G A/V OUT jack (26, 42) H CAMERA, PLAY/EDIT lamp (14) I REC START/STOP button (17, 19) J Tripod receptacle Attach - Sony DCRHC38 | Operating Guide - Page 70
76 A Remaining battery (approx.) B GUIDE FN Bottom Upper left Indicator Center Meaning AUDIO MODE (40) Upper right Indicator Meaning DV input (44) Center Indicator % Z Meaning NightShot plus (20) Warning (55) Bottom Indicator 9 . Meaning Flexible spot meter (29)/ Manual exposure (30) Manual - Sony DCRHC38 | Operating Guide - Page 71
SEL. (29) z Tips • You can also operate by touching t [DISP GUIDE]. n / EDIT + Picture effect (36) White balance (31) Wide select ( meaning of each indicator that appears on the LCD screen. 1 Touch [GUIDE] t [DISP GUIDE]. Quick Reference 2 Touch the area including the indicator that you want - Sony DCRHC38 | Operating Guide - Page 72
E Easy Handycam 17, 27 EDITSEARCH 24, 37 END SCH (END SEARCH 24, 52 EXPOSURE 30 F FADER 30 First Step Guide 46, 49 Flexible spot meter 29 FOCUS 28, 52 Frame-by-frame Playback.... 33 G Getting started 10 I INDOOR 31 "InfoLITHIUM" battery pack 59 Install 47 i.LINK 60 i.LINK cable 42, 44 - Sony DCRHC38 | Operating Guide - Page 73
Recording time 13 REMAIN 40 Reversal Playback 32 S S VIDEO cable 26, 42 SCENE SEL 29 Searching for the starting point 24 SEPIA Time code 70 Tripod 69 TV 26 TV color systems 57 TWILIGHT 29 U USAGE GUIDE 23 USB STREAM 40 Using abroad 57 V V SPD PLAY (Various speed playback) .....32 73 - Sony DCRHC38 | Operating Guide - Page 74
contiene los siguientes elementos. El número entre paréntesis indica la cantidad del elemento. Adaptador de alimentación de ca (1) Cable de alimentación (1) Cable de conexión A/V (1) Batería recargable NP-FH30 (1) CD-ROM "Handycam Application Software" (1) Guía de operaciones (Este manual) (1) 74 - Sony DCRHC38 | Operating Guide - Page 75
Paso 2: Carga de la batería Spanish Quick Guide/Guía rápida en español 1 2 2 3 1 Batería Con la marca v hacia abajo Toma de entrada de cc 4 Al tomacorriente de pared Interruptor POWER Adaptador de alimentación de ca Cable de alimentación Para cargar la batería "InfoLITHIUM" (serie H), con - Sony DCRHC38 | Operating Guide - Page 76
ver la información sobre la batería durante 20 s (segundo) presionando nuevamente DISP/ BATT INFO mientras se visualiza la información. Batería restante (aprox.) BATTERY INFO NIVEL CARGA BATERÍA 0% 50% 100% TIEMPO GRAB DISPON PANT. LCD : 85 min VISOR : 99 min Capacidad de grabación (aprox - Sony DCRHC38 | Operating Guide - Page 77
de entrada de cc de la videocámara, la batería no suministrará alimentación, incluso si el cable de alimentación está desconectado del tomacorriente de pared. Acerca del tiempo de carga/grabación/ reproducción tomacorriente de inmediato. Continuación , 77 Spanish Quick Guide/Guía rápida en español - Sony DCRHC38 | Operating Guide - Page 78
Paso 2: Carga de la batería (Continuación) • No utilice el adaptador de alimentación de ca colocado en un espacio angosto, tal como entre una pared y los muebles. • Evite la formación de cortocircuitos en la clavija de cc del adaptador de alimentación de ca o en el terminal de la batería con objetos - Sony DCRHC38 | Operating Guide - Page 79
Spanish Quick Guide/Guía rápida en español 3 Ajuste [M] (mes), luego toque y repita el procedimiento para [D] (día), y pueden visualizarse durante la reproducción ([CÓD. DATOS] (Durante el funcionamiento de Easy Handycam, sólo puede ajustar [FECHA HORA])). • Si los botones del panel sensible al - Sony DCRHC38 | Operating Guide - Page 80
Paso 4: Ajustes antes de grabar Apertura de la tapa del objetivo Deslice el interruptor LENS COVER a OPEN. El visor Puede ver imágenes utilizando el visor para evitar el desgaste de la batería o cuando la imagen en la pantalla LCD es mala. Visor Después de grabar, ajuste el interruptor LENS COVER - Sony DCRHC38 | Operating Guide - Page 81
5: Inserción de un videocasete Solamente puede utilizar videocasetes mini DV . 1 Deslice y sostenga la palanca OPEN/EJECT en disponible para grabación varía en función del [MOD GRB]. Spanish Quick Guide/Guía rápida en español Compartimiento del videocasete El compartimiento del videocasete se - Sony DCRHC38 | Operating Guide - Page 82
Grabación Abra la tapa del objetivo. Interruptor POWER REC START/ STOP A REC START/STOP B Deslice el interruptor POWER varias veces en el sentido de la flecha para que se encienda el indicador CAMERA. Si el interruptor POWER está en la posición OFF(CHG), deslícelo mientras presiona el botón verde. - Sony DCRHC38 | Operating Guide - Page 83
Spanish Quick Guide/Guía rápida en español Reproducción Deslice el interruptor POWER en el sentido de la flecha varias veces para encender el indicador PLAY/EDIT. Si - Sony DCRHC38 | Operating Guide - Page 84
US Additional information on this product and answers to frequently asked questions can be found at our Customer Support Website. http://www.sony.net/ Printed in Japan
-
 1
1 -
 2
2 -
 3
3 -
 4
4 -
 5
5 -
 6
6 -
 7
7 -
8
-
9
-
10
-
11
-
12
-
13
-
14
-
15
-
16
-
17
-
18
-
19
-
20
-
21
-
22
-
23
-
24
-
25
-
26
-
27
-
28
-
29
-
30
-
31
-
32
-
33
-
34
-
35
-
36
-
37
-
38
-
39
-
40
-
41
-
42
-
43
-
44
-
45
-
46
-
47
-
48
-
49
-
50
-
51
-
52
-
53
-
54
-
55
-
56
-
57
-
58
-
59
-
60
-
61
-
62
-
63
-
64
-
65
-
66
-
67
-
68
-
69
-
70
-
71
-
72
-
73
-
74
-
75
-
76
-
77
-
78
-
79
-
80
-
81
-
82
-
83
-
84
 |
 |
2-319-523-
11
(1)
© 2007 Sony Corporation
Digital Video Camera Recorder
Operating Guide
DCR-HC38
Getting Started
10
Recording/
Playback
17
Using the Menu
27
Dubbing/Editing
42
Using a Computer
46
Troubleshooting
50
Additional Information
57
Quick Reference
67
Spanish Quick Guide/
Guía rápida en español
74