Sony DEV5 Digital Recording Binoculars Handbook - Page 50
etc. with the A/V connecting, supplied or an A/V - dev 50
 |
View all Sony DEV5 manuals
Add to My Manuals
Save this manual to your list of manuals |
Page 50 highlights
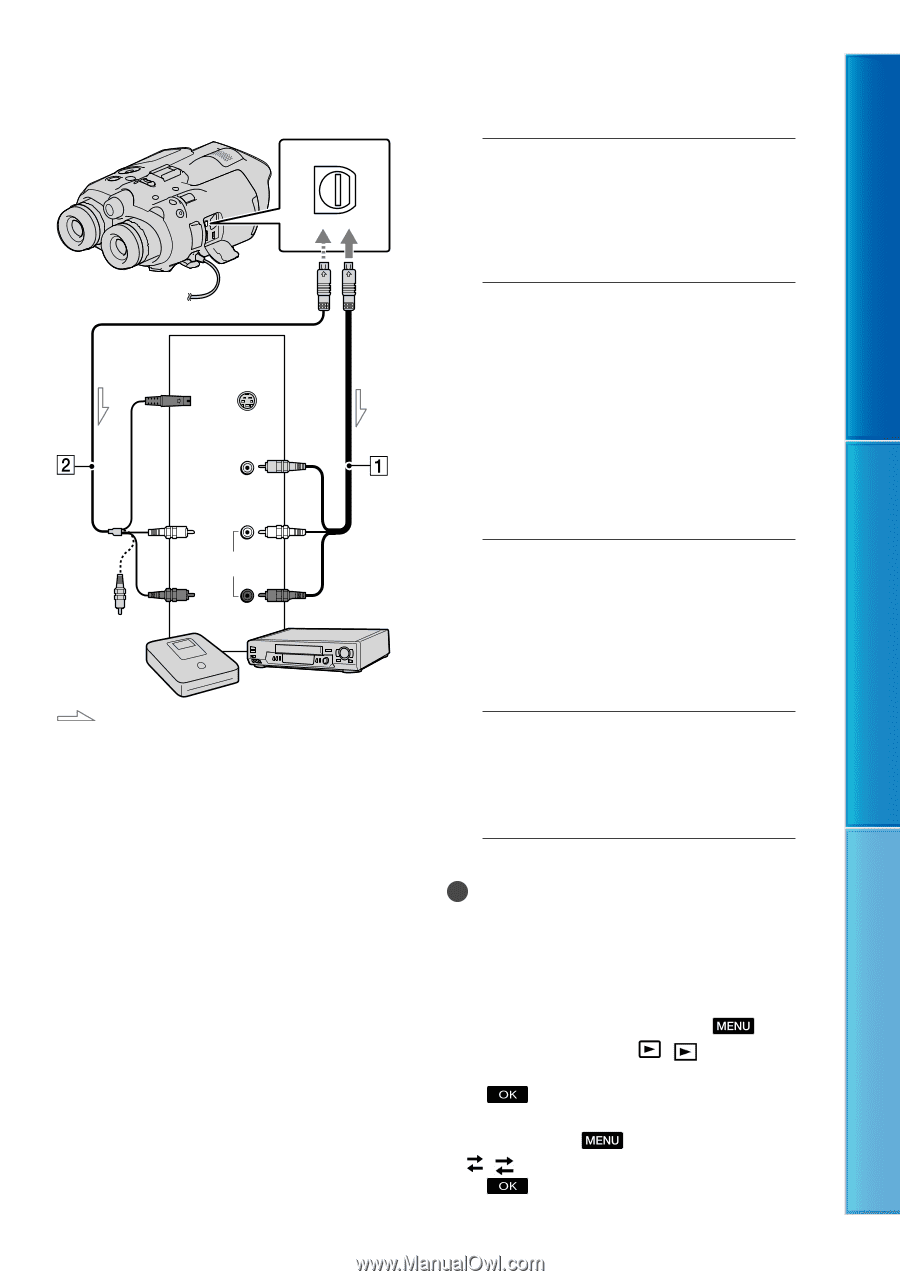
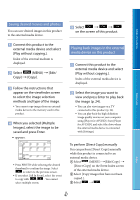
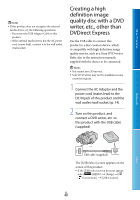
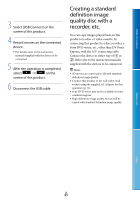
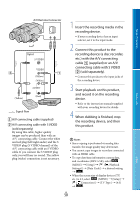
Table of Contents Menu Lists A/V Remote Connector Input S VIDEO (Yellow) VIDEO (Yellow) (White) AUDIO (Red) Signal flow A/V connecting cable (supplied) A/V connecting cable with S VIDEO (sold separately) By using this cable, higher quality images can be produced than with an A/V connecting cable. Connect the white and red plug (left/right audio) and the S VIDEO plug (S VIDEO channel) of the A/V connecting cable with an S VIDEO cable. If you connect the S VIDEO plug only, you will hear no sound. The yellow plug (video) connection is not necessary. 1 Insert the recording media in the recording device. If your recording device has an input selector, set it to the input mode. 2 Connect this product to the recording device (a disc recorder, etc.) with the A/V connecting cable (supplied) or an A/V connecting cable with S VIDEO (sold separately). Connect this product to the input jacks of the recording device. 3 Start playback on this product, and record it on the recording device. Refer to the instruction manuals supplied with your recording device for details. 4 When dubbing is finished, stop the recording device, and then this product. Notes Since copying is performed via analog data transfer, the image quality may deteriorate. You cannot copy images to recorders connected with an HDMI cable. To copy date/time information camera data, and coordinates (DEV-5/5K), select (MENU) [Setup] [ ( Playback Settings)] [Data Code] a desired setting . When the screen size of display devices (TV, etc.) is 4:3, select (MENU) [Setup] [ ( Connection)] [TV Type] [4:3] . Index GB 50
-
 1
1 -
2
-
3
-
4
-
5
-
6
-
7
-
8
-
9
-
10
-
11
-
12
-
13
-
14
-
15
-
16
-
17
-
18
-
19
-
20
-
21
-
22
-
23
-
24
-
25
-
26
-
27
-
28
-
29
-
30
-
31
-
32
-
33
-
34
-
35
-
36
-
37
-
38
-
39
-
40
-
41
-
42
-
43
-
44
-
 45
45 -
 46
46 -
 47
47 -
 48
48 -
 49
49 -
 50
50 -
 51
51 -
 52
52 -
 53
53 -
 54
54 -
 55
55 -
56
-
57
-
58
-
59
-
60
-
61
-
62
-
63
-
64
-
65
-
66
-
67
-
68
-
69
-
70
-
71
-
72
-
73
-
74
-
75
-
76
-
77
-
78
-
79
-
80
-
81
-
82
-
83
-
84
-
85
-
86
-
87
-
88
-
89
-
90
-
91
-
92
-
93
-
94
-
95
-
96
-
97
-
98
 |
 |