Sony DPP-EX50 Operating Instructions - Page 16
Remove the protective sheet., Set the print paper into the, tray., Close the paper tray cover. - supplies
 |
UPC - 027242639546
View all Sony DPP-EX50 manuals
Add to My Manuals
Save this manual to your list of manuals |
Page 16 highlights
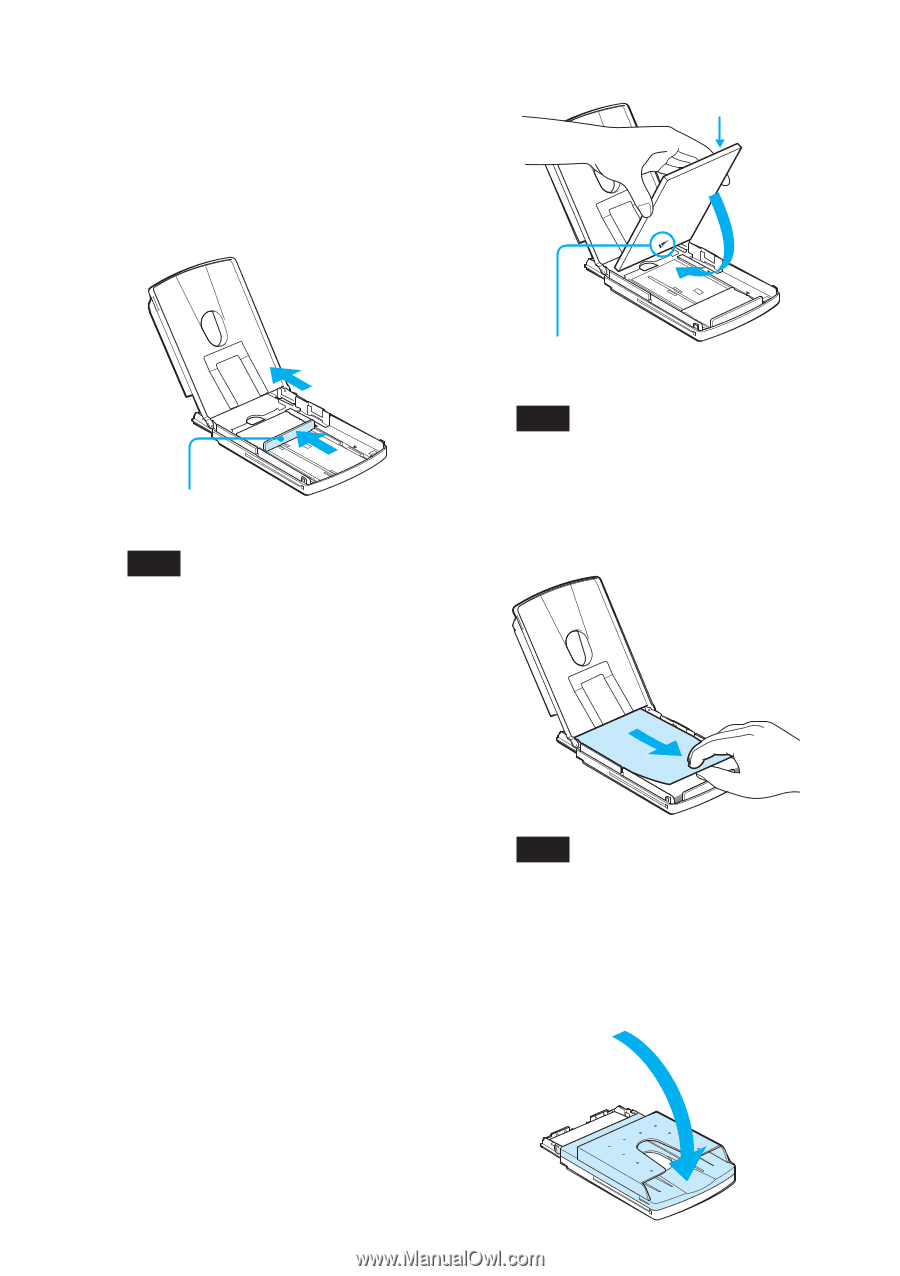
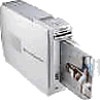
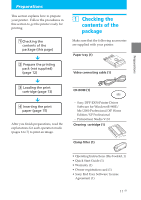
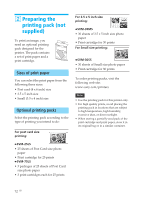
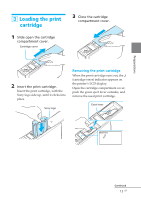
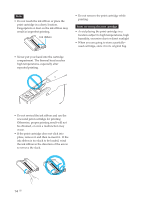
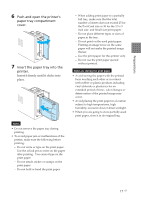
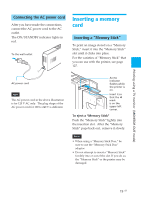
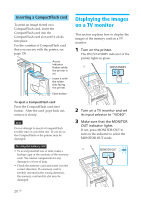
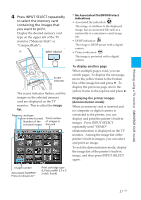
x To use Small size paper Slide the spacer toward the paper feed direction until it clicks into place at the most inside arrow marker. Printing surface Paper feed direction Spacer Note Make sure to adjust the slider to the paper size before you install the print paper. If you insert the print paper and then adjust the spacer, a trouble may occur. 3 Set the print paper into the tray. Riffle the print paper. Then insert the print paper and the protection sheet together with its printing surface (the side with no imprint) facing up and the arrow pointing to the paper feed direction. You can set up to 25 sheets for Post Card size and 30 sheets for 3.5 x 5 inch size or Small size print paper. Arrows pointing the feed direction Note Do not touch the printing surface. Fingerprints on the printing surface may result in imperfect printing. 4 Remove the protective sheet. Note You can use the protective sheet as cleaning sheet. Make sure to keep it together with the supplied cleaning cartridge. (page 124) 5 Close the paper tray cover. 16 GB
-
 1
1 -
2
-
3
-
4
-
5
-
6
-
7
-
8
-
9
-
10
-
 11
11 -
 12
12 -
 13
13 -
 14
14 -
 15
15 -
 16
16 -
 17
17 -
 18
18 -
 19
19 -
 20
20 -
 21
21 -
22
-
23
-
24
-
25
-
26
-
27
-
28
-
29
-
30
-
31
-
32
-
33
-
34
-
35
-
36
-
37
-
38
-
39
-
40
-
41
-
42
-
43
-
44
-
45
-
46
-
47
-
48
-
49
-
50
-
51
-
52
-
53
-
54
-
55
-
56
-
57
-
58
-
59
-
60
-
61
-
62
-
63
-
64
-
65
-
66
-
67
-
68
-
69
-
70
-
71
-
72
-
73
-
74
-
75
-
76
-
77
-
78
-
79
-
80
-
81
-
82
-
83
-
84
-
85
-
86
-
87
-
88
-
89
-
90
-
91
-
92
-
93
-
94
-
95
-
96
-
97
-
98
-
99
-
100
-
101
-
102
-
103
-
104
-
105
-
106
-
107
-
108
-
109
-
110
-
111
-
112
-
113
-
114
-
115
-
116
-
117
-
118
-
119
-
120
-
121
-
122
-
123
-
124
-
125
-
126
-
127
-
128
-
129
-
130
-
131
-
132
-
133
-
134
-
135
-
136
-
137
-
138
-
139
-
140
-
141
-
142
-
143
-
144
 |
 |