Sony DPP-EX50 Operating Instructions - Page 38
Items, Procedures, press ENTER.
 |
UPC - 027242639546
View all Sony DPP-EX50 manuals
Add to My Manuals
Save this manual to your list of manuals |
Page 38 highlights
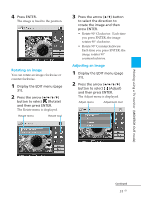
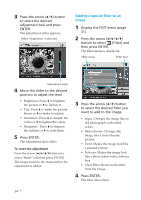
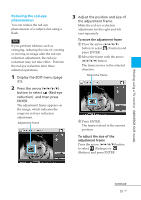
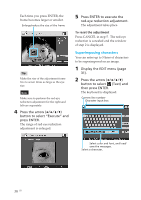
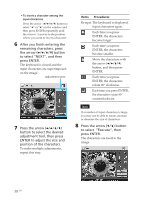
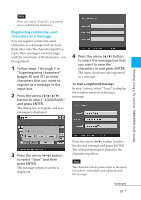
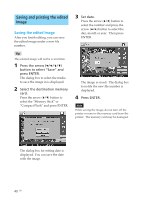
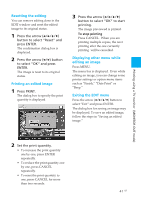
•To insert a character among the input characters Press the arrow (B/b/V/v) button to select "B" or "b" on the window and then press ENTER repeatedly until the cursor (|) moves to the position where you want to insert a character. 6 After you finish entering the remaining characters, press the arrow (B/b/V/v) button to select "NEXT", and then press ENTER. The keyboard is closed and the input characters are superimposed on the image. Adjustment tools 7 Press the arrow (B/b/V/v) button to select the desired adjustment tool, then press ENTER to adjust the size and position of the characters. To make multiple adjustments, repeat this step. Items Procedures Re-input The keyboard is displayed. Input characters again. Each time you press ENTER, the characters become larger. Each time you press ENTER, the characters become smaller. Move the characters with the arrow (B/b/V/v) button, and then press ENTER. Each time you press ENTER, the characters rotate 90° clockwise. Each time you press ENTER, the characters rotate 90° counterclockwise. Note If a number of input characters is large, you may not be able to rorate, increase or decrease the size of characters. 8 Press the arrow (v/V) button to select "Execute", then press ENTER. The characters are fixed to the image. 38 GB
-
 1
1 -
2
-
3
-
4
-
5
-
6
-
7
-
8
-
9
-
10
-
11
-
12
-
13
-
14
-
15
-
16
-
17
-
18
-
19
-
20
-
21
-
22
-
23
-
24
-
25
-
26
-
27
-
28
-
29
-
30
-
31
-
32
-
 33
33 -
 34
34 -
 35
35 -
 36
36 -
 37
37 -
 38
38 -
 39
39 -
 40
40 -
 41
41 -
 42
42 -
 43
43 -
44
-
45
-
46
-
47
-
48
-
49
-
50
-
51
-
52
-
53
-
54
-
55
-
56
-
57
-
58
-
59
-
60
-
61
-
62
-
63
-
64
-
65
-
66
-
67
-
68
-
69
-
70
-
71
-
72
-
73
-
74
-
75
-
76
-
77
-
78
-
79
-
80
-
81
-
82
-
83
-
84
-
85
-
86
-
87
-
88
-
89
-
90
-
91
-
92
-
93
-
94
-
95
-
96
-
97
-
98
-
99
-
100
-
101
-
102
-
103
-
104
-
105
-
106
-
107
-
108
-
109
-
110
-
111
-
112
-
113
-
114
-
115
-
116
-
117
-
118
-
119
-
120
-
121
-
122
-
123
-
124
-
125
-
126
-
127
-
128
-
129
-
130
-
131
-
132
-
133
-
134
-
135
-
136
-
137
-
138
-
139
-
140
-
141
-
142
-
143
-
144
 |
 |
