Sony DPP-EX50 Operating Instructions - Page 47
Adding a message, Printing using a TV monitor, MONITOR OUT mode
 |
UPC - 027242639546
View all Sony DPP-EX50 manuals
Add to My Manuals
Save this manual to your list of manuals |
Page 47 highlights
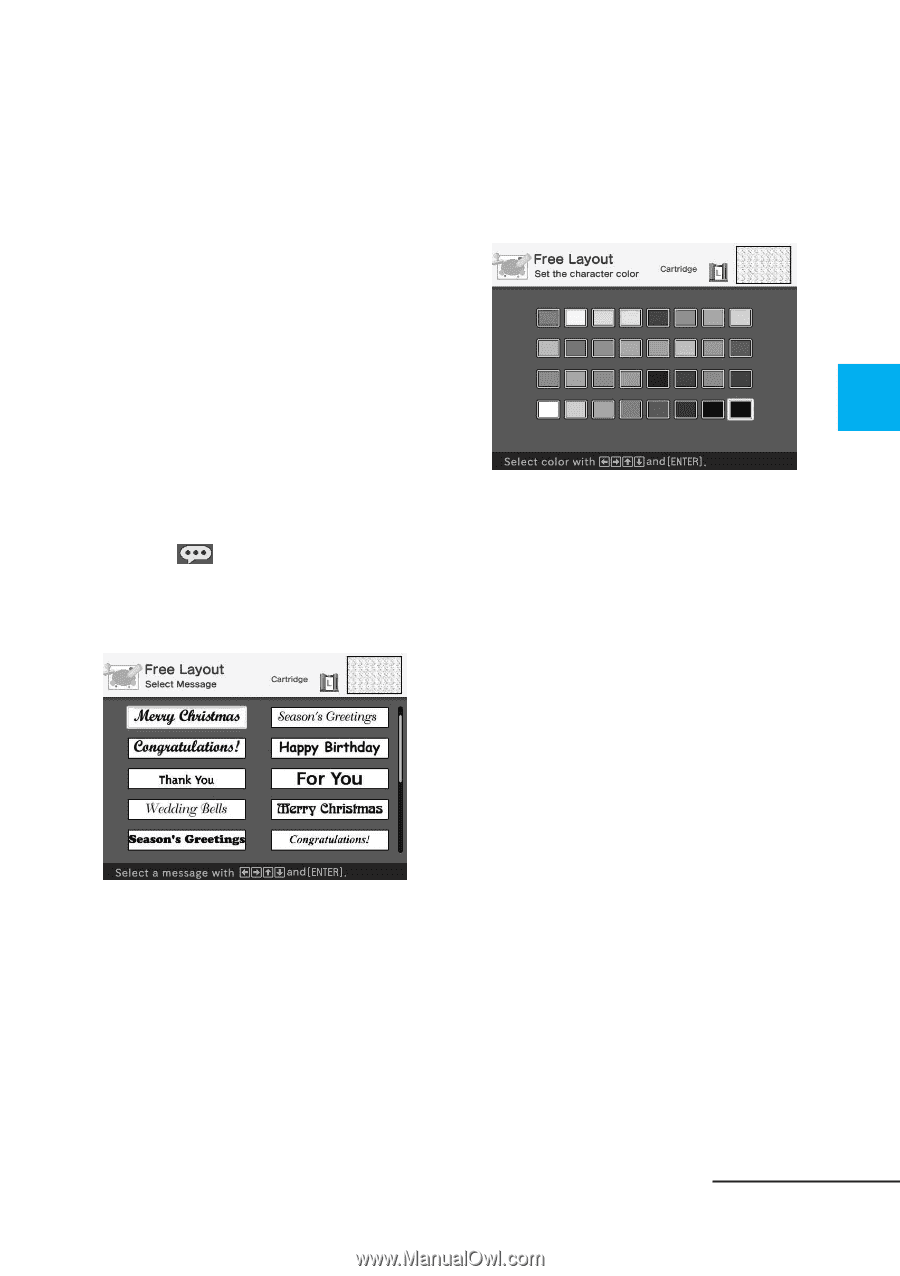
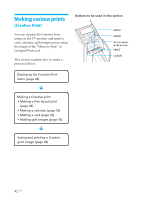
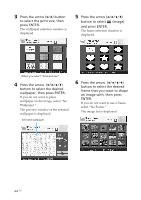
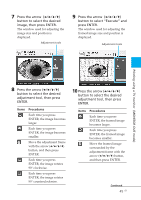
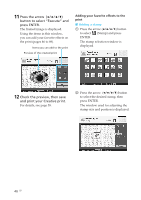
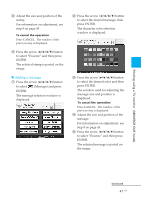
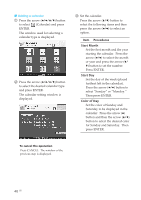
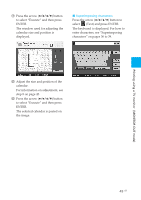
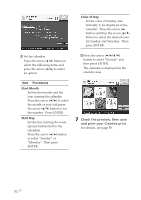
Printing using a TV monitor (MONITOR OUT mode) 3 Adjust the size and position of the stamp. For information on adjustment, see step 8 on page 45. To cancel the operation Press CANCEL. The window of the previous step is displayed. 4 Press the arrow (B/b/V/v) button to select "Execute" and then press ENTER. The selected stamp is pasted on the image. x Adding a message 1 Press the arrow (B/b/V/v) button to select (Message) and press ENTER. The message selection window is displayed. 2 Press the arrow (B/b/V/v) button to select the desired message, then press ENTER. The character color selection window is displayed. 3 Press the arrow (B/b/V/v) button to select the desired color and then press ENTER. The window used for adjusting the message size and position is displayed. To cancel the operation Press CANCEL. The window of the previous step is displayed. 4 Adjust the size and position of the message. For information on adjustment, see step 8 on page 45. 5 Press the arrow (B/b/V/v) button to select "Execute" and then press ENTER. The selected message is pasted on the image. Continued 47 GB
-
 1
1 -
2
-
3
-
4
-
5
-
6
-
7
-
8
-
9
-
10
-
11
-
12
-
13
-
14
-
15
-
16
-
17
-
18
-
19
-
20
-
21
-
22
-
23
-
24
-
25
-
26
-
27
-
28
-
29
-
30
-
31
-
32
-
33
-
34
-
35
-
36
-
37
-
38
-
39
-
40
-
41
-
 42
42 -
 43
43 -
 44
44 -
 45
45 -
 46
46 -
 47
47 -
 48
48 -
 49
49 -
 50
50 -
 51
51 -
 52
52 -
53
-
54
-
55
-
56
-
57
-
58
-
59
-
60
-
61
-
62
-
63
-
64
-
65
-
66
-
67
-
68
-
69
-
70
-
71
-
72
-
73
-
74
-
75
-
76
-
77
-
78
-
79
-
80
-
81
-
82
-
83
-
84
-
85
-
86
-
87
-
88
-
89
-
90
-
91
-
92
-
93
-
94
-
95
-
96
-
97
-
98
-
99
-
100
-
101
-
102
-
103
-
104
-
105
-
106
-
107
-
108
-
109
-
110
-
111
-
112
-
113
-
114
-
115
-
116
-
117
-
118
-
119
-
120
-
121
-
122
-
123
-
124
-
125
-
126
-
127
-
128
-
129
-
130
-
131
-
132
-
133
-
134
-
135
-
136
-
137
-
138
-
139
-
140
-
141
-
142
-
143
-
144
 |
 |