Sony DPP-EX50 Operating Instructions - Page 50
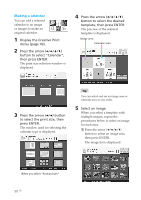
Making a calendar, Display the Creative Print
 |
UPC - 027242639546
View all Sony DPP-EX50 manuals
Add to My Manuals
Save this manual to your list of manuals |
Page 50 highlights
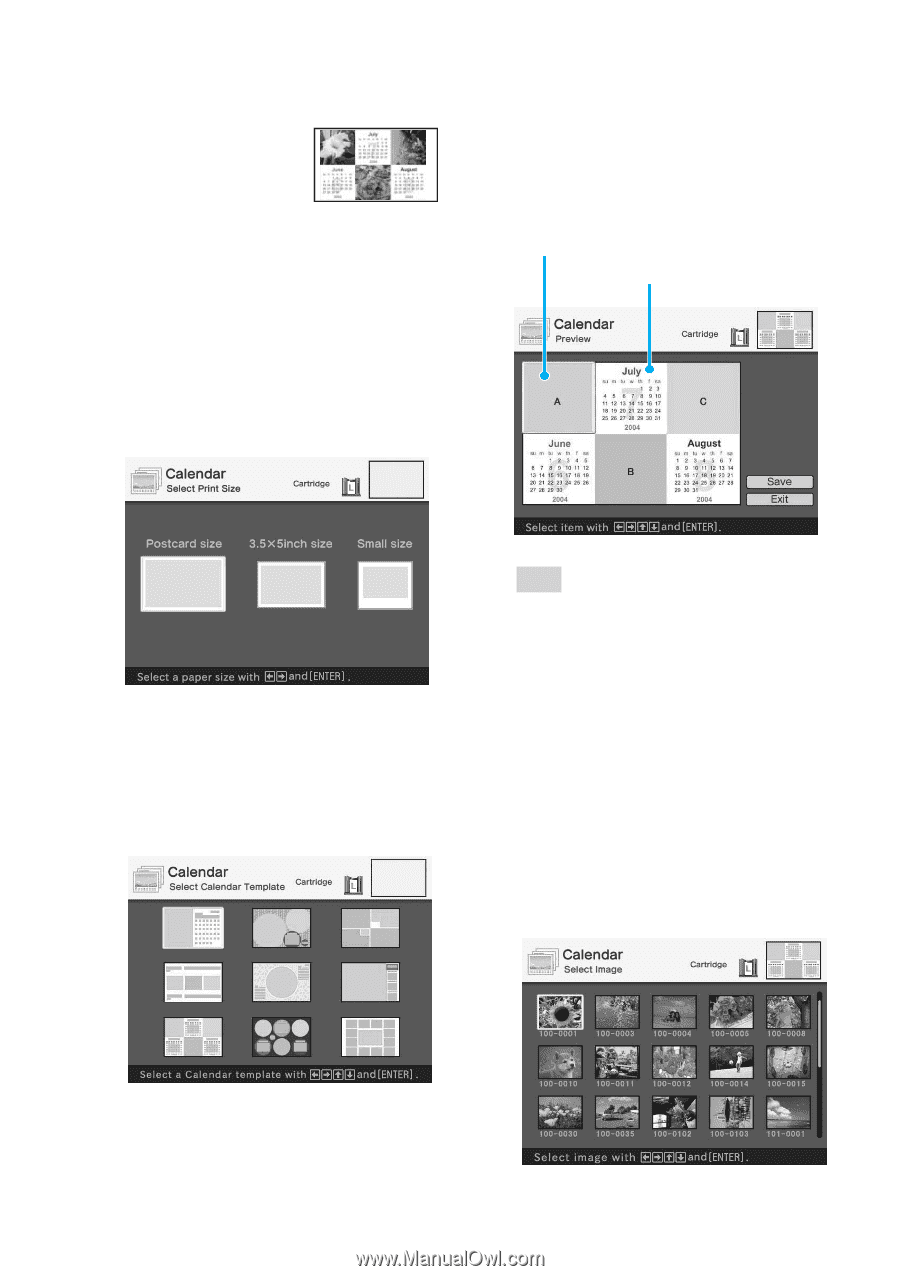
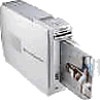
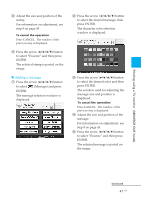
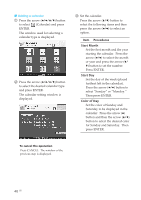
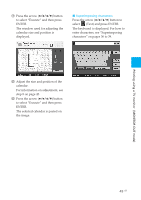
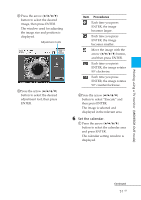
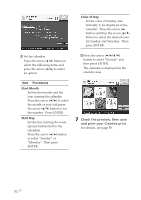
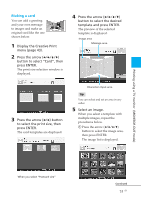
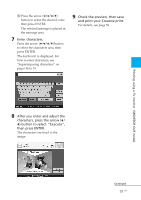
Making a calendar You can add a selected calendar to an image or images to make an original calendar. 1 Display the Creative Print menu (page 43). 2 Press the arrow (B/b/V/v) button to select "Calendar", then press ENTER. The print size selection window is displayed. 4 Press the arrow (B/b/V/v) button to select the desired template, then press ENTER. The preview of the selected template is displayed. Image area Calendar area . 3 Press the arrow (B/b) button to select the print size, then press ENTER. The window used for selecting the calendar type is displayed. Tip You can select and set an image area or calendar area in any order. 5 Select an image. When you select a template with multiple images, repeat the procedures below to select an image for each area. 1 Press the arrow (B/b/V/v) button to select an image area, then press ENTER. The image list is displayed. When you select "Postcard size" 50 GB
-
 1
1 -
2
-
3
-
4
-
5
-
6
-
7
-
8
-
9
-
10
-
11
-
12
-
13
-
14
-
15
-
16
-
17
-
18
-
19
-
20
-
21
-
22
-
23
-
24
-
25
-
26
-
27
-
28
-
29
-
30
-
31
-
32
-
33
-
34
-
35
-
36
-
37
-
38
-
39
-
40
-
41
-
42
-
43
-
44
-
 45
45 -
 46
46 -
 47
47 -
 48
48 -
 49
49 -
 50
50 -
 51
51 -
 52
52 -
 53
53 -
 54
54 -
 55
55 -
56
-
57
-
58
-
59
-
60
-
61
-
62
-
63
-
64
-
65
-
66
-
67
-
68
-
69
-
70
-
71
-
72
-
73
-
74
-
75
-
76
-
77
-
78
-
79
-
80
-
81
-
82
-
83
-
84
-
85
-
86
-
87
-
88
-
89
-
90
-
91
-
92
-
93
-
94
-
95
-
96
-
97
-
98
-
99
-
100
-
101
-
102
-
103
-
104
-
105
-
106
-
107
-
108
-
109
-
110
-
111
-
112
-
113
-
114
-
115
-
116
-
117
-
118
-
119
-
120
-
121
-
122
-
123
-
124
-
125
-
126
-
127
-
128
-
129
-
130
-
131
-
132
-
133
-
134
-
135
-
136
-
137
-
138
-
139
-
140
-
141
-
142
-
143
-
144
 |
 |