Sony DPP-EX50 Operating Instructions - Page 81
Printing from a PictBridge camera (PictBridge mode), Printing images from the digital camera
 |
UPC - 027242639546
View all Sony DPP-EX50 manuals
Add to My Manuals
Save this manual to your list of manuals |
Page 81 highlights
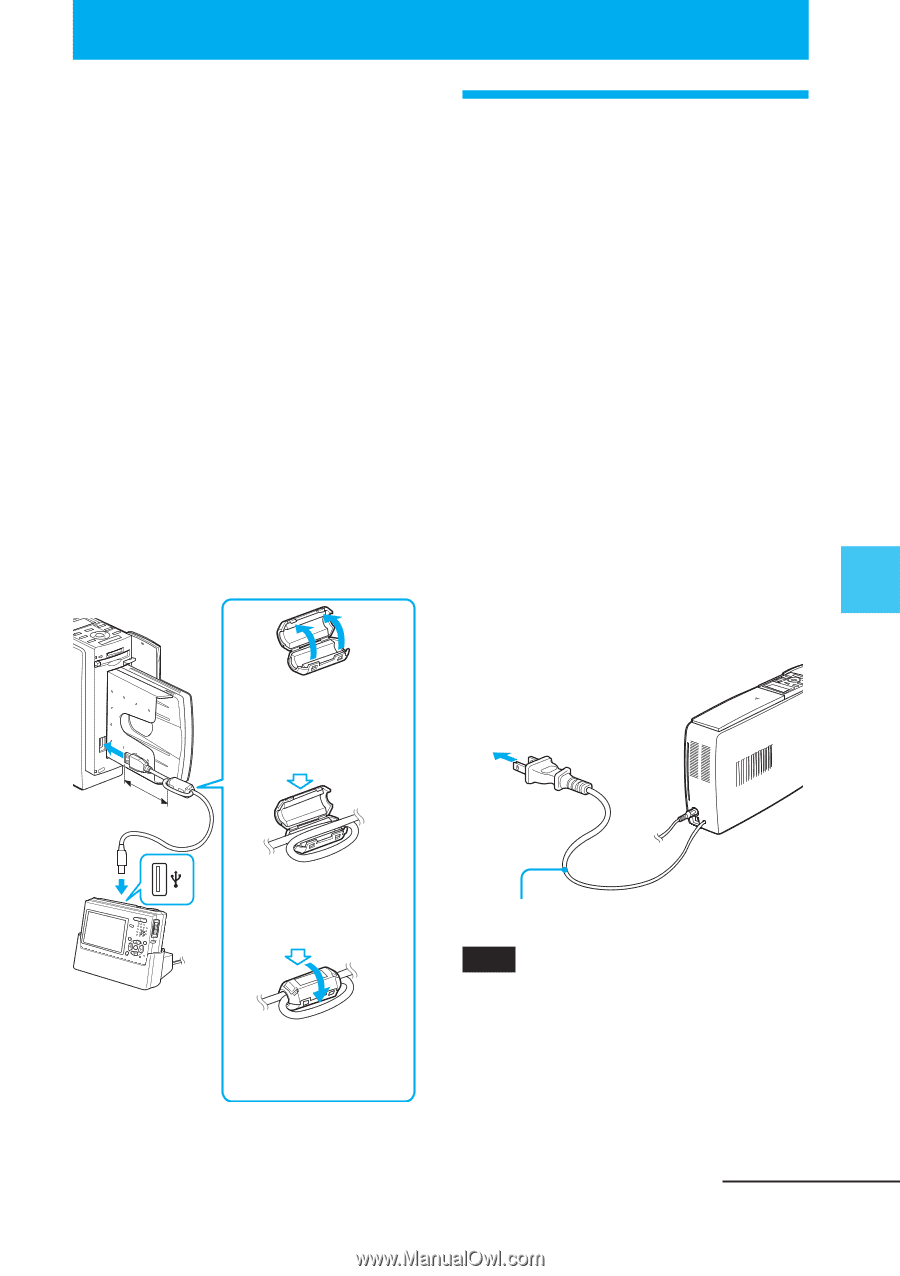
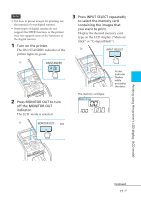
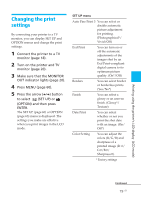
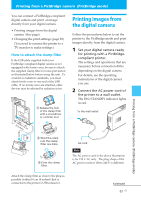
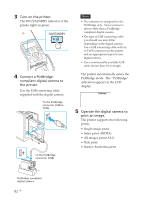
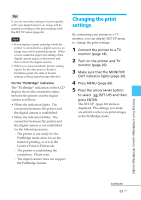
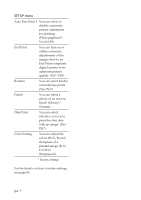
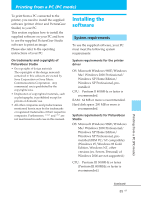
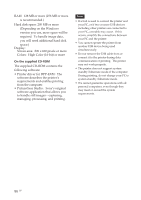
Printing from a PictBridge camera (PictBridge mode) You can connect a PictBridge-compliant digital camera and print an image directly from your digital camera. • Printing images from the digital camera (this page) • Changing the print settings (page 83) (You need to connect the printer to a TV monitor to make settings.) How to attach the clamp filter If the USB cable supplied with your PictBridge-compliant digital camera is not equipped with ferrite cores, be sure to attach the supplied clamp filter for noise prevention as illustrated below before using the unit. To conform to radiation standards, you must attach ferrite cores to one end of the USB cable. If no ferrite cores are attached, other devices may be affected by radiation noise. (4Winicthhiens)10 cm 1 Release the lock of the clamp filter with a screwdriver or a similar tool. Printing images from the digital camera Follow the procedures below to set the printer to the PictBridge mode and print images directly from the digital camera. 1 Set your digital camera ready for printing with a PictBridgecompliant printer. The settings and operations that are necessary before connection differ depending on the digital camera. For details, see the operating instructions of the digital camera you use. 2 Connect the AC power cord of the printer to a wall outlet. The ON/STANDBY indicator lights in red. To the wall outlet 2 Wind the cable into the clamp filter one time. 3 Close the clamp filter. AC cord Note The AC power cord in the above illustration is for 120 V AC only. The plug shape of the AC power cord for 100 to 240 V is different. Printing from a PictBridge camera (PictBridge mode) Attach the clamp filter as close to the plug as possible (within 10 cm (4 inches)) that is connected to the printer's USB connector. Continued 81 GB
-
 1
1 -
2
-
3
-
4
-
5
-
6
-
7
-
8
-
9
-
10
-
11
-
12
-
13
-
14
-
15
-
16
-
17
-
18
-
19
-
20
-
21
-
22
-
23
-
24
-
25
-
26
-
27
-
28
-
29
-
30
-
31
-
32
-
33
-
34
-
35
-
36
-
37
-
38
-
39
-
40
-
41
-
42
-
43
-
44
-
45
-
46
-
47
-
48
-
49
-
50
-
51
-
52
-
53
-
54
-
55
-
56
-
57
-
58
-
59
-
60
-
61
-
62
-
63
-
64
-
65
-
66
-
67
-
68
-
69
-
70
-
71
-
72
-
73
-
74
-
75
-
 76
76 -
 77
77 -
 78
78 -
 79
79 -
 80
80 -
 81
81 -
 82
82 -
 83
83 -
 84
84 -
 85
85 -
 86
86 -
87
-
88
-
89
-
90
-
91
-
92
-
93
-
94
-
95
-
96
-
97
-
98
-
99
-
100
-
101
-
102
-
103
-
104
-
105
-
106
-
107
-
108
-
109
-
110
-
111
-
112
-
113
-
114
-
115
-
116
-
117
-
118
-
119
-
120
-
121
-
122
-
123
-
124
-
125
-
126
-
127
-
128
-
129
-
130
-
131
-
132
-
133
-
134
-
135
-
136
-
137
-
138
-
139
-
140
-
141
-
142
-
143
-
144
 |
 |