Sony DPP-EX50 Operating Instructions - Page 96
Printing photos from the PictureGear Studio, Start the PictureGear Studio.
 |
UPC - 027242639546
View all Sony DPP-EX50 manuals
Add to My Manuals
Save this manual to your list of manuals |
Page 96 highlights
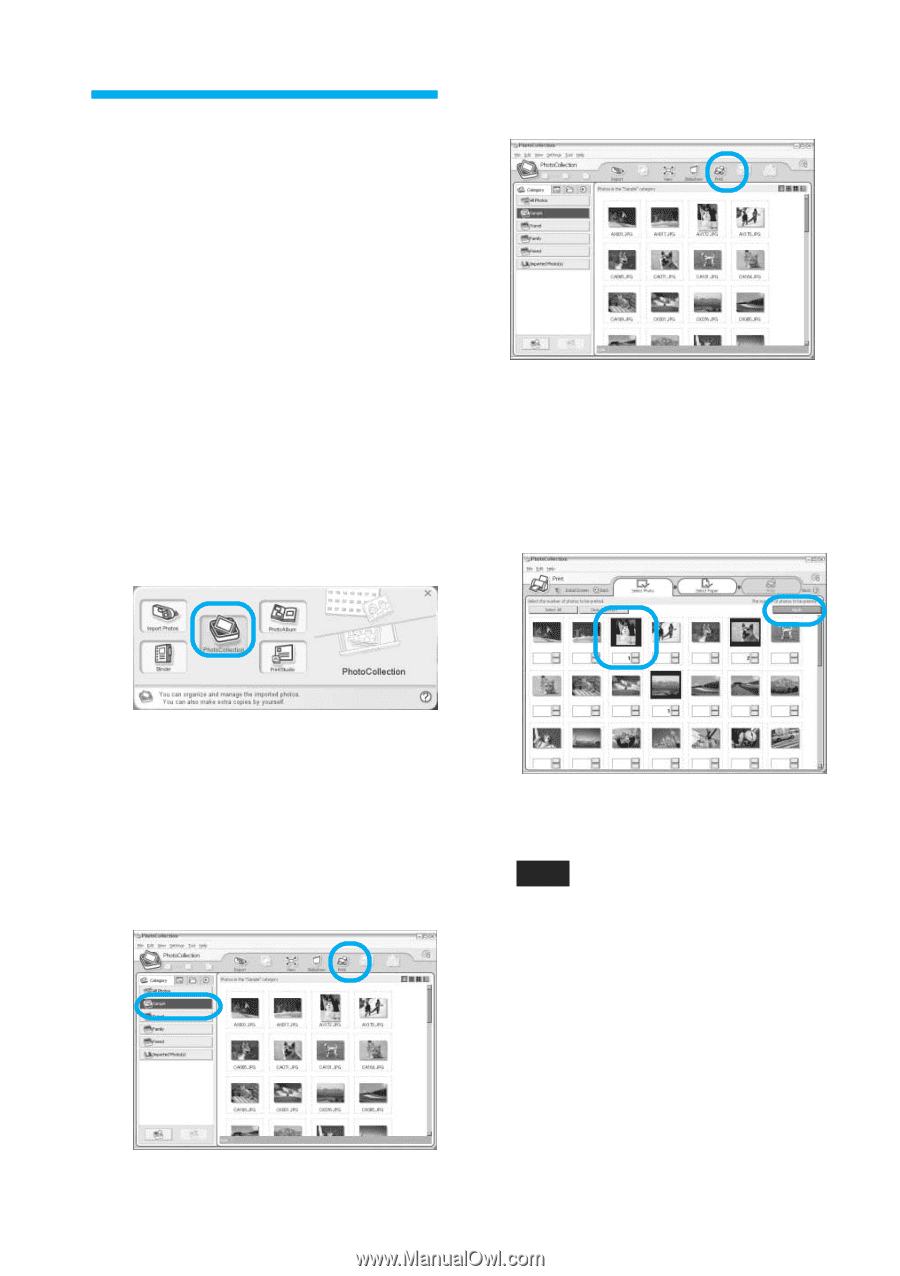
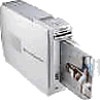
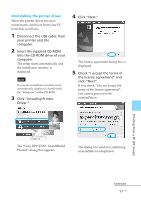
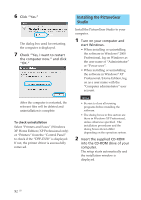
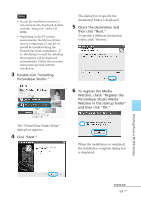
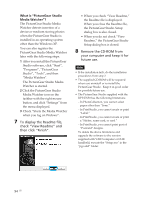
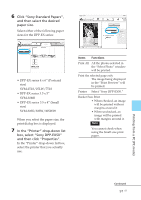
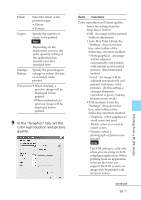
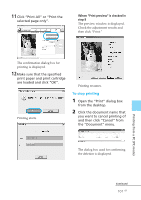
Printing photos from the PictureGear Studio 4 Click "Print." PictureGear Studio allows you to carry out a series of procedures for handling a still image-capturing, managing, processing, and outputting. You can use the software to print an image from your PC in the post card, 3.5 x 5 inch, or small size print paper. 1 Start the PictureGear Studio. The PictureGear Studio window is displayed. 2 Click "Photo Collection". The Print dialog box is displayed. 5 Select the photos that you want to print, set the number of copies to be printed for each photo, and then click "Apply". The "Photo Collection" window is displayed. 3 Click the desired photo category folder. For explanations, "Sample" folder is selected in the following example. The print paper selection dialog box is displayed. Note Make sure to set the print quantity in this dialog box. Even if you set the number of copies in "Paper/Output" tab of the "Sony DPP-EX50 Properties" dialog box, the print quantity will not be reflected. 96 GB
-
 1
1 -
2
-
3
-
4
-
5
-
6
-
7
-
8
-
9
-
10
-
11
-
12
-
13
-
14
-
15
-
16
-
17
-
18
-
19
-
20
-
21
-
22
-
23
-
24
-
25
-
26
-
27
-
28
-
29
-
30
-
31
-
32
-
33
-
34
-
35
-
36
-
37
-
38
-
39
-
40
-
41
-
42
-
43
-
44
-
45
-
46
-
47
-
48
-
49
-
50
-
51
-
52
-
53
-
54
-
55
-
56
-
57
-
58
-
59
-
60
-
61
-
62
-
63
-
64
-
65
-
66
-
67
-
68
-
69
-
70
-
71
-
72
-
73
-
74
-
75
-
76
-
77
-
78
-
79
-
80
-
81
-
82
-
83
-
84
-
85
-
86
-
87
-
88
-
89
-
90
-
 91
91 -
 92
92 -
 93
93 -
 94
94 -
 95
95 -
 96
96 -
 97
97 -
 98
98 -
 99
99 -
 100
100 -
 101
101 -
102
-
103
-
104
-
105
-
106
-
107
-
108
-
109
-
110
-
111
-
112
-
113
-
114
-
115
-
116
-
117
-
118
-
119
-
120
-
121
-
122
-
123
-
124
-
125
-
126
-
127
-
128
-
129
-
130
-
131
-
132
-
133
-
134
-
135
-
136
-
137
-
138
-
139
-
140
-
141
-
142
-
143
-
144
 |
 |