Sony DPP-F700 Read This First
Sony DPP-F700 - Digital Photo Printer/frame Manual
 |
UPC - 027242776197
View all Sony DPP-F700 manuals
Add to My Manuals
Save this manual to your list of manuals |
Sony DPP-F700 manual content summary:
- Sony DPP-F700 | Read This First - Page 1
package Digital Photo Printer/Frame (1) Cleaning cartridge (1)/ Cleaning sheet (1) (Used for cleaning inside this unit.) Stand (1) Remote control (1) Operating Instructions (1) Read This First (this leaflet) (1) Paper tray (1) About the Print Packs (1) AC adaptor (1) CD-ROM (1) Power cord - Sony DPP-F700 | Read This First - Page 2
Insert the paper tray and ink ribbon until each clicks into place. Installation place for printing AC adaptor To the wall Install this unit with at least 10 cm outlet (3 13/32 inches) of space at the rear. Power cord 10cm Do not bend! Do not use used print paper! ˎˎ You can use Sony optional
-
 1
1 -
 2
2
 |
 |

How to print
1
Preparing the remote control.
Protective sheet
Pull out the protective sheet
before use as illustrated.
The supplied lithium battery (CR2025) is
already inserted into the remote control.
2
Setting the stand.
When using as a photo frame
Set the stand to this unit as
illustrated.
Do not attach the stand when using this unit
as a printer.
(See the reverse side of this leaflet.)
3
Connecting to the AC power source.
AC adaptor
main unit
DC cable
To the DC IN 24V jack
1
To the wall outlet
2
1
Insert the plug of the AC
adaptor into the DC IN 24V jack
on the back of this unit.
2
Connect the AC adaptor to the
wall outlet.
This unit automatically
C
turns on.
This unit automatically turns on when the AC
adaptor is connected to the wall outlet. Step
4 is only required when this unit is turned off
with the AC adaptor connected to the wall
outlet.
4
Turn this unit on.
Press
(on/standby).
The standby indicator on the
C
(on/standby) of this unit
lights up in green and the Sony
logo at the bottom of the LCD
lights up.
5
Setting the current date and time.
1
2,3,4
1
Press MENU.
2
Press
/
to select the
(Settings) tab.
3
Press
/
to select [Date/time
Settings] and then press
(ENTER).
4
Set the current date and time
following the guidance on the
screen.
6
Inserting a memory card.
“Memory Stick”/”Memory Stick
Micro” adaptor (Standard size)
“Memory Stick Duo”/ ”Memory
Stick Micro” adaptor (Duo-size)
SD memory card/SD memory
card adaptor
1
CompactFlash card
xD-Picture Card
Access lamp
SD memory card/
SD memory card
adaptor
“Memory Stick”/
”Memory Stick Micro”
adaptor (Standard size)
“Memory Stick Duo”/ ”Memory
Stick Micro” adaptor (Duo-size)
After inserting
1
Insert a memory card firmly
into the designated slot.
The access lamp flashes
C
when the memory card is
inserted correctly.
When using a mini SD
ˎ
, micro
SD
or “Memory Stick Micro”
media
, be sure to insert it in
an appropriate adaptor.
If the access lamp does not flash,
ˎ
check if the memory card is
inserted in the correct direction.
2
2
A slideshow of the images
stored on the inserted memory
card starts automatically.
1
Selecting view mode.
VIEW MODE buttons
Press the button corresponding to
view mode you want to select.
For details, refer to page 26 to 31
in the Operating Instructions.
Clock and Calendar
Index
Slideshow
SINGLE
single image display
Buttons and display type of view mode
2
Selecting a style.
Press
/
/
/
to select a style and
press
(ENTER).
Styles
Various styles are available in each view mode.
Select the style you want.
For details on view styles, see the explanation of view mode in
the Operating Instruction.
You can rotate this unit to
portrait or landscape orientation
without resetting the stand.
(The orientation of the image
on the screen automatically
changes according to the
orientation of this unit.)
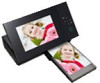
Digital Photo Printer/Frame
DPP-F700
Read This First
Welcome to the Sony DPP-F700 Digital Photo
Printer/Frame.
This leaflet explains preparations and basic viewing and
printing procedures.
To customize this unit and to enjoy a variety of viewing
and printing options, please read the Operating
Instructions also supplied.
Checking the contents of the package
Digital Photo Printer/Frame (1)
Stand (1)
Remote control (1)
Paper tray (1)
AC adaptor (1)
Power cord (1)
Cleaning cartridge (1)/
Cleaning sheet (1)
(Used for cleaning inside this unit.)
Operating Instructions (1)
Read This First (this leaflet) (1)
About the Print Packs (1)
CD-ROM (1)
Warranty (1)
(In some regions, the warranty is not supplied.)
Sony End User Software License
Agreement (1)
Getting started
Viewing images
4-155-703-
11
(1)
© 2009
Sony Corporation
Printed in China
Note
°e plug shape and specifications of the power cord differ depending on
the region in which you purchased this unit.