Sony DPP-FP55 Operating Instructions
Sony DPP-FP55 Manual
 |
View all Sony DPP-FP55 manuals
Add to My Manuals
Save this manual to your list of manuals |
Sony DPP-FP55 manual content summary:
- Sony DPP-FP55 | Operating Instructions - Page 1
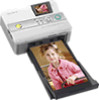
2-682-264-13 (1) Digital Photo Printer DPP-FP55 Operating Instructions Before operating this printer, please read this manual thoroughly and retain it for future reference. Owner's Record The model and serial numbers are located on the bottom. Record the serial number in the - Sony DPP-FP55 | Operating Instructions - Page 2
Sony Customer Information Services Center 1-800-222-SONY (7669) The number below is for the FCC related matters only. Regulatory Information Declaration of Conformity Trade Name: SONY Model No.: DPP-FP55 Responsible Party: Sony with the instructions, may picture of this digital photo printer - Sony DPP-FP55 | Operating Instructions - Page 3
Sony service station. Duplication, edition, or printing of a CD, TV programs, copyrighted materials such as pictures photo images with this printer of Sony Corporation. • Microsoft, Windows® and manual. • The raster process of true type fonts is based on the FreeType Team software. •This software - Sony DPP-FP55 | Operating Instructions - Page 4
What you can do with this printer .......... 6 Identifying the parts 8 Preparations 1 Checking the contents of the package 10 2 Preparing the print pack 11 Size of print paper 11 Optional print packs 11 3 Loading the print cartridge 12 4 Inserting the print paper 13 5 Connecting the AC power - Sony DPP-FP55 | Operating Instructions - Page 5
47 Installing the printer driver 48 Installing the Picture Motion Browser ...... 51 Printing photos from the Picture Motion Browser 53 Printing from other application software 60 Troubleshooting If trouble occurs 62 If an error message appears 77 If paper jams 80 Cleaning the inside of - Sony DPP-FP55 | Operating Instructions - Page 6
Duo"), or SD card You can print using the printer's LCD screen Digital Camera or other external device You can print from a PictBridge-compliant camera .page 46 You can select and print an image .page 20 Basic one-image print You can make a variety of printing .pages 26 to 36 Enlarged/Reduced - Sony DPP-FP55 | Operating Instructions - Page 7
a PictBridge-compliant digital camera. (.page 46) x You can print an image easily from your camera or an external mass storage device*. (.page 18) (*Not all types of mass storage devices' operations are guaranteed.) Supreme picture quality functions enabling photo-realistic printing x Professional - Sony DPP-FP55 | Operating Instructions - Page 8
tray compartment door (page 15) qa Paper tray compartment (page 15) qs SD CARD slot (pages 18) qd MEMORY STICK PRO STD/DUO slot (page 17) Printer right side panel qf Print cartridge eject lever (page 12) qg Print cartridge (pages 12, 13) qh Print cartridge compartment door (pages 12, 13) 8 GB - Sony DPP-FP55 | Operating Instructions - Page 9
) Connect the supplied AC power adaptor into this connector. Printer left side panel 3 USB connector (page 49) When using the printer in PC mode, connect a PC into this connector. 4 PictBridge connector (pages 19, 46) Paper tray 1 Paper eject tray (pages 13, 14) 2 Paper tray lid (pages 13, 14) 9 GB - Sony DPP-FP55 | Operating Instructions - Page 10
- Sony DPP-FP55 Printer Driver Software for Windows® XP Professional/Windows® XP Home Edition/Windows® 2000 Professional/Windows® Millennium Edition - Picture Motion Browser Ver.1.1 • Sample color print pack (Post card size, 10 sheets) • Operating Instructions (this booklet, 1) • Quick Start Guide - Sony DPP-FP55 | Operating Instructions - Page 11
2 Preparing the print pack To print an image, you need a print pack designed for the printer. The sample color print pack contains a set of 10 sheets of post card size print paper and a print cartridge for 10 prints. Size of print paper The size of the post card size print paper is as follows - Sony DPP-FP55 | Operating Instructions - Page 12
Arrow 3 Close the cartridge compartment door. Notes • Use the print cartridge contained in the same box with the print paper. • Do not touch the ink ribbon or place the print cartridge in a dusty location. Fingerprints or dust on the ink ribbon may result in imperfect printing. Ink ribbon 12 GB - Sony DPP-FP55 | Operating Instructions - Page 13
. The thermal head reaches high temperatures, especially after repeated printing. 4 Inserting the print paper 1 Open the paper eject tray. • Do not rewind the ink ribbon and use the rewound print cartridge for printing. Otherwise, proper printing result will not be obtained, or even a malfunction - Sony DPP-FP55 | Operating Instructions - Page 14
can set up to 20 sheets of print paper. Riffle the print paper thoroughly. Insert the print paper into the tray, with the protective sheet at the top. If there is no protective sheet: Riffle the print paper thoroughly. Then insert the print paper with its printing surface (the side with no imprint - Sony DPP-FP55 | Operating Instructions - Page 15
write or type on the print paper. Use the oil ink pen to write on the paper after printing. You cannot type on the print paper using an ink-jet printer, etc. - Do not attach sticker or stamps on the print paper. - Do not fold or bend the print paper. - Total number of print paper does not exceed 20 - Sony DPP-FP55 | Operating Instructions - Page 16
AC adaptor to an easily accessible wall outlet close by. If some trouble occurs while using the adaptor, immediately shut off the power by disconnecting outlet , even if the printer itself has been turned off. • The print paper emerges from the rear a few times during printing. Do not block the rear - Sony DPP-FP55 | Operating Instructions - Page 17
Inserting a memory card To print an image stored on a "Memory Stick" (or "Memory Stick Duo"), or SD card, insert it into the relevant card slot. When multiple memory cards are inserted, the card inserted first will have the first priority. When you turn on the printer with multiple cards being - Sony DPP-FP55 | Operating Instructions - Page 18
device ready for printing with the Mass Storage-compliant printer. The settings and operations that are necessary before connection differ depending on the external device you use. For details, see the operating instructions of the external device. (In case of Sony Cyber-shot digital camera, for - Sony DPP-FP55 | Operating Instructions - Page 19
To USB connector Notes • The type of USB cable you should use may differ depending on the digital camera. Use a USB cable with an A-TYPE connector for the printer and an appropriate type for your digital camera. • We cannot guarantee connection with all types of mass storage devices. • If you use - Sony DPP-FP55 | Operating Instructions - Page 20
a camera or other external device" (page 18) Note The print paper emerges from the rear a few times during printing. Make sure to spare enough space behind the printer during printing. Selecting an input signal with the printer The printer is not equipped with the input select switch. When you - Sony DPP-FP55 | Operating Instructions - Page 21
Tip When the printer is ready for printing, the PRINT indicator lights in blue green. (If not, check to see that the print paper and print cartridge are properly set.) 4 When printing is complete and the print paper automatically emerges, remove the printed paper from the paper tray. Making basic - Sony DPP-FP55 | Operating Instructions - Page 22
multiple images This section explains how to select multiple images, specify print quantity for each of them and print them at a time. 1 Press 1 (on/standby) switch to turn on the printer. The 1 (on/standby) indicator of the printer lights in yellow green. An image contained in the memory card - Sony DPP-FP55 | Operating Instructions - Page 23
, remove the printed paper from the paper tray. Tip Even if the remaining volume of the print cartridge is shorter than the print quantity, you can proceed with printing. If the print cartridge runs out in the middle of printing and a message appears, follow the displayed instructions to replace the - Sony DPP-FP55 | Operating Instructions - Page 24
switch an image preview and the image list display to view and check a picture before printing. An image preview Selected input media (Memory card or external device)* Print cartridge type (P: Postcard/C: cleaning cassette) Associated file/ Number of the DPOF/Protect selected images/ indications - Sony DPP-FP55 | Operating Instructions - Page 25
Making basic printing **Associated file/DPOF/Protect indications • Associated file indication: The image, in addition to the displayed image, has an associated file such as a motion file or a miniature e-mail image file. • DPOF indication: The image is DPOF preset with a digital camera. • Protect - Sony DPP-FP55 | Operating Instructions - Page 26
again. The previous window is displayed. 3 Press g/G to select (Edit) and then press ENTER. The Edit menu is displayed. Items / Procedures Increases or reduces the size of an image by pressing the buttons on the printer. Moves an image. Rotates an image. Adjusts the picture quality of an image - Sony DPP-FP55 | Operating Instructions - Page 27
Making various printing Enlarging and reducing an image size 1 Display the Edit menu (page 26). 2 Press (zoom in) to enlarge an image or (zoom out) to reduce the size of it. Each time you press the button, the image becomes larger or smaller: : up to 200% : up to 60% Note The picture quality of an - Sony DPP-FP55 | Operating Instructions - Page 28
G to make the picture bluish or g to make it reddish. • Saturation: Press G to deepen the colors or g to lighten the colors. • Sharpness: Press G to sharpen the outlines or g to reset them. 5 Press ENTER. The adjustment takes effect. Tip To print the image previewed, press PRINT (page 30). Adding - Sony DPP-FP55 | Operating Instructions - Page 29
picture. • Fish-eye: Makes the image look like a photo taken with a fish-eye lens. • No Filter: No special filter on the image (default setting). 4 Press ENTER. The filter takes effect. Tip To print the image previewed, press PRINT frame 3 Adjust the position and size of the adjustment frame. Make - Sony DPP-FP55 | Operating Instructions - Page 30
. The red-eye reduction adjustment is canceled and the window of step 2 is displayed. Tip To print the image previewed, press PRINT (page 30). Printing and saving an image Printing an image 1 Press PRINT. The dialog box to specify the print quantity is displayed. 2 Press f/F to increase or decrease - Sony DPP-FP55 | Operating Instructions - Page 31
. Note While saving the image, do not turn off the printer or remove a memory card from the printer. The memory card may be damaged. Making split images and a calendar (Creative Print) Displaying the Creative Print menu You can display the Creative Print menu and make a calendar or split images - Sony DPP-FP55 | Operating Instructions - Page 32
ENTER. The split image templates are displayed. To save Creative Print (page 30) • To save an image, select window. on the To exit the Creative Print menu • Press MENU in the middle of the operations and select "Creative Print Complete". • Display the preview image and then press g/G/f/F to - Sony DPP-FP55 | Operating Instructions - Page 33
The window for selecting an image is displayed. Items Procedures / Increases or reduces the size of an image by pressing the buttons on the printer. through 7 to select an image for each area. Making various printing 6 Adjust the size and position of the selected image. Press g/G to select the - Sony DPP-FP55 | Operating Instructions - Page 34
1 Display the Creative Print menu (page 31). 2 Press g/G to select "Calendar", then press ENTER. The window used for selecting the g/G/f/F to select the desired image, then press ENTER. The window used for adjusting the image size and position is displayed. For information on adjustment, see step - Sony DPP-FP55 | Operating Instructions - Page 35
number). Image numbers Date (If Date Print is on.) Making various printing Tip To print the image previewed, press PRINT (page 30). • DPOF preset image printing The images which are DPOF (Digital Print Order Format) preset for printing are displayed with the print mark ( ) in the image list. You - Sony DPP-FP55 | Operating Instructions - Page 36
to preset images for printing, see the manual of your digital camera. • Some types of digital camera do not support the DPOF function, or the printer may not support some of the functions of the digital camera. 1 Press MENU on the printer. The menu bar is displayed. Easy Printing icon Menu bar To - Sony DPP-FP55 | Operating Instructions - Page 37
window to specify the way how images are switched is displayed. 4 Press f/F to select "Automatic" to switch images automatically or "Manual" to switch them manually Press CANCEL. Printing a displayed image While playing the slideshow manually, you can print a displayed image by pressing PRINT. Notes - Sony DPP-FP55 | Operating Instructions - Page 38
(folder and file numbers) that you want to search for: Starting image number Ending image number To exit the menu mode Press MENU. The previous window is displayed. 2 Press g/G to select (Image Search) and then press ENTER. The Image Search menu is displayed. Image Search menu Tip To search for - Sony DPP-FP55 | Operating Instructions - Page 39
multiple images, repeat these procedures. Press PRINT to start printing. The specified number of copies of the selected images are printed. CANCEL MENU Notes • During deleting or formatting, do not turn off the printer or remove the memory card. The printer, the memory card or an external device - Sony DPP-FP55 | Operating Instructions - Page 40
Delete/Format menu icon To exit the menu mode, press MENU. The previous window is displayed. 2 Press g/G to select (Delete/ Format) and then press delete a protected image with the protect indication ( ) or a waiting-to-print indication ( ) displayed. Formatting a "Memory Stick" You can format a - Sony DPP-FP55 | Operating Instructions - Page 41
Up) The Set Up menu allows you to change various print settings listed on pages 42 and 43. Buttons to displayed. Menu bar Set Up menu icon To exit the menu mode, press MENU. The previous window is displayed. Note Setting items which cannot be changed are displayed in gray and cannot be selected. - Sony DPP-FP55 | Operating Instructions - Page 42
an image automatically so that the image is printed with stronger sharpness correction and more vivid pictures than the Photo mode. Notes • The image data is not corrected. • When printing in PC mode, the Auto Fine Print 3 setting with the printer driver has priority over the setting here. In the - Sony DPP-FP55 | Operating Instructions - Page 43
print with the date of shooting, shoot an image in the DCF file format. When the image is saved with the printer, the date of saving is printed. Off* Prints the more greenish the picture becomes as if it receives green light. The lower you set the level, the darker the picture becomes as if red - Sony DPP-FP55 | Operating Instructions - Page 44
Changing the printer preferences (Option) The Option menu allows you to change the preferences To exit the menu mode, press MENU. The previous window is displayed. 3 Press f/F to select the desired setting item, and press ENTER. The setting window for the selected item is displayed (next page). To - Sony DPP-FP55 | Operating Instructions - Page 45
printing Item Settings Contents Listing Order Ascending* In the image list window, the images are displayed in the order of their image numbers, starting from the smallest number. Descending In the image list window functions of the printer starts automatically after the printer has been left - Sony DPP-FP55 | Operating Instructions - Page 46
is displayed on the display window of the printer. 5 Operate the digital camera to print an image. The printer supports the following prints: • Single-image print. • All images print • Index print • DPOF print • Border/Borderless print • Date print For notes during printing, see page 21. Notes • If - Sony DPP-FP55 | Operating Instructions - Page 47
CD-ROM The supplied CD-ROM contains the following software: • Printer driver for DPP-FP55: The software describes the printer's requirements and enables printing from the computer. • Picture Motion Browser: Sony's original software application that allows you to handle photographs and moving - Sony DPP-FP55 | Operating Instructions - Page 48
your computer. The setup starts automatically and the installation window is displayed. Note In case the installation window is not automatically displayed, double-click the "Setup.exe" of the CD-ROM. 4 Click "Installing Printer Driver". The "Sony DPP-FP55 - InstallShield Wizard" dialog box appears. - Sony DPP-FP55 | Operating Instructions - Page 49
of the printer driver is complete. When you are prompted to restart your computer, restart the computer. 13 • To finish installation, click "Complete" and remove the CD-ROM from your computer and keep it for future use. • To continue to install the Picture Motion Browser software, click "Installing - Sony DPP-FP55 | Operating Instructions - Page 50
CD-ROM into the CD-ROM drive of your computer. The setup starts automatically and the installation window is displayed. 3 Click "Installing Printer Driver". The "Sony DPP-FP55 - InstallShield Wizard" dialog box appears. 4 Click "Next". The license agreement dialog box is displayed. 5 Check "I accept - Sony DPP-FP55 | Operating Instructions - Page 51
Panel" to check if the "Sony DPPFP55" is displayed. If not, the printer driver is successfully removed. Installing the Picture Motion Browser 1 Turn on your computer and start Windows. • When installing or uninstalling the software in Windows ® 2000 Professional, log on Windows as the user name of - Sony DPP-FP55 | Operating Instructions - Page 52
Next." The "Setup Status" dialog box is displayed. When the printer setup is complete, the "InstallShield Wizard Complete" dialog box is to install the program" dialog box is displayed. The installation of the Picture Motion Browser is complete. When you are prompted to restart your computer - Sony DPP-FP55 | Operating Instructions - Page 53
"Sony Picture Utility" and click "Change/Remove" ("Remove" with Windows XP). The software is uninstalled. Printing photos from the Picture Motion Browser You can use the Picture Motion Browser to print an image from your PC using post card size print paper. 1 Start the Picture Motion Browser window - Sony DPP-FP55 | Operating Instructions - Page 54
as thumbnails on each date of the calendar. In "Calendar" view, you can switch the display according to the year, month, or hour. The Print dialog box is displayed. 4 In the "Print" drop-down list box, select "Sony DPP-FP55" and then click "Print." The preparations for printing start. 54 GB - Sony DPP-FP55 | Operating Instructions - Page 55
Printer Select "Sony DPP-FP55". Paper size From the drop-down list box, select the paper size you actually use for printing: • P size • L size Note In some regions, L size print paper is not sold. Print options • When checked, an image will be printed over the entire printing area of the paper - Sony DPP-FP55 | Operating Instructions - Page 56
/Output" tab, specify the paper size. Items Functions Paper size From the drop-down list box, select the paper size you actually use for printing: • P size • L size Then check either of the following to specify the margins around the image: • with border: an image is printed with borders around it - Sony DPP-FP55 | Operating Instructions - Page 57
colors are used. - Match: when you want to match colors. - Pictures: when a photograph or pictures are printed. ExifPrint Check it to adjust and print an image shot with a Exif Print (Exif 2.21)-compliant digital camera. The printer driver uses the color conversion and Exif shooting data to adjust - Sony DPP-FP55 | Operating Instructions - Page 58
red-eye phenomenon is not corrected, use the Picture Motion Browser correction function. • Red-eye reduction is enabled only when you have installed the printer driver from "Setup.exe" in the supplied CD-ROM. For the details see the Readme.txt. Print settings Adjusts the color elements and sharpness - Sony DPP-FP55 | Operating Instructions - Page 59
window is displayed. Note You cannot register the whole drive. 3 Click "Yes." Registration of the image information in the data base starts. 4 Click "Close." Printing be registered. • When the software is first started, the message prompting you to register "My Pictures" will be displayed. • - Sony DPP-FP55 | Operating Instructions - Page 60
On "borderless" setting in the "Paper size" section When using an application other than the Picture Motion Browser, an image might be printed with borders even if you select borderless print in the "Paper size" section of the "Paper/Output" tab in the "Sony DPP-FP55 Properties" dialog box. When you - Sony DPP-FP55 | Operating Instructions - Page 61
application software you use, the print quantity setting of the application you use may have priority over the setting specified in the printer driver dialog box. Exif Print Settings in the "Graphics" tab The Exif Print setting in the "Color reproduction/Picture quality" section supports the Picture - Sony DPP-FP55 | Operating Instructions - Page 62
Troubleshooting If trouble occurs If you run into any problems using the printer, use the following guidance to solve the problem. If the problem persists, consult your Sony printer and the printer operates on the PictBridge/PC mode, no images will be displayed on the window a digital camera or other - Sony DPP-FP55 | Operating Instructions - Page 63
it may not be printed with the printer even if it is printer can display, save, delete or handle up to 9 999 image files. If there are more than 9 999 images stored in a memory card or an external device, use the PC or PictBridge mode to display and handle the remaining images. Troubleshooting - Sony DPP-FP55 | Operating Instructions - Page 64
to select it and specify the print quantity for the image. (.page 22) • There are 8 or more c The printer cannot display the images hierarchies in shot with a digital camera is 3:4. When an image is edited or printed in the postcard size, it is saved as a more horizontal print image and its top - Sony DPP-FP55 | Operating Instructions - Page 65
Cause/Solutions • Is the print paper properly c If print paper is not properly loaded, set in the paper tray? the printer may develop trouble. Check the following: • Is the correct set of print paper and print cartridge loaded? (.page 11) • Is the print paper loaded in the correct direction - Sony DPP-FP55 | Operating Instructions - Page 66
of the digital camera you are using. • Did you use the Edit menu to enlarge the image? c An enlarged image, depending on its image size, will be printed with deteriorated picture quality. • Did you allow dust to get c Wipe the plastic part of the print on the print cartridge? cartridge and - Sony DPP-FP55 | Operating Instructions - Page 67
software including the Adobe Photoshop. The AdobeRGB, an optional color space extended with the DCF 2.0, determines the color ranges widely used in printing industry. For whether or not a digital camera supports the AdobeRGB, see the operating instructions of the digital camera. Troubleshooting - Sony DPP-FP55 | Operating Instructions - Page 68
page 28) c Because of the differences in the printer's internal processing and PC software processing, the printed images will be different. c Set "Date Print" in the Set Up menu to "On". (.page 43) c The "Date Print" function of this unit supports an image that is compatible with the DCF standards - Sony DPP-FP55 | Operating Instructions - Page 69
• Is the paper tray inserted cRe-insert the paper tray firmly straight properly? in to the end. There are white lines or dots on the printed pictures. c The print head or paper path may be soiled. Use the supplied cleaning cartridge to clean the head and path. (.page 80) Troubleshooting 69 GB - Sony DPP-FP55 | Operating Instructions - Page 70
Cause/Solutions The picture is too bright, reduction. (.page 29) Red-eye reduction does not take effect. c Set the size of the adjustment frame to be two to seven times as large as the eye you operating the Creative Print menu? Cause/Solutions c In the Creative Print menu, templates are used - Sony DPP-FP55 | Operating Instructions - Page 71
Release the protection and try delete an image. external device protected? printing again. • Is the image DPOF-preset? c Release the DPOF preset with your digital camera. • Is the write-protect switch c Slide the write- write protect switch to the LOCK position. (.page 85) Troubleshooting 71 GB - Sony DPP-FP55 | Operating Instructions - Page 72
to remove the cartridge. If this does not solve the problem, contact Sony service facilities or your Sony dealer. c Paper is jammed. See "If paper jams" (.page 80) and remove jammed paper from the printer. If jammed paper cannot be removed, contact the Sony service facilities. c The data size of an - Sony DPP-FP55 | Operating Instructions - Page 73
from the one currently printed will be canceled. c Depending on the digital camera you use, you cannot cancel printing from the printer. Operate the digital camera to stop printing. Refer to the operating instructions of the digital camera. You cannot make Index printing. • Is the message "There - Sony DPP-FP55 | Operating Instructions - Page 74
the memory card or an external device images from the printer. c Please download the printer driver from the Customer support home page (.page 88). Or contact your Sony dealer. c Follow the procedures in the operating instructions to install the driver (.page 48). If an error occurs, restart your - Sony DPP-FP55 | Operating Instructions - Page 75
you can set print range with an application, set an image to be printed fully in the print range even if it is printed over the range. - Set a larger value in the "Enlarge/ Reduce" text box in the "Paper/ Output" tab of the "Sony DPP-FP55 Properties" dialog box. (.page 56) Troubleshooting 75 GB - Sony DPP-FP55 | Operating Instructions - Page 76
software you are using supports ICM. Preview image does not reflect the print settings in the "Graphics" tab of the "Sony DPP-FP55 Properties" dialog box. c The print settings adjusts the printer itself and cannot influence the preview image. Print quantity specified in the "Paper/Output - Sony DPP-FP55 | Operating Instructions - Page 77
, then retry. Meaning/Solutions c An error has occurred with the printer. Unplug the AC power cord of the printer, connect it again and then try operating again. If this occurs again, consult with your Sony dealer or Sony service facilities. Storage media Error messages No Memory Stick./No SD Card - Sony DPP-FP55 | Operating Instructions - Page 78
/Solutions No print cartridge. Set a new print cartridge and press [PRINT]. No print cartridge. Set the print cartridge for the P Size and press [PRINT]. c The print cartridge is not inserted in the printer. Set the print cartridge into the printer. (.page 12) If "cleaning cartridge" is displayed - Sony DPP-FP55 | Operating Instructions - Page 79
the print cartridge size actually loaded in the printer and set the print paper for the identical size. (.page 14) c Paper jams. See "If paper jams" (.page 80) and remove jammed paper from the printer. If the jammed paper cannot be removed, contact the Sony service facilities. Troubleshooting 79 - Sony DPP-FP55 | Operating Instructions - Page 80
If you cannot remove the jammed paper, contact your Sony dealer. Cleaning the inside of the printer If white lines or periodical dots are printed on the pictures, use the cleaning cartridge supplied and the protective sheet of the supplied printing pack to clean inside the printer. Tip You can also - Sony DPP-FP55 | Operating Instructions - Page 81
on the print paper and carry out cleaning, which may cause paper jam or other troubles. • If a cleaning does not improve printed picture quality, please carry out cleaning a couple of times. • You cannot clean the printer while it is connected to a PC or a PictBridge camera. Troubleshooting 81 GB - Sony DPP-FP55 | Operating Instructions - Page 82
unplug the printer from the electrical outlet before cleaning and servicing the printer. On installation • Avoid placing the printer in a location of the printer and do not use the printer for at least one hour. On transport When you transport the printer, remove the print cartridge, paper tray, AC - Sony DPP-FP55 | Operating Instructions - Page 83
documents with the printer, pay special attention or other materials may be copyrighted. Unauthorized video printing of such materials may infringe the provisions of the compact-size IC recording medium with a large capacity. It has been designed not only for exchanging/sharing digital data - Sony DPP-FP55 | Operating Instructions - Page 84
adaptor, you may be unable to remove the "Memory Stick Micro". *4 The printer supports FAT32. The printer has been demonstrated as operable with a "Memory Stick" with a capacity of 4GB or smaller manufactured by Sony Corporation. However, we do not guarantee the operations of all the "Memory Stick - Sony DPP-FP55 | Operating Instructions - Page 85
technology developed by Sony. This technology trouble with the printer. • When using a "Memory Stick", make sure to check correct insertion direction. Wrong usage may cause trouble with the printer printer. • When you format a "Memory Stick", use the format function of the printer or your digital - Sony DPP-FP55 | Operating Instructions - Page 86
is reading or writing data and the access indicator is flashing. Otherwise, data may be rendered unreadable or erased. *1 The printer supports FAT32. The printer has been demonstrated as operable with an SD card with a capacity of 2 GB or smaller. To use a miniSD card, you need an adaptor. *2 The - Sony DPP-FP55 | Operating Instructions - Page 87
24bit Windows format Some image file formats are not compatible. Maximum number of pixels to be handled 6 400(H) x 4 800(V) dots (Excluding Index Print and part of Creative Print) Maximum number of files to be handled 9 999 files for a memory card/an external device Print cartridge/Print Paper See - Sony DPP-FP55 | Operating Instructions - Page 88
*3: When photo of 3.11MB file size containing effective picture elements of 7,200,000 is taken by DSC-T30 (7Mega Cyber-shot) *4: Time from when the PRINT button is pressed to when printing is finished while printing from a "Memory Stick PRO Duo" inserted in the printer 's slot (The printing time may - Sony DPP-FP55 | Operating Instructions - Page 89
Postcard size 152.4 mm/6 inch (1 800 dots) 95.5 mm/ 3 7/8 inch (1 128 dots) 101.6 mm/ 4 inch (1 200 dots) 146.3 mm/5 7/8 inch (1 728 dots) Border print range Borderless print range Perforations The above illustrations are those when an image with a 2:3 aspect ratio is printed. The printing range - Sony DPP-FP55 | Operating Instructions - Page 90
-use printer. The printer supports DPOF printing and can automatically print the preset number of copies of the DPOF preset images. Exif 2.21 (Exif Print) Exif (Exchangeable image file format for digital cameras) Print is a global standard for digital photo printing. A digital camera supporting Exif - Sony DPP-FP55 | Operating Instructions - Page 91
an image size 27 Exif Print 42 External device 18 F Filter 28 Fish-eye effect 29 Format 40 I Icon 45 Image Data Display 24, 45 Image list 25 Index printing 35 Input indications 24 Inserting Memory card 17 Print cartridge 12 Print paper 13 Installing Picture Motion Browser 51 Printer driver 48 - Sony DPP-FP55 | Operating Instructions - Page 92
37 Special filter 28 Specifications 87 Split images 32 Supplied accessories 10 System requirement 47 T Troubleshooting 62 U USB connector 49 W Write-protect switch 85 Z Zoom in/out 24 Printed using VOC (Volatile Organic Compound)-free vegetable oil based ink. Sony Corporation Printed in China
-
 1
1 -
 2
2 -
 3
3 -
 4
4 -
 5
5 -
 6
6 -
 7
7 -
8
-
9
-
10
-
11
-
12
-
13
-
14
-
15
-
16
-
17
-
18
-
19
-
20
-
21
-
22
-
23
-
24
-
25
-
26
-
27
-
28
-
29
-
30
-
31
-
32
-
33
-
34
-
35
-
36
-
37
-
38
-
39
-
40
-
41
-
42
-
43
-
44
-
45
-
46
-
47
-
48
-
49
-
50
-
51
-
52
-
53
-
54
-
55
-
56
-
57
-
58
-
59
-
60
-
61
-
62
-
63
-
64
-
65
-
66
-
67
-
68
-
69
-
70
-
71
-
72
-
73
-
74
-
75
-
76
-
77
-
78
-
79
-
80
-
81
-
82
-
83
-
84
-
85
-
86
-
87
-
88
-
89
-
90
-
91
-
92
 |
 |

2-682-264-
13
(1)
2006 Sony Corporation
Operating Instructions
Before operating this printer, please read
this manual thoroughly and retain it for
future reference.
Owner’s Record
The model and serial numbers are
located on the bottom.
Record the serial
number in the space provided below.
Refer to these numbers whenever you
call upon your Sony dealer regarding this
product.
Model No.
DPP-FP55
Serial No.
Digital Photo
Printer
DPP-FP55
Before you begin
Preparations
Making basic printing
Making various printing
Printing from a PictBridge
camera
Printing from a PC
Troubleshooting
Additional information