Sony DSC-G1 Instruction Manual
Sony DSC-G1 - Cyber-shot Digital Camera Manual
 |
UPC - 027242701298
View all Sony DSC-G1 manuals
Add to My Manuals
Save this manual to your list of manuals |
Sony DSC-G1 manual content summary:
- Sony DSC-G1 | Instruction Manual - Page 1
Digital Still Camera/Cámara fotografía digital Instruction Manual GB Manual de instrucciones ES DSC-G1 For details on the advanced operations, please access "Cyber-shot Handbook" contained on the supplied CDROM via a computer. Para más detalles sobre las operaciones avanzadas, acceda a la "Gu - Sony DSC-G1 | Instruction Manual - Page 2
whenever you call upon your Sony dealer regarding this product. Model No. DSC-G1 Serial No WARNING To reduce user to the presence of important operating and maintenance (servicing) instructions to operate from battery power, or other sources, refer to the operating instructions. [ Polarization This - Sony DSC-G1 | Instruction Manual - Page 3
the operating instructions. Improper adjustment of other controls may result in damage and will often require extensive work by a qualified technician to restore the set to normal operation. - When the set exhibits a distinct change in performance - this indicates a need for service. [ Servicing Do - Sony DSC-G1 | Instruction Manual - Page 4
about this product, you may call: Sony Customer Information Services Center 1-800-222-SONY (7669) The number below is for the FCC related matters only. [ Regulatory Information Declaration of Conformity Trade Name: SONY Model No.: DSC-G1 Responsible Party: Sony Electronics Inc. Address: 16530 Via - Sony DSC-G1 | Instruction Manual - Page 5
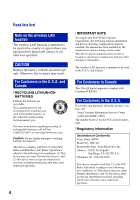
apply, See www.dtsc.ca.gov/hazardouswaste/perchlorate Perchlorate Material : Lithium battery contains perchlorate For Customers in Europe GB Hereby, Sony Corporation, declares that this DSC-G1 Digital Still Camera is in compliance with the essential requirements and other relevant provisions of - Sony DSC-G1 | Instruction Manual - Page 6
The electromagnetic fields at the specific frequencies may influence the picture and sound of this camera. [ Notice If static the fuse cover. If you should lose the fuse cover, please contact your nearest Sony service station. For use in Norway Use of this radio equipment is not allowed in - Sony DSC-G1 | Instruction Manual - Page 7
Memory Stick Duo" back up Do not turn off the camera or remove the battery pack or "Memory Stick Duo" while the access lamp If moisture condensation occurs, remove it before using the camera (page 37). • Do not shake or strike the camera. In addition to malfunctions and an inability to record images - Sony DSC-G1 | Instruction Manual - Page 8
the accessories supplied 10 1 Inserting the battery pack 11 2 Charging the battery pack 13 3 Turning the camera on/setting the clock 15 4 Connecting the camera with your computer 16 Viewing "Cyber-shot Handbook 16 Installing the software 17 Shooting images easily (Auto adjustment mode - Sony DSC-G1 | Instruction Manual - Page 9
Troubleshooting 35 Battery pack and power 35 Shooting still images/movies 36 Viewing images 36 Precautions 37 Specifications 38 GB 9 - Sony DSC-G1 | Instruction Manual - Page 10
• Power cord (mains lead) (1) • Wrist strap (1) • CD-ROM (Cyber-shot application software/ "Cyber-shot Handbook") (1) • Instruction Manual (this manual) (1) • Rechargeable battery pack NP-FR1 (1)/Battery case (1) Attach the strap to prevent the camera from damage by being dropped, etc. Hook 10 - Sony DSC-G1 | Instruction Manual - Page 11
on the side of the battery pack to the same direction. Battery eject lever Insert the battery pack while pressing the battery eject lever with the tip of the battery pack. GB 1Open the battery/"Memory Stick Duo" cover. 2Insert the battery pack. 3Close the battery/"Memory Stick Duo" cover. [ To - Sony DSC-G1 | Instruction Manual - Page 12
[ When recording in a "Memory Stick Duo" (not supplied) You can also record images in a "Memory Stick Duo" (not supplied) instead of the internal memory. Access lamp Insert the "Memory Stick Duo" with the terminal side facing as illustrated. Push the "Memory Stick Duo" in once to remove the "Memory - Sony DSC-G1 | Instruction Manual - Page 13
plug the adaptor into the wall outlet (wall socket). 3Attach the camera on the Cyber-shot Station. The CHG lamp lights on, and charging starts. When the CHG lamp turns off, charging is finished (Full charge). [ Charging time Battery pack NP-FR1 Full charge time Approx. 240 min. • Time required - Sony DSC-G1 | Instruction Manual - Page 14
turn on and check the time on the LCD screen. When the remaining battery time is not indicated, switch the display by pressing the DISP (Screen display DISP (Screen display • It takes about one minute until the correct battery switch) button remaining time appears. • Only is indicated, depending - Sony DSC-G1 | Instruction Manual - Page 15
HOME button, and select [ Settings] t [ Clock Set] (page 25). [ When you turn on the power • If the camera is running on battery power and you do not operate the camera for about three minutes, the camera turns off automatically to prevent wearing down the battery pack (Auto power-off function). 15 - Sony DSC-G1 | Instruction Manual - Page 16
with your computer If you use the software contained in the CD-ROM (supplied), you can display images shot with the camera on the computer. For details, refer to "Cyber-shot Handbook." CONNECT button (USB) jack Connect the USB cable to the (USB) jack of the Cyber-shot Station and the USB jack of - Sony DSC-G1 | Instruction Manual - Page 17
Installing the software Supported Operating Systems for " Cyber-shot Handbook." 1 Turn on your computer, and insert the CD- ROM (supplied) into the CD-ROM drive. The screen below appears. GB When you click the [Install] button, the "Choose Setup Language" screen appears. 2 Follow the instructions - Sony DSC-G1 | Instruction Manual - Page 18
. 2Select a mode with the / (Movie/Photo) button. Each time you press the / (Movie/Photo) button, the mode changes between Movie and Photo. 3Hold the camera steady, keeping your arm at your side. Position the subject in the center of the LCD screen. 4Shoot with the shutter button. Aside from an - Sony DSC-G1 | Instruction Manual - Page 19
[ Using the zoom Press the zoom button. • When the zoom scale exceeds 3×, the camera uses the Digital Zoom function. [ Flash (Selecting a flash mode for still images) Press the (Flash) button repeatedly until the desired mode is selected. : Flash Auto Strobes when there - Sony DSC-G1 | Instruction Manual - Page 20
(playback zoom) button ɟ Control button BACK button 1Press the (Playback) button. When the lens cover is closed, pressing the POWER button turns on the camera with the playback mode. 2Select an image by moving the control button to C/c. Moving it to C displays the previous image, and moving it to - Sony DSC-G1 | Instruction Manual - Page 21
[ Viewing an index screen Press (Index) to switch to the index screen. Each time you press DISP (Screen display switch) or (Index), the screen changes as follows. DISP (Screen display switch) DISP (Screen display switch) or Select an image with the control button. To return to the single-image - Sony DSC-G1 | Instruction Manual - Page 22
screen regardless of the shooting/viewing mode. Up Right Left Down Press z Control button HOME button 1Press HOME to display the home screen. Category Item Guide 2Move the control button to C/c to select a category. 3Move the control button to X/x to select an item. 4Press z to set. 22 - Sony DSC-G1 | Instruction Manual - Page 23
[ When [ ] (Media Tools) or [ ] (Settings) is selected ɟ ɠ 1When you select [ Main] in [ ] (Settings), select the desired item by moving the control button to X/x. 2Move the control button to c to select the item selection area, and move to X/x to select the desired item, then press z. 3Select - Sony DSC-G1 | Instruction Manual - Page 24
on the items are displayed on the screen using the guide. Category Camera Viewer Music Items Photo Movie Album Memory Stick Last Image Last Viewed Slide Show Audio Player Communication Toolbox Media Tools Collaboration Shot - Sony DSC-G1 | Instruction Manual - Page 25
page 22 Items Main Sound Beep AVLS Screen Language Function Guide Preferences HOME Design LCD Brightness Initialize Video Out USB Connect Clock Set Clock Set Camera Image Size(Photos) Image Size(Movies) AF Mode Digital Zoom Red Eye Reduction AF Illuminator SteadyShot Auto Orientation - Sony DSC-G1 | Instruction Manual - Page 26
Up Right Down Press z 1Press MENU to display the menu. • Different items are available depending on the mode. Function guide Setting [Function Guide] to [Off] turns off the function guide (page 25). 2Move the control button to X/x to select the menu item. 3Move the control button to C/c to select - Sony DSC-G1 | Instruction Manual - Page 27
(Print) (Slide Show) (Import)/ (Export) (Details) Searches for an album in chronogical order, or combines or splits the album created in the camera. Deletes images or protects images against accidental erasure. Rotates images or change the image size. Registers labels on images. Searches for images - Sony DSC-G1 | Instruction Manual - Page 28
on how to use the software, refer to the "Cyber-shot Handbook", or Help for the software. "Album Editor" With the supplied "Album Editor", you can use a computer to easily search for images or to edit the settings of the album and the properties of the images stored in the camera. With the "Album - Sony DSC-G1 | Instruction Manual - Page 29
LAN The camera is compliant with the DLNA (Digital Living Network Alliance) to connect with a DLNA-enabled device via wireless LAN. For further information, refer to the "Cyber-shot Handbook". Exchanging images among the DSC-G1s Directly establishes a connection among the DSC-G1s without an - Sony DSC-G1 | Instruction Manual - Page 30
Cyber-shot Handbook". Importing music files This section describes an example of importing music files to the "My Music" folder. 1 Connect the camera "MUSIC" folder. • Note that this camera does not support ATRAC3 and ATRAC3plus formats. This camera supports only MP3 format files. Playing back music - Sony DSC-G1 | Instruction Manual - Page 31
Indicators on the screen [ When shooting still images [ When shooting movies [ When playing back A 60Min 3:2 3M 2M VGA 16:9 Battery remaining Recording media/The destination medium of Original Images Recording folder/Playback folder SteadyShot Radio field strength with a network Image size [400] - Sony DSC-G1 | Instruction Manual - Page 32
forward m Rewind y Frame-by-frame (advance) Frame-by-frame (rewind) Movie operation guide >/M Skip/Fastforward ./m Skip/Rewind y Frame-by-frame (advance) Frame-by-frame ( image (stored/not stored) Self-diagnosis display Low battery warning Exposure Value Spot metering cross hair AF range finder - Sony DSC-G1 | Instruction Manual - Page 33
number of images that can be recorded/ viewed and the battery life are decreased under the following conditions: - The surrounding temperature is low. • Shooting movies continuously with an image size of [320] - The flash is used frequently. - The camera has been turned on and off many GB times - Sony DSC-G1 | Instruction Manual - Page 34
:30 10:31:40 21:07:10 • The maximum recording time is two hours per one recording. • When images recorded using earlier Sony models are played back on this camera, the display may differ from the actual image size. • When measuring media capacity, 1 GB equals 1 billion bytes, a portion of which is - Sony DSC-G1 | Instruction Manual - Page 35
Troubleshooting If you experience trouble with your camera, try the following solutions. 1 Check the items below, and refer to "Cyber-shot Handbook." If a code such as "C/E:ss:ss" appears on the screen, refer to "Cyber-shot Handbook." 2 Remove the battery pack, and insert the battery pack again - Sony DSC-G1 | Instruction Manual - Page 36
one. Fully discharge and then charge the battery pack to correct the display. • The battery pack is discharged. Install the charged battery pack (page 13). • The battery pack is dead. Replace it with a new one. Shooting still images/movies Your camera cannot record images. • Check the free capacity - Sony DSC-G1 | Instruction Manual - Page 37
record the date and time. Charging method of the internal rechargeable backup battery Insert charged battery pack in the camera, or connect the camera to a wall outlet (wall socket) using the AC Adaptor and the Cyber-shot Station, and leave the camera for 24 hours or more with the power off. 37 - Sony DSC-G1 | Instruction Manual - Page 38
) Mass: Approx. 238 g (8.4 oz) (including NP-FR1 battery pack and wrist strap, etc.) Microphone: Stereo Speaker: Monaural (Headphones (not supplied): Stereo) Exif Print: Compatible PRINT Image Matching III: Compatible PictBridge: Compatible 38 Cyber-shot Station UC-GA [Input and Output connectors - Sony DSC-G1 | Instruction Manual - Page 39
, INTERNAL AND COMMERCIAL USES AND LICENSING MAY BE OBTAINED FROM MPEG LA, LLC. SEE HTTP://WWW.MPEGLA.COM "C Library," "Expat," "zlib," "libjpeg," and "Wireless software" software are provided in your camera. We provide this software based on license agreements with their owners of copyright. Based - Sony DSC-G1 | Instruction Manual - Page 40
, es posible que se produzcan incendios o lesiones. Atención para los clientes en Europa Por el presente testamento, Sony Corporation, declara que esta cámara fotografía digital DSC-G1 cumple con los requisitos esenciales y otras cláusulas aplicables de la Directiva 1999/5/ EC. Para más detalles, le - Sony DSC-G1 | Instruction Manual - Page 41
grabada. [ Acerca de la compatibilidad de los datos de imagen • Esta cámara cumple con la norma universal DCF (Design rule for Camera File system) establecida por JEITA (Japan Electronics and Information Technology Industries Association). • La reproducción en otros equipos de imágenes ES - Sony DSC-G1 | Instruction Manual - Page 42
12 Visualización de la "Guía práctica de Cyber-shot 12 Instalación del software 13 Toma de imágenes fácilmente (Modo de software suministrado utilizando su ordenador 24 "Album Editor 24 "Picture Motion Browser 24 Utilización de la LAN inalámbrica 25 Intercambio de imágenes entre los DSC-G1 - Sony DSC-G1 | Instruction Manual - Page 43
Solución de problemas 31 Batería y alimentación 31 Toma de imágenes fijas/películas 32 Visualización de imágenes 32 Precauciones 33 Especificaciones 34 ES 5 - Sony DSC-G1 | Instruction Manual - Page 44
recargable NP-FR1 (1)/caja de la batería (1) • Cable de A/V (1) • Correa para muñeca (1) • CD-ROM (software de aplicación de Cybershot/" Guía práctica de Cyber-shot") (1) • Manual de instrucciones (este manual) (1) Coloque la correa para evitar que la cámara se dañe dejándola caer, etc. Gancho 6 - Sony DSC-G1 | Instruction Manual - Page 45
1 Inserción de la batería ɟ La parte posterior de la batería Tapa de la batería/"Memory Stick Duo" Ponga el vértice de la marca v de la ranura de inserción de la batería y el de la marca v del costado de la batería en la misma dirección. Palanca de expulsión de la batería Inserte la batería al - Sony DSC-G1 | Instruction Manual - Page 46
[ Cuando grave en un "Memory Stick Duo" (no suministrado) También puede grabar imágenes en un "Memory Stick Duo" (no suministrado) en lugar de la memoria interna. Lámpara de acceso Inserte el "Memory Stick Duo" con el lado del terminal orientado como se muestra en la ilustración. Empuje el "Memory - Sony DSC-G1 | Instruction Manual - Page 47
de ca ɟ Toma DC (cc) IN Marca v Cable de alimentación 1Conecte el cable del adaptador de ca (suministrado) a la toma DC (cc) IN del Cyber-shot Station (suministrado). ES 2Conecte el cable de alimentación al adaptador de ca y enchufe el adaptador en la toma de corriente de la pared. 3Ponga la - Sony DSC-G1 | Instruction Manual - Page 48
[ Para comprobar el tiempo de batería restante Abra la tapa del objetivo o pulse el botón POWER para encender y compruebe el tiempo en la pantalla LCD. Cuando no se indique el tiempo de batería restante, cambie la visualización pulsando el botón DISP (Cambio de visualización en pantalla). Pantalla - Sony DSC-G1 | Instruction Manual - Page 49
3 Encendido de la cámara/ajuste del reloj Tapa del objetivo Palanca OPEN (CAMERA) Botón POWER Izquierda: Mueva el botón hacia el lado de la pantalla LCD. Arriba Derecha: Mueva el botón hacia el lado del objetivo. Pulse z Abajo ɟ - Sony DSC-G1 | Instruction Manual - Page 50
4 Conexión de la cámara a su ordenador Si utiliza el software que contiene el CD-ROM (suministrado), podrá visualizar imágenes tomadas con la cámara en el ordenador. Para más detalles, consulte la "Guía práctica de Cyber-shot". Botón CONNECT Toma (USB) Conecte el cable USB a la toma (USB) del - Sony DSC-G1 | Instruction Manual - Page 51
Instalación del software Sistema operativo compatible con "Album Editor", "Picture Motion Browser" Windows de operación del "Album Editor" y "Picture Motion Browser", consulte la "Guía práctica de Cyber-shot". 1 Encienda su ordenador e inserte el CD- ROM (suministrado) en la unidad de CDROM. Aparece - Sony DSC-G1 | Instruction Manual - Page 52
de visualización en pantalla) Botón de control Botón (Flash) Botón / (Macro/Lupa) Botón (Autodisparador) 1Abra la tapa del objetivo deslizando la palanca OPEN (CAMERA). Abra hasta que produzca un chasquido. 2Seleccione un modo con el botón / (Película/Foto). Cada vez que pulse el botón / (Película - Sony DSC-G1 | Instruction Manual - Page 53
[ Utilización del zoom Pulse el botón del zoom. • Cuando la relación de zoom excede 3×, la cámara utiliza la función del zoom digital. [ Flash (Selección de un modo de flash para imágenes fijas) Pulse el botón (Flash) repetidamente hasta que se seleccione el modo deseado. : Flash automá - Sony DSC-G1 | Instruction Manual - Page 54
Visionado/borrado de imágenes Botón POWER Botón (Reproducción) Botón (Borrar) Botón (Índice)/ (Zoom de reproducción) Botón (Zoom de reproducción) ɟ Botón de control Botón BACK 1Pulse el botón (Reproducción). Cuando está cerrada la tapa del objetivo, al pulsar el botón POWER la cámara se - Sony DSC-G1 | Instruction Manual - Page 55
[ Visualización de una pantalla de índice Pulse (Índice) para cambiar a la pantalla de índice. Cada vez que pulse DISP (Cambio de visualización en pantalla) o (Índice), la pantalla cambiará de la forma siguiente. DISP (Cambio de visualización en pantalla) Botón DISP (Cambio de visualización en - Sony DSC-G1 | Instruction Manual - Page 56
Modo de operación - principal/menú Utilización de la pantalla principal La pantalla principal es la pantalla básica utilizada para acceder a las diversas funciones. Puede acceder a la pantalla principal independientemente del modo de toma de imagen/ visualización. Arriba Izquierda Derecha - Sony DSC-G1 | Instruction Manual - Page 57
[ Cuando se selecciona [ ] (Herr. sop.) o [ ] (Ajustes) ɟ ɠ 1Cuando seleccione [ Princ] en [ ] (Ajustes), seleccione el elemento deseado moviendo el botón de control hacia X/x. 2Mueva el botón de control hacia c para seleccionar el área de selección de elemento, y mueva hacia X/x para seleccionar - Sony DSC-G1 | Instruction Manual - Page 58
Foto Película Álbum Memory Stick Última imagen Vista últ. vez Diapositivas Reproductor audio Comunicación Herramientas Herr. sop. Collaboration Shot Picture Gift Imprimir Compartir imágs. General Espacio sop. grab Soporte predet Número Archivo Comprobar Álbum Memory Stick Formatear Camb - Sony DSC-G1 | Instruction Manual - Page 59
Salida vídeo Conexión USB Aju.Reloj Aju.Reloj Cámara Tam. imagen (fotos) Tam. imagen (pelí.) Modo AF Reducción ojos rojos SteadyShot Zoom digital Iluminador AF Orient. autom. Música Repetir MEGA BASS ES Autoapag LCD Red Punto Acceso Apodo Ahorro alimen. Red Contr.intercam.imág 21 - Sony DSC-G1 | Instruction Manual - Page 60
Utilización de los elementos del menú Selecciona una función utilizada para tomar imagen o ver del menú. Izquierda Botón de control Botón MENU Arriba Derecha Abajo Pulse z 1Pulse MENU para visualizar el menú. • Dependiendo del modo hay disponibles diferentes elementos. Guía de funciones Al - Sony DSC-G1 | Instruction Manual - Page 61
Para más detalles sobre la operación 1 página 22 Elementos del menú Los elementos de menú disponibles varían en función de la posición de modo. En la pantalla solamente se visualizan los elementos disponibles. Menú para toma de imágenes Cámara Escena Selecciona el modo cámara de imagen fija. - Sony DSC-G1 | Instruction Manual - Page 62
cómo utilizar el software, consulte la "Guía práctica de Cyber-shot", o la Ayuda (Help) para el software. "Album Editor" All Programs] (Todos los programas) (en Windows 2000, [Programs] (Programas)) t [Sony Picture Utility] t [Picture Motion Browser]. Cierre del "Picture Motion Browser" Haga clic en - Sony DSC-G1 | Instruction Manual - Page 63
mara cumple con la norma DLNA (Digital Living Network Alliance) para conectarla con un dispositivo habilitado para DLNA por medio de una LAN inalámbrica. Para más información, consulte la "Guía práctica de Cyber-shot". Intercambio de imágenes entre los DSC-G1 Se establece una conexión directamente - Sony DSC-G1 | Instruction Manual - Page 64
música Puede reproducir archivos MP3 almacenados en la carpeta "MUSIC" de la memoria interna. Para más información, consulte la "Guía práctica de Cyber-shot". Importación de archivos de música Esta sección describe un ejemplo de importación de archivos de música a la carpeta "My Music". 1 Conecte la - Sony DSC-G1 | Instruction Manual - Page 65
Indicadores de la pantalla [ Cuando se toman imágenes fijas [ Cuando se toman películas [ Cuando se reproduce A 60Min 3:2 3M 2M VGA 16:9 Batería restante Soporte de grabación/El soporte de destino de las imágenes originales Carpeta de grabación/ Carpeta de reproducción SteadyShot Intensidad de - Sony DSC-G1 | Instruction Manual - Page 66
N X M m y 2007/01/01 ---- C z (verde) z (rojo) 00:00:00 Espera 125 F3,5 +2,0EV DSC00012 s 2007/01/01 9:30AM Reproducción N Reproducción X Pausa M Avance rápido m Retroceso y Fotograma a fotograma (avance) Fotograma a fotograma (retroceso) Guía de operación de película >/M Salto/Avance rápido ./m - Sony DSC-G1 | Instruction Manual - Page 67
ágenes Duración de la batería (min (minuto)) Aprox. 280 Aprox. 140 • El método de medición está basado en el estándar CIPA. (CIPA: Camera & Imaging Products Association) • El número de imágenes/duración de la batería no cambiará, independientemente del tamaño de imagen. [ Cuando se ven imágenes - Sony DSC-G1 | Instruction Manual - Page 68
:07:10 • El tiempo de grabación máximo es de dos h (hora) por grabación. • Cuando se reproduzcan en esta cámara imágenes grabadas utilizando modelos Sony anteriores, la indicación podrá variar del tamaño de imagen real. • Cuando se mide la capacidad de un soporte, 1 GB equivale a 1 000 millones de - Sony DSC-G1 | Instruction Manual - Page 69
como "C/E:ss:ss" en la pantalla, consulte la "Guía práctica de Cyber-shot". 2 Extraiga la batería, vuelva a insertarla después de un min (minuto) hora. Botón RESET 4 Consulte con el distribuidor Sony o con la oficina de servicio local autorizada de Sony. ES Le rogamos que entienda que usted da - Sony DSC-G1 | Instruction Manual - Page 70
El indicador de batería restante es incorrecto. • Este fenómeno ocurre cuando utiliza la cámara en un lugar muy cálido o frío. • La batería restante visualizada es diferente de la real. Descargue completamente la batería y vuelva a cargarla para corregir la indicación. • La batería está descargada. - Sony DSC-G1 | Instruction Manual - Page 71
respaldo recargable Inserte la batería cargada en la cámara, o conecte la cámara a una toma de corriente de la pared utilizando el adaptador de ca y el Cyber-shot Station, y deje la cámara 24 h (hora) o más con la alimentación desactivada. 33 - Sony DSC-G1 | Instruction Manual - Page 72
JPEG, compatible con DPOF Películas: Cumple con MPEG-4 (Estéreo) Soporte de grabación: Memoria interna Matching III: Compatible PictBridge: Compatible 34 Cyber-shot Station UC-GA [Conectores de entrada Marcas comerciales • es una marca comercial de Sony Corporation. • "Memory Stick", , "Memory - Sony DSC-G1 | Instruction Manual - Page 73
Mac productos utilizados en este manual son, en general, MPEG LA, LLC. CONSULTE HTTP://WWW.MPEGLA.COM En su cámara se proporcionan los software "C Library", "Expat", "zlib", "libjpeg", y "Wireless software". Este software URL para descargarlo. http://www.sony.net/Products/Linux/ Es preferible - Sony DSC-G1 | Instruction Manual - Page 74
36 - Sony DSC-G1 | Instruction Manual - Page 75
ES 37 - Sony DSC-G1 | Instruction Manual - Page 76
Additional information on this product and answers to frequently asked questions can be found at our Customer Support Website. En la página Web de atención al cliente puede encontrar información adicional sobre este producto y respuesta a las preguntas hechas con más frecuencia. Printed on 70%
-
 1
1 -
 2
2 -
 3
3 -
 4
4 -
 5
5 -
 6
6 -
 7
7 -
8
-
9
-
10
-
11
-
12
-
13
-
14
-
15
-
16
-
17
-
18
-
19
-
20
-
21
-
22
-
23
-
24
-
25
-
26
-
27
-
28
-
29
-
30
-
31
-
32
-
33
-
34
-
35
-
36
-
37
-
38
-
39
-
40
-
41
-
42
-
43
-
44
-
45
-
46
-
47
-
48
-
49
-
50
-
51
-
52
-
53
-
54
-
55
-
56
-
57
-
58
-
59
-
60
-
61
-
62
-
63
-
64
-
65
-
66
-
67
-
68
-
69
-
70
-
71
-
72
-
73
-
74
-
75
-
76
 |
 |

© 2007 Sony Corporation
2-898-083-
83
(1)
Instruction Manual
Manual de instrucciones
DSC-G1
Digital Still Camera/Cámara fotografía digital
Operating Instructions
Before operating the unit, please read this manual thoroughly, and retain it for future reference.
Manual de instrucciones
Antes de operar la unidad, lea este manual atentamente, y guárdelo para futuras referencias.
For details on the advanced operations, please access
“Cyber-shot Handbook”
contained on the supplied CD-
ROM via a computer.
Para más detalles sobre las operaciones avanzadas, acceda
a la
“Guía práctica de Cyber-shot”
que contiene el CD-ROM
suministrado a través de un ordenador.
GB
ES