Sony DSC-G3 Instruction Manual
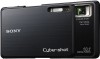
Sony DSC-G3 - Cybershot 10MP Digital Camera Manual
 |
UPC - 027242744363
View all Sony DSC-G3 manuals
Add to My Manuals
Save this manual to your list of manuals |
Sony DSC-G3 manual content summary:
- Sony DSC-G3 | Instruction Manual - Page 1
4-105-996-21(1) Digital Still Camera Instruction Manual DSC-G3 Before operating the unit, please read this manual thoroughly and retain it for future reference. Getting started Shooting/viewing images Uploading images Using shooting functions Using viewing functions Connecting to other devices - Sony DSC-G3 | Instruction Manual - Page 2
space provided below. Refer to these numbers whenever you call upon your Sony dealer regarding this product. Model No. DSC-G3 Serial No WARNING To reduce fire or shock hazard, do not expose the unit to rain or moisture. For Customers in the U.S.A. This symbol is intended to alert the user to the - Sony DSC-G3 | Instruction Manual - Page 3
the operating instructions. Improper adjustment of other controls may result in damage and will often require extensive work by a qualified technician to restore the set to normal operation. - When the set exhibits a distinct change in performance - this indicates a need for service. [ Servicing Do - Sony DSC-G3 | Instruction Manual - Page 4
batteries. [ Battery DSC-G3 has been tested and found to comply with FCC radiation exposure limits set forth for an uncontrolled equipment and meets the FCC radio frequency (RF) Exposure Guidelines in Supplement C to OET65. If you have any questions about this product, you may call: Sony Customer - Sony DSC-G3 | Instruction Manual - Page 5
approved in this manual could void your authority with the instructions, may cause digital device pursuant to Subpart B of Part 15 of FCC Rules. For Customers in Europe Hereby, Sony Corporation, declares that this DSC-G3 Digital Still Camera service or the shop where you purchased the product. 5 - Sony DSC-G3 | Instruction Manual - Page 6
battery, please contact your local Civic Office, your household waste disposal service or the shop where you purchased the product. Notice for customers fuse cover, please contact your nearest Sony service station. For use in Norway Use the RLAN (or WAS or WiFi) devices in the Department of - Sony DSC-G3 | Instruction Manual - Page 7
Table of contents IMPORTANT SAFEGUARDS 2 Read this first 4 Notes on using the camera 9 Getting started 11 Checking the accessories supplied 11 Identifying parts 12 Charging the battery pack 13 Inserting the battery pack 15 Setting the clock 17 Setting the wireless network 18 Shooting/ - Sony DSC-G3 | Instruction Manual - Page 8
camera settings 47 Changing the screen display 47 Setting the password lock for the internal memory 48 Using the HOME screen 49 Using the MENU items 52 Using functions in Program Auto mode 54 Others 55 Viewing "Cyber-shot Handbook 55 List of icons displayed on the screen 56 Troubleshooting - Sony DSC-G3 | Instruction Manual - Page 9
"Memory Stick Duo" back up Do not turn off the camera, remove the battery pack, or remove the "Memory Stick Duo" while the access content or recording failure Sony cannot compensate for failure to record or loss or damage of recorded content due to a malfunction of the camera or recording media, etc - Sony DSC-G3 | Instruction Manual - Page 10
LAN may not be available, may require a separate service charge, or communications may be blocked or suffer from or service provider. • Sony makes no guarantees whatsoever in the provision of the web browser. Sony Sony bears no responsibility for any damages that may arise due to security problems - Sony DSC-G3 | Instruction Manual - Page 11
• CD-ROM (1) - Cyber-shot application software - "Cyber-shot Handbook" - "Cyber-shot Step-up Guide" • Instruction Manual (this manual) (1) x Using the wrist strap Attach the strap and place your hand through the loop to prevent the camera from damage by being dropped. • Rechargeable battery pack NP - Sony DSC-G3 | Instruction Manual - Page 12
• Use a tripod with a screw less than 5.5 mm (7/32 inch) long. Otherwise, you cannot firmly secure the camera, and damage to the camera may occur. P Battery/"Memory Stick Duo" cover Q Multi connector R Battery eject lever S "Memory Stick Duo" slot T Battery insertion slot U Access lamp 12 - Sony DSC-G3 | Instruction Manual - Page 13
charger to the wall outlet (wall socket). If you continue charging the battery pack for about one more hour after the CHARGE lamp turns off, the charge will last slightly longer (full charge). For customers in the USA and Canada Plug CHARGE lamp Lit: Charging Off: Charging finished (normal charge - Sony DSC-G3 | Instruction Manual - Page 14
with compatible Sony batteries. x Battery life and number of images you can record/view Shooting still images Viewing still images Battery life (min.) Approx. 100 Approx. 170 No. of Images Approx. 200 Approx. 3400 • The measurement method is based on the CIPA standard. (CIPA: Camera & Imaging - Sony DSC-G3 | Instruction Manual - Page 15
remaining charge indicator may not be correct under certain circumstances. • If the NP-FD1 battery pack (not supplied) is used, the minute display is also shown after the remaining charge indicator. • Battery capacity decreases over time and through repeated use. When the operating time per charge - Sony DSC-G3 | Instruction Manual - Page 16
eject lever. Be sure not to drop the battery pack. Note • Never remove the battery pack/"Memory Stick Duo" (not supplied) when the access lamp is lit. This may cause damage to data. x Recording to internal memory The camera has an approximately 4GB internal memory that allows you to record and - Sony DSC-G3 | Instruction Manual - Page 17
item, then touch v/V to set its numeric value. • Midnight is indicated as 12:00 AM, and noon as 12:00 PM. 4 Touch [OK]. Notes • The camera does not have a feature for superimposing dates on images. By using "PMB" in the CD-ROM (supplied), you can print or save images with the - Sony DSC-G3 | Instruction Manual - Page 18
Setting the wireless network A wireless LAN function is equipped with this camera. Connect the camera to a network via an access point. 1 Press the POWER button to turn on the camera. Getting started 2 Touch t (Communication) t [Network] t t [ Network Settings] t . POWER button 3 Touch [Time - Sony DSC-G3 | Instruction Manual - Page 19
following are needed to connect the camera to a network: - An internet service provider (ISP) contract - ADSL camera for about three minutes, the camera may disconnect from the network automatically to save battery power. In these cases establish the connection again. zUsing the keyboard When manual - Sony DSC-G3 | Instruction Manual - Page 20
the frame on the LCD screen with your thumb until it opens fully. The camera is turned on. 2 Hold the camera steady as illustrated. • Press the T side of the zoom (W/T) button to zoom the lens). 4 Press the shutter button fully down. The image is shot. 20 Shutter button SteadyShot mark AE/AF lock - Sony DSC-G3 | Instruction Manual - Page 21
Shooting/viewing images Viewing images 1 Press the (Playback) button. The last image shot is displayed. • When images on the "Memory Stick Duo" recorded with other cameras cannot be played back on this camera, view the images in [Folder View] (page 36). x Selecting next/previous image Touch (Next)/ - Sony DSC-G3 | Instruction Manual - Page 22
using "PMB". • For details on the computer connection or "PMB", see page 42. x Viewing stored images You can play back images stored in the camera using the Slideshow and Scrapbook functions. You can also organize large numbers of images using the desired View Mode and easily search through them - Sony DSC-G3 | Instruction Manual - Page 23
Sony portal site. 2 Log in to a media service. WLAN (Wireless network) button 3 Upload images according to the on-screen instructions. Notes • Some media services to the network. • Be sure to use sufficiently charged batteries while connected to the network. x Shutting down the browser Press the - Sony DSC-G3 | Instruction Manual - Page 24
the internet browser A Button Action Switches screen display Displays Sony portal site / Next/Previous page / Update/Cancels loading Button Action Switches screen display Button Action Jump • Enter a URL address manually, then touch this button. The screen is moved to the specified website. - Sony DSC-G3 | Instruction Manual - Page 25
Using shooting functions Selecting the desired shooting mode 1 Touch (REC Mode) t desired mode t . Using shooting functions Shooting mode Auto Adjustment Program Auto Easy Shooting High Sensitivity Movie Mode Landscape Soft Snap Twilight Portrait Twilight Scene Selection Function Allows you to - Sony DSC-G3 | Instruction Manual - Page 26
a smile. When the smile level exceeds the b point on the indicator, the camera shoots images automatically. When you touch (Smile icon) again, Smile Shutter ends. • eyes with the bangs. 2 Try to orient the face in front of the camera and be as level as possible. The detection rate is higher when the - Sony DSC-G3 | Instruction Manual - Page 27
recognizes the scene. (Twilight), (Twilight Portrait), (Twilight using a tripod), (Backlight), (Backlight Portrait), (Landscape), (Macro) or (Portrait) appears. When the camera does not recognize the scene, the image is shot as Scene Recognition [Off]. Scene Recognition icon Setting value icon 27 - Sony DSC-G3 | Instruction Manual - Page 28
camera adjusts the focus automatically from distant subjects to close-up. Normally, put the camera in this mode. (Macro On): The camera adjusts (Off): Not using the self-timer. (Self-Timer 10sec): Shooting starts after a 10-second delay. Use this setting if you want to include yourself in the image. - Sony DSC-G3 | Instruction Manual - Page 29
Using shooting functions Selecting a flash mode 1 Touch (Flash) t desired mode t . (Flash Auto): Flashes when there is insufficient light or backlight. (Flash On): Flash always operates. (Slow Synchro): Flash always operates. The shutter speed is slow in a dark place to clearly shoot the background - Sony DSC-G3 | Instruction Manual - Page 30
you wish to focus on to change the focus position. 1 Point the camera at the subject, then touch the point of the frame you want to focus area with a face is touched on the screen. (Auto): Selects the face the camera is to automatically focus on. (Child Priority): Detects and shoots with priority on a - Sony DSC-G3 | Instruction Manual - Page 31
) Approx. 8 Usage guidelines For viewing on a TV (high picture quality) For viewing on a TV (standard picture quality) For e-mail attachments Note • When you print images shot with 16:9 aspect ratio, both edges may be cut off. 31 - Sony DSC-G3 | Instruction Manual - Page 32
:40 3:22:50 640(Standard) 3:00:50 0:10:20 0:21:40 0:44:20 1:30:10 2:58:00 5:59:20 12:10:20 320 12:03:30 0:41:30 1:25: Stick PRO Duo". • This camera does not support HD recordings or playbacks for movies. • When an image shot with other camera is played back on this camera, the image may not appear - Sony DSC-G3 | Instruction Manual - Page 33
Using viewing functions Using viewing functions Viewing an enlarged image (Playback zoom) 1 Press the (Playback) button to display an image, then touch the area you want to enlarge. The image is enlarged at twice the size, with the area you touched at the center. When (screen display) is set - Sony DSC-G3 | Instruction Manual - Page 34
the screen, and then touch [Exit]. zSelecting background music You can transfer a desired music file from your CDs or MP3 files to the camera to play back during slideshow. To transfer music files, install the "Music Transfer" software (supplied) to your computer (page 43), then follow the - Sony DSC-G3 | Instruction Manual - Page 35
Using viewing functions Viewing images with the Scrapbook display The camera automatically presents images against a background like a homemade photo album. 1 Press the (Playback) button to display a still image, then touch t (Scrapbook) t . 2 Turn the page with / . / : Save - Sony DSC-G3 | Instruction Manual - Page 36
, then touch (Image Index) t (View Mode) t desired mode. (Date View): Displays images by the date. (Event View): Analyzes the dates shots and frequency, automatically organizes the images into groups and displays them. (Favorites): Displays images registered as Favorites. (Folder View): Displays and - Sony DSC-G3 | Instruction Manual - Page 37
into six groups. Favorites: Displays a list of the images registered to the selected Favorites number. Note • When you cannot play back images recorded with other cameras, view the images in [Folder View]. 37 - Sony DSC-G3 | Instruction Manual - Page 38
Operate the DLNA-enabled "BRAVIA" via the home network and set the camera so that images stored in the camera can be viewed. 1 t (Communication) t [Network] t t For details, see the operating manual of the playback device. • Be sure to use sufficiently charged batteries while connected to the network - Sony DSC-G3 | Instruction Manual - Page 39
the WLAN (wireless network) button, or touch [OK]. t (Exit) t t Sending images to "BRAVIA" Operate the camera over your home network to send images to a "BRAVIA" that supports a renderer function. 1 Touch t (Communication) t [Network] t t (Send and View) t . 2 Touch [Search ext. devices]. The - Sony DSC-G3 | Instruction Manual - Page 40
[OK]. t (Exit) t t Notes • Images can only be played on equipment that supports a renderer function. For details on renderer settings, refer to the "BRAVIA" instruction manual. • Be sure to use sufficiently charged batteries while connected to the network. zSending multiple images to the "BRAVIA - Sony DSC-G3 | Instruction Manual - Page 41
images on an HD (High Definition) TV • You can view images recorded on the camera by connecting the camera to an HD (High Definition) TV with the HD Output Adaptor Cable (not supplied) or Cyber-shot Station (not supplied). • Set [COMPONENT] to [HD(1080i)] in [Main Settings 2] by selecting (Settings - Sony DSC-G3 | Instruction Manual - Page 42
your still images and movies. For details, see "PMB Guide". Import to computer Calendar Viewing images in a calendar. Print Printing images with date stamps. DVD Creating a data disc using a CD burner drive or DVD burner drive. Export to camera Media service Uploading the image to the media - Sony DSC-G3 | Instruction Manual - Page 43
× 768 dots or more * 64-bit editions and Starter (Edition) are not supported. 2 Turn on your computer, and insert the CD-ROM (supplied) into the Install]. The "Choose Setup Language" screen appears. 4 Follow the instructions on the screen to complete the installation. 5 Remove the CD-ROM after the - Sony DSC-G3 | Instruction Manual - Page 44
button. For details, see the "PMB Guide". Notes • Do not disconnect the cable for multi-use terminal from the camera while the camera is operating or while "Accessing..." appears on the screen of the camera. Doing so may corrupt the data. • When using a battery with little remaining charge, you may - Sony DSC-G3 | Instruction Manual - Page 45
been exported to the internal memory automatically. 1 Connect the camera to your computer. If the AutoPlay Wizard appears, close it Guide". x Viewing "PMB Guide" 1 Double-click the (PMB Guide) icon on the desktop. • To access the "PMB Guide" from the start menu: Click [Start] t [All Programs] t [Sony - Sony DSC-G3 | Instruction Manual - Page 46
in AutoPlay Wizard. The User Agreement screen appears. 3 Follow the instructions on the screen to complete the installation. "PMB Portable" starts Always connect to a network when using "PMB Portable". x Using the camera with your Macintosh computer You can copy images to your Macintosh computer. - Sony DSC-G3 | Instruction Manual - Page 47
Changing camera settings Changing the screen display 1 Touch t desired mode t . (Normal): Displays buttons and icons ( Bright]). When viewing images in bright outside light, reset to [Bright]. However, the battery power may decrease faster under such condition. Changing camera settings 47 - Sony DSC-G3 | Instruction Manual - Page 48
internal memory. 1 Touch t (Settings) t [Main Settings] t t [Password Lock] t . 2 Input the 4-digit number of your choice t touch [OK]. 3 Input the same 4-digit number again t touch [OK] t [OK]. 4 Turn off the camera. Password Lock is enabled starting from the next playback. x Entering the - Sony DSC-G3 | Instruction Manual - Page 49
. Only the available items are displayed on the screen. Changing camera settings x Shooting Item Shooting Description Records still images or movies. View Description Displays images by the date. Analyzes the dates shots and frequency, automatically organizes the images into groups and displays - Sony DSC-G3 | Instruction Manual - Page 50
Connect: LUN Settings: COMPONENT: Video Out: TV TYPE: Password Lock: Selects the beeps produced when you operate the camera. Displays the function guide. Restores the camera to its default settings. Corrects misalignment of the response positions of the buttons on the touch panel. Demonstrates the - Sony DSC-G3 | Instruction Manual - Page 51
Displays lines to easily set a subject in a horizontal or vertical position. Selects the auto focus operation mode. Selects the digital zoom method. Auto Orientation: Auto Review: Recognizes the orientation change and saves the image in the proper orientation. Displays the image on the screen for - Sony DSC-G3 | Instruction Manual - Page 52
easy setting when the camera is in shooting or Automatically detects the shooting conditions and then takes the shot. ( Off/ Auto/ Advanced) Face Detection Selects the Burst/BRK±0.3EV, BRK±0.7EV, BRK±1.0EV) EV Adjusts exposure manually. (-2.0EV to +2.0EV) Metering Mode Sets which part of the - Sony DSC-G3 | Instruction Manual - Page 53
Remove Sharemark) (Retouch) (Paint) (Multi-Purpose Resize) Changing camera settings Description Selects the playback date list. Selects the event group Mode. Registers/cancels registration of images to be uploaded to a media service. ( This Image/ Multiple Images/ Add All in Date Range*/ Remove - Sony DSC-G3 | Instruction Manual - Page 54
Item (Delete) (Protect) (Print) (Rotate) (Volume Settings) Description Deletes images. ( This Image/ Multiple Images/ All in Date Range*) * The displayed text differs according to each View Mode. Prevents accidental erasure. ( This Image/ Multiple Images/ Set All in Date Range*/ Remove All in Date - Sony DSC-G3 | Instruction Manual - Page 55
ROM (supplied). Refer to it for in-depth instructions on the many functions of the camera. x For Windows users 1 Turn on your computer, and insert the CD-ROM (supplied) into the CD-ROM drive. 2 Click "Cyber-shot Handbook". "Cyber-shot Step-up Guide", which contains information on accessories for the - Sony DSC-G3 | Instruction Manual - Page 56
are displayed on the screen to indicate the camera status. You can select the display settings by touching the indication on the bottom right of the screen (page 47). When shooting still images A Display Indication Battery remaining Low battery warning Image size • The icons are limited in - Sony DSC-G3 | Instruction Manual - Page 57
Others Display 96 8/8 00:25:05 C Display Indication Playback folder Number of recordable images Image number/Number of images recorded in selected folder Recordable time (h:m:s) Recording/Playback Media ("Memory Stick Duo", internal memory) PictBridge connecting Changing folder Scene Recognition - Sony DSC-G3 | Instruction Manual - Page 58
Troubleshooting If you experience trouble with the camera, try the following solutions. 1 Check the items below, and refer to "Cyber-shot Handbook" (PDF). If a code such as "C/E:ss:ss" appears on the screen, refer to "Cyber-shot Handbook". 2 Remove the battery pack, wait for about one minute, re- - Sony DSC-G3 | Instruction Manual - Page 59
battery pack while inside the camera. • You cannot charge the battery pack using the AC Adaptor (not supplied). Use the battery charger (supplied) to charge the battery play back some images stored on the "Memory Stick Duo" shot using other cameras. Play such images in Folder View (page 36). • This - Sony DSC-G3 | Instruction Manual - Page 60
information. Check with the wireless network service that you are connecting to. • (WEP key or WPA key), see the operation manual for the access point or the information listed on the force a connection failure. The MAC address of this camera will be displayed after the connection test. It takes - Sony DSC-G3 | Instruction Manual - Page 61
shoot with moisture remaining inside the lens, you will be unable to record clear images. On the internal rechargeable backup battery This camera has an internal rechargeable battery for maintaining the date and time and other settings regardless of whether the power is on or off. This rechargeable - Sony DSC-G3 | Instruction Manual - Page 62
Primary color filter Total pixel number of camera: Approx. 10.3 Megapixels Effective pixel number of camera: Approx. 10.1 Megapixels Lens: Carl Zeiss Vario-Tessar 4× Taiwan) 1 to 13 (EU, China, Hong Kong, South Korea) BC-CSD battery charger Power requirements: AC 100 V to 240 V, 50/60 Hz, 2.2 W - Sony DSC-G3 | Instruction Manual - Page 63
• The following marks are trademarks of Sony Corporation. , "Cyber-shot", "Memory Stick", , "Memory Stick are trademarks and/or service marks of Digital Living Network Alliance. addition, system and product names used in this manual are, in general, trademarks or registered trademarks - Sony DSC-G3 | Instruction Manual - Page 64
Additional information on this product and answers to frequently asked questions can be found at our Customer Support Website. Printed on 70% or more recycled paper using VOC (Volatile Organic Compound)-free vegetable oil based ink. Printed in Japan
-
 1
1 -
 2
2 -
 3
3 -
 4
4 -
 5
5 -
 6
6 -
 7
7 -
8
-
9
-
10
-
11
-
12
-
13
-
14
-
15
-
16
-
17
-
18
-
19
-
20
-
21
-
22
-
23
-
24
-
25
-
26
-
27
-
28
-
29
-
30
-
31
-
32
-
33
-
34
-
35
-
36
-
37
-
38
-
39
-
40
-
41
-
42
-
43
-
44
-
45
-
46
-
47
-
48
-
49
-
50
-
51
-
52
-
53
-
54
-
55
-
56
-
57
-
58
-
59
-
60
-
61
-
62
-
63
-
64
 |
 |

© 2008 Sony Corporation
4-105-996-
21
(1)
Digital Still Camera
Instruction Manual
DSC-G3
Before operating the unit, please read
this manual thoroughly and retain it for
future reference.
GB
Getting started
Shooting/viewing images
Uploading images
Using shooting functions
Using viewing functions
Connecting to other devices
Changing camera settings