Sony DSC-HX1 Instruction Manual
Sony DSC-HX1 - Cyber-shot Digital Camera Manual
 |
UPC - 027242767171
View all Sony DSC-HX1 manuals
Add to My Manuals
Save this manual to your list of manuals |
Sony DSC-HX1 manual content summary:
- Sony DSC-HX1 | Instruction Manual - Page 1
answers to frequently asked questions can be found at our Customer Support Website. En la página Web de atención al cliente puede Japan 4-132-059-61(1) Digital Still Camera Cámara fotografía digital DSC-HX1 Instruction Manual G····B Manual de instrucciones E···S··E···S © 2009 Sony Corporation - Sony DSC-HX1 | Instruction Manual - Page 2
to these numbers whenever you call upon your Sony dealer regarding this product. Model No. DSC-HX1 Serial No WARNING To reduce fire or shock ion batteries. • Be sure to charge the battery pack using a genuine Sony battery charger or a device that can charge the battery pack. • Keep the battery pack - Sony DSC-HX1 | Instruction Manual - Page 3
by Sony. • Dispose of used battery packs promptly as described in the instructions. [ Battery charger Even if the CHARGE lamp is not lit, the battery charger is not disconnected from the AC power source (mains) as long as it is connected to the wall outlet (wall socket). If some trouble occurs - Sony DSC-HX1 | Instruction Manual - Page 4
accordance with the instructions, may cause harmful order to comply with the limits for a digital device pursuant to Subpart B of Part Sony Deutschland GmbH, Hedelfinger Strasse 61, 70327 Stuttgart, Germany. For any service or guarantee matters please refer to the addresses given in separate service - Sony DSC-HX1 | Instruction Manual - Page 5
case of products that for safety, performance or data integrity reasons require a permanent connection with an incorporated battery, this battery should be replaced by qualified service staff only. To ensure that the battery lose the fuse cover, please contact your nearest Sony service station. 5GB - Sony DSC-HX1 | Instruction Manual - Page 6
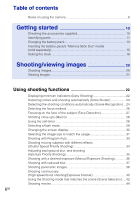
camera 8 Getting started 10 Checking the accessories supplied 10 Identifying parts 11 Charging the battery pack 13 Inserting the battery pack/a "Memory Stick Aperture Priority Shooting 35 Shooting with a desired exposure (Manual Exposure Shooting 36 Shooting with reduced blur 37 Shooting - Sony DSC-HX1 | Instruction Manual - Page 7
the operation sounds 56 Setting the custom button 57 Using the MENU items 58 Using the (Settings) items 62 Others 65 Learning more about the camera ("Cyber-shot Handbook 65 List of icons displayed on the screen 66 Troubleshooting 69 Precautions 72 Specifications 73 7GB - Sony DSC-HX1 | Instruction Manual - Page 8
x Notes on using the camera Internal memory and "Memory Stick Duo" media back up Do not turn off the camera, remove the battery pack, or remove the "Memory Stick Duo" media while the access lamp is lit. Otherwise, the internal memory data or "Memory Stick Duo" media may be damaged. Be sure to make a - Sony DSC-HX1 | Instruction Manual - Page 9
movies. Therefore, movies recorded using this camera cannot be played on devices that do not support MPEG-4 AVC/H.264. Warning on copyright or recording failure Sony cannot compensate for failure to record or loss or damage of recorded content due to a malfunction of the camera or recording media - Sony DSC-HX1 | Instruction Manual - Page 10
(sold separately) and connect it to the multi connector of the camera. • Shoulder strap (1) • Lens cap (1)/Lens cap strap (1) HDMI cable HDMI adaptor 10GB • CD-ROM (1) - Cyber-shot application software - "Cyber-shot Handbook" - "Cyber-shot Step-up Guide" • Instruction Manual (this manual) (1) - Sony DSC-HX1 | Instruction Manual - Page 11
Identifying parts M DC IN jack/DC IN jack cover • You cannot charge the battery pack by connecting your camera to the AC Adaptor (sold separately). Use the battery charger to charge the battery pack. N Multi connector Getting started A ON/OFF (Power) button B Mode dial C / (Burst/Bracket) button - Sony DSC-HX1 | Instruction Manual - Page 12
insert slot wj Battery eject lever wk "Memory Stick Duo" media slot wl Access lamp e; Battery/"Memory Stick Duo" media cover ea Tripod receptacle • Use a tripod with a screw less than 5.5 mm (7/32 inches) long. Otherwise, you cannot firmly secure the camera, and damage to the camera may occur - Sony DSC-HX1 | Instruction Manual - Page 13
partially charged. Battery pack 2 Connect the battery charger to the wall outlet (wall socket). If you continue charging the battery pack for about one more hour after the CHARGE lamp turns off, the charge will last slightly longer (Full charge). For customers in the USA and Canada Plug CHARGE - Sony DSC-HX1 | Instruction Manual - Page 14
the battery pack from the battery charger. • Be sure to use the battery pack or the battery charger of the genuine Sony brand. x Battery life still images may vary depending on the camera settings. zUsing the camera abroad You can use the camera, the battery charger (supplied), and the AC Adaptor - Sony DSC-HX1 | Instruction Manual - Page 15
Duo" media (sold separately). With the terminal side facing the lens, insert the "Memory Stick Duo" media until it clicks into place. 3 Insert the battery pack. Insert the battery with the v mark downward while pressing the battery eject lever in the direction of the arrow. 4 Close the cover. 15GB - Sony DSC-HX1 | Instruction Manual - Page 16
45. Other types of "Memory Stick" media or memory card are not compatible with the camera. "Memory Stick" media You cannot use a "Memory Stick" media with the camera. x To remove the "Memory Stick Duo" media Access lamp Note • Never remove the "Memory Stick Duo" media/battery pack when the access - Sony DSC-HX1 | Instruction Manual - Page 17
through repeated use. When the operating time per charge decreases markedly, the battery pack needs to be replaced. Purchase a new battery pack. • If the camera is running on and you do not operate the camera for about three minutes, the camera turns off automatically (Auto power-off function). 17GB - Sony DSC-HX1 | Instruction Manual - Page 18
Getting started Setting the clock 1 Press the ON/OFF (Power) button. The camera is turned on. • It may take time for the power to turn on and allow operation. 2 Select a setting item with v/ V on the control button, then - Sony DSC-HX1 | Instruction Manual - Page 19
Getting started 6 Select [OK], then press z. Note • The camera does not have a feature for superimposing dates on images. By using "PMB" in the CD-ROM (supplied), you can print or save images with the - Sony DSC-HX1 | Instruction Manual - Page 20
mode dial to (Movie Mode) (page 44). Mode dial ON/OFF (Power) button 2 Hold the camera steady as illustrated. • Turn the W/T (Zoom) lever to the T side to zoom in, and 150 cm (4 feet 11 1/8 inches) (T) (from the lens). Shutter button SteadyShot mark AE/AF lock 4 Press the shutter button fully down. - Sony DSC-HX1 | Instruction Manual - Page 21
Shooting/viewing images Viewing images 1 Press the (Playback) button. The last image shot is displayed. • When images on the "Memory Stick Duo" media recorded with other cameras cannot be played back on this camera, view the images in [Folder View] (page 47). (Playback) button x Selecting next/ - Sony DSC-HX1 | Instruction Manual - Page 22
Using shooting functions Displaying minimum indicators (Easy Shooting) This mode uses the minimum number of settings. The text size increases and indicators become easier to see. 1 Set the mode dial to Shooting). (Easy Action Self-Timer Image Size Flash How to change Press on the control button - Sony DSC-HX1 | Instruction Manual - Page 23
smile. When the smile level exceeds the b point on the indicator, the camera shoots images automatically. When you press the (Custom) button again, Smile eyes with the bangs. 2 Try to orient the face in front of the camera and be as level as possible. The detection rate is higher when the eyes - Sony DSC-HX1 | Instruction Manual - Page 24
the shooting conditions automatically (Scene Recognition) 1 Set the mode dial to (Intelligent Auto Adjustment). 2 Aim the camera at the subject. When the camera recognizes a scene, a Scene Recognition icon, (Twilight), (Twilight Portrait), (Twilight using a tripod), (Backlight), (Backlight Portrait - Sony DSC-HX1 | Instruction Manual - Page 25
face and background brightness and contrast adjusted (DRO plus) When shooting with Scene Recognition set to [Advanced], the camera automatically takes two shots when (Portrait) is recognized. An image without closed eyes is automatically selected, displayed, and recorded. Using shooting functions - Sony DSC-HX1 | Instruction Manual - Page 26
frame to the desired spot and focuses on it. (Semi Manual): Automatically and quickly focuses on the area around a set distance. (Manual Focus): Allows you to focus on the subject manually. zSelecting Flexible Spot AF, Semi Manual or Manual Focus You can determine the focus position with the control - Sony DSC-HX1 | Instruction Manual - Page 27
on the face of the subject (Face Detection) The camera detects the face of the subject and focuses on it. ] or the metering mode is set to [Multi]. zRegistering the priority face (Selected-face Memory) 1 Press z on the control button during Face Detection. The leftmost face is registered as the - Sony DSC-HX1 | Instruction Manual - Page 28
adjusts the focus with priority on close-up subjects. Set Macro On when shooting close subjects. Note • Macro mode is fixed to [Auto] when the camera is in Intelligent Auto Adjustment mode or Movie Mode. Using the self-timer 1 Press (Self-Timer) on the control button, then select the desired mode - Sony DSC-HX1 | Instruction Manual - Page 29
that is out of flash light. (Flash Off): Flash does not operate. Notes • [Flash On] and [Slow Synchro (Flash On)] are not available when the camera is in Intelligent Auto Adjustment mode. • You cannot use the flash during burst or bracket shooting. 29GB - Sony DSC-HX1 | Instruction Manual - Page 30
side, and a dark image when skewed to the left side. If you view images in bright outside light, adjust the screen brightness up. However, the battery power may decrease faster under such condition. 30GB - Sony DSC-HX1 | Instruction Manual - Page 31
Selecting the image size to match the usage The image size determines the size of the image file that is recorded when you take a image. The larger the image size, the more detail will be reproduced when the image is printed on large-format paper. The smaller the image size, the more images can be - Sony DSC-HX1 | Instruction Manual - Page 32
of still images that can be recorded (Units: Images) Capacity Internal memory "Memory Stick Duo" media formatted with this camera Size Approx. 11 MB 256 MB 512 MB 1 GB 2 GB . • When an image shot with other cameras is played back on this camera, the image may not appear in the actual - Sony DSC-HX1 | Instruction Manual - Page 33
Using shooting functions Shooting with Program Auto Allows you to shoot with the exposure adjusted automatically (both the shutter speed and the aperture (F value)). Also you can select various settings using the menu. 1 Set the mode dial to (Program Auto). 2 Press the shutter button. x Shooting - Sony DSC-HX1 | Instruction Manual - Page 34
Shooting moving subjects with different effects (Shutter Speed Priority Shooting) You can shoot still images after adjusting the shutter speed manually. 1 Set the mode dial to (Shutter Speed Priority Shooting). 2 Press the jog dial. Jog dial 3 Turn the jog dial to select the shutter speed value. - Sony DSC-HX1 | Instruction Manual - Page 35
Adjusting background blur, and shooting (Aperture Priority Shooting) You can manually adjust the amount of light that passes through the lens. 1 Set the mode dial to (Aperture Priority Shooting). 2 Press the jog dial. Using shooting functions Jog dial 3 Turn the jog dial to select the aperture (F - Sony DSC-HX1 | Instruction Manual - Page 36
Exposure Shooting) You can shoot still images at a desired exposure after adjusting the shutter speed and aperture (F value) manually. The camera maintains the setting even when the power is turned off. Once you set a value, you can reproduce the same exposure by simply setting the mode - Sony DSC-HX1 | Instruction Manual - Page 37
Shooting with reduced blur A series of high-speed burst shots are taken with one full press of the shutter button following situations: - Images with erratic movement - The main object is too close from the camera - Image with a repeating pattern such as sky, sandy beach or lawn - Image with constant - Sony DSC-HX1 | Instruction Manual - Page 38
LCD screen clearly. Press the MENU button for changing [Shooting Direction] or [Image Size] (page 58). 3 Fully press the shutter button. 4 Pan the camera following the indication on the screen. When a guidance bar reaches to the end, the shooting stops and panoramic images are recorded. This part - Sony DSC-HX1 | Instruction Manual - Page 39
Panorama is not suitable for the following situations: - Objects are moving - Objects are too close to the camera - Image with a repeating pattern such as sky, sandy beach, or lawn - Image with constant change such image. • Panoramic images are played back with the supplied software "PMB." 39GB - Sony DSC-HX1 | Instruction Manual - Page 40
because some shooting settings make the shutter speed slow. zAbout the recording of High-speed burst shooting images After shooting High-speed burst images, the shot images are displayed in frames on the LCD screen. When all the images are fitted in the frames, recording completes. You can stop the - Sony DSC-HX1 | Instruction Manual - Page 41
zPlaying back grouped burst images Burst shots are recorded in a group and you can play them back automatically. Display Main Image Only When a face is detected in burst images, a most suitable image - Sony DSC-HX1 | Instruction Manual - Page 42
Using the Shooting mode that matches the scene (Scene Selection) 1 Set the mode dial to (Scene Selection). A list of Scene Selection modes is displayed. 2 Select the desired mode with v/V/b/B on the control button t z. If you want to switch to another scene, press the MENU button. 42GB - Sony DSC-HX1 | Instruction Manual - Page 43
(High Sensitivity): Shoots images without a flash even in low lighting. (Portrait): Shoots with backgrounds blur away, and the subject is sharpened. (Advanced Sports Shooting): Shoots subjects with fast movements such as sports. (Landscape): Shoots with the focus on a distant subject. (Twilight - Sony DSC-HX1 | Instruction Manual - Page 44
Press the shutter button fully down to start recording. 3 Press the shutter button fully down again to stop recording. Note • The operating sound of the lens might be recorded while shooting a movie. A beep sound of other buttons such as the jog dial or W/T (Zoom) lever might be recorded. x Viewing - Sony DSC-HX1 | Instruction Manual - Page 45
total times for all movie files. Continuous shooting is possible for approximately 29 minutes. (Units: hour : minute : second) Capacity Internal memory "Memory Stick Duo" media formatted with this camera Approx. Size 11 MB 256 MB 512 MB 1 GB 2 GB 4 GB 8 GB 16 GB 1440×1080(Fine) - - 0:05:00 - Sony DSC-HX1 | Instruction Manual - Page 46
Using viewing functions Viewing an enlarged image (Playback zoom) 1 Press the (Playback) button to display an image, then turn the (Playback zoom) lever to the T side. The image is enlarged twice the previous size, at the center of the image. 2 Adjust the zoom scale and position. (Playback zoom) - Sony DSC-HX1 | Instruction Manual - Page 47
when using "Memory Stick Duo" media shots and frequency, automatically organizes the images into groups and displays them. (Favorites): Displays images registered as Favorites. (Folder View): Displays and organizes images by folders. Note • When you cannot play back images recorded with other cameras - Sony DSC-HX1 | Instruction Manual - Page 48
. zDeleting all images (Format) You can delete all data stored on "Memory Stick Duo" media or the internal memory. If a "Memory Stick Duo" media is inserted, all data stored on the "Memory Stick Duo" media are deleted. If no "Memory Stick Duo" media is inserted, all data stored in the internal - Sony DSC-HX1 | Instruction Manual - Page 49
on your TV, you may be using a PAL-only TV. Try switching the Video Out setting to PAL (page 63). zViewing images on an HD (High Definition) TV You can view images recorded on the camera by connecting the camera to an HD (High Definition) TV with an HDMI cable (sold separately) or - Sony DSC-HX1 | Instruction Manual - Page 50
internal memory at a print shop directly from the camera. Copy the images to a "Memory Stick Duo" media, then take the "Memory Stick Duo" media to the print shop. How to copy: Press MENU t (Settings) t [OK]. ("Memory Stick" Tool) t [Copy] t For details, consult your photo printing service shop - Sony DSC-HX1 | Instruction Manual - Page 51
. For details, consult with a photo printing service shop. Printing at home: Connect to a PictBridge-compliant printer, and press the MENU button, then set [Print] t [Date] to [Date] or [Day&Time]. Superimposing dates on images using PMB: With the supplied "PMB" software installed on a PC (page 53 - Sony DSC-HX1 | Instruction Manual - Page 52
Guide" (page 54). Import to computer Media service Uploading the image to the media service. Print Printing images with date stamps. Calendar Viewing images in a calendar. CD/DVD Creating a data disc using a CD burner drive or DVD burner drive. Export to camera Exporting images to a "Memory Stick - Sony DSC-HX1 | Instruction Manual - Page 53
): Approximately 500 MB Display: Screen resolution: 1,024 × 768 dots or more Video memory: 32 MB or more (Recommended: 64 MB or more) *1 64-bit editions and Starter (Edition) are not supported. *2 Starter (Edition) is not supported. 2 Turn on your computer, and insert the CD-ROM (supplied) into - Sony DSC-HX1 | Instruction Manual - Page 54
] t [All Programs] t [Sony Picture Utility] t [Help] t [PMB Guide]. Notes • Do not disconnect the cable for multi-use terminal from the camera while the camera is operating or while "Accessing..." appears on the screen of the camera. Doing so may corrupt the data. • When using a battery with little - Sony DSC-HX1 | Instruction Manual - Page 55
images are exported to "Memory Stick Duo" media, view them in [Folder View]. You can install "Music Transfer" on your Macintosh computer. Recommended computer environment The following environment is recommended for a computer connected to the camera. Recommended environment for importing images - Sony DSC-HX1 | Instruction Manual - Page 56
settings Changing the operation sounds You can set the sound produced when you operate the camera. 1 Press the MENU button. 2 Select (Settings) with V on the control button, then press z. MENU button 3 Select (Main Settings) with v/V/b/B on the control button, then press [ - Sony DSC-HX1 | Instruction Manual - Page 57
setting screen. Metering Mode: Displays the Metering Mode setting screen. Note • Custom Button is fixed to [Smile Shutter] in (Easy Shooting) and Demo Mode. Changing camera settings 57GB - Sony DSC-HX1 | Instruction Manual - Page 58
Using the MENU items Displays available functions for easy setting when the camera is in shooting or playback mode. Only the items that are available for each mode are displayed on the screen. Select (Settings) t [Main Settings] t [Initialize] - Sony DSC-HX1 | Instruction Manual - Page 59
scene when shooting movies. ( Auto/ High Sensitivity) Sets the direction of moving the camera. ( Right/ Left/ Up/ Down) Sets the image size. ( //// / Recognition Automatically detects the shooting conditions and then takes the shot. ( Auto/ Advanced) Smile Detection Sensitivity Sets the level - Sony DSC-HX1 | Instruction Manual - Page 60
Selects the anti-blur mode. ( Shooting/ Continuous/ Off) Changes the camera settings. Warm/ x MENU in viewing mode 60GB Item Description (Slideshow Red Eye Correction/ Unsharp masking/ Soft Focus/ Partial Color/ Fisheye Lens/ Cross Filter/ Radial Blur/ Retro/ Happy Faces) (Multi-Purpose - Sony DSC-HX1 | Instruction Manual - Page 61
) Description Prevents accidental erasure. ( This Image/ Multiple Images) Adds a Print order mark to the image you want to print in a "Memory Stick Duo" media. ( This Image/ Multiple Images) Prints images using a PictBridge compliant printer. ( This Image/ Multiple Images) Rotates a still image - Sony DSC-HX1 | Instruction Manual - Page 62
Using the (Settings) items You can change the default settings of the camera. (Shooting Settings) are displayed only when settings have been entered from shooting mode. 1 Press the MENU button to display the menu screen. 2 Select (Settings) with V - Sony DSC-HX1 | Instruction Manual - Page 63
) Item AF Illuminator Grid Line Digital Zoom Conversion Lens Flash Sync. Auto Orientation Auto Review Expanded Focus (Main Settings) Custom Button Beep Language Setting Function Guide Initialize Demo Mode HDMI Resolution CTRL FOR HDMI COMPONENT Video Out Wide Zoom Display USB Connect - Sony DSC-HX1 | Instruction Manual - Page 64
Change REC.Folder Delete REC.Folder Copy File Number Format File Number Area Setting Date & Time Setting Description Formats the "Memory Stick Duo" media. Creates a folder in "Memory Stick Duo" media for recording images. Changes the folder currently used for recording images. Deletes folders in - Sony DSC-HX1 | Instruction Manual - Page 65
and insert the CD-ROM (supplied) into the CD-ROM drive. 2 Click "Cyber-shot Handbook". "Cyber-shot Step-up Guide", which contains information on accessories for the camera, is installed at the same time. 3 Start "Cyber-shot Handbook" from the shortcut on the desktop. x For Macintosh users 1 Turn on - Sony DSC-HX1 | Instruction Manual - Page 66
Icons are displayed on the screen to indicate the camera status. You can change the screen display using DISP (screen display) on the control button (page 30). When shooting still images A Display Indication Battery remaining Low battery warning Image Size • The icons are limited in Shooting - Sony DSC-HX1 | Instruction Manual - Page 67
1 1 9:30 AM z STOP z PLAY bB BACK/NEXT V VOLUME Recording a movie/Standby a movie Recording time (m:s) Folder-file number Recorded date/time of the playback image Function guide for playing image Selecting images Adjusting volume Semi Manual Manual Focus Manual Focus bar Others 67GB - Sony DSC-HX1 | Instruction Manual - Page 68
Media ("Memory Stick Duo" media, internal memory) Changing folder AF Illuminator Red Eye Reduction Metering Mode Flash mode Flash charging White Balance ISO number D Display C:32:00 Indication Self-Timer Self-diagnosis display Destination Overheating warning Conversion Lens - Sony DSC-HX1 | Instruction Manual - Page 69
Troubleshooting If you experience trouble with the camera, try the following solutions. 1 Check the items below, and refer to "Cyber-shot Handbook" (PDF). If a code such as "C/E:ss:ss" appears on the screen, refer to "Cyber-shot Handbook." 2 Remove the battery pack, wait for about one minute, re- - Sony DSC-HX1 | Instruction Manual - Page 70
an image size of [1440×1080(Fine)], [1440×1080(Standard)] or [1280×720] on "Memory Stick PRO Duo" media. When using recording media other than "Memory Stick PRO Duo" media, set the movie image size to [VGA]. • The camera is in Smile Shutter demonstration mode. Set [Demo Mode] to [Off]. Cannot create - Sony DSC-HX1 | Instruction Manual - Page 71
You may not be able to play back some images stored on the "Memory Stick Duo" media shot using other cameras. Play such images in Folder View (page 47). • This is caused by copying images on your computer to the "Memory Stick Duo" media without using the "PMB." Play such images in Folder View (page - Sony DSC-HX1 | Instruction Manual - Page 72
Cleaning the lens Wipe the lens with a soft cloth to remove fingerprints, dust, etc. Cleaning the camera surface Clean the camera surface case, be sure to charge this rechargeable battery before using the camera. However, even if this rechargeable battery is not charged, you can still use the camera - Sony DSC-HX1 | Instruction Manual - Page 73
camera: Approx. 10.3 Megapixels Effective pixel number of camera: Approx. 9.1 Megapixels Lens: G-series 20× zoom lens out(SD/HD Component)/HDMI/USB) Video output Audio output (stereo) HDMI excluding protrusions) Mass (including NP-FH50 battery pack and "Memory Stick Duo" media): Approx. 504 g (1lb - Sony DSC-HX1 | Instruction Manual - Page 74
battery charger (2.6 oz) Rechargeable battery pack NP-FH50 Used battery: Lithium-ion battery Maximum voltage: DC Sony Corporation. , "Cyber-shot," "Memory Stick," , "Memory Stick PRO," , "Memory Stick Duo," , "Memory Stick PRO Duo," , "Memory Stick PRO-HG Duo," , "Memory Stick manual are - Sony DSC-HX1 | Instruction Manual - Page 75
75GB Others - Sony DSC-HX1 | Instruction Manual - Page 76
Nombre del producto: Cámara Digital Modelo: DSC-HX1 POR FAVOR LEA DETALLADAMENTE ESTE MANUAL DE INSTRUCCIONES ANTES DE CONECTAR fugas. • Asegúrese de cargar la batería con un cargador de baterías original de Sony o con un dispositivo que pueda cargarla. • Mantenga la batería fuera del alcance de niñ - Sony DSC-HX1 | Instruction Manual - Page 77
la seguridad de los productos es Sony Deutschland GmbH, Hedelfinger Strasse 61, 70327 Stuttgart, Alemania. Para resolver cualquier asunto relacionado con el soporte técnico o la garantía, consulte las direcciones que se indican - Sony DSC-HX1 | Instruction Manual - Page 78
componentes 9 Carga de la batería 11 Inserción de la batería o de un "Memory Stick Duo" (se vende por separado 13 Ajuste del reloj 16 Toma/visualización de imágenes la exposición deseada (Toma con exposición manual 36 Toma de imágenes con desenfoque reducido 37 Toma de imágenes panorámicas 38 - Sony DSC-HX1 | Instruction Manual - Page 79
Utilización de los elementos de MENU 58 Utilización de los elementos de (Ajustes 62 Otros ...65 Más información acerca de la cámara ("Guía práctica de Cyber-shot 65 Lista de los iconos visualizados en la pantalla 66 Solución de problemas 69 Precauciones 72 Especificaciones 73 5ES - Sony DSC-HX1 | Instruction Manual - Page 80
sus datos para protegerlos. Acerca de los archivos de administración Si inserta un "Memory Stick Duo" sin un archivo de administración en la cámara y activa la alimentación, parte de la capacidad del "Memory Stick Duo" se utilizará automáticamente para crear un archivo de administración. Es posible - Sony DSC-HX1 | Instruction Manual - Page 81
de datos de imágenes • La cámara cumple con la norma universal DCF (Design rule for Camera File system) definida por la JEITA (Japan Electronics and Information Technology Industries Association). • Sony no garantiza la reproducción en otros equipos de imágenes grabadas con su cámara y la reproducci - Sony DSC-HX1 | Instruction Manual - Page 82
de los accesorios suministrados • Cargador de batería BC-VH1 (1) • CD-ROM (1) - Software de aplicación Cyber-shot - "Guía práctica de Cyber-shot" - "Guía avanzada de Cyber-shot" • Manual de instrucciones (este manual) (1) • Cable de alimentación (1) (no suministrado en EE. UU. ni Canadá) x Uso - Sony DSC-HX1 | Instruction Manual - Page 83
Introducción Identificación de los componentes L Gancho de la correa para el hombro M Toma DC IN/tapa de la toma DC IN • No es posible cargar la batería conectando la cámara al adaptador de alimentación de ca (se vende por separado). Utilice el cargador de batería para cargar la batería. N Conector - Sony DSC-HX1 | Instruction Manual - Page 84
: DISP/ / / Y Altavoz Z Ranura de inserción de la batería wj Palanca de expulsión de la batería wk Ranura para "Memory Stick Duo" wl Indicador luminoso de acceso e; Batería/tapa del "Memory Stick Duo" ea Rosca para trípode • Utilice un trípode que disponga de un tornillo con una longitud - Sony DSC-HX1 | Instruction Manual - Page 85
Introducción Carga de la batería 1 Introduzca la batería en el cargador. • Es posible cargar la batería aunque se encuentre parcialmente cargada. Batería 2 Conecte el cargador de la batería a una toma de pared. Si sigue cargando la batería durante aproximadamente más de una hora después de - Sony DSC-HX1 | Instruction Manual - Page 86
• Asegúrese de utilizar la batería o el cargador de batería originales de Sony. x Duración de la batería y número de imágenes que se pueden 7 400 El método de medición está basado en el estándar CIPA. (CIPA: Camera & Imaging Products Association) Nota • La vida útil de la batería y el número - Sony DSC-HX1 | Instruction Manual - Page 87
Introducción Inserción de la batería o de un "Memory Stick Duo" (se vende por separado) 1 Abra la tapa. 2 Inserte el "Memory Stick Duo" (se vende por separado). Introduzca el "Memory Stick Duo" con el lado del terminal orientado hacia el objetivo hasta que encaje. 3 Introduzca la batería. Inserte - Sony DSC-HX1 | Instruction Manual - Page 88
películas con [1440×1080(Fina)], se recomienda utilizar un "Memory Stick PRO Duo" de 512 MB o más que presente la marca: - PRO Duo")* ("Memory Stick - PRO-HG Duo") ("Memory Stick * Es posible utilizar soportes "Memory Stick PRO Duo" independientemente de si incluyen la marca Mark2. Si desea - Sony DSC-HX1 | Instruction Manual - Page 89
Introducción x Comprobación de la carga restante de la batería Se mostrará un indicador de carga restante en la parte superior izquierda de la pantalla LCD. Icono de carga restante Tiempo restante Notas • El indicador correcto de la carga restante tarda aproximadamente un minuto en aparecer. • Es - Sony DSC-HX1 | Instruction Manual - Page 90
Introducción Ajuste del reloj 1 Pulse el botón ON/OFF (Encendido). La cámara se encenderá. • Es posible que la alimentación tarde unos instantes en activarse y que puedan llevarse a cabo operaciones. 2 Seleccione un elemento de ajuste mediante v/V del botón de control y, a continuación, pulse z. - Sony DSC-HX1 | Instruction Manual - Page 91
6 Seleccione [OK] y, a continuación, pulse z. Nota • La cámara no dispone de función para superponer fechas a las imágenes. Mediante la utilización de "PMB" que se encuentra incluido en el CD-ROM (suministrado), es posible imprimir o almacenar imágenes con la fecha. x Ajuste de la fecha y la hora - Sony DSC-HX1 | Instruction Manual - Page 92
Toma/visualización de imágenes Toma/visualización de imágenes Toma de imágenes 1 Ajuste el dial de modo en (Ajuste automát. inteligente) y, a continuación, pulse el botón ON/OFF (Encendido). Para filmar películas, ajuste el dial de modo en (Modo película) (página 44). Botón ON/OFF (Encendido) - Sony DSC-HX1 | Instruction Manual - Page 93
ón de imágenes Visualización de imágenes 1 Pulse el botón (Reproducción). Se visualizará la última imagen capturada. • Si las imágenes del "Memory Stick Duo" grabadas con otras cámaras no se pueden reproducir en esta cámara, visualice las imágenes de [Ver carpetas] (página 47). Botón (Reproducci - Sony DSC-HX1 | Instruction Manual - Page 94
Utilización de las funciones de toma de imágenes Visualización de los mínimos indicadores (Toma fácil) Este modo permite utilizar el número mínimo de ajustes. El tamaño del texto aumenta y los indicadores pasan a ser más fáciles de visualizarse. 1 Ajuste el dial de modo en (Toma fácil). Acción - Sony DSC-HX1 | Instruction Manual - Page 95
Utilización de las funciones de toma de imágenes Detección de sonrisas y captura de imágenes automáticamente (Captador de sonrisas) 1 Pulse el botón (Personalizado). • Si no aparece la pantalla Captador de sonrisas, ajuste [Captador de sonrisas] con [BotónPersonalizado] en (Ajustes). 2 Espere a - Sony DSC-HX1 | Instruction Manual - Page 96
Detección de las condiciones de toma de imágenes automáticamente (Reconocimiento de escena) 1 Ajuste el dial de modo en (Ajuste automát. inteligente). 2 Oriente la cámara hacia el motivo. Cuando la cámara reconoce una escena, se muestra un icono Reconocimiento de escena, (Crepúsculo), (Retrato crep - Sony DSC-HX1 | Instruction Manual - Page 97
zToma de dos imágenes con ajustes diferentes y selección de la imagen deseada Pulse el botón MENU y, a continuación, seleccione (Reconocimiento de escena) t (Avanzado) mediante v/V/b/B del botón de control. Si la cámara reconoce una escena difícil de capturar ( (Crepúsculo), (Retrato crepúsculo - Sony DSC-HX1 | Instruction Manual - Page 98
enfocar automática y rápidamente el área situada alrededor de una distancia establecida. (Enfoque manual): Permite enfocar el motivo manualmente. zAl seleccionar AF de punto flexible, Semimanual o Enfoque manual Es posible determinar la posición de enfoque mediante el botón de control. También es - Sony DSC-HX1 | Instruction Manual - Page 99
Utilización de las funciones de toma de imágenes Enfoque de la cara del motivo (Detección de cara) La cámara detecta la cara del motivo y la enfoca. Es posible seleccionar qué motivo desea que tenga prioridad a la hora de efectuar el enfoque. 1 Pulse el botón MENU. Botón MENU 2 Seleccione (Detecci - Sony DSC-HX1 | Instruction Manual - Page 100
zRegistro de la cara sobre la que se ha establecido prioridad (Memoria de cara seleccionada) 1 Pulse z del botón de control durante la función de Detección de cara. La cara situada más a la izquierda se registra como cara con prioridad y el marco pasa a estar iluminado de color naranja . 2 Cada vez - Sony DSC-HX1 | Instruction Manual - Page 101
Toma de primeros planos (Macro) Es posible tomar primeros planos de gran belleza de motivos pequeños como insectos o flores. 1 Pulse (Macro) del botón de control y, a continuación, seleccione el modo deseado mediante b/B t z. (Auto): Esta cámara ajusta el enfoque automáticamente desde objetos - Sony DSC-HX1 | Instruction Manual - Page 102
Selección de un modo de flash 1 Pulse (Flash) del botón de control y, a continuación, seleccione el modo deseado mediante b/B t z. (Flash automático): Destella cuando no hay suficiente luz o luz de fondo. (Flash activado): El flash funciona siempre. (Sinc lenta (Flash activado)): El flash funciona - Sony DSC-HX1 | Instruction Manual - Page 103
Utilización de las funciones de toma de imágenes Cambio de la visualización en pantalla 1 Pulse DISP (visualización en pantalla) del botón de control y, a continuación, seleccione el modo deseado mediante v/V. (Brillante + Sólo imagen): Permite aumentar el brillo de la pantalla y visualizar ú - Sony DSC-HX1 | Instruction Manual - Page 104
Selección del tamaño de la imagen para adaptarlo al tipo de uso El tamaño de la imagen determina el tamaño del archivo de imagen grabado al tomar la imagen. Cuanto más grande sea el tamaño de la imagen, más detalles se reproducirán al imprimir la imagen en papel de formato grande. Cuanto menor sea - Sony DSC-HX1 | Instruction Manual - Page 105
grabadas en formato 16:9, es posible que ambos bordes se corten. x Número de imágenes que se pueden grabar (Unidades: imágenes) Capacidad Memoria interna "Memory Stick Duo" formateado con esta cámara Tamaño Aprox. 11 MB 256 MB 512 MB 1 GB 2 GB 4 GB 8 GB 16 GB 9M 2 51 108 221 448 - Sony DSC-HX1 | Instruction Manual - Page 106
Toma de imágenes mediante Programa automático Permite tomar imágenes con la exposición ajustada automáticamente (tanto la velocidad de obturación como la abertura (valor F)). También es posible seleccionar diversos ajustes a través del menú. 1 Ajuste el dial de modo en (Programa automático). 2 Pulse - Sony DSC-HX1 | Instruction Manual - Page 107
Utilización de las funciones de toma de imágenes Toma de imágenes de motivos en movimiento con distintos efectos (Toma con prioridad de la velocidad del obturador) Es posible tomar imágenes fijas después de ajustar la velocidad de obturación manualmente. 1 Ajuste el dial de modo en (Toma con - Sony DSC-HX1 | Instruction Manual - Page 108
zAcerca de la velocidad de obturación Cuando se ajusta una velocidad de obturación mayor, los motivos en movimiento como, por ejemplo, gente corriendo, coches o agua que salpica, etc. aparecerán detenidos. Cuando se ajusta una velocidad de obturación menor, aparecerán los trazos de los motivos en - Sony DSC-HX1 | Instruction Manual - Page 109
Ajuste del desenfoque de fondo y de la toma de imágenes (Toma con prioridad de la abertura) Es posible ajustar manualmente la cantidad de luz que pasa a través del objetivo. 1 Ajuste el dial de modo en (Toma con prioridad de la abertura). 2 Pulse el dial táctil. Utilización de las funciones de toma - Sony DSC-HX1 | Instruction Manual - Page 110
establecido un valor, es posible reproducir la misma exposición simplemente ajustando el dial de modo en (Toma con exposición manual). 1 Ajuste el dial de modo en (Toma con exposición manual). 2 Pulse el dial táctil para seleccionar el elemento que desea ajustar. Cada vez que pulsa el dial táctil - Sony DSC-HX1 | Instruction Manual - Page 111
para reducir el desenfoque y el ruido del motivo. 1 Ajuste el dial de modo en (Crepúsculo manual) o en (Antidesenfoque de moción). Seleccione sin trípode. Seleccione habitación. (Crepúsculo manual) cuando tome imágenes de escenas nocturnas (Antidesenfoque de moción) cuando tome imágenes dentro de - Sony DSC-HX1 | Instruction Manual - Page 112
Toma de imágenes panorámicas Permite tomar múltiples imágenes y crear una imagen panorámica a partir de imágenes compuestas mientras toma panorámicas con la cámara. Es posible crear imágenes panorámicas hacia arriba, hacia abajo, hacia la derecha y hacia la izquierda. 1 Ajuste el dial de modo en ( - Sony DSC-HX1 | Instruction Manual - Page 113
las imágenes a una posición vertical. Indica el área mostrada de la imagen panorámica completa. • Las imágenes panorámicas se reproducen mediante el software "PMB" suministrado. 39ES - Sony DSC-HX1 | Instruction Manual - Page 114
Toma de imágenes continua (Toma en ráfaga a alta velocidad/variación de la exposición) 1 Pulse el botón / (Ráfaga/ Variación) Botón / (Ráfaga/ Variación) 2 Seleccione el modo de toma mediante b/B del botón de control y pulse z. (Normal): Permite tomar una sola imagen. (Ráfaga(Alto)): Permite tomar - Sony DSC-HX1 | Instruction Manual - Page 115
zReproducción de imágenes en ráfaga agrupadas Las tomas en ráfaga se guardarán en un grupo y podrá reproducirlas automáticamente. Visualiza sólo imag.principal Si se detecta una cara en las imágenes en ráfaga, se mostrará una imagen más adecuada como imagen principal. Si no se detecta una cara, la - Sony DSC-HX1 | Instruction Manual - Page 116
Utilización del modo de toma de imágenes adaptado a una escena (Selección escena) 1 Ajuste el dial de modo en (Selección escena). Se visualizará una lista de modos de Selección escena. 2 Seleccione el modo que desee mediante v/V/b/B del botón de control t z. Si desea cambiar a otra escena, pulse el - Sony DSC-HX1 | Instruction Manual - Page 117
(Alta sensibilidad): Permite tomar imágenes sin flash incluso en condiciones de iluminación escasa. (Retrato): Permite realizar tomas de imágenes con fondos desenfocados y motivos nítidos. (Toma deportiva avanzada): Permite tomar imágenes de motivos con movimientos rápidos como, por ejemplo, los - Sony DSC-HX1 | Instruction Manual - Page 118
Filmación de películas 1 Ajuste el dial de modo en (Modo película). 2 Pulse el botón del disparador a fondo para iniciar la grabación. 3 Pulse el botón del disparador a fondo de nuevo para detener la grabación. Nota • Es posible que se grabe el sonido del funcionamiento del objetivo cuando se - Sony DSC-HX1 | Instruction Manual - Page 119
ajustado en [Normal]. • Las películas de tamaño [1 440×1 080(Fina)], [1 440×1 080(Estándar)] o [1 280×720] solamente se pueden grabar en un "Memory Stick PRO Duo". • El tamaño de un archivo de película está limitado a 2 GB aproximadamente. Durante el proceso de grabación, la filmación de películas - Sony DSC-HX1 | Instruction Manual - Page 120
Utilización de las funciones de visualización Visualización de imágenes ampliadas (Zoom de reproducción) 1 Pulse el botón (Reproducción) para visualizar una imagen y, a continuación, mueva la palanca (Zoom de reproducción) hacia el lado T. La imagen se ampliará al doble del tamaño anterior a partir - Sony DSC-HX1 | Instruction Manual - Page 121
de visualización (Modo visualización) Permite seleccionar el formato de visualización para visualizar varias imágenes cuando se utiliza un "Memory Stick Duo". 1 Pulse el botón (Reproducción) para visualizar una imagen y, a continuación, pulse el botón MENU. Botón MENU 2 Seleccione (Modo visualizaci - Sony DSC-HX1 | Instruction Manual - Page 122
(Formato) Es posible eliminar todos los datos almacenados en el "Memory Stick Duo" o en la memoria interna. Si se inserta un "Memory Stick Duo", se eliminarán todos los datos almacenados en el "Memory Stick Duo". Si no se inserta un "Memory Stick Duo", se eliminarán todos los datos almacenados en la - Sony DSC-HX1 | Instruction Manual - Page 123
Conexión con otros dispositivos Visualización de imágenes en un televisor 1 Conecte la cámara al televisor mediante el cable para terminal multiuso (suministrado). Al conector múltiple Cable para terminal multiuso A las tomas de entrada de audio/vídeo Nota • El ajuste de Salida vídeo está en modo - Sony DSC-HX1 | Instruction Manual - Page 124
de impresiones imágenes almacenadas en la memoria interna directamente desde la cámara. Copie las imágenes en un "Memory Stick Duo" y, a continuación, lleve el "Memory Stick Duo" al establecimiento de impresión. Cómo efectuar la copia: Pulse MENU t (Ajustes) t [Copiar] t [OK]. (Her - Sony DSC-HX1 | Instruction Manual - Page 125
el botón MENU y, a continuación, ajuste [Imprimir] t [Fecha] en [Fecha] o [Día/Hora]. Superposición de fechas a las imágenes mediante el software PMB: Con el software "PMB" suministrado instalado en un ordenador (página 53), es posible superponer directamente la fecha en una imagen. Sin embargo - Sony DSC-HX1 | Instruction Manual - Page 126
Browser)" Ahora más que nunca, puede disfrutar de las imágenes grabadas gracias al software "PMB" que se encuentra incluido en un CD-ROM (suministrado). Además de ón de imágenes a un "Memory Stick Duo" y visualización de estas. Nota • El software "PMB" no es compatible con ordenadores Macintosh. 52ES - Sony DSC-HX1 | Instruction Manual - Page 127
Music Transfer" también se instalará. • Inicie sesión como administrador. 1 Compruebe su entorno informático. Entorno recomendado para utilizar el software "PMB" y "Music Transfer" Sistema operativo (preinstalado): Microsoft Windows XP*1 SP3/Windows Vista*2 SP1 CPU: Para reproducir o editar imágenes - Sony DSC-HX1 | Instruction Manual - Page 128
Etapa 2: Importación de imágenes en el ordenador mediante el software "PMB" 1 Inserte una batería completamente cargada en la PMB" desde el menú de inicio: Haga clic en [Inicio] t [Todos los programas] t [Sony Picture Utility] t [Ayuda] t [Guía de PMB]. Notas 54ES • No desconecte el cable para - Sony DSC-HX1 | Instruction Manual - Page 129
Es posible copiar imágenes a un ordenador Macintosh. Sin embargo, el software "PMB" no es compatible. Cuando exporte imágenes a un "Memory Stick Duo", visualícelas en [Ver carpetas]. Es posible instalar el software "Music Transfer" en un ordenador Macintosh. Entorno informático recomendado Para un - Sony DSC-HX1 | Instruction Manual - Page 130
Modificación de los ajustes de la cámara Modificación de los sonidos de funcionamiento Es posible ajustar el sonido que se produce al realizar una operación en la cámara. 1 Pulse el botón MENU. 2 Seleccione (Ajustes) mediante V del botón de control y, a continuación, pulse z. Botón MENU 3 - Sony DSC-HX1 | Instruction Manual - Page 131
Configuración del botón personalizado Es posible establecer la función utilizada habitualmente a partir de Captador de sonrisas, Balance Blanco o Modo medición para el botón personalizado y ajustarlo fácilmente al tomar imágenes. El ajuste predeterminado del botón personalizado es [Captador de - Sony DSC-HX1 | Instruction Manual - Page 132
Utilización de los elementos de MENU Permite visualizar las funciones disponibles para facilitar el ajuste cuando la cámara se encuentra en modo de toma de imágenes o de reproducción. En la pantalla solamente se visualizan los elementos disponibles en cada modo. Seleccione (Ajustes) t [Ajustes - Sony DSC-HX1 | Instruction Manual - Page 133
x MENU en el modo de toma de imágenes Elemento Modo Toma película Dirección de la toma Tamaño imag Descripción Cambia el ajuste en función de la escena seleccionada al tomar imágenes. ( Auto/ Alta sensibilidad) Permite establecer la dirección en la que se moverá la cámara. ( Derecha/ Izquierda/ - Sony DSC-HX1 | Instruction Manual - Page 134
Elemento Modo color Filtro color Saturación de color Contraste Nitidez SteadyShot (Ajustes) Descripción Cambia la intensidad de la imagen o añade efectos especiales. ( Normal/ Vívido/ Real/ Sepia/ B y N) Permite añadir efectos de color como si utilizase un filtro de color. ( Desactivar/ Rojo/ - Sony DSC-HX1 | Instruction Manual - Page 135
borrado accidental. ( Esta imagen/ Múltiples imágenes) Permite añadir una marca de orden de impresión a la imagen que desea imprimir de un "Memory Stick Duo". ( Esta imagen/ Múltiples imágenes) Imprime imágenes mediante una impresora compatible con PictBridge. ( Esta imagen/ Múltiples imágenes) Gira - Sony DSC-HX1 | Instruction Manual - Page 136
Utilización de los elementos de (Ajustes) Es posible cambiar los ajustes predeterminados de la cámara. (Ajustes de toma) solamente se mostrarán si los ajustes se han introducido desde el modo de toma de imágenes. 1 Pulse el botón MENU para visualizar la pantalla del menú. 2 Seleccione (Ajustes) - Sony DSC-HX1 | Instruction Manual - Page 137
líneas de cuadrícula en la pantalla. Selecciona el modo de zoom digital. Permite el ajuste para obtener un enfoque apropiado al colocar un objetivo la parte central de la imagen doble mientras se utiliza el Enfoque manual. Permite establecer la función deseada para el botón personalizado. Selecciona - Sony DSC-HX1 | Instruction Manual - Page 138
multiuso. Cambia los archivos de música mediante el software "Music Transfer". Elimina todos los archivos de música de fondo que se encuentran almacenados en la cámara. Formatea el "Memory Stick Duo". Crea una carpeta en el "Memory Stick Duo" para grabar imágenes. Cambia la carpeta utilizada - Sony DSC-HX1 | Instruction Manual - Page 139
instrucciones detalladas acerca de las distintas funciones de la cámara. • Necesitará Adobe Reader para poder leer la "Guía práctica de Cyber-shot" Si dicho software no se encuentra instalado en el ordenador, podrá descargarlo de la siguiente página web: http://www.adobe.com/ x Para usuarios de - Sony DSC-HX1 | Instruction Manual - Page 140
, Programa automático, Toma con prioridad de la velocidad del obturador, Toma con prioridad de la abertura, Toma con exposición manual, Crepúsculo manual, Antidesenfoque de moción, Barrido panorámico) Modo Toma película Balance Blanco Modo medición SteadyShot Aviso de vibración Reconocimiento de - Sony DSC-HX1 | Instruction Manual - Page 141
grupo de ráfaga Filtro por caras Favoritos Proteger Orden de impresión (DPOF) Exportación del software PMB Zoom de reproducción B Visualización z ISO400 Indicación Bloqueo AE/AF Número ISO 125 imágenes Permite ajustar el volumen Semimanual Enfoque manual Barra de Enfoque manual Otros 67ES - Sony DSC-HX1 | Instruction Manual - Page 142
grabables Número de imagen/Número de imágenes grabadas en la carpeta seleccionada Tiempo de grabación Soporte de grabación/ reproducción ("Memory Stick Duo", memoria interna) Cambiar carpeta Iluminador AF Reducción ojos rojos Modo medición Modo Flash Carga del flash Balance Blanco ISO400 Número - Sony DSC-HX1 | Instruction Manual - Page 143
de Cybershot" (PDF). Si aparece un código como, por ejemplo, "C/E:ss:ss" en la pantalla, consulte la "Guía práctica de Cyber-shot". 2 mínima necesidad para verificar y mejorar los síntomas de los fallos de funcionamiento. Sony no copiará ni guardará ninguno de dichos datos. Batería y alimentación No - Sony DSC-HX1 | Instruction Manual - Page 144
películas con un tamaño de imagen de [1 440×1 080(Fina)], [1 440×1 080(Estándar)] o [1 280×720] en un "Memory Stick PRO Duo". Si utiliza un soporte de grabación distinto de un "Memory Stick PRO Duo", ajuste el tamaño de las imágenes de la película en [VGA]. • La cámara se encuentra en - Sony DSC-HX1 | Instruction Manual - Page 145
no pueda reproducir algunas imágenes almacenadas en el "Memory Stick Duo" y tomadas con otras cámaras. Reproduzca dichas imágenes en Ver carpetas (página 47). • Esto se produce al copiar imágenes del ordenador al "Memory Stick Duo" sin utilizar el software "PMB". Reproduzca dichas imágenes en Ver - Sony DSC-HX1 | Instruction Manual - Page 146
Precauciones No utilice/almacene la cámara en los siguientes lugares • En lugares extremadamente calurosos, fríos o húmedos En lugares tales como en un automóvil estacionado bajo el sol, es posible que el cuerpo de la cámara se deforme, lo que podría provocar un fallo de funcionamiento. • Bajo la - Sony DSC-HX1 | Instruction Manual - Page 147
a la velocidad de obturación, Prioridad a la abertura, Exposición manual, Selección de escena (10 modos) Balance de blancos: Automá prf, sin incluir partes salientes) Peso (incluida la batería NP-FH50 y el "Memory Stick Duo"): Aprox. 504 g Micrófono: Estéreo Altavoz: Monoaural Exif Print: Compatible - Sony DSC-HX1 | Instruction Manual - Page 148
Sony Corporation. , "Cyber-shot", "Memory Stick", , "Memory Stick PRO", , "Memory Stick Duo", , "Memory Stick PRO Duo", , "Memory Stick PRO-HG Duo", , "Memory Stick los nombres de sistemas y productos utilizados en este manual son, en general, marcas comerciales o marcas comerciales - Sony DSC-HX1 | Instruction Manual - Page 149
75ES Otros - Sony DSC-HX1 | Instruction Manual - Page 150
76ES - Sony DSC-HX1 | Instruction Manual - Page 151
77ES Otros
-
 1
1 -
 2
2 -
 3
3 -
 4
4 -
 5
5 -
 6
6 -
 7
7 -
8
-
9
-
10
-
11
-
12
-
13
-
14
-
15
-
16
-
17
-
18
-
19
-
20
-
21
-
22
-
23
-
24
-
25
-
26
-
27
-
28
-
29
-
30
-
31
-
32
-
33
-
34
-
35
-
36
-
37
-
38
-
39
-
40
-
41
-
42
-
43
-
44
-
45
-
46
-
47
-
48
-
49
-
50
-
51
-
52
-
53
-
54
-
55
-
56
-
57
-
58
-
59
-
60
-
61
-
62
-
63
-
64
-
65
-
66
-
67
-
68
-
69
-
70
-
71
-
72
-
73
-
74
-
75
-
76
-
77
-
78
-
79
-
80
-
81
-
82
-
83
-
84
-
85
-
86
-
87
-
88
-
89
-
90
-
91
-
92
-
93
-
94
-
95
-
96
-
97
-
98
-
99
-
100
-
101
-
102
-
103
-
104
-
105
-
106
-
107
-
108
-
109
-
110
-
111
-
112
-
113
-
114
-
115
-
116
-
117
-
118
-
119
-
120
-
121
-
122
-
123
-
124
-
125
-
126
-
127
-
128
-
129
-
130
-
131
-
132
-
133
-
134
-
135
-
136
-
137
-
138
-
139
-
140
-
141
-
142
-
143
-
144
-
145
-
146
-
147
-
148
-
149
-
150
-
151
 |
 |
© 2009 Sony Corporation
4-132-059-
61
(1)
Printed in Japan
Printed on 70% or more recycled paper using VOC
(Volatile Organic Compound)-free vegetable oil based
ink.
Impreso en papel reciclado en un 70% o más utilizando
tinta hecha con aceite vegetal exento de compuesto
orgánico volátil (COV).
Additional information on this product and answers
to frequently asked questions can be found at our
Customer Support Website.
En la página Web de atención al cliente puede
encontrar información adicional sobre este producto
y respuesta a las preguntas hechas con más
frecuencia.
Digital Still Camera
Cámara fotografía digital
DSC-HX1
Instruction Manual
··················································
Manual de instrucciones
································
GB
ES