Sony DSC-W170/R Cyber-shot® Handbook
Sony DSC-W170/R - Cyber-shot Digital Still Camera Manual
 |
View all Sony DSC-W170/R manuals
Add to My Manuals
Save this manual to your list of manuals |
Sony DSC-W170/R manual content summary:
- Sony DSC-W170/R | Cyber-shot® Handbook - Page 1
Digital Still Camera Cyber-shot Handbook DSC-W150/W170 Before operating the unit, please read this Handbook thoroughly together with the "Instruction Manual" and the "Cyber-shot Step-up Guide", and retain them for future reference. © 2008 Sony Corporation VCLICK! Table of contents Basic Operations - Sony DSC-W170/R | Cyber-shot® Handbook - Page 2
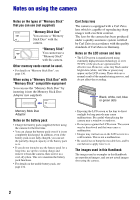
appear on the LCD screen. These dots are a normal result of the manufacturing process, and do not affect the recording. Black, white, red, blue or green dots Memory Stick Duo Adaptor Notes on the battery pack • Charge the battery pack (supplied) before using the camera for the first time. • You can - Sony DSC-W170/R | Cyber-shot® Handbook - Page 3
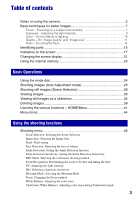
of contents Notes on using the camera 2 Basic techniques for better images screen 17 Changing the screen display 21 Using the internal memory 23 Basic Operations Using the mode dial 24 Shooting images : Determining the scene to be shot and taking the shot EV: Adjusting the light intensity ISO - Sony DSC-W170/R | Cyber-shot® Handbook - Page 4
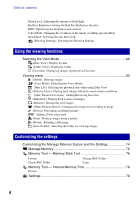
Remove Favorites): Adding/Removing Favorites (Slideshow): Playing back a series of images (Retouch): Retouching still images (Multi-Purpose Resize): the settings Customizing the Manage Memory feature and the Settings 74 Manage Memory 76 Memory Tool - Memory Stick Tool 76 Format Create - Sony DSC-W170/R | Cyber-shot® Handbook - Page 5
" ...97 Copying images to a computer without "Picture Motion Browser".........101 Viewing image files stored on a computer with the camera copying to the "Memory Stick Duo 103 Using the "Music Transfer" (supplied 104 Using your Macintosh computer 105 Viewing "Cyber-shot Step-up Guide 107 5 - Sony DSC-W170/R | Cyber-shot® Handbook - Page 6
using a PictBridge compliant printer 109 Printing at a shop 112 Troubleshooting Troubleshooting 114 Warning indicators and messages 125 Others Using the camera abroad - Power sources 129 On the "Memory Stick Duo 130 On the battery pack 132 On the battery charger 133 Index Index ...134 6 - Sony DSC-W170/R | Cyber-shot® Handbook - Page 7
HOME screen (page 41) and the menus (page 43). Focus Focusing on a subject successfully When you press the shutter button halfway down, the camera adjusts the focus automatically (Auto Focus). Remember to press the shutter button only halfway down. Do not fully press the Press the shutter button - Sony DSC-W170/R | Cyber-shot® Handbook - Page 8
camera on a flat surface to hold the camera steady. • Shoot with a 2-second delay self-timer and stabilize the camera camera shake and subject blur occur frequently under low-light or slow shutter speed conditions, such as those encountered in (Twilight) mode or (Twilight Portrait) mode. In that case - Sony DSC-W170/R | Cyber-shot® Handbook - Page 9
of light that the camera will receive when you release the shutter. Shutter speed = Length of time the camera receives Exposure: light However, you can adjust it manually using the functions below. Adjusting EV: Allows you to adjust the exposure determined by the camera (page 52). Metering Mode: - Sony DSC-W170/R | Cyber-shot® Handbook - Page 10
(standard) Cloudy Bluish Fluorescent Green-tinged Incandescent Reddish The color tones are adjusted automatically in the Auto Adjustment mode. However, you can adjust color tones manually with [White Balance] (page 57). 10 - Sony DSC-W170/R | Cyber-shot® Handbook - Page 11
you cannot see the differences on the screen of the camera, the fine detail and data processing time differ when the image is printed or displayed on a computer screen. Description of the pixels and the image size 1 Image size: 10M (DSC-W170 only) 3648 pixels × 2736 pixels = 9,980,928 pixels 2 Image - Sony DSC-W170/R | Cyber-shot® Handbook - Page 12
Basic techniques for better images DSC-W170 The default settings are marked with . Image size 10M (3648×2736) Usage guidelines For prints up to A3+(13×19") No. of images Less 3:2 (8M)*1 ( - Sony DSC-W170/R | Cyber-shot® Handbook - Page 13
3:2 aspect ratio, same as photograph printing paper or postcards, etc. *2) Both edges of the image may be cut off when printing (page 122). DSC-W170/W150 The default settings are marked with . Movie image size Frame/Second Usage guidelines 640(Fine) (640×480) Approx. 30 Shoot high quality movie - Sony DSC-W170/R | Cyber-shot® Handbook - Page 14
software "Picture Motion Browser". The "White circular spots" This is caused by particles (dust, pollen, etc.) floating close to the lens. When they are accentuated by the camera's flash, they appear as white circular spots. Camera In that case, use a tripod or hold your arms firmly at your - Sony DSC-W170/R | Cyber-shot® Handbook - Page 15
B Shutter button (25) C POWER lamp D Flash (26) E Microphone F Lens G Speaker H Finder window I Self-timer lamp (27)/ Smile Shutter lamp (31)/ AF illuminator (83) Bottom A AE/AF lock lamp (green) B Flash charge lamp/ Record lamp (orange) C Finder D LCD screen (21) E MENU button (43) F (Playback - Sony DSC-W170/R | Cyber-shot® Handbook - Page 16
M Multi connector Used in the following situations: • Making a USB connection between the camera and the computer. • Making a connection to audio/video input jacks secure the camera, and damage to the camera may occur. O Battery/"Memory Stick Duo" cover P Battery insertion slot Q "Memory Stick Duo" - Sony DSC-W170/R | Cyber-shot® Handbook - Page 17
A Display Indication Battery remaining Low battery warning (125) Image size (46) • is displayed only for the DSC-W170. • is displayed only for the DSC-W150. Mode dial tripod or other means to stabilize the camera (page 8). Smile Detection Sensitivity indicator/Number of images (31) Zoom scaling (26, - Sony DSC-W170/R | Cyber-shot® Handbook - Page 18
. Number of recordable images Recording Media ("Memory Stick Duo", Internal memory) Recordable time (hours : minutes : seconds) Scene Recognition (51) AF illuminator (83) Red-eye reduction (59) Flash mode (26) Flash charging Conversion lens (85) Indication Self-timer (27) Self-diagnosis display (125 - Sony DSC-W170/R | Cyber-shot® Handbook - Page 19
Indication Battery remaining Low battery warning (125) Image size (46) • is displayed only for the DSC-W170. • is displayed only for the DSC-W150. (33) Volume (33) PictBridge connecting (111) • Do not disconnect the cable for multi-use terminal while the mark is displayed. Indication Playback (33) - Sony DSC-W170/R | Cyber-shot® Handbook - Page 20
. Image number/Number of images recorded in selected folder Playback Media ("Memory Stick Duo", Internal memory) Changing folder (73) • This does not appear when using internal memory. Metering mode (54) Flash White balance (57) ISO400 C:32:00 +2.0EV 500 F3.5 ISO number (53) Self-diagnosis display - Sony DSC-W170/R | Cyber-shot® Handbook - Page 21
Each time the LCD backlight up. However, the battery power may cameras. • When you set the LCD screen to off, the digital zoom does not function. When you select (Flash mode)/ (Self-timer)/ (Macro), the image is displayed for about two seconds. • If you turn the power off and on again while the LCD - Sony DSC-W170/R | Cyber-shot® Handbook - Page 22
Changing the screen display z Adjusting EV (Exposure Value) by displaying a histogram A B Dark Bright A histogram is a graph showing the brightness of an image. Press v (DISP) on the control button repeatedly to display the histogram on the screen. The graph display indicates a bright image - Sony DSC-W170/R | Cyber-shot® Handbook - Page 23
Perform the procedure on pages 97, 98 or 101, 102 without a "Memory Stick Duo" inserted in the camera. • You cannot copy image data on a "Memory Stick Duo" to the internal memory. • By connecting the camera to a computer with a cable for multi-use terminal, you can copy data stored in the internal - Sony DSC-W170/R | Cyber-shot® Handbook - Page 24
Basic Operations Using the mode dial Set the mode dial to the desired function. Mode dial : Auto Adjustment mode Allows shooting with the settings adjusted automatically. t page 25 : Easy Shooting mode Allows you to shoot still images using the minimum necessary functions with easy-to-see - Sony DSC-W170/R | Cyber-shot® Handbook - Page 25
Mode dial MENU button Macro button DISP button Flash button Self-timer button z button v/V/b/B button Control button 1 Select the (Auto Adjustment mode): Select . When shooting movies: Select . 2 Hold the camera, with your elbows pressed against your body to steady it. Position the subject in - Sony DSC-W170/R | Cyber-shot® Handbook - Page 26
) (T) (from the front of the lens). • When the camera cannot focus on the subject automatically, the Timer (10 sec/ Off) (page 27). W/T Using the zoom Press T to zoom, press W to undo the zoom. • When the zoom scale exceeds 5×, the camera uses the Digital Zoom function. For details on the [Digital - Sony DSC-W170/R | Cyber-shot® Handbook - Page 27
and a beep sounds until the shutter operates. Self-timer lamp To cancel, press V ( ) again. • Use the 2-second delay self-timer to prevent blur of an image. The shutter is released 2 seconds after you press the shutter button, which reduces camera shake when the shutter button is pressed. • In - Sony DSC-W170/R | Cyber-shot® Handbook - Page 28
Shooting still images (Scene Selection) MENU button Shutter button z button v/V/b/B button Control button Mode dial Select the mode in the mode dial 1 Select the desired mode of Scene Selection with the mode dial. 2 Shoot with the shutter button. Select the mode in SCN 1 Select SCN with - Sony DSC-W170/R | Cyber-shot® Handbook - Page 29
screen Twilight* Allows you to shoot night scenes at far distance without losing the dark atmosphere of the surroundings. Smile Shutter When the camera detects a smile, the shutter is released automatically. For details, see page 31. Soft Snap Allows you to shoot images with a softer atmosphere for - Sony DSC-W170/R | Cyber-shot® Handbook - Page 30
to the scene condition, a combination of functions is determined by the camera. Some functions are not available, depending on the Scene Selection mode. - - - - - - - - *3 Red Eye Reduction -- - -- Self-timer - *1) [Flash] for [White Balance] cannot be selected. *2) [Off] for - Sony DSC-W170/R | Cyber-shot® Handbook - Page 31
time the smile level reaches the set Smile Detection Sensitivity (indicated by b), the camera automatically when either the "Memory Stick Duo" or internal memory becomes full or when six the camera. • Smiles may not be detected correctly depending on the conditions. • You cannot use the Digital Zoom - Sony DSC-W170/R | Cyber-shot® Handbook - Page 32
(Scene Selection) z Hints for better capturing of smiles 1 Do not cover the eyes with the bangs. 2 Try to orient the face in front of the camera and be as level as possible. The detection rate is higher when the eyes are narrowed. 3 Give a clear smile with an open mouth. The smile - Sony DSC-W170/R | Cyber-shot® Handbook - Page 33
press the (Playback) button when the camera is powered off, the camera is turned on automatically and set to playback displayed in a smaller size. • Sometimes images shot using earlier Sony models cannot be played back. Press the HOME button case, the center is enlarged. • To store enlarged images, - Sony DSC-W170/R | Cyber-shot® Handbook - Page 34
Duo") or in Folder View (when using the internal memory). You can change the View Mode by selecting (View Images) on the HOME screen (page 62). • Each time you press (Index), the number of images on the index screen increases. • When using a "Memory Stick Duo", you can select the desired date/folder - Sony DSC-W170/R | Cyber-shot® Handbook - Page 35
movies. • Settings other than [Image] and [Filter by Faces] are stored until the next time they are changed. • Sometimes the [Filter by Faces] function cannot be used with images shot using earlier Sony models. To end the slideshow Press the (Slideshow) button. • You cannot pause the slideshow. To - Sony DSC-W170/R | Cyber-shot® Handbook - Page 36
follows. The default settings are marked with . Image This setting is fixed to [Folder] if a "Memory Stick Duo" (not supplied) is not inserted. All Plays back all the still images in order. Folder . • Sometimes filtering cannot be performed with images shot using earlier Sony models. Smiles 36 - Sony DSC-W170/R | Cyber-shot® Handbook - Page 37
include faces A lively, high tempo slideshow, with effects such as zooming in on faces and displaying multiple images side by side, to bring out the best of images that include faces Music The music played is determined by default according to the effect you select. You can custom set any music - Sony DSC-W170/R | Cyber-shot® Handbook - Page 38
can transfer a desired music file from your CDs or MP3 files to the camera to playback during slideshow. You can transfer music using [ Music Tool] in (Slideshow) on the HOME screen and the "Music Transfer" software (supplied) installed on a computer. For details, see pages 104 and 106. • You can - Sony DSC-W170/R | Cyber-shot® Handbook - Page 39
Basic Operations Deleting images (Index) button MENU button (Playback) button z button v/V/b/B button Control button 1 Press the (Playback) button. 2 Press the MENU button while displaying in single-image or index mode. 3 Select [Delete] with v/V on the control button. 4 Select the desired - Sony DSC-W170/R | Cyber-shot® Handbook - Page 40
Deleting images When you select [This Image] You can delete the selected image. Select [OK] with v, then press z. When you select [Multiple Images] You can select and delete multiple images simultaneously. 1 Select the images you want to delete, then press z. The mark is checked in the checkbox - Sony DSC-W170/R | Cyber-shot® Handbook - Page 41
The HOME screen is the gateway screen for all the functions of the camera, and can be called up regardless of the mode setting (shooting/viewing to display the HOME screen. Shooting Shooting Category Item Shoot photos or movies Guide 2 Select a category with b/B on the control button. 3 Select - Sony DSC-W170/R | Cyber-shot® Handbook - Page 42
Function Guide Smile demo mode Main Settings 2 (page 81) USB Connect Video Out COMPONENT Wide Zoom Display Shooting Settings Shooting Settings 1 (page 83) AF Illuminator AF Mode Conversion Lens Grid Line Digital Zoom Shooting Settings 2 (page 86) Auto Orientation Auto Review Clock - Sony DSC-W170/R | Cyber-shot® Handbook - Page 43
Basic Operations MENU button 1 Press the MENU button to display the menu. z button v/V/b/B button Control button Function Guide Setting [Function Guide] to [Off] turns off the function guide (page 79). • The menu will be displayed only during shooting and playback mode. • Different items will - Sony DSC-W170/R | Cyber-shot® Handbook - Page 44
Menu items The available menu items vary depending on the mode setting (shooting/viewing), and the mode dial position in the shooting mode. Only the available items are displayed on the screen. Mode dial position: ( : available) Scene Shooting menu (page 46) Scene Selection - Image Size - Sony DSC-W170/R | Cyber-shot® Handbook - Page 45
Menu items Viewing menu (page 63) (Delete) (Date List) (Add / Remove Favorites) (Retouch) (Protect) (Print) (Select Folder) (View Mode) (Filter by Faces) (Slideshow) (Multi-Purpose Resize) (Rotate) Basic Operations 45 - Sony DSC-W170/R | Cyber-shot® Handbook - Page 46
the settings pre-adjusted to match various scene conditions (page 28). Image Size: Selecting the Image Size For details, see page 11. For still images (DSC-W170 only) (DSC-W150 only) Selects image size for shooting still images. 46 - Sony DSC-W170/R | Cyber-shot® Handbook - Page 47
on the operation 1 page 43 For Easy Shooting mode Selects the still image size for Easy Shooting mode. Large Shoots images in [10M] (DSC-W170 only) or [8M] (DSCW150 only) size. Small Shoots images in [3M] size. For movie (Fine) (Standard) Selects image size for recording movies. Flash - Sony DSC-W170/R | Cyber-shot® Handbook - Page 48
priority on adults' faces. • The Face Detection function does not work when using the digital zoom. • When the Scene Selection mode is set to ( is selected in the Scene Selection mode. • When the camera detects more than one subject, the camera will judge which is the main subject and set focus by - Sony DSC-W170/R | Cyber-shot® Handbook - Page 49
Shooting menu For details on the operation 1 page 43 Smile Detection: Setting the Smile Detection function Selects the priority subject for the Smile Shutter function. For details on the Smile Shutter, see page 31. (Auto) Detects and shoots smiling faces automatically. (Child Priority) - Sony DSC-W170/R | Cyber-shot® Handbook - Page 50
best timer, a series of a maximum of five images is recorded. • The recording interval is approximately 0.62 seconds (DSC-W170) or 0.51 seconds (DSC-W150). The recording interval becomes longer, depending on the setting for the image size. • When the battery level is low, or when the internal memory - Sony DSC-W170/R | Cyber-shot® Handbook - Page 51
. (A total of two shots) If the camera does not recognize the scene, it only shoots one image. In this case, the image is shot just as if scene recognition not function in the following situations: - During burst shooting - When using digital zoom • The flash is set to (Flash Auto) or (Flash forced - Sony DSC-W170/R | Cyber-shot® Handbook - Page 52
be recognized depending on the situation. EV: Adjusting the light intensity Manually adjusts the exposure. Toward - Toward + -2.0EV Toward -: Darkens an image. 0EV The exposure is determined automatically by the camera. +2.0EV Toward +: Brightens an image. • For details on the Exposure, see - Sony DSC-W170/R | Cyber-shot® Handbook - Page 53
can select only from [ISO AUTO], [ISO 80] to [ISO 400] when set to Burst or Exposure Bracket. • When shooting under brighter conditions, the camera automatically increases its tone reproduction and helps prevent images to become whitish (excluding when [ISO] is set to [ISO 80]). Using the shooting - Sony DSC-W170/R | Cyber-shot® Handbook - Page 54
that sets which part of the subject to measure to determine the exposure. (Multi) Divides into multiple regions and measures each region. The camera determines a well-balanced exposure (Multi-pattern metering). (Center) Measures the center of the image, and determines the exposure based on the - Sony DSC-W170/R | Cyber-shot® Handbook - Page 55
an extremely small subject or a narrow area automatically. • Using the AF lock function together, you can compose the image the way you want. Hold the camera steady so as not to misalign the subject and the AF range finder frame. AF range finder frame AF range finder frame indicator 55 - Sony DSC-W170/R | Cyber-shot® Handbook - Page 56
window. • AF stands for Auto Focus. • When you use Digital Zoom or AF illuminator, the AF range finder frame is disabled and appears in a dotted line. In this case, the camera works manual distance setting contains some errors, and this error increases when the zoom is set to the T side or the lens - Sony DSC-W170/R | Cyber-shot® Handbook - Page 57
Using the shooting functions Shooting menu For details on the operation 1 page 43 White Balance: Adjusting the color tones Adjusts color tones according to the surrounding light conditions. Use this function if image color appears unnatural. (Auto) Adjusts the White Balance automatically. ( - Sony DSC-W170/R | Cyber-shot® Handbook - Page 58
10. • Under fluorescent lights that flicker, the white balance function may not work correctly even though you select [Fluorescent Light 1], [Fluorescent Light 2] or [ 2) (Flash) (Underwater) mode (page 29). The camera automatically adjusts color tones underwater so they appear natural. Adjusts - Sony DSC-W170/R | Cyber-shot® Handbook - Page 59
function The flash strobes two or more times before shooting to reduce the red-eye phenomenon looked away from the pre-strobe. In such a case, you can correct the red-eye using [Retouch] shot, and improves the image quality by automatic correction. (Off) Does not adjust. (DRO standard) The camera - Sony DSC-W170/R | Cyber-shot® Handbook - Page 60
the image to standard color. (Vivid) Sets the image to bright and deep color. (Sepia) Sets the image to sepia color. (B & W) Sets the image to black and white. • You can select only [Normal], [Sepia] or [B & W] when shooting movies. 60 - Sony DSC-W170/R | Cyber-shot® Handbook - Page 61
. You can stabilize images even when zooming up a far subject. • Battery consumption is faster than in [Shooting] mode. Does not use anti-blur to [Continuous]. • The anti-blur function may not work properly in the following cases. - When camera shake is too strong. - When the shutter speed is - Sony DSC-W170/R | Cyber-shot® Handbook - Page 62
the camera with a "Memory Stick Duo", you can select how images are played back (View Mode) from the HOME screen. When using internal memory, images for each folder created using [Create REC.Folder] of the [Memory Tool]. If a new folder has not been created, all images are located in the "101MSDCF - Sony DSC-W170/R | Cyber-shot® Handbook - Page 63
the menu, see page 43. The selectable playback mode is displayed in white. Available Unavailable View Mode (Date View/Folder View/Favorites) Internal memory (Delete): Deleting images Selects and deletes images on the single-image screen or the index screen, see page 39. (This Image) (Multiple - Sony DSC-W170/R | Cyber-shot® Handbook - Page 64
then displayed. (Infants) (Smiles) • Sometimes images are mistakenly displayed or hidden. • Sometimes filtering cannot be performed with images shot using earlier Sony models. (Add / Remove Favorites): Adding/Removing Favorites Select your favorite image and add/remove from groups as favorites - Sony DSC-W170/R | Cyber-shot® Handbook - Page 65
. • Select [Remove All in Date Range]/[Remove All in Favorites] to remove all the images of the selected date or Favorites group. (Slideshow): Playing back a series of images This item has the same function as pressing (Slideshow) button. See page 35. 65 - Sony DSC-W170/R | Cyber-shot® Handbook - Page 66
or makes corrections to a recorded image and records it as a new file. The original image is retained. To retouch the still images after selecting the desired mode with b/B. 4 Retouch the images following the instructions for each retouching mode below. (Trimming) Playback zoom is performed on - Sony DSC-W170/R | Cyber-shot® Handbook - Page 67
Viewing menu For details on the operation 1 page 43 (Unsharp masking) Sharpens the image within a chosen frame. Using the viewing functions (Soft Focus) 1 Set the area (frame) of the desired image to retouch with v/V/ b/B, then press the MENU button. 2 Select [OK] with v/V, then press z. • - Sony DSC-W170/R | Cyber-shot® Handbook - Page 68
Viewing menu (Fisheye Lens) For details on the operation 1 page 43 Applies a fisheye effect around a chosen point. (Cross Filter) 1 Set the center point of the desired image to retouch - Sony DSC-W170/R | Cyber-shot® Handbook - Page 69
softens the image by blurring the focus and lowering the surrounding light so that it appears as if it was taken by an old camera. (Happy Faces) 1 Select [Level] with v/V, then press z. Select level of retouch with v/V, then press z again. 2 Adjust the desired range to retouch with W/T. 3 Select - Sony DSC-W170/R | Cyber-shot® Handbook - Page 70
Resize): Changing the image size according to usage You can change the aspect ratio and size of the shooting images, then record them as the new files. You can convert images to the 16:9 aspect ratio for high definition viewing and to the VGA size for blog or e-mail attachments. HDTV - Sony DSC-W170/R | Cyber-shot® Handbook - Page 71
erases all the data stored on the recording media, even if the images are protected, and these images cannot be restored. • It may take some time to protect an image. 71 - Sony DSC-W170/R | Cyber-shot® Handbook - Page 72
attached. (Print): Printing images using a printer Printing images shot with the camera. See page 109. (Rotate): Rotating a still image Rotates or movies. • You may not be able to rotate images shot with other cameras. • When viewing images on a computer, the image rotation information may - Sony DSC-W170/R | Cyber-shot® Handbook - Page 73
selecting the folder Select [Exit] in step 2, then press z. z On the folders The camera stores images in a specified folder of a "Memory Stick Duo". You can change the folder or create a new one. • To create a new folder t [Create REC.Folder] (page 76) • To change the folder for recording images - Sony DSC-W170/R | Cyber-shot® Handbook - Page 74
) on the HOME screen. z button v/V/b/B button Control button HOME button 1 Press the HOME button to display the HOME screen. 2 Select (Manage Memory) or (Settings) with b/B on the control button. 3 Select an item with v/V, then press z. 4 Select the desired setting with v/V, then press z. • The - Sony DSC-W170/R | Cyber-shot® Handbook - Page 75
Customizing the Manage Memory feature and the Settings 5 Select a setting with v/V, then press z. To cancel the setting change Select [Cancel] if it is shown as an option on the screen, then press z. If not, press b. • This setting is maintained even when the power is turned off. • The camera is set - Sony DSC-W170/R | Cyber-shot® Handbook - Page 76
Memory Tool - Memory Stick Tool This item appears only when a "Memory Stick Duo" is inserted in the camera. Format Formats the "Memory Stick Duo". A commercially available "Memory ] in step 2, then press z. • When not creating a new folder, the "101MSDCF" folder is selected as the recording folder. - Sony DSC-W170/R | Cyber-shot® Handbook - Page 77
charged battery pack. If you attempt to copy image files using a battery pack with little remaining charge, the battery pack memory, remove the "Memory Stick Duo" after copying, then format the internal memory ([Format] in [Internal Memory Tool]) (page 78). • A new folder is created on the "Memory - Sony DSC-W170/R | Cyber-shot® Handbook - Page 78
on the operation 1 page 74 Memory Tool - Internal Memory Tool This item does not appear when a "Memory Stick Duo" is inserted in the camera. Format Formats the internal memory. • Note that formatting permanently erases all data in the internal memory, including even protected images. 1 Select - Sony DSC-W170/R | Cyber-shot® Handbook - Page 79
you operate the camera, the function guide appears. On Displays the function guide. Off Does not display the function guide. Initialize Initializes the setting to the default setting. Even if you execute this function, the images stored in the internal memory are retained. 1 Select [Initialize - Sony DSC-W170/R | Cyber-shot® Handbook - Page 80
from the mode dial (page 29). 2 Aim the camera at the subject and press the shutter button all the way down starts. • If you do not operate the camera for about 15 seconds, the demonstration starts automatically is released when the camera detects a smile, no image is recorded. • Always set - Sony DSC-W170/R | Cyber-shot® Handbook - Page 81
automatically, and the images in the recording folder on the camera are copied to the computer. (with Windows Vista/ XP, Mac OS X) Mass Storage Establishes a Mass Storage connection between the camera and a computer or other USB device (page 97). COMPONENT Selects the video signal output type - Sony DSC-W170/R | Cyber-shot® Handbook - Page 82
images that can be played in Wide Zoom are 4:3 and 3:2 images. Movies, 16:9 images, and portrait images cannot be zoomed. • The image displayed on the LCD screen of the camera does not change. 82 - Sony DSC-W170/R | Cyber-shot® Handbook - Page 83
red light allowing the camera to focus easily when the shutter The indicator appears at this time. Auto Uses the AF You cannot use the AF illuminator when: - Semi manual is set (page 56). - (Landscape) mode, the normal AF range finder frame is disabled and new AF range finder frame is displayed by a - Sony DSC-W170/R | Cyber-shot® Handbook - Page 84
shortens the time needed for focusing. • Battery consumption is faster than in [Single] mode. • AF mode setting is invalid when the Face Detection function is activated. • When using semi manual, [Single] is automatically selected. Digital Zoom Selects the digital zoom mode. The camera enlarges - Sony DSC-W170/R | Cyber-shot® Handbook - Page 85
-W170 DSC-W150 Approx. 7.0 × Approx. 6.3 × Approx. 8.9 × Approx. 8.0 × Approx. 28 × Approx. 25 × Approx. 9.5 × Approx. 8.5 × • You cannot use the Digital zoom when: - (Smile Shutter) mode is selected in the Scene Selection mode. - The LCD screen is off. - Shooting movies Conversion Lens - Sony DSC-W170/R | Cyber-shot® Handbook - Page 86
Auto Orientation. • Black is displayed to the left and right of vertical orientation images. • Depending on the shooting angle of the camera, the orientation of after shooting a still image. On Uses the Auto Review. Off Does not use Auto Review. • If you press the shutter button halfway down - Sony DSC-W170/R | Cyber-shot® Handbook - Page 87
Settings For details on the operation 1 page 74 Clock Settings Clock Settings Sets the date and time. 1 Select [ Clock Settings] from (Settings) on the HOME screen. 2 Press z on the control button. 3 Select the date display format with v/V, then press z. 4 Select each item - Sony DSC-W170/R | Cyber-shot® Handbook - Page 88
Settings For details on the operation 1 page 74 Language Setting Language Setting Selects the language to be used in the menu items, warnings and messages. 88 - Sony DSC-W170/R | Cyber-shot® Handbook - Page 89
jacks, connect the audio plug (black) of the cable for multi-use terminal to the left audio jack. 2 Turn on the TV and set the input. • Refer also to the operating instructions supplied with the TV. 3 Press (Playback) button to turn on the camera. Images shot with the camera appear on the TV. Press - Sony DSC-W170/R | Cyber-shot® Handbook - Page 90
can view an image with high quality* recorded on the camera by connecting the camera to an HD (High Definition) TV with an HD Output Adaptor Cable (not supplied). Turn off both the camera and the TV before connecting the camera to the TV. * Images shot in [VGA] image size cannot be played back in HD - Sony DSC-W170/R | Cyber-shot® Handbook - Page 91
details, refer to the operating instruction of the TV. On TV color systems If you want to view images on a TV screen, you need a TV with a video input jack and the cable for multi-use terminal. The color system of the TV must match that of the digital still camera. Check the following lists - Sony DSC-W170/R | Cyber-shot® Handbook - Page 92
computer Enjoying your Windows computer For details on using a Macintosh computer, refer to "Using your Macintosh computer" (page 105). Illustrations of screens used in this section are based on the English version. Install the software (supplied) first (page 94) • Installing the software as follows - Sony DSC-W170/R | Cyber-shot® Handbook - Page 93
at the same time, some devices, including the camera, may not operate, depending on the types of USB devices you are using. • Operations are not guaranteed when using a USB hub. • Connecting the camera using a USB interface that is compatible with Hi-Speed USB (USB 2.0 compliant) allows advanced - Sony DSC-W170/R | Cyber-shot® Handbook - Page 94
menu screen appears. • If it does not appear, double-click [Computer] (in Windows XP/2000, [My Computer]) t (SONYPICTUTIL). • The AutoPlay screen may appear. Select "Run Install.exe." and follow the instructions that appear on the screen to proceed with the installation. 2 Click [Install]. The - Sony DSC-W170/R | Cyber-shot® Handbook - Page 95
(supplied) After you install the software, the short cut icons for "Picture Motion Browser", "PMB Guide", "Music Transfer" are created on the desktop. Double-click to start "Picture Motion Browser". Double-click to start "PMB Guide". Double-click to start "Music Transfer". 95 Using your computer - Sony DSC-W170/R | Cyber-shot® Handbook - Page 96
(in Windows 2000, [Programs]) t [Sony Picture Utility] t [PMB - Picture Motion Browser]. • The confirmation message of the Information tool appears on the screen when starting the "Picture Motion Browser" for the first time. Select [Start]. This function informs you of news, such as software updates - Sony DSC-W170/R | Cyber-shot® Handbook - Page 97
. • When copying images in the internal memory, this step is unnecessary. 2 Insert the sufficiently charged battery pack into the camera, or connect the camera to a wall outlet (wall socket) with the AC Adaptor (not supplied) and the USB/AV/DC IN cable for multi-use terminal (not supplied). • When - Sony DSC-W170/R | Cyber-shot® Handbook - Page 98
images are displayed. • The "Pictures" (in Windows XP/2000, "My Pictures") folder is set as the default folder in "Viewed folders". Organize images on the computer on a calendar by shooting date to view them. For details, see the "PMB Guide". • If you use the Memory Stick slot, refer to page 101 - Sony DSC-W170/R | Cyber-shot® Handbook - Page 99
and file names The image files recorded with the camera are grouped as folders on the "Memory Stick Duo" or the internal memory. Example: viewing folders on Windows Vista Double-click here Windows XP/Windows 2000 Double-click here 2 Click (USB Mass Storage Device) t [Stop]. 3 Confirm the device on - Sony DSC-W170/R | Cyber-shot® Handbook - Page 100
Copying images to your computer using the "Picture Motion Browser" • You cannot record any images to the "100MSDCF" folder. The images in this folder are available only for viewing. • You cannot record/play back any images to the "MISC" folder. • Image files are named as follows: - Still image files - Sony DSC-W170/R | Cyber-shot® Handbook - Page 101
, see page 120. For a computer without a Memory Stick slot: Make a USB connection and follow Stages to copy images. • The screen displays shown in this section are the examples for copying images from "Memory Stick Duo". • The camera is not compatible with Windows 95/ 98/98 Second Edition/NT/Me of - Sony DSC-W170/R | Cyber-shot® Handbook - Page 102
confirmation message appears. When you overwrite an existing image with a new one, the original file data is deleted. To copy an image play back that image with the camera. For Windows 2000 Double-click [My Computer] t [Removable Disk] after connecting the camera to your computer. Then, perform from - Sony DSC-W170/R | Cyber-shot® Handbook - Page 103
main window. 3 From the [Manipulate] menu, select [Open with External Program] t [Image Export Tool]. 4 Thereafter, follow the instructions on the screen and export the image files to the "Memory Stick Duo". • For details on "Picture Motion Browser", see "PMB Guide". To export images to the camera - Sony DSC-W170/R | Cyber-shot® Handbook - Page 104
" appears. 4 Make a USB connection between the camera and your computer. 5 Start "Music Transfer". 6 Follow the instructions on the screen to add/ [Off]. • You can reset the Music files to the preset ones using [Initialize] (page 79), however, other settings will also be reset. • For details on using - Sony DSC-W170/R | Cyber-shot® Handbook - Page 105
(v10.3 to v10.5) CPU: iMac, eMac, iBook, PowerBook, Power Mac G3/G4/G5 series, Mac mini Memory: 64 MB or more (128 MB or more is recommended) Hard Disk: Disk space required for installation-approximately 250 MB Notes on connecting the camera to a computer • Operations are not guaranteed for all the - Sony DSC-W170/R | Cyber-shot® Handbook - Page 106
that image file. To delete the USB connection Drag and drop the drive icon or the icon of the "Memory Stick Duo" to the "Trash" icon beforehand when you perform the procedures listed below, or the camera is disconnected from the computer. • Disconnecting the cable for multi-use terminal. • Removing - Sony DSC-W170/R | Cyber-shot® Handbook - Page 107
Guide" is also installed. "Cyber-shot Step-up Guide" further introduces how to use the camera and optional accessories. Viewing on Windows Double-click (Step-up Guide) on the desktop. To access "Step-up Guide" from the Start menu, click [Start] t [All Programs] (in Windows 2000, [Programs]) t [Sony - Sony DSC-W170/R | Cyber-shot® Handbook - Page 108
using the supplied "Picture Motion Browser" software and print the images. You can insert the date on the image and print it (page 96). Printing at a shop (page 112) You can take a "Memory Stick Duo" containing images shot with the camera to a photo printing service shop. You can make a (Print order - Sony DSC-W170/R | Cyber-shot® Handbook - Page 109
the cable for multi-use terminal. When [USB Connect] is set to [Auto], the camera will automatically recognize certain printers when connected. Skip Stage 1, if this is the case. MENU button Control button HOME button • It is recommended to use a fully charged battery pack to prevent the power from - Sony DSC-W170/R | Cyber-shot® Handbook - Page 110
button, select [Print] with v/V on the control button, then press z. 2 To the multi connector The camera is set to playback mode, then an image and the print menu appear on the screen. 1 To the USB jack Cable for multi-use terminal 2 Turn on the printer. Press the (Playback) button and turn on - Sony DSC-W170/R | Cyber-shot® Handbook - Page 111
. [Size] Selects the size of the printing sheet. [Date] Selects [Day & Time] or [Date] to insert the date and time on images. • When you choose [Date], the date will be inserted in the has returned to Stage 2, and disconnect the cable for multiuse terminal from the camera. Printing still images 111 - Sony DSC-W170/R | Cyber-shot® Handbook - Page 112
Printing at a shop You can take a "Memory Stick Duo" containing images shot with the camera to a photo printing service shop. As long as the shop supports photo printing services conforming to the DPOF, you can make a (Print order) mark on images in advance so that you do not need to reselect them - Sony DSC-W170/R | Cyber-shot® Handbook - Page 113
Printing at a shop Selecting and marking the images 1 Press the MENU button while displaying images in singleimage mode or in index mode. 2 Select [DPOF] with v/V on the control button, [Multiple Images] with b/B, and then press z. 3 Select an image to mark with the control button, then press z. - Sony DSC-W170/R | Cyber-shot® Handbook - Page 114
Troubleshooting If you experience trouble with the camera, try the following solutions. 1 Check the items on pages 115 to 124. If a code such as "C/E:ss:ss" appears on the screen, see page 125. 2 Remove the battery pack, wait for about one minute, re-insert the battery pack, then turn on the power - Sony DSC-W170/R | Cyber-shot® Handbook - Page 115
it with a new one. Cannot charge the battery pack. • You cannot charge the battery pack using the AC Adaptor (not supplied). Use the battery charger to charge the battery. Shooting still images/movies Cannot record images. • Check the free capacity of the internal memory or "Memory Stick Duo". If - Sony DSC-W170/R | Cyber-shot® Handbook - Page 116
Troubleshooting Cannot shoot in Smile Shutter mode. • Press the shutter button all the way down. • No image is shot unless a smile is detected (page 31). • [Smile demo mode] is set to [On]. Set [Smile demo mode] to [Off] (page 80). This subject is not visible on the screen. • The camera is set to - Sony DSC-W170/R | Cyber-shot® Handbook - Page 117
Troubleshooting The flash does not work white circular spots appear in images shot using the flash. • Particles (dust time are not displayed on the LCD screen. • While shooting, the date and time are not displayed. They are displayed only during playback. Cannot insert dates on image. • The camera - Sony DSC-W170/R | Cyber-shot® Handbook - Page 118
through the finder while the digital zoom is in use. Cannot shoot images in succession. • The internal memory or "Memory Stick Duo" is full. Delete unnecessary images (page 39). • The battery level is low. Insert the charged battery pack. The same image is shot several times. • [REC Mode] is set to - Sony DSC-W170/R | Cyber-shot® Handbook - Page 119
(page 35). Troubleshooting The image does not appear on the TV screen. • Check [Video Out] to see if the video output signal of the camera is set to the color system of your TV (page 82). • Check whether the connection is correct (page 89). • If the USB connector of the cable for multi-use - Sony DSC-W170/R | Cyber-shot® Handbook - Page 120
other than Sony should contact those manufacturers. • If "Memory Stick PRO Duo" is not supported, connect the camera to the computer (pages 97, 105). The computer recognizes the "Memory Stick PRO Duo". Your computer does not recognize the camera. • Turn on the camera. • When the battery level is - Sony DSC-W170/R | Cyber-shot® Handbook - Page 121
Troubleshooting You do not know how to use "Picture Motion Browser". • Refer to "PMB Guide" (page 96). The image and sound are interrupted by noise when you view a movie on a computer. • You are playing back the movie directly from the internal memory or the "Memory Stick Duo". Copy the movie to the - Sony DSC-W170/R | Cyber-shot® Handbook - Page 122
turned on and can be connected to the camera. • Set [USB Connect] to [PictBridge] (page 81). • Disconnect and connect the cable for multi-use terminal again. If an error message is indicated on the printer, refer to the operating instructions supplied with the printer. Cannot print images. • Check - Sony DSC-W170/R | Cyber-shot® Handbook - Page 123
or the internal memory will be deleted and all settings, including date, will be initialized. The camera does not function with the lens portion extended. • Do not attempt to force the lens that has stopped moving. • Insert a charged battery pack, then turn on the camera again. 123 Troubleshooting - Sony DSC-W170/R | Cyber-shot® Handbook - Page 124
Troubleshooting The lens gets fogged. • Moisture condensation has occurred. Turn off the camera and leave it for about an hour before using it. The lens does not move when you turn off the camera. • The battery pack is discharged. Replace it with a charged battery pack. The camera becomes warm when - Sony DSC-W170/R | Cyber-shot® Handbook - Page 125
camera is working. The last two digits (indicated by ss) will differ depending on the state of the camera. If you cannot solve the problem even after trying the following corrective actions a few times, the camera may need repair. Contact your Sony dealer or local authorized Sony service facility - Sony DSC-W170/R | Cyber-shot® Handbook - Page 126
with a name beginning with "999" exists on the "Memory Stick Duo". You cannot create any folders if this is the case. File error • An error occurred while the image was playing back. Sony does not guarantee playback of image files on the camera if the files have been processed using a computer or - Sony DSC-W170/R | Cyber-shot® Handbook - Page 127
maximum 999 files. Cancel the selection. Low battery power • When copying an image recorded in the internal memory to the "Memory Stick Duo", use a fully charged battery. Printer busy Paper error No paper Ink error Low ink No ink • Check the printer. Printer error • Check the printer. • Check if the - Sony DSC-W170/R | Cyber-shot® Handbook - Page 128
Unable to detect face for retouch • Retouching may not be possible depending on the image. Turn the power off and on again • The lens malfunction. Self-Timer is invalid • The self-timer is unavailable under these settings (page 30). Recover data Recovering data • Date information or other data is - Sony DSC-W170/R | Cyber-shot® Handbook - Page 129
Others Using the camera abroad - Power sources You can use the camera, the battery charger (supplied), and the AC-LS5K AC Adaptor (not supplied) in any country or region where the power supply is within 100 V to 240 V AC, 50/60 Hz. • Do not use an electronic transformer (travel converter), as this - Sony DSC-W170/R | Cyber-shot® Handbook - Page 130
. • Data may be corrupted in the following cases: - When the "Memory Stick Duo" is removed or the camera is turned off during a read or write operation. - When the "Memory Stick Duo" is used in locations subject to static electricity or electrical noise. • We recommend backing up important data on - Sony DSC-W170/R | Cyber-shot® Handbook - Page 131
to operate properly with the camera. Notes on using "Memory Stick Micro" (not supplied) • To use a "Memory Stick Micro" with the camera, be sure to insert the "Memory Stick Micro" into a Duo-sized "M2" Adaptor. If you insert a "Memory Stick Micro" into the camera without a Duo-sized "M2" Adaptor - Sony DSC-W170/R | Cyber-shot® Handbook - Page 132
it is probably time to replace it with a new one. • The battery life varies according to how it is stored and the operating conditions and environment in which each battery pack is used. Compatible battery pack • The NP-BG1 (supplied) can be used only in G type compatible Cyber-shot models. • If you - Sony DSC-W170/R | Cyber-shot® Handbook - Page 133
. Check that the battery pack is the specified type. If the battery pack is the specified type, remove the battery pack, replace it with new one or another one and check if the battery charger operates correctly. If the battery charger operates correctly, a battery error may have occurred. 133 - Sony DSC-W170/R | Cyber-shot® Handbook - Page 134
Orientation 86 Auto Review 86 B B & W 60 Battery charger 133 Battery pack 132 Beach mode 29 Beep 79 Blur 8 BRK 50 Burst 50 C Cable for multi- Software 94 Viewing image files stored on a computer with the camera 103 Windows 92 Connecting Computer 97 Printer 110 TV 89 Conversion Lens - Sony DSC-W170/R | Cyber-shot® Handbook - Page 135
the camera 25 memory 23 Internal Memory Tool...........78 ISO 9, 10, 53 J JPG 100 L Landscape mode 29 Language Setting 88 LCD Playback zoom 33 Precision digital zoom.......... 84 Pressing LCD backlight 21 SD 81 Select Folder 73 Self-diagnosis display.........125 Self-timer 27 Semi manual - Sony DSC-W170/R | Cyber-shot® Handbook - Page 136
metering cross hairs .....54 SteadyShot 61 T Trimming 66 Troubleshooting 114 TV 89 Twilight mode 29 Twilight Portrait mode .........29 U Underexposure 9 Underwater 29 Underwater White Balance 58 Unsharp masking 67 USB Connect 81 Using the camera abroad ....129 V VGA 12, 13 Video Out 82 - Sony DSC-W170/R | Cyber-shot® Handbook - Page 137
to download it. http://www.sony.net/Products/Linux/ We would prefer you do not contact us about the contents of source code. Read "license2.pdf" in the "License" folder on the CD-ROM. You will find licenses (in English) of "GPL", and "LGPL" software. To view the PDF, Adobe Reader is needed. If - Sony DSC-W170/R | Cyber-shot® Handbook - Page 138
Additional information on this product and answers to frequently asked questions can be found at our Customer Support Website.
-
 1
1 -
 2
2 -
 3
3 -
 4
4 -
 5
5 -
 6
6 -
 7
7 -
8
-
9
-
10
-
11
-
12
-
13
-
14
-
15
-
16
-
17
-
18
-
19
-
20
-
21
-
22
-
23
-
24
-
25
-
26
-
27
-
28
-
29
-
30
-
31
-
32
-
33
-
34
-
35
-
36
-
37
-
38
-
39
-
40
-
41
-
42
-
43
-
44
-
45
-
46
-
47
-
48
-
49
-
50
-
51
-
52
-
53
-
54
-
55
-
56
-
57
-
58
-
59
-
60
-
61
-
62
-
63
-
64
-
65
-
66
-
67
-
68
-
69
-
70
-
71
-
72
-
73
-
74
-
75
-
76
-
77
-
78
-
79
-
80
-
81
-
82
-
83
-
84
-
85
-
86
-
87
-
88
-
89
-
90
-
91
-
92
-
93
-
94
-
95
-
96
-
97
-
98
-
99
-
100
-
101
-
102
-
103
-
104
-
105
-
106
-
107
-
108
-
109
-
110
-
111
-
112
-
113
-
114
-
115
-
116
-
117
-
118
-
119
-
120
-
121
-
122
-
123
-
124
-
125
-
126
-
127
-
128
-
129
-
130
-
131
-
132
-
133
-
134
-
135
-
136
-
137
-
138
 |
 |
© 2008 Sony Corporation
3-294-896-
12
(1)
GB
Digital Still Camera
Cyber-shot Handbook
DSC-W150/W170
Before operating the unit, please read this
Handbook thoroughly together with the
“Instruction Manual”
and the
“Cyber-shot
Step-up Guide”
, and retain them for future
reference.
V
CLICK!
Table of contents
Basic Operations
Using the shooting
functions
Using the viewing
functions
Customizing the settings
Viewing images on a TV
Using your computer
Printing still images
Troubleshooting
Others
Index