Sony DSC W180 Operating Instructions
Sony DSC W180 - Cyber-shot Digital Camera Manual
 |
UPC - 027242766396
View all Sony DSC W180 manuals
Add to My Manuals
Save this manual to your list of manuals |
Sony DSC W180 manual content summary:
- Sony DSC W180 | Operating Instructions - Page 1
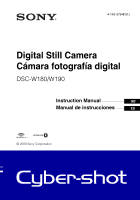
4-143-379-61(1) Digital Still Camera Cámara fotografía digital DSC-W180/W190 Instruction Manual G···B Manual de instrucciones E···S © 2009 Sony Corporation - Sony DSC W180 | Operating Instructions - Page 2
located on the bottom. Record the serial number in the space provided below. Refer to these numbers whenever you call upon your Sony dealer regarding this product. Model No. DSC-W180/W190 Serial No WARNING To reduce fire or shock hazard, do not expose the unit to rain or moisture. If the shape of - Sony DSC W180 | Operating Instructions - Page 3
pack dry. • Replace only with the same or equivalent type recommended by Sony. • Dispose of used battery packs promptly as described in the instructions. [ Battery charger Even if the CHARGE lamp is not lit, the battery charger is not disconnected from the AC power source (mains) as long as it - Sony DSC W180 | Operating Instructions - Page 4
Name: SONY Model No.: DSC-W180 Responsible Party: Sony Electronics Inc SONY Model No.: DSC-W190 Responsible Party: Sony expressly approved in this manual could void your accordance with the instructions, may cause cable must be used with the equipment in order to comply with the limits for a digital - Sony DSC W180 | Operating Instructions - Page 5
addresses given in separate service or guarantee documents. This product has been tested and found compliant with the limits set out in the EMC Directive for using connection cables shorter than 3 meters (9.8 feet). [ Attention The electromagnetic fields at the specific frequencies may influence the - Sony DSC W180 | Operating Instructions - Page 6
reasons require a permanent connection with an incorporated battery, this battery should be replaced by qualified service staff only. To ensure that the battery will be treated properly, hand over the product . If you should lose the fuse cover, please contact your nearest Sony service station. 6GB - Sony DSC W180 | Operating Instructions - Page 7
Table of contents Notes on using the camera 9 Getting started 10 Checking the accessories supplied 10 Identifying parts 11 Charging the battery pack 12 Inserting the battery pack/a "Memory Stick Duo" media (sold separately 14 Setting the clock 16 Shooting/viewing images 18 Shooting images - Sony DSC W180 | Operating Instructions - Page 8
computer 36 Changing camera settings 40 Changing the operation sounds 40 Using the MENU items 41 Using the (Settings) items 44 Others 46 List of icons displayed on the screen 46 Learning more about the camera ("Cyber-shot Handbook 49 Troubleshooting 50 Precautions 52 Specifications 53 8GB - Sony DSC W180 | Operating Instructions - Page 9
Stick Duo" media back up Do not turn off the camera, remove the battery pack, or remove the "Memory Stick Duo" media while the access lamp is lit. Otherwise, the internal memory data or "Memory Stick Duo" media may be damaged. Be sure to make a backup copy to protect your data. Notes on recording - Sony DSC W180 | Operating Instructions - Page 10
charger BC-CSKA (1) • Wrist strap (1) • Power cord (mains lead) (1) (not supplied in the USA and Canada) • Rechargeable battery pack NP-BK1 (1) • Dedicated USB cable (1) • CD-ROM (1) - Cyber-shot application software - "Cyber-shot Handbook" - "Cyber-shot Step-up Guide" • Instruction Manual - Sony DSC W180 | Operating Instructions - Page 11
the camera to AC Adaptor AC-LS5K (sold separately) will not charge the battery. Use a battery charger for charging the battery. M (USB)·A/V OUT camera, and damage to the camera may occur. T Battery/"Memory Stick Duo" media cover U Battery insertion slot V Battery eject lever W "Memory - Sony DSC W180 | Operating Instructions - Page 12
Getting started Charging the battery pack 1 Insert the battery pack into the battery charger. • You can charge the battery even when it is partially charged. Battery pack 2 Connect the battery charger to the wall outlet (wall socket). • If you continue charging the battery pack for about one more - Sony DSC W180 | Operating Instructions - Page 13
the battery charger of the genuine Sony brand. x Battery life and number of images you can record/view Shooting still images Viewing still images Battery life (min.) Approx. 145 Approx. 240 No. of Images Approx. 290 Approx. 4800 The measurement method is based on the CIPA standard. (CIPA: Camera - Sony DSC W180 | Operating Instructions - Page 14
" media (sold separately) 1 Open the cover. 2 Insert the "Memory Stick Duo" media (sold separately). With the terminal side facing the lens, insert the "Memory Stick Duo" media until it clicks into place. 3 Insert the battery pack. Insert the battery while pressing the lever in the direction of the - Sony DSC W180 | Operating Instructions - Page 15
Memory Stick" media or memory card are not compatible with the camera. "Memory Stick" media You cannot use a "Memory Stick" media with the camera. x When there is no "Memory then push the "Memory Stick Duo" media in once. Note • Never remove the "Memory Stick Duo" media/battery pack when the access - Sony DSC W180 | Operating Instructions - Page 16
Getting started Setting the clock 1 Press the ON/OFF (Power) button. The camera is turned on. • It may take time for the power to turn on and allow operation. 2 Select the date and time display format with v/V on - Sony DSC W180 | Operating Instructions - Page 17
Getting started Note • The camera does not have a feature for superimposing dates on images. By using "PMB" in the CD-ROM (supplied), you can print or save images with the date. x Setting the date and time again Press the MENU button, then select (Settings) t [Clock Settings] (page 45). 17GB - Sony DSC W180 | Operating Instructions - Page 18
(Power) button. To shoot movies, set the mode switch to (Movie) (page 28). 2 Hold the camera steady as illustrated. • Press the T button to zoom in, W button to zoom out. ON/OFF (Power ) (T) (from the lens). 4 Press the shutter button fully down. The image is shot. 18GB Shutter button AE/AF lock - Sony DSC W180 | Operating Instructions - Page 19
Viewing images 1 Set the mode switch to (Playback). The last image shot is displayed. Shooting/viewing images x Selecting next/previous image Select an image switch to (Still Image) or (Movie). x Turning off the camera Press ON/OFF (Power) button. Control button Control button (Delete) button 19GB - Sony DSC W180 | Operating Instructions - Page 20
smile. When the smile level exceeds the b point on the indicator, the camera shoots images automatically. When you press (Smile) button again, Smile Shutter ends eyes with the bangs. 2 Try to orient the face in front of the camera and be as level as possible. The detection rate is higher when the - Sony DSC W180 | Operating Instructions - Page 21
Focusing on the face of the subject (Face Detection) The camera detects the face of the subject and focuses on it. You can select which subject takes priority when focusing. 1 Press the MENU button. 2 Select (Face - Sony DSC W180 | Operating Instructions - Page 22
1 Press (Macro) on the control button repeatedly to select the desired mode t z. : The camera adjusts the focus automatically from distant subjects to close-up. Normally, put the camera in this mode. : The camera adjusts the focus with priority on close-up subjects. Set Macro On when shooting close - Sony DSC W180 | Operating Instructions - Page 23
side, and a dark image when skewed to the left side. • If you view images in bright outside light, adjust the screen brightness up. However, the battery power may decrease faster under such condition. 23GB - Sony DSC W180 | Operating Instructions - Page 24
Selecting the image size to match the usage The image size determines the size of the image file that is recorded when you take a image. The larger the image size, the more detail will be reproduced when the image is printed on large-format paper. The smaller the image size, the more images can be - Sony DSC W180 | Operating Instructions - Page 25
only) (4000×2248) For viewing on a high-definition TV. (DSC-W190 only) (3648×2056) (DSC-W180 only) (1920×1080) No. of images Less More Less Less More Printing Fine Rough Fine Fine Rough Note • When you print images shot with 16:9 aspect ratio, both edges may be cut off. Using shooting functions - Sony DSC W180 | Operating Instructions - Page 26
DSC-W190 (Units: Images) Capacity Internal memory "Memory Stick Duo" media formatted with this camera 15000 DSC-W180 (Units: Images) Capacity Internal memory "Memory Stick Duo" media formatted with this camera Size shot with other cameras is played back on this camera, the image may - Sony DSC W180 | Operating Instructions - Page 27
the Shooting mode that matches the scene (Scene Selection) 1 Set the mode switch to (Still Image). 2 Press the MENU button. 3 Select (Camera) with v/V/b/B on the control button t the desired Scene Selection t z. (High Sensitivity): Shoots images without a flash even in low lighting. (Soft Snap - Sony DSC W180 | Operating Instructions - Page 28
Shooting movies 1 Set the mode switch to (Movie), then press ON/ OFF (Power) button. ON/OFF(Power) button 2 Press the shutter button fully down to start recording. 3 Press the shutter button fully down again to stop recording. x Viewing movies 1 Set the mode switch to (Playback) and press B (next - Sony DSC W180 | Operating Instructions - Page 29
320 × 240. (Units: hour : minute : second) Capacity Internal memory "Memory Stick Duo" media formatted with this camera Size Approx. 12 MB 256 MB 512 MB 1 GB 2 GB 2 GB, the camera stops recording automatically. • The camera does not support HD recordings or playbacks for movies. - Sony DSC W180 | Operating Instructions - Page 30
Using viewing functions Viewing an enlarged image (Playback zoom) 1 Set the mode switch to (Playback) to display an image, then press (Playback zoom) button. The image is enlarged at twice the size, with the center of the image. 2 Adjust the zoom scale and position. button: Zooms in. W button of - Sony DSC W180 | Operating Instructions - Page 31
Viewing a series of still images (Slideshow) 1 Set the mode switch to (Playback) to display a still image, then press the MENU button. 2 Select (Slideshow) with v/V on the control button, then press z. MENU button 3 Select [Start] with v, then press z. The slideshow starts. • To end the slideshow - Sony DSC W180 | Operating Instructions - Page 32
Deleting images Deleting images 1 Set the mode switch to (Playback) to display an image, then press (Delete) button. (Delete) button 2 Press b/B on the control button to select the desired setting. (This Image): You can delete the currently displayed image. (Multiple Images): You can select and - Sony DSC W180 | Operating Instructions - Page 33
are deleted. 1 Press the MENU button. 2 Select (Settings) with V on the control button, then press z. MENU button 3 Select ["Memory Stick" Tool] or [Internal Memory Tool] with v/V on the control button, then press [Format] t z. 4 Select [OK], then press z. Note • Formatting permanently deletes - Sony DSC W180 | Operating Instructions - Page 34
, you can print images by the following procedure. First, set the camera to enable USB connection between the camera and the printer. 1 Connect the camera to the printer with the dedicated USB cable (supplied). 2 Turn on the camera and the printer. After the connection is made, the indicator appears - Sony DSC W180 | Operating Instructions - Page 35
Stick Duo" media to the print shop. How to copy: Press MENU t (Settings) t ["Memory Stick" Tool] t [Copy] t [OK]. For details, consult your photo printing service shop. zSuperimposing dates on images This camera does not include a function for superimposing a date on an image. The reason for this - Sony DSC W180 | Operating Instructions - Page 36
more than ever by taking advantage of the software, and "PMB" is included on a CD-ROM (supplied). There are more functions, in addition to those listed below, for enjoying your images. For details, see the "PMB Guide" (page 38). Import to computer Media service Uploading the image to the media - Sony DSC W180 | Operating Instructions - Page 37
): Approximately 500 MB Display: Screen resolution: 1,024 × 768 dots or more Video memory: 32 MB or more (Recommended: 64 MB or more) *1 64-bit editions and Starter (Edition) are not supported. *2 Starter (Edition) is not supported. 2 Turn on your computer, and insert the CD-ROM (supplied) into the - Sony DSC W180 | Operating Instructions - Page 38
t [All Programs] t [Sony Picture Utility] t [Help] t [PMB Guide]. Notes • Do not disconnect the dedicated USB cable from the camera while the camera is operating or while "Accessing..." appears on the screen of the camera. Doing so may corrupt the data. • When using a battery with little remaining - Sony DSC W180 | Operating Instructions - Page 39
can copy images to your Macintosh computer. However, "PMB" is not compatible. Recommended computer environment The following environment is recommended for a computer connected to the camera. Recommended environment for importing images OS (pre-installed): Mac OS 9.1/9.2/ Mac OS X (v10.1 to v10 - Sony DSC W180 | Operating Instructions - Page 40
settings Changing the operation sounds You can set the sound produced when you operate the camera. 1 Press the MENU button. 2 Select (Settings) with V on the control button, then press z. MENU button 3 Select [Main Settings] with v/V on the control button, then press [ - Sony DSC W180 | Operating Instructions - Page 41
/ Beach/ Snow) Sets the image size. DSC-W190 DSC-W180 Selects the anti-blur mode. ( Off/ Auto) Selects the continuous shooting method. ( Normal/ Burst) Adjusts exposure manually. (-2.0 EV to +2.0 EV) Selects a luminous sensitivity. (Auto/ISO 100 to ISO 3200) Changing camera settings 41GB - Sony DSC W180 | Operating Instructions - Page 42
reduce the red-eye phenomenon. ( Auto/ On/ Off) Color Mode Changes the vividness of the image or adds special effects. ( Normal/ Sepia/ B & W) (Settings) Changes the camera settings. 42GB - Sony DSC W180 | Operating Instructions - Page 43
/ Blog/E-mail) Prevents accidental erasure. ( This Image/ Multiple Images) Adds a Print order mark to the image you want to print in a "Memory Stick Duo" media. ( This Image/ Multiple Images) Prints images using a PictBridge compliant printer. Rotates a still image. Selects the folder for viewing - Sony DSC W180 | Operating Instructions - Page 44
Shooting Settings Initialize Grid Line Digital Zoom Auto Review Description Selects or turns off the sound produced when you operate the camera. Selects the USB mode when connecting the camera to a computer or a PictBridge-compliant printer using the dedicated USB cable. Sets the video signal - Sony DSC W180 | Operating Instructions - Page 45
Memory Tool Clock Settings Language Setting Format Clock Settings Language Setting Description Formats the "Memory Stick Duo" media. Creates a folder in "Memory images. Copies all images in the internal memory to "Memory Stick Duo" media. Formats the internal memory. Sets the date and time. Selects - Sony DSC W180 | Operating Instructions - Page 46
23). When shooting still images A Display Indication Battery remaining Low battery warning When shooting movies Image size • / is displayed only for the DSCW190. • is displayed only for the DSC-W180. Camera mode (Scene Selection) Camera mode (Program Auto) White balance When playing back - Sony DSC W180 | Operating Instructions - Page 47
1.0 m AF range finder frame indicator Semi-manual value Macro 00:00:12 Counter 101-0012 Folder time of the playback image z STOP z PLAY Function guide for playing image bB BACK/NEXT Selecting images V VOLUME /Playback Media ("Memory Stick Duo" media, internal memory) Recordable time - Sony DSC W180 | Operating Instructions - Page 48
D Display Indication Self-timer Spot metering cross hair AF range finder frame N Playback Playback bar Histogram • appears when histogram display is disabled. 48GB - Sony DSC W180 | Operating Instructions - Page 49
and insert the CD-ROM (supplied) into the CD-ROM drive. 2 Click "Cyber-shot Handbook". "Cyber-shot Step-up Guide", which contains information on accessories for the camera, is installed at the same time. 3 Start "Cyber-shot Handbook" from the shortcut on the desktop. x For Macintosh users 1 Turn on - Sony DSC W180 | Operating Instructions - Page 50
to "Cyber-shot Handbook" (PDF). 2 Remove the battery pack, wait for about one minute, re-insert the battery pack, then turn on the power. 3 Initialize the settings (page 44). 4 Consult your Sony dealer or local authorized Sony service facility. On repairing cameras with internal memory function - Sony DSC W180 | Operating Instructions - Page 51
pack while it is inside the camera. • You cannot charge the battery pack using the AC Adaptor (sold separately). Use the battery charger (supplied) to charge the battery. The CHARGE lamp flashes while charging the battery. • Remove and reinsert the battery pack, making sure it is installed correctly - Sony DSC W180 | Operating Instructions - Page 52
shoot with moisture remaining inside the lens, you will be unable to record clear images. On the internal rechargeable backup battery This camera has an internal rechargeable battery for maintaining the date and time and other settings regardless of whether the power is on or off. This rechargeable - Sony DSC W180 | Operating Instructions - Page 53
Specifications Camera [System] Image device: DSC-W190: 7.79 mm (1/2.3 type) color CCD, Primary color filter DSC-W180: 7.70 mm (1/2.3 type) color CCD, Primary color filter Total pixel number of camera: DSC-W190: Approx. 12.4 Megapixels DSC-W180 (including NP-BK1 battery pack, "Memory Stick Duo" media - Sony DSC W180 | Operating Instructions - Page 54
battery charger specifications are subject to change without notice. Trademarks • The following marks are trademarks of Sony Corporation. , "Cyber-shot," "Memory Stick," , "Memory Stick PRO," , "Memory Stick Duo," , "Memory Stick PRO Duo," , "Memory Stick PRO-HG Duo," , "Memory manual are - Sony DSC W180 | Operating Instructions - Page 55
55GB Others - Sony DSC W180 | Operating Instructions - Page 56
del producto: Cámara Digital Modelo: DSC-W180/W190 POR FAVOR LEA DETALLADAMENTE ESTE MANUAL DE INSTRUCCIONES ANTES DE CONECTAR fugas. • Asegúrese de cargar la batería con un cargador de baterías original de Sony o con un dispositivo que pueda cargarla. • Mantenga la batería fuera del alcance de niñ - Sony DSC W180 | Operating Instructions - Page 57
se aplican las directivas de la UE El fabricante de este producto es Sony Corporation, 1-7-1 Konan Minato-ku Tokyo, 1080075, Japón. El representante on de datos (fallo), reinicie la aplicación o desconecte el cable de comunicación (USB, etc.) y vuelva a conectarlo. [ Tratamiento de los equipos - Sony DSC W180 | Operating Instructions - Page 58
Tratamiento de las baterías al final de su vida útil (aplicable en la Unión Europea y en países europeos con sistemas de recogida selectiva de residuos) Este símbolo en la batería o en el embalaje indica que la batería proporcionada con este producto no puede ser tratada como un residuo doméstico - Sony DSC W180 | Operating Instructions - Page 59
de la cámara 7 Preparativos 8 Comprobación de los accesorios suministrados 8 Identificación de las partes 9 Carga de la batería 10 Inserción de la batería/un "Memory Stick Duo" (se vende por separado 12 Ajuste del reloj 14 Toma/visionado de imágenes 16 Toma de imágenes 16 Visualización de - Sony DSC W180 | Operating Instructions - Page 60
ón de los elementos de (Ajustes 41 Otros ...43 Lista de iconos visualizados en la pantalla 43 Para saber más sobre la cámara ("Guía práctica de Cyber-shot") ........ 45 Solución de problemas 46 Precauciones 48 Especificaciones 49 6ES - Sony DSC W180 | Operating Instructions - Page 61
contrario, podrán dañarse los datos de la memoria interna o el "Memory Stick Duo". Asegúrese de hacer una copia de seguridad para proteger sus Design rule for Camera File system) establecida por la JEITA (Japan Electronics and Information Technology Industries Association). • Sony no garantiza que - Sony DSC W180 | Operating Instructions - Page 62
suministrado en EE. UU. y Canadá) • Batería recargable NP-BK1 (1) • Cable USB exclusivo (1) • CD-ROM (1) - Software de aplicación del Cyber-shot - "Guía práctica de Cyber-shot" - "Guía avanzada de Cyber-shot" • Manual de instrucciones (este manual) (1) x Utilización de la correa de muñeca La correa - Sony DSC W180 | Operating Instructions - Page 63
ía no se cargará. Utilice un cargador de batería para cargar la batería. M Terminal (USB)·A/V OUT (lateral) N Tapa de toma O Gancho para correa de muñeca P Para mara se dañe. T Tapa de la batería/"Memory Stick Duo" U Ranura de inserción de la batería V Palanca de expulsión de la bater - Sony DSC W180 | Operating Instructions - Page 64
á Clavija Lámpara CHARGE Iluminada: Cargando Apagada: Ha finalizado la carga (carga normal) Lámpara CHARGE Para clientes en países/regiones distintos de EE.UU. y Canadá Cable de alimentación Lámpara CHARGE 3 Cuando se haya completado la carga, desconecte el cargador de batería. 10ES - Sony DSC W180 | Operating Instructions - Page 65
xima. • Cuando finalice la carga, desenchufe el cable de alimentación de la toma de corriente de ía o el cargador de batería de la marca Sony genuina. x Duración de la batería y nú medición está basado en el estándar CIPA. (CIPA: Camera & Imaging Products Association) Nota • La duración de la bater - Sony DSC W180 | Operating Instructions - Page 66
Stick Duo" (se vende por separado). Con el lado del terminal orientado hacia el objetivo, inserte el "Memory Stick Duo" hasta que produzca un chasquido al encajar en su sitio. 3 Inserte la batería. Inserte la batería a la vez que presiona la palanca en - Sony DSC W180 | Operating Instructions - Page 67
la cámara (aproximadamente 12 MB) Para copiar imágenes de la memoria interna a un "Memory Stick Duo", inserte el "Memory Stick Duo" en la cámara, después seleccione MENU t (Ajustes) t [Her "Memory Stick"] t [Copiar]. x Para extraer la batería Palanca de expulsión de la batería Preparativos x Para - Sony DSC W180 | Operating Instructions - Page 68
Preparativos Ajuste del reloj 1 Pulse el botón ON/OFF (Alimentación). La cámara se enciende. • Es posible que lleve algún tiempo en conectarse la alimentación y permitir realizar operaciones. 2 Seleccione el formato de visualización de fecha y hora con v/V del botón de control, después pulse z. - Sony DSC W180 | Operating Instructions - Page 69
Preparativos Nota • La cámara no tiene una función para superponer fechas en imágenes. Utilizando "PMB" del CD- ROM (suministrado), puede imprimir o guardar imágenes con la fecha. x Ajuste de la fecha y la hora otra vez Pulse el botón MENU, después seleccione (Ajustes) t [Ajustes del reloj] (página - Sony DSC W180 | Operating Instructions - Page 70
Toma/visionado de imágenes Toma de imágenes 1 Ajuste el conmutador de modo a (Imagen fija), después pulse el botón ON/ OFF (Alimentación). Para tomar películas, ajuste el conmutador de modo a (Película) (página 26). Toma/visionado de imágenes 2 Sujete la cámara sin moverla como se muestra en la - Sony DSC W180 | Operating Instructions - Page 71
Visualización de imágenes 1 Ajuste el conmutador de modo a (Reproducción). Se visualiza la última imagen tomada. Toma/visionado de imágenes x Selección de la imagen siguiente/anterior Seleccione una imagen con B (siguiente)/b (anterior) del botón de control. x Eliminación de una imagen 1 Pulse el - Sony DSC W180 | Operating Instructions - Page 72
Utilización de las funciones de toma de imagen Detección de sonrisas y toma automática (Captador de sonrisas) 1 Ajuste el conmutador de modo a 2 Pulse el botón (Sonrisa). (Imagen fija). 3 Espere mientras se detecta una sonrisa. Cuando el nivel de sonrisa excede el punto b del indicador, la cámara - Sony DSC W180 | Operating Instructions - Page 73
Enfoque de la cara del motivo (Detección de cara) La cámara detecta la cara del motivo y la enfoca. Puede seleccionar qué motivo tendrá prioridad al enfocar. 1 Pulse el botón MENU. 2 Seleccione (Detección de cara) con v/V/b/B del botón de control t modo deseado t z. (Auto): Selecciona y enfoca - Sony DSC W180 | Operating Instructions - Page 74
Toma de primeros planos (Macro) Puede tomar bellas imágenes en primer plano de objetos pequeños tales como insectos o flores. 1 Pulse (Macro) del botón de control repetidamente para seleccionar el modo deseado t z. : La cámara ajusta el enfoque automáticamente desde motivos distantes a primer plano. - Sony DSC W180 | Operating Instructions - Page 75
Selección de un modo de flash 1 Pulse (Flash) del botón de control repetidamente para seleccionar el modo deseado t z. : Destella cuando hay insuficiente luz o contraluz. : El flash funciona siempre. : El flash funciona siempre. En un lugar oscuro la velocidad de obturación es lenta para tomar - Sony DSC W180 | Operating Instructions - Page 76
Selección del tamaño de imagen para coincidir con la utilización El tamaño de imagen determina el tamaño del archivo de imagen que se graba cuando toma una imagen. Cuanto más grande sea el tamaño de imagen, más detalles se reproducirán cuando la imagen sea impresa en papel de formato grande. Cuanto - Sony DSC W180 | Operating Instructions - Page 77
de imagen Guía de uso N°. de imágenes (4 000×3 000) Para copias hasta tamaño A3+ (DSC-W190 solamente) Menos (3 648×2 736) (DSC-W180 solamente) (3 264×2 448) Para copias hasta tamaño A3 (DSC-W190 solamente) (2 592×1 944) Para copias hasta tamaño A4 (2 048×1 536) Para copias hasta tamaño L/2L - Sony DSC W180 | Operating Instructions - Page 78
que se pueden grabar DSC-W190 (Unidades: Imágenes) Capacidad Memoria interna "Memory Stick Duo" formateado con 2M) 11 230 450 900 1 800 3 700 7 500 15 000 DSC-W180 (Unidades: Imágenes) Capacidad Memoria interna "Memory Stick Duo" formateado con esta cámara Tamaño Aprox. 12 MB 256 MB - Sony DSC W180 | Operating Instructions - Page 79
Utilización de las funciones de toma de imagen Utilización del modo de toma que coincide con la escena (Selección escena) 1 Ajuste el conmutador de modo a (Imagen fija). 2 Pulse el botón MENU. 3 Seleccione (Cámara) con v/V/ b/B del botón de control t la Selección escena deseada t z. (Alta - Sony DSC W180 | Operating Instructions - Page 80
Toma de películas 1 Ajuste el conmutador de modo a (Película), después pulse el botón ON/OFF (Alimentación). Botón ON/OFF (Alimentación) 2 Pulse el botón del disparador a fondo para iniciar la grabación. 3 Pulse el botón del disparador a fondo otra vez para detener la grabación. x Visionado de - Sony DSC W180 | Operating Instructions - Page 81
totales para todos los archivos de película. El tamaño de imagen se fija a 320 × 240. (Unidades: h (hora) : min (minuto) : s (segundo)) Capacidad Memoria interna "Memory Stick Duo" formateado con esta cámara Tamaño Aprox. 12 MB 256 MB 512 MB 1 GB 2 GB 4 GB 8 GB 16 GB 320 × 240 0:00:20 - Sony DSC W180 | Operating Instructions - Page 82
Utilización de las funciones de visionado Visionado de una imagen ampliada (zoom de reproducción) 1 Ajuste el conmutador de modo a (Reproducción) para visualizar una imagen, después pulse el botón (Zoom de reproducción). La imagen se amplía al doble del tamaño, con el centro de la imagen. 2 Ajuste - Sony DSC W180 | Operating Instructions - Page 83
Visualización de una serie de imágenes fijas (Diapositivas) 1 Ajuste el conmutador de modo a (Reproducción) para visualizar una imagen fija, después pulse el botón MENU. 2 Seleccione (Diapositivas) con v/V del botón de control, después pulse z. Botón MENU 3 Seleccione [Inicio] con v, después - Sony DSC W180 | Operating Instructions - Page 84
Borrado de imágenes Borrado de imágenes 1 Ajuste el conmutador de modo a (Reproducción) para visualizar una imagen, después pulse el botón (Borrar). Botón (Borrar) 2 Pulse b/B del botón de control para seleccionar el ajuste deseado. (Esta imagen): Puede eliminar la imagen visualizada - Sony DSC W180 | Operating Instructions - Page 85
memoria interna. 1 Pulse el botón MENU. 2 Seleccione (Ajustes) con V del botón de control, después pulse z. Botón MENU 3 Seleccione [Her "Memory Stick"] o [Herr.memoria interna] con v/V del botón de control, después pulse [Formatear] t z. 4 Seleccione [OK], y después pulse z. Nota • El formateo - Sony DSC W180 | Operating Instructions - Page 86
Conexión a otros dispositivos Visionado de imágenes en un televisor 1 Conecte la cámara al televisor con el cable A/V exclusivo (suministrado). Al terminal (USB)·A/V OUT Cable A/V exclusivo A las tomas de entrada de audio/ vídeo Nota • El ajuste [Salida vídeo] sale de fábrica puesto en el modo - Sony DSC W180 | Operating Instructions - Page 87
impresora, asegúrese de ajustar [Conexión USB] en (Ajustes) a [PictBridge]. Memory Stick Duo", después lleve el "Memory Stick Duo" al establecimiento. Cómo copiar: Pulse MENU t (Ajustes) t [Her "Memory en las imágenes utilizando PMB: Con el software "PMB" suministrado instalado en un PC (página - Sony DSC W180 | Operating Instructions - Page 88
)" Puede disfrutar de las imágenes grabadas más que nunca aprovechando las ventajas del software, y "PMB" incluidos en el CD-ROM (suministrado). Hay más funciones, adem cámara Exportación de imágenes a un "Memory Stick Duo" y visionado de las mismas. Nota • "PMB" no es compatible con - Sony DSC W180 | Operating Instructions - Page 89
x Etapa 1: Instalación de "PMB" (suministrado) Puede instalar el software (suministrado) utilizando el procedimiento siguiente. • Inicie la sesión como Administrador. 1 Compruebe el entorno de su ordenador. Entorno recomendado para utilizar "PMB" SO (preinstalado): Microsoft Windows - Sony DSC W180 | Operating Instructions - Page 90
acceder a la "Guía de PMB" desde el menú de inicio: Haga clic en [Inicio] t [Todos los programas] t [Sony Picture Utility] t [Ayuda] t [Guía de PMB]. Notas • No desconecte el cable USB exclusivo de la cámara mientras la cámara esté funcionando ni mientras aparece "Acceso..." en la pantalla de la - Sony DSC W180 | Operating Instructions - Page 91
un ordenador conectado a la cámara se recomienda el entorno siguiente. Entorno recomendado para importar imágenes SO (preinstalado): Mac OS 9,1/9,2/ Mac OS X (v10,1 a v10,5) Toma USB: Suministrada como estándar 37ES Conexión a otros dispositivos - Sony DSC W180 | Operating Instructions - Page 92
Cambio de los ajustes de la cámara Cambio de los sonidos de operación Puede ajustar el sonido producido cuando utiliza la cámara. 1 Pulse el botón MENU. 2 Seleccione (Ajustes) con V del botón de control, después pulse z. Botón MENU 3 Seleccione [Ajustes principales] con v/V del botón de control, - Sony DSC W180 | Operating Instructions - Page 93
/ Programa automático/ Alta sensibilidad/ Instantánea suave/ Paisaje/ Retrato crepúsculo/ Crepúsculo/ Playa/ Nieve) Establece el tamaño de imagen. DSC-W190 DSC-W180 Selecciona el modo de toma estable. ( Desactivar/ Auto) Selecciona el método de toma continua. ( Normal/ Ráfaga) Ajusta la exposici - Sony DSC W180 | Operating Instructions - Page 94
el borrado accidental. ( Esta imagen/ Múltiples imágenes) Añade una marca de orden de impresión a la imagen que quiere imprimir de un "Memory Stick Duo". ( Esta imagen/ Múltiples imágenes) Imprime imágenes utilizando una impresora compatible con PictBridge. Gira una imagen fija. Selecciona una - Sony DSC W180 | Operating Instructions - Page 95
toma Inicializar Cuadrícula Zoom digital Revisión autom Descripción Selecciona o desactiva el sonido producido cuando utiliza la cámara. Selecciona el modo USB cuando se conecta la cámara a un ordenador o a una impresora compatible con PictBridge utilizando el cable USB exclusivo. Ajusta la salida - Sony DSC W180 | Operating Instructions - Page 96
Duo" para grabar imágenes. Cambia la carpeta utilizada actualmente para grabar imágenes. Copia todas las imágenes de la memoria interna a un "Memory Stick Duo". Formatea la memoria interna. Establece la fecha y hora. Selecciona el idioma a utilizar en los elementos de menú, avisos y mensajes. 42ES - Sony DSC W180 | Operating Instructions - Page 97
Indicación Batería restante Aviso de poca batería Tamaño de imagen • / solamente se visualiza para la DSCW190. • solamente se visualiza para la DSCW180. Modo de cámara (Selección escena) Modo de cámara (Programa automático) Balance del blanco Cuando se reproduce Ráfaga Modo de medición Detecci - Sony DSC W180 | Operating Instructions - Page 98
volumen C Visualización 12 00:00:15 44ES Indicación Carpeta de grabación Número de imágenes que se pueden grabar Soporte de grabación/ reproducción ("Memory Stick Duo", memoria interna) Tiempo que se puede grabar Reducción del efecto ojos rojos Modo de flash Carga del flash Carpeta de reproducci - Sony DSC W180 | Operating Instructions - Page 99
/ x Para usuarios de Windows 1 Encienda su ordenador e inserte el CD-ROM (suministrado) en la unidad de CD-ROM. 2 Haga clic en "Cyber-shot Handbook". La "Guía avanzada de Cyber-shot", que contiene información sobre accesorios para la cámara, se instala al mismo tiempo. 3 Inicie la "Guía práctica de - Sony DSC W180 | Operating Instructions - Page 100
Compruebe el elemento de abajo, y consulte la "Guía práctica de Cyber-shot" (PDF). 2 Extraiga la batería, espere un min (minuto) aproximadamente, mínimo necesario para verificar y mejorar los síntomas del mal funcionamiento. Sony no copiará ni guardará ninguno de esos datos. Batería y alimentaci - Sony DSC W180 | Operating Instructions - Page 101
genes fijas/películas Resulta imposible grabar imágenes. • Compruebe la capacidad libre de la memoria interna o el "Memory Stick Duo" (páginas 24, 27). Si está llena, realice uno de lo siguiente: - Borre imágenes no otras cámaras. • La cámara está en el modo USB. Elimine la conexión USB. 47ES Otros - Sony DSC W180 | Operating Instructions - Page 102
Precauciones No utilice o almacene la cámara en los siguientes lugares • En un lugar muy caluroso, frío o húmedo En lugares tales como en un automóvil aparcado al sol, es posible que el cuerpo de la cámara se deforme y esto podrá ocasionar un mal funcionamiento. • Bajo la luz solar directa o cerca - Sony DSC W180 | Operating Instructions - Page 103
DSC-W190: Aprox. 12,4 Megapíxeles DSC-W180: Aprox. 10,3 Megapíxeles Número efectivo de píxeles de la cámara: DSC-W190: Aprox. 12,1 Megapíxeles DSC-W180 USB)·A/V OUT: Salida de vídeo Salida de audio (Monoaural) Conmunicación USB Conmunicación USB: Hi-Speed USB (Cumple con USB BK1, "Memory Stick Duo - Sony DSC W180 | Operating Instructions - Page 104
Sony Corporation. , "Cyber-shot", "Memory Stick", , "Memory Stick PRO", , "Memory Stick Duo", , "Memory Stick PRO Duo", , "Memory Stick PRO-HG Duo", , "Memory los nombres de sistemas y productos utilizados en este manual son, en general, marcas comerciales o marcas comerciales registradas - Sony DSC W180 | Operating Instructions - Page 105
51ES Otros - Sony DSC W180 | Operating Instructions - Page 106
52ES - Sony DSC W180 | Operating Instructions - Page 107
53ES Otros - Sony DSC W180 | Operating Instructions - Page 108
54ES - Sony DSC W180 | Operating Instructions - Page 109
55ES Otros - Sony DSC W180 | Operating Instructions - Page 110
56ES - Sony DSC W180 | Operating Instructions - Page 111
57ES Otros - Sony DSC W180 | Operating Instructions - Page 112
Additional information on this product and answers to frequently asked questions can be found at our Customer Support Website. En la página Web de atención al cliente puede encontrar información adicional sobre este producto y respuesta a las preguntas hechas con más frecuencia. Printed on 70%
-
 1
1 -
 2
2 -
 3
3 -
 4
4 -
 5
5 -
 6
6 -
 7
7 -
8
-
9
-
10
-
11
-
12
-
13
-
14
-
15
-
16
-
17
-
18
-
19
-
20
-
21
-
22
-
23
-
24
-
25
-
26
-
27
-
28
-
29
-
30
-
31
-
32
-
33
-
34
-
35
-
36
-
37
-
38
-
39
-
40
-
41
-
42
-
43
-
44
-
45
-
46
-
47
-
48
-
49
-
50
-
51
-
52
-
53
-
54
-
55
-
56
-
57
-
58
-
59
-
60
-
61
-
62
-
63
-
64
-
65
-
66
-
67
-
68
-
69
-
70
-
71
-
72
-
73
-
74
-
75
-
76
-
77
-
78
-
79
-
80
-
81
-
82
-
83
-
84
-
85
-
86
-
87
-
88
-
89
-
90
-
91
-
92
-
93
-
94
-
95
-
96
-
97
-
98
-
99
-
100
-
101
-
102
-
103
-
104
-
105
-
106
-
107
-
108
-
109
-
110
-
111
-
112
 |
 |
© 2009 Sony Corporation
4-143-379-
61
(1)
DSC-W180/W190
Digital Still Camera
Cámara fotografía digital
Instruction Manual
··················································
Manual de instrucciones
·······························
GB
ES