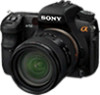
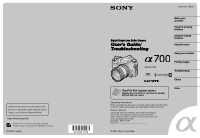
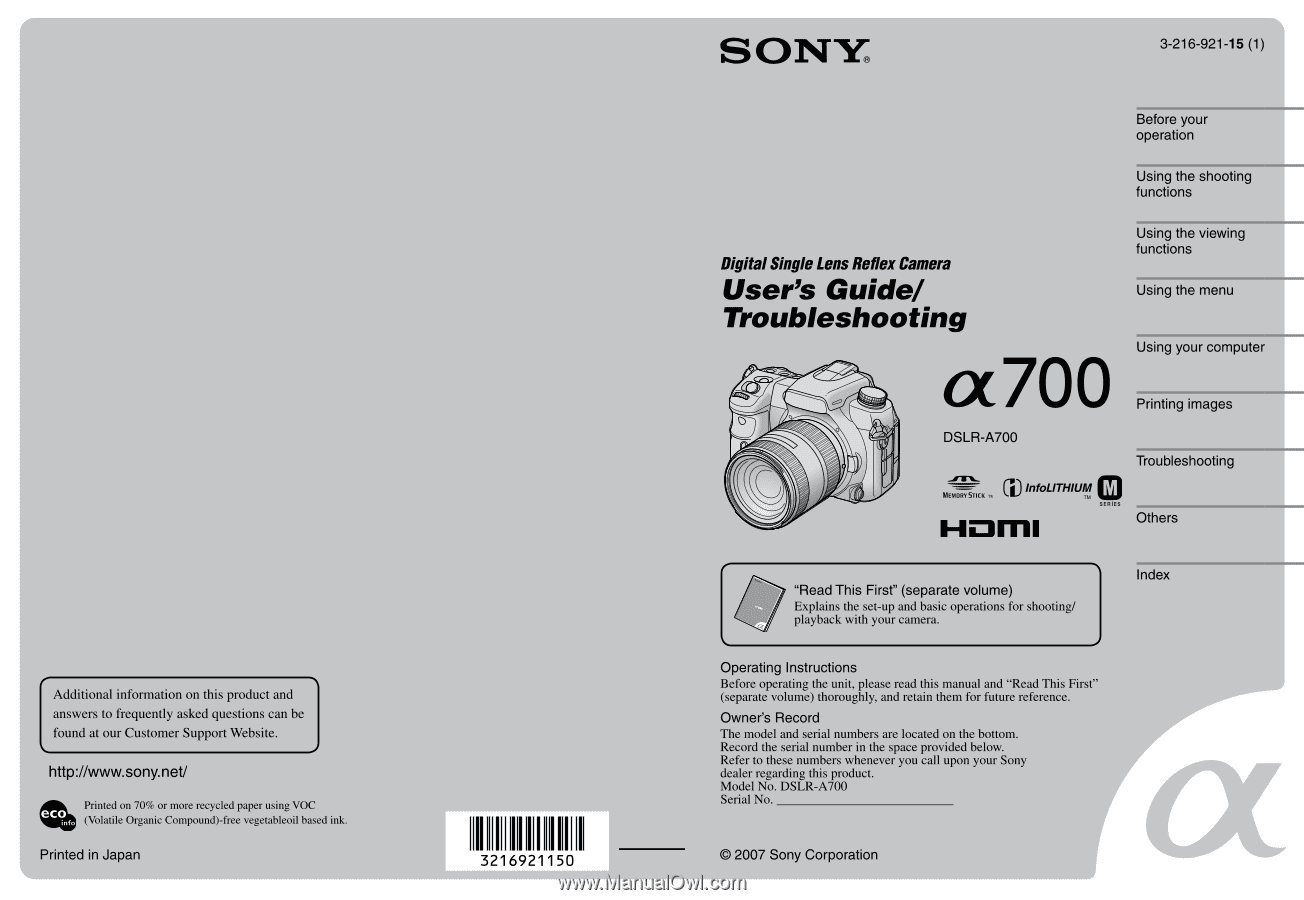
Sony DSLR-A700P User's Guide
Sony DSLR-A700P - alpha; Digital Single Lens Reflex Camera Manual
 |
View all Sony DSLR-A700P manuals
Add to My Manuals
Save this manual to your list of manuals |
Sony DSLR-A700P manual content summary:
- Sony DSLR-A700P | User's Guide - Page 1
Digital Single Lens Reflex Camera User's Guide/ Troubleshooting "Read This First" (separate volume) Explains the set-up and basic operations for shooting/ playback with your camera. Before your operation Using the shooting functions Using the viewing functions Using the menu Using your computer - Sony DSLR-A700P | User's Guide - Page 2
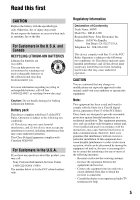
magnitude to constitute a risk of electric shock to persons. This symbol is intended to alert the user to the presence of important operating and maintenance (servicing) instructions in the literature accompanying the appliance. 2 - Sony DSLR-A700P | User's Guide - Page 3
For those sets designed to operate from battery power, or other sources, refer to the operating instructions. Polarization This set may be equipped plugs, receptacles, and the point where the cord exits from the appliance. Accessories Do not place the set on an unstable cart, stand, tripod, bracket - Sony DSLR-A700P | User's Guide - Page 4
when following the operating instructions. Adjust only those controls that are specified in the operating instructions. Improper adjustment of other servicing to qualified service personnel. Replacement parts When replacement parts are required, be sure the service technician has used replacement - Sony DSLR-A700P | User's Guide - Page 5
about this product, you may call: Sony Customer Information Services Center 1-800-222-SONY (7669) The number below is for the FCC related matters only. Regulatory Information Declaration of Conformity Trade Name: SONY Model No.: DSLR-A700 Responsible Party: Sony Electronics Inc. Address: 16530 Via - Sony DSLR-A700P | User's Guide - Page 6
Material: Lithium battery contains perchlorate. For Customers in Europe This product has been tested and found compliant with the limits set out in the EMC Directive for using connection cables shorter than 3 meters (9.8 feet). Attention The electromagnetic fields at the specific frequencies may - Sony DSLR-A700P | User's Guide - Page 7
to become discolored or to stick to the flash surface, resulting in insufficient light emission. • Keep the camera, supplied accessories, etc., out of the reach of children. The battery pack, the accessory shoe cap, etc., may be swallowed. If such a problem occurs, consult a doctor immediately. 7 - Sony DSLR-A700P | User's Guide - Page 8
the camera to direct sunlight. If sunlight is focused on a nearby object, it may cause a fire. When you must place the camera under direct sunlight, attach the lens cap. pictures used in this manual The photographs used as examples of pictures in this manual are reproduced images, and are - Sony DSLR-A700P | User's Guide - Page 9
camera 7 Before your operation Identifying parts 14 Indicators on the monitor 19 Switching the recording information display 23 Number of images 24 The number of images that can be recorded when using the battery priority mode - S 39 Shooting with manual exposure mode - M 41 Exposure 45 - Sony DSLR-A700P | User's Guide - Page 10
Image processing and color 61 Adjusting the white balance 61 Setting ISO...64 Using the D-Range Optimizer 66 Using a Creative Style 67 Flash ...73 Selecting the flash mode 73 Using the flash compensation 75 Shooting with Slow Sync (Shooting the dark background with flash 77 Using the flash - Sony DSLR-A700P | User's Guide - Page 11
setup Dial exp.comp Ctrl dial lock Button ops. Release w/oCard Release w/oLens Custom menu 3 110 Red eye reduc. Exp.comp.set Bracket order Auto review Auto off w/ VF Rec.info.disp. Img.orientation Custom menu 4 113 Custom reset 11 - Sony DSLR-A700P | User's Guide - Page 12
brightness Info.disp.time Power save Video output HDMI output Language Date/Time setup Setup menu 2 123 Memory card File number Folder name Select folder New folder USB connection MassStrg.card Setup menu 3 125 Menu start Delete confirm. Audio signals Cleaning mode Reset default 12 - Sony DSLR-A700P | User's Guide - Page 13
your computer 127 Connecting the camera and your computer 129 Copying Troubleshooting Troubleshooting 149 Warning messages 158 Others On the memory card (not supplied 161 On the "InfoLITHIUM" battery pack 163 On the battery charger 164 Optional accessories 165 Precautions 168 Specifications - Sony DSLR-A700P | User's Guide - Page 14
Before your operation Identifying parts Camera * Do not directly touch these parts. See the AF illuminator (54, 102)/Self-timer lamp (57) I Depth-of-field preview button (39) J Lens contacts* K Mirror* L Lens mount M Lens release button (t step 2 in "Read This First") N Focus mode lever (52, 101) O - Sony DSLR-A700P | User's Guide - Page 15
: Fn (Function) button (30) For viewing: (Rotate) button (88) L Accessory shoe (166) M Diopter-adjustment dial (t step 5 in "Read This First") P Image sensor position mark (50) Q For shooting: AF/MF (Auto focus/ manual focus) button (53) For viewing: (Enlarge) button (86) R Rear control dial - Sony DSLR-A700P | User's Guide - Page 16
(7/32 inch). You will be unable to firmly secure the camera to tripods having screws longer than 5.5 mm (7/32 inch), and may damage the camera. B Battery cover open lever (t step 1 in "Read This First") (Scale up/down) buttons (86) M (Delete) button (t step 6 in "Read This First") N v/V/b/B/ (29) 16 - Sony DSLR-A700P | User's Guide - Page 17
of in fire. • When the lithium battery becomes weak, the operating distance of the Remote Commander may shorten, or the Remote Commander may not function properly. In this case, replace the battery with a Sony CR2025 lithium battery. Use of another battery may present a risk of fire or explosion - Sony DSLR-A700P | User's Guide - Page 18
When threading the strap through the holder ring, hold the tip of the strap with your finger, and slide the holder ring rather than the tip of the strap into position to secure the strap. If the holder ring comes off the strap, put it back on the strap from the notched side. Notched side 18 - Sony DSLR-A700P | User's Guide - Page 19
in "Read This First") Aspect ratio 16:9 (95) Before your operation A metering area (48) Shooting area for aspect ratio 16:9 (95) B Display Indication Flash-compensation (75 This First") WL Wireless flash (73) High-speed sync (167) Manual focus (53) z Focus (t step 5 in "Read This First") - Sony DSLR-A700P | User's Guide - Page 20
(46) Indication Flash mode (73)/Red-eye reduction (110) Exposure-compensation (45)/Metered Manual (42) Flash-compensation (75) EV scale (42, 47, 58) ISO AUTO ISO temperature, Color filter, Custom) (61) D Display 90% Indication Battery remaining (t step 1 in "Read This First") Image quality (96 - Sony DSLR-A700P | User's Guide - Page 21
Before your operation E Operation guide The next operation may be indicated on the DPOF set (116) Image quality (96) 1/30 F4.0 ISO 400 2007 1 1 10:37PM 3/7 Image size (94) Battery remaining (t step 1 in "Read This First") Shutter speed (39) Aperture (37) ISO sensitivity (64) Date of recording - Sony DSLR-A700P | User's Guide - Page 22
temperature, Color filter, Custom) (61) D-range optimizer (66) Date of recording File number/total number of images Image size (94) Battery remaining (t step 1 in "Read This First") Playback image (85) B Display P A S M Indication Histogram (85) Mode dial (34) 1/125 F3.5 ISO100 -0.3 -0.3 35mm - Sony DSLR-A700P | User's Guide - Page 23
enlarged display. You can choose to turn off the display to minimize battery consumption. When you rotate the camera to a vertical position, the display automatically rotates to adjust to the camera position. Horizontal position Detailed display Enlarged display No display DISP (Display) button - Sony DSLR-A700P | User's Guide - Page 24
that can be recorded on a memory card formatted with this camera. The values may vary depending on the shooting conditions. The number 410 153 309 293 590 199 401 Image size: L 10M (Aspect ratio: 16:9) Size Capacity 128MB 256MB 512MB Standard 36 65 136 Fine 24 44 94 Extra fine - Sony DSLR-A700P | User's Guide - Page 25
operation Image size: M 5.4M (Aspect ratio: 16:9) Size Capacity 128MB 256MB 512MB Standard 56 99 209 & JPEG 8 14 30 RAW & JPEG 5 10 21 Image size: S 2.6M (Aspect ratio: 16:9) Size Capacity 128MB 256MB 512MB Standard 81 145 305 Fine 62 112 236 Extra fine 38 68 143 cRAW - Sony DSLR-A700P | User's Guide - Page 26
13 26 RAW & JPEG 10 20 cRAW 19 38 RAW 13 26 1GB 255 174 93 53 40 76 52 Image size: L 10M (Aspect ratio: 16:9) Capacity Size 256MB 512MB Standard 73 147 Fine 50 101 Extra fine 27 55 cRAW & JPEG 13 27 RAW & JPEG 10 20 cRAW 19 38 - Sony DSLR-A700P | User's Guide - Page 27
Size 256MB 512MB 1GB Standard 163 329 650 Fine 126 254 503 Extra fine 76 154 306 cRAW & JPEG 16 33 66 RAW & JPEG 11 23 47 2GB 872 636 363 121 87 2GB 1152 885 522 128 91 2GB 1273 985 598 130 92 ( - Sony DSLR-A700P | User's Guide - Page 28
pack The table shows the approximate number of images that can be recorded when you use the camera with the battery pack (supplied) at full capacity and at an ambient temperature of 25°C (77°F). The numbers of images that can be recorded take into account changing - Sony DSLR-A700P | User's Guide - Page 29
button Multi-selector (Playback) button The directions in which the multi-selector is moved are expressed as follows in this operating instructions. Up: v Down: V To the right: B To the left: b Moving the multi-selector to v/V/b/B moves the cursor in the corresponding direction. Pressing - Sony DSLR-A700P | User's Guide - Page 30
the recording information screen, the Exclusive disp screen that switches the display to each exclusive screen is available. In this operating instructions, examples use the Quick Navi screen for explanations. Quick Navi screen Exclusive disp screen Fn (Function) button Front control dial Rear - Sony DSLR-A700P | User's Guide - Page 31
Before your operation 2 Select the desired item with the multi-selector. 3 Set the item with the front or rear control dial. For details on how to set up each item, see the corresponding page. • When using Creative Style (page 67), some of the setup tasks can be accomplished only on the Exclusive - Sony DSLR-A700P | User's Guide - Page 32
Operations available from the Quick Navi screen are: Exposure AF area Drive mode White Balance ISO D-Range Optimizer Creative Style* Flash mode* Flash compensation Image size Image quality page 45 page 49 page 55 page 61 page 64 page 66 page 67 page 73 page 75 page 94 page 96 Gray items are not - Sony DSLR-A700P | User's Guide - Page 33
Before your operation 3 Move the multi-selector to v/V to select the desired item, then press the center. 4 Move the multi-selector to v/V to select the desired setting, then press the center. 5 Press the MENU button to turn off the menu. The menu is also turned off if you press the shutter button - Sony DSLR-A700P | User's Guide - Page 34
Allows easy shooting with the settings adjusted automatically, depending entirely on the camera. t step 5 in "Read This First" : Scene Selection adjusting the shutter speed manually (page 39). M: Manual exposure mode Allows you to shoot after adjusting the exposure manually (both the shutter speed - Sony DSLR-A700P | User's Guide - Page 35
recording distance is not changed even if you select Macro. To shoot a larger image, using a macro lens is recommended. Sports action Shoots moving subjects outdoors or in bright places. • The camera continues to focus while the shutter button is pressed and held halfway down (Continuous AF, page - Sony DSLR-A700P | User's Guide - Page 36
off. In program auto mode, the new settings will be maintained if another mode has been selected or the power has been turned off. When the camera is in auto adjustment mode and the flash is up, the camera flashes automatically whenever it is necessary. When the camera is in program auto mode and - Sony DSLR-A700P | User's Guide - Page 37
program shift is turned on, pulling up the flash cancels the program shift. Shooting with aperture priority mode - A You can adjust the aperture manually. If you open the aperture (a smaller F-number), the infocus range becomes narrower. Only the main subject is then in focus. When the aperture - Sony DSLR-A700P | User's Guide - Page 38
Select an aperture value using the front or rear control dial. • The aperture range depends on the lens. • The aperture value is adjusted in 1/3 EV increments. You can set this exposure step to 1/2 suit your purpose, either to sharpen the specific area of image, or to focus on the entire image. 38 - Sony DSLR-A700P | User's Guide - Page 39
• With a lens equipped with a focus hold button, you can set the camera to perform the preview function using the focus hold button with [FocusHoldButton] in the Custom menu (page 106). Shooting with shutter speed priority mode - S You can adjust the shutter speed manually - Sony DSLR-A700P | User's Guide - Page 40
. • When the shutter speed is one second or more, the noise reduction (Long exp.NR) will be done after shooting (page 103). • The (Camera-shake warning) indicator does not appear in the shutter speed priority mode. z Shooting techniques When shooting a moving person, car, or spindrift, etc., using - Sony DSLR-A700P | User's Guide - Page 41
control dial • "BULB" (Bulb shooting) is indicated next to "30" (page 43). • In the manual exposure mode, even when [ISO sensitivity] (page 64) is set to [AUTO], it is fixed to amount of ambient light (page 73). • The (Camera-shake warning) indicator does not appear in the manual exposure mode. 41 - Sony DSLR-A700P | User's Guide - Page 42
viewfinder indicates the difference between the standard exposure (0.0 EV) determined by the camera meter and the set exposure determined by the shutter speed, and the aperture specified by the photographer (Metered Manual). The set exposure specified by the photographer is the same as the exposure - Sony DSLR-A700P | User's Guide - Page 43
change the shutter speed and aperture value combination without changing the exposure in manual mode. Mode dial Front control dial AEL (AE lock) button 1 Set such as fireworks. Attach a tripod to the camera when using the bulb shooting function. Mode dial Front control dial Shutter button Rear - Sony DSLR-A700P | User's Guide - Page 44
bulb exposure mode up to about four and a half hours using a fully charged battery pack. • After shooting, the noise reduction will be done for the same time, the more outstanding the noise on the monitor. • To reduce camera-shake, connecting the Remote Commander is recommended (pages 60, 166). To - Sony DSLR-A700P | User's Guide - Page 45
. However, you can set the exposure to your desired setting in the following setup. Adjusting the exposure You can manually shift the exposure value determined by the camera. Use this mode when you brighten or darken the overall screen. (Exposure) button Multi-selector 1 Press the (Exposure) button - Sony DSLR-A700P | User's Guide - Page 46
+ plus direction is effective. Adjust in the + direction When shooting a darker overall image, the camera judges that the subject is too dark and may set a brighter exposure for the image. In other than shutter speed priority mode or manual mode, the slow sync shooting is performed (page 77). 46 - Sony DSLR-A700P | User's Guide - Page 47
press the AEL (AE lock) button, an exposure value determined by the camera is locked as the standard value (0). At the same time, an exposure (varies according to the recomposition of the shot). The locked exposure Turn the camera on 2 and the light level of 2 is displayed. The arrow indicates 2 - Sony DSLR-A700P | User's Guide - Page 48
for shooting a subject with strong contrast or measuring the light of a specific area of the screen. If the area to be measured is not in Position of the subject. z Multi segment metering The screen of this camera is equipped with 39 honeycomb sharped metering elements and one metering element - Sony DSLR-A700P | User's Guide - Page 49
Using the shooting functions Focus When you hold the grip and look into the viewfinder, or press the shutter button halfway down, the camera adjusts the focus automatically (Auto focus). Make it a habit to press the shutter button only halfway down to confirm that the subject is visually in - Sony DSLR-A700P | User's Guide - Page 50
, use the focus lock shooting feature (page 51) or manual focus (page 53). - A subject that is low in bright or glittering, such as the sun, the body of an automobile, or the surface of water. To camera shows the location of the image sensor*. When you measure the exact distance between the camera - Sony DSLR-A700P | User's Guide - Page 51
Using the shooting functions z Shooting techniques When the subject is outside the AF area (Focus-lock) If the subject is off-center and outside the AF area, the background within the AF area will be in focus and the subject will be out of focus. To prevent this, lock the focus by following the - Sony DSLR-A700P | User's Guide - Page 52
, if the subject is motionless, the focus is locked and if the subject is in motion, the camera continues to focus. This mode is used in various situations. • You can substitute DMF (Direct Manual Focus) for AF-A with [AF-A setup] in the Recording menu (page 101). C ( Continuous AF) In this mode - Sony DSLR-A700P | User's Guide - Page 53
Using the shooting functions Manual focus MF ( Manual focus) You can set the distance of a subject. Rotate the focusing ring of the lens to achieve a sharp used. • To obtain steady exposure in manual focus mode, the camera uses the distance information to determine the exposure. To improve the - Sony DSLR-A700P | User's Guide - Page 54
AF illuminator In the auto focus mode, even when you shoot a subject under dark conditions or a low contrast subject, the AF illuminator allows the camera to focus more easily on a subject. Press the shutter button half way down, a red illuminator is automatically emitted until the focus is locked - Sony DSLR-A700P | User's Guide - Page 55
Using the shooting functions Drive mode You can use continuous shooting, self-timer, bracket, and shooting using the Remote Commander, with the DRIVE button. DRIVE button Multi-selector 1 Press DRIVE to display the drive mode screen. 2 Select the desired mode with v/V on the multi-selector, then - Sony DSLR-A700P | User's Guide - Page 56
shutter button, the camera records the images continuously (Single-shot AF) or (Manual focus), and the shutter speed is number, depending on the camera memory buffer. • When image is displayed in auto review. • The number of continuous JPEG 12 images Extra fine 16 images Fine/Standard No limit - Sony DSLR-A700P | User's Guide - Page 57
later. The 10-second self-timer is convenient when the photographer appears in a photo and the 2-second self-timer is convenient to reduce the camera-shake because the mirror is pulled up beforehand. Check that the focus is confirmed on the subject, then press the shutter button. 10sec self-timer - Sony DSLR-A700P | User's Guide - Page 58
mode, the shutter speed changes in aperture priority mode, and aperture changes in shutter speed priority mode. Normally, the shutter speed changes in manual mode. You can change the aperture by pressing and holding the AEL (AE Lock) button while taking a picture. * Ambient light: Any light other - Sony DSLR-A700P | User's Guide - Page 59
* Mired: a unit to indicate the color conversion quality in color temperature filters. • Only the image recorded last is displayed in auto review (page 111). Shooting with the DRO advanced bracket DRO advanced bracket shooting takes three pictures while separately optimizing the gradation and colors - Sony DSLR-A700P | User's Guide - Page 60
two seconds later. Verify that the subject is visually in focus, and point the transmitter at the remote sensor located on the front of the camera, then press the SHUTTER or 2 SEC button. • You cannot use the other drive modes (Continuous advanced, etc.). • To lock the focus (focus lock shooting - Sony DSLR-A700P | User's Guide - Page 61
of the image sensor, color processing that is a unique feature of digital cameras, Creative Style for various scenes, etc. Adjusting the white balance the auto white balance mode. However, you can adjust color tones manually with the white balance mode. Reddish Multi-selector Front control dial - Sony DSLR-A700P | User's Guide - Page 62
be compensated from G (Green) to M (Magenta) just like using a CC (Color Compensation) filter for photography. • When setting the color temperature measured by the color meter, test shooting is recommended before the actual photo is taken. 62 - Sony DSLR-A700P | User's Guide - Page 63
Using the shooting functions 1 Select a "ColorTemperature" or "Color filter" item with v/V on the multi-selector. 2 Adjust with b/B. • The color temperature can be selected between 2500K and 9900K. • The color filter value can be selected between G9 and M9. The increment is equivalent to the CC - Sony DSLR-A700P | User's Guide - Page 64
2 Hold the camera so that the white area fully covers the spot-metering circle and press Select the desired number. • The custom white balance setting registered in this operation is effective until a new setting is registered. (The setting is retained after the power is turned off.) • If the flash - Sony DSLR-A700P | User's Guide - Page 65
1 Press the ISO button to display the ISO screen. Using the shooting functions 2 Select the desired value with v/V on the multi-selector. • ISO can be set from [AUTO] and between 100 and 6400. • ISO numbers that are higher than ISO 3200 increase the appearance of noise. • You can use the front or - Sony DSLR-A700P | User's Guide - Page 66
Using the D-Range Optimizer The camera analyzes the shooting conditions and automatically corrects the image to improve the image quality. Front control dial Multi-selector Fn (Function) button Rear control dial 1 - Sony DSLR-A700P | User's Guide - Page 67
Advanced Auto - In program auto, aperture priority, shutter speed priority, or manual exposure mode: Standard - In Scene Selection mode: Unfixed, depending on the selected mode • When using AE lock, the camera automatically corrects the locked image. • When in Continuous advance mode, the correction - Sony DSLR-A700P | User's Guide - Page 68
Unswitchable image styles: "Standard", "Vivid", "Neutral", and "Adobe RGB" Switchable image styles: Stylebox a - c Adjustable Items Item Contrast Saturation Sharpness Brightness Zone Matching Unswitchable image styles -3 to +3 -3 to +3 -3 to +3 not not adjustable adjustable Switchable - Sony DSLR-A700P | User's Guide - Page 69
Using the shooting functions (Portrait) (Landscape) (Sunset) (Night view) (Autumn leaves) (B/W) (Sepia) Basic operation For capturing the skin color in a soft tone, ideally suited to capturing portraits. The saturation, contrast, and sharpness are heightened for capturing vivid and crisp scenery. - Sony DSLR-A700P | User's Guide - Page 70
3 Press the center to display the Creative Style screen. • You can select this screen from the Recording menu (page 97). 4 Select the desired image style with v/V on the multi-selector. • You can select "Standard", "Vivid", "Neutral", "Adobe RGB", "Portrait", "Landscape", and "B/W" with the default - Sony DSLR-A700P | User's Guide - Page 71
To switch image styles for the stylebox 1 Display the Creative Style screen (steps 1 to 3 on page 69). Using the shooting functions 2 Select a switchable stylebox with v/V on the multi-selector. 3 Move the cursor to the right side with B, and select an image style with v/V. 4 To adjust (Contrast - Sony DSLR-A700P | User's Guide - Page 72
color reproduction, compared to sRGB that is the standard color space of the digital camera. If the main purpose is to print out the image, especially when printers that support color management and DCF2.0 option color space. Using some applications and printers that do not support color management - Sony DSLR-A700P | User's Guide - Page 73
Using the shooting functions Flash This section explains the various shooting functions with the flash. Selecting the flash mode If the built-in flash is pulled up, the flash fires automatically when the surroundings are dark in auto adjustment or Scene Selection mode. You can intentionally change - Sony DSLR-A700P | User's Guide - Page 74
the AEL (AE Lock) button on the camera to test fire the flash. • If the flash does not fire, change the camera, external flash, or subject position. 7 the camera and the external flash separately. See page 73 to set the camera. To set the external flash, refer to the operating instructions supplied - Sony DSLR-A700P | User's Guide - Page 75
the camera is in slow sync recording mode while "AEL" appears in the viewfinder and on the LCD monitor. Every test fire camera and the external flash in the gray area within radius 5 m (16.4 ft) as illustrated below. For more information about flash range, also refer to the operating instructions - Sony DSLR-A700P | User's Guide - Page 76
Front control dial Multi-selector Fn (Function) button Rear control dial 1 Press the Fn (Function) button to display the Quick Navi screen (page 30). 2 Select the flash compensation item with the multi-selector. Flash compensation item 3 Select the desired value with the front or rear control - Sony DSLR-A700P | User's Guide - Page 77
speed priority mode or manual mode, slow sync shooting is not available using the AEL (AE lock) button. • You can set the camera to keep the slow sync of the flash sync terminal and plug the cord in. • Select the manual exposure mode and set the shutter speed to 1/200 second with the Super - Sony DSLR-A700P | User's Guide - Page 78
• Before you connect the flash sync cord to the Flash sync terminal, turn off the power of the connected flash. If the power is on, it may flash when you connect the cord. • The flash will always be full emission. Flash compensation (page 75) cannot be used. You can perform bracket shooting while - Sony DSLR-A700P | User's Guide - Page 79
. Mode dial MENU button Multi-selector To register a setting 1 Put the camera on the setting you want to register. See the next page for the screen. The memory information set in step 1 (the current setting on the camera) will be displayed. 5 Select the number you want to register with b/B, then - Sony DSLR-A700P | User's Guide - Page 80
and shutter speed values are also registered. Program shift and manual shift cannot be registered. 2)The number and the settings will setting will not correspond to the positions of the dials and levers on the camera. Refer to the information displayed on the LCD monitor when you take pictures - Sony DSLR-A700P | User's Guide - Page 81
Using the shooting functions Using the C (Custom) button You can assign a function of your choosing to the C (Custom) button. Press the button and the setting screen of the selected function is displayed. Creative Style (page 67) is assigned to the C button as the default setting. MENU button - Sony DSLR-A700P | User's Guide - Page 82
Flash compens. Drive mode AF area Image size Quality Creative Style D-RangeOptimizer Flash mode Memory Displays the flash compensation setup screen (page 75). Functions as the DRIVE button (page 55). Displays the AF area setup screen (page 49). Displays the image size setup screen (page 94). - Sony DSLR-A700P | User's Guide - Page 83
Using the viewing functions Viewing images Pressing the (Playback) button turns the camera to the playback mode and an image is displayed on the LCD monitor. Multi-selector (Playback) button Select an image with b/B. Switching the playback screen - Sony DSLR-A700P | User's Guide - Page 84
Switching to the index screen Pressing the (Index) button switches to the index screen. Each time you press the DISP (Display) button, the screen changes as follows. (Index) button DISP (Display) button (Delete) button Multi-selector Select an image with v/V/b/B (Index) button (Index) button or - Sony DSLR-A700P | User's Guide - Page 85
Using the viewing functions 2 Select the desired folder with v/V, then press the center. To delete all the images in the folder 1 Select the folder you want to delete with v/V on the multi-selector. 2 Press the (Delete) button. 3 Select "Delete" with v, then press the center. • You can set the - Sony DSLR-A700P | User's Guide - Page 86
Number of pixels Dark Light A histogram is the luminance distribution that shows how many pixels of a particular brightness exist in the picture. This camera has four histogram displays that are separately for luminance and RGB, and each shows the brightness on the horizontal axis (left side is - Sony DSLR-A700P | User's Guide - Page 87
Using the viewing functions 1 Display the image you want to enlarge, then press the (Enlarge) button. The center of the image is enlarged. 2 Scale up or down the image with the rear control dial. 3 Select the portion you want to enlarge with v/V/b/B on the multi-selector. • Each time you press the - Sony DSLR-A700P | User's Guide - Page 88
Rotating an image At the default setting, images shot in the portrait orientation are played back in the portrait orientation. You can rotate images in the following way, if necessary. (Playback) button (Rotate) button 1 Display the image you want to rotate, then press the (Rotate) button. The - Sony DSLR-A700P | User's Guide - Page 89
OUT terminal Video cable 2 Turn on the TV and switch the input. • See also the operating instructions supplied with the TV. 3 Turn on the camera, and press (Playback). Images shot with the camera appear on the TV screen. Select the desired image with b/B on the multi-selector. Multi-selector - Sony DSLR-A700P | User's Guide - Page 90
to your TV on the other end. • By connecting your camera to Sony's VIDEO-A compatible TV using an HDMI cable, TV sets suitable image quality for viewing still picture automatically. Please refer to the operating instructions of Sony's VIDEO-A compatible TV for more details. • Some devices may not - Sony DSLR-A700P | User's Guide - Page 91
, Holland, Hong Kong, Hungary, Italy, Kuwait, Malaysia, New Zealand, Norway, Poland, Portugal, Singapore, Slovak Republic, Spain t step 6 in "Read This First" 29 • The other buttons are used when the camera is in recording mode or is connected to a PictBridge printer (pages 60, 148). Slide show - Sony DSLR-A700P | User's Guide - Page 92
AF EyeStart trigr. AF/MF button AF/MF control AF drive speed AF area disp. FocusHoldButton 3 Red eye reduc. Exp.comp.set Bracket order Auto review Auto off w/ VF Rec.info.disp. Img.orientation 2 AEL button Ctrl dial setup Dial exp.comp Ctrl dial lock Button ops. Release w/oCard Release w/oLens - Sony DSLR-A700P | User's Guide - Page 93
to 126) 1 LCD brightness Info.disp.time Power save Video output HDMI output Language Date/Time setup 2 Memory card File number Folder name Select folder • New folder USB connection • MassStrg.card 2 3 Menu start Delete confirm. Audio signals Cleaning mode Reset default Using the menu 93 - Sony DSLR-A700P | User's Guide - Page 94
are marked with . Image size A digital image is made up of a see the differences on the screen of the camera, the fine detail and data processing time differ 2848 pixels 3104 × 2064 pixels 2128 × 1424 pixels [Aspect ratio]: [16:9] L:10M M:5.4M S:2.6M 4272 × 2400 pixels 3104 × 1744 pixels - Sony DSLR-A700P | User's Guide - Page 95
aspect ratio to suit your purpose. 3:2 A normal ratio. 16:9 An HDTV ratio. [16:9] is recommended when viewing on an HDTV. When [16:9] is selected, make your composition in this area. • RAW files recorded in 16:9 ratio are displayed in 16:9 ratio using compatible software, such as "Image Data - Sony DSLR-A700P | User's Guide - Page 96
32 Quality The image compression rate determines the image quality. As the file size of the uncompressed image will be larger, it is common for a digital camera to compress the recorded image. RAW ( ) cRAW* ( ) File format: RAW (raw data) A RAW file is the raw material to be processed on the - Sony DSLR-A700P | User's Guide - Page 97
a RAW image does not go through any basic image processing, so its colors cannot be accurately reproduced in playback mode or on an auto review screen. If the data is correctly recorded, accurate colors can be reproduced on a computer. • You cannot verify the effects of D-Range Optimizer other than - Sony DSLR-A700P | User's Guide - Page 98
For details on the operation 1 page 32 Custom button You can assign a function to the C (Custom) button. AF lock For details, see page 81. AF/MF control D.O.F.preview ISO White balance Exposure comp. Flash compens. Drive mode AF area Image size Quality Creative Style D-RangeOptimizer - Sony DSLR-A700P | User's Guide - Page 99
shooting, and the camera sets the amount of in the calculation. Manual flash The built lens is used. • ADI flash is only available in combination with the lens that is provided with a distance encoder. To determine the lens is equipped with a distance encoder, refer to the operating instructions - Sony DSLR-A700P | User's Guide - Page 100
You can select the amount of light when [Flash control] is set to [Manual flash]. 1/1 Guide number approx. 12 1/2 Guide number approx. 8.4 1/4 Guide number approx. 6 1/8 Guide number approx. 4.2 1/16 Guide number approx. 3 • Under the condition in meter at ISO 100 Flash compens. For - Sony DSLR-A700P | User's Guide - Page 101
) Assigns the Direct man. focus function. You can make a fine adjustment after adjusting the focus in auto focus. To make a fine adjustment in Direct Manual Focus 1 Set to [DMF]. 2 Set the focus mode lever to "A". 3 Press the shutter button halfway down to lock the focus. 4 Turn the focusing ring - Sony DSLR-A700P | User's Guide - Page 102
For details on the operation 1 page 32 Priority setup Select a setting for shutter release. AF The shutter cannot be released when the focus is not confirmed. Release The shutter can be released even when the focus is not confirmed. Select this setting if the shooting opportunity takes - Sony DSLR-A700P | User's Guide - Page 103
long exposure. • Noise reduction is not performed on continuous shooting or continuous bracketing even when it is set to [On]. High ISO NR When the camera sensitivity is set high, noise in the pictures tends to become more noticeable. When the ISO is set to 1600 or above, High ISO noise - Sony DSLR-A700P | User's Guide - Page 104
Recording menu 4 For details on the operation 1 page 32 Memory For details, see page 79. Rec mode reset You can reset the main functions of the recording mode when the mode dial is set to P, A, S, or M. 1 Select [Rec mode reset], then press the center of the multi-selector. The message "Reset - Sony DSLR-A700P | User's Guide - Page 105
automatically. On Automatically adjusts the focus. • This mode uses up the battery charge faster than [Off]. Off Does not adjust the focus. EyeStart /MF button The AF/MF button switches between AF (auto focus) and MF (manual focus) in the default setting (page 53). This button can be used as - Sony DSLR-A700P | User's Guide - Page 106
local AF area is illuminated for 0.3 seconds. Off The local AF area is illuminated only when the multi-selector is pressed. FocusHoldButton If you use a lens equipped with a focus hold button, you can change the function of the button to preview a shot. Focus hold Uses the button as the focus - Sony DSLR-A700P | User's Guide - Page 107
. AEL hold While the button is held down, the camera temporarily performs spot metering regardless of the metering mode previously "AEL toggle" is selected. • Except when shutter speed priority mode or the manual mode is selected, slow sync is selected automatically whenever the flash is used. In - Sony DSLR-A700P | User's Guide - Page 108
For details on the operation 1 page 32 Dial exp.comp You can adjust the exposure (page 45) with the front or rear control dial. Off Does not adjust the exposure with the dials. Front dial Adjusts the exposure with the front control dial. Rear dial Adjusts the exposure with the rear control - Sony DSLR-A700P | User's Guide - Page 109
shutter cannot be released when no memory card is inserted in the camera. Release w/oLens You can set the shutter lock to keep the shutter from releasing when no lens is mounted on the camera. When attaching the camera to an astronomical telescope, for example, select [Enable] so the shutter can - Sony DSLR-A700P | User's Guide - Page 110
Custom menu 3 For details on the operation 1 page 32 The default settings are marked with . Red eye reduc. Reduces the red-eye phenomenon by providing low-flash light a few times before shooting when using the flash. On Reduces the red-eye phenomenon. Off Does not use red-eye reduction. • - Sony DSLR-A700P | User's Guide - Page 111
bracket shooting shows only the image recorded last. If you delete the image following the process above, only the displayed image is deleted. • In auto review, the image will not be displayed in the vertical position even if you shot the image in a vertical position (page 112). Auto off w/ VF The - Sony DSLR-A700P | User's Guide - Page 112
display rotates automatically to a vertical position when the camera is in a vertical position. Horizontal The display does not rotate when the camera is in a vertical position. Img.orientation You , depending on the software employed. • To rotate the displayed image manually, see page 88. 112 - Sony DSLR-A700P | User's Guide - Page 113
Custom menu 4 For details on the operation 1 page 32 Custom reset The settings in the Custom menu are all reset to the default settings. 1 Select [Custom reset], then press the center of the multi-selector. The message "Reset custom functions?" appears on the LCD monitor. 2 Select [OK] with v on - Sony DSLR-A700P | User's Guide - Page 114
Playback menu 1 Playback menu For details on the operation 1 page 32 The default settings are marked with . Delete You can delete unnecessary images. Follow the procedure below. Marked images Deletes only the selected images. All images Deletes all the images on the memory card. • Once you - Sony DSLR-A700P | User's Guide - Page 115
up. Do not eject the memory card while the lamp is lit. • Format the memory card using the camera. If you format it on a computer, the memory card may not be usable with the camera, depending on the format type used. • You cannot format a "Memory Stick Duo" that is inserted into the - Sony DSLR-A700P | User's Guide - Page 116
, then press the center of the multi-selector. The image protection is canceled, and the screen returns to the playback screen. DPOF setup Using the camera, you can specify the images and the number of images to print before you print images at a shop or with your printer. Follow the procedure - Sony DSLR-A700P | User's Guide - Page 117
screen. • If you insert a memory card that contains DPOF-marked images specified with other cameras into this camera, then specify images to which to attach a DPOF-mark, the DPOF specifications made with other cameras are canceled. To unspecify DPOF on all the images When you do so, the index print - Sony DSLR-A700P | User's Guide - Page 118
play back an image recorded in the portrait position, the camera detects the orientation of the image and automatically displays it in TV or a computer, it will be displayed in the portrait position even if [Manual rotate] is selected. • If [Not record] is selected with [Img.orientation] in - Sony DSLR-A700P | User's Guide - Page 119
Playback menu 2 For details on the operation 1 page 32 The default settings are marked with . Slide show Plays back recorded images in order (Slide show). Select [Slide show], then press the center of the multi-selector. The slide show starts and ends automatically after all the images have been - Sony DSLR-A700P | User's Guide - Page 120
again if you press the shutter button halfway down or perform some other operation. Power save If you do not operate the camera for given period of time, the camera turns to power saving mode and almost completely shuts down (Power Save). t step 4 in "Read This First" You can set the time - Sony DSLR-A700P | User's Guide - Page 121
camera turns to power save mode after 30 minutes when the camera is connected to a TV. However, when connected to a TV with an HDMI cable (not supplied) and using an AC Adaptor/charger the TV does not support the selected signal, in which case the camera outputs the signal supported by the TV. - Sony DSLR-A700P | User's Guide - Page 122
For details on the operation 1 page 32 Date/Time setup Sets the date and time. Select [Date/Time setup], then press the center of the multi-selector. Set the date and time again on the Date/Time setup screen. • For the procedure on setting the date and time, see step 4 in "Read This First". 122 - Sony DSLR-A700P | User's Guide - Page 123
. Standard form Selects the standard form folder. Date form Selects the date form folder. A new folder will be created automatically every time a recording date changes. • The folders and images will be displayed as follows. Example: AB A: Folder number B: Y (the last digit) / MM / DD 123 - Sony DSLR-A700P | User's Guide - Page 124
new folder is created with a number incremented one higher than the largest number currently used, and the folder becomes the current recording folder. USB connection Selects the USB mode to be used when connecting the camera are both inserted in the camera, both can be displayed depending on - Sony DSLR-A700P | User's Guide - Page 125
. Off Turns off the sound. Cleaning mode If dust or debris enters the camera and lands on the image sensor (the part that acts as the film), should be completed quickly. 1 Confirm that the battery is fully charged. • The use of an AC Adaptor/charger (not supplied) is recommended. 2 Select [ - Sony DSLR-A700P | User's Guide - Page 126
inside the camera body. • When cleaning the image sensor, do not put the tip of a blower into the cavity beyond the lens mount. You do not need to put the blower close to the image sensor. 6 Attach the lens and set the POWER switch to OFF. • The camera starts beeping if the battery pack becomes - Sony DSLR-A700P | User's Guide - Page 127
Using your computer Using your computer Enjoying your computer Connecting the camera with your computer (page 129) Preparing the camera and the computer, and connecting the camera and your computer Copying images to your computer (page 130) Viewing images on your computer Installing the application - Sony DSLR-A700P | User's Guide - Page 128
a multi-boot environment. * 64-bit editions and Starter (Edition) are not supported. USB jack: Provided as standard x Macintosh OS (pre-installed): Mac OS to a single computer at the same time, some devices, including your camera, may not operate, depending on the types of USB devices you are - Sony DSLR-A700P | User's Guide - Page 129
Storage] (page 124). 1 Insert a memory card with recorded images into the camera. 2 Insert the sufficiently charged battery pack in the camera, or connect the camera to a wall outlet (wall socket) with the AC Adaptor/charger (not supplied). • When you copy images to your computer using insufficient - Sony DSLR-A700P | User's Guide - Page 130
" (For Windows Vista: "Documents") folder. 1 After making a USB connection, click [Copy pictures to a folder on my computer using Microsoft Scanner and Camera Wizard] t [OK] as the wizard screen appears automatically on the desktop. 3 Double-click the folder where the image files you want to copy - Sony DSLR-A700P | User's Guide - Page 131
overwrite confirmation message appears. When you overwrite an existing image with a new one, the original file data is deleted. To copy an image file name, you may not be able to play back that image with your camera (page 134). Copying images to a Computer - Windows 2000 This section describes an - Sony DSLR-A700P | User's Guide - Page 132
4 is unnecessary for Windows XP/ Vista. x Macintosh Drag and drop the drive icon or the icon of the memory card to the "Trash" icon. The camera is disconnected from the computer. The image is displayed. x Macintosh Double-click the hard disk icon t the desired image file to open that image file - Sony DSLR-A700P | User's Guide - Page 133
as folders on the memory card. Example: viewing folders on Windows XP Using your computer A Folders containing image data recorded using this camera. (The first three digits show the folder number.) B You can create a folder by date form (page 123). • You cannot record/play back any images to the - Sony DSLR-A700P | User's Guide - Page 134
no folder, first create a folder with your camera (page 124) and then copy the image file. 2 Copy the image file to the memory card folder in the following order. 1Right-click the image file, then click [Copy]. 2Double-click [Removable Disk] or [Sony MemoryStick] in [My Computer]. 3Right-click the - Sony DSLR-A700P | User's Guide - Page 135
more Display: 1024 × 768 dots or more, High Color (16-bit color) or more * 64-bit editions and Starter (Edition) are not supported. x Macintosh Recommended environment for using "Image Data Converter SR Ver.2"/ "Image Data Lightbox SR"/"Remote Camera Control" OS (pre-installed): Mac OS X (v10.4) or - Sony DSLR-A700P | User's Guide - Page 136
computer following the instructions on the screen. 6 Remove the CD-ROM after the installation is complete. The following software is installed. • Sony Picture Utility "Picture Motion Browser" • Sony Image Data Suite "Image Data Converter SR" "Image Data Lightbox SR" "Remote Camera Control" After you - Sony DSLR-A700P | User's Guide - Page 137
camera more than ever by taking advantage of the software. This section summarizes the "Picture Motion Browser" and gives the basic instructions ] (in Windows 2000, [Programs]) t [Sony Picture Utility] t [Help] t [Picture Motion Browser Guide]. Starting and exiting the "Picture Motion Browser" - Sony DSLR-A700P | User's Guide - Page 138
, click the [Import] button. You can view images arranged by shooting date on a calendar. For details on the operation, refer to "Picture Motion Browser Guide". By default, images are imported into a folder created in "My Pictures" that is named with the date of importing. • For details on the - Sony DSLR-A700P | User's Guide - Page 139
. x Macintosh To start up Double-click [Image Data Converter SR Ver.2] in the [Sony Image Data Suite] folder from the [Application] folder. To exit Click [Quit Image Data Data Converter SR". Technical Support Additional information on this product and answers to frequently asked questions can be found - Sony DSLR-A700P | User's Guide - Page 140
you to do the following: • Display and compare RAW/JPEG images recorded with this camera. • Rate the images on a scale of five. • Display an image in menu, click [Start] t [All Programs] (For Windows 2000: [Programs]) t [Sony Image Data Suite] t [Image Data Lightbox SR]. To exit Click the button on - Sony DSLR-A700P | User's Guide - Page 141
2 Rate images. You can attach mark(s), depending on how you rate the image on a scale of five. mark(s) 3 Prioritize images according to the rating. You can rank the images by their importance and save or delete them. Utilizing [Collection] [Collection] is a database that manages the operation status - Sony DSLR-A700P | User's Guide - Page 142
from the Start menu, click [Start] t [All Programs] t [Sony Image Data Suite] t [Help] t [Remote Camera Control]. Starting up or exiting "Remote Camera Control" x Windows To start up Click [Start] t [All Programs] t [Sony Image Data Suite] t [Remote Camera Control]. To exit Click the button on the - Sony DSLR-A700P | User's Guide - Page 143
computer using the USB cable. 1 To the USB terminal 2 Turn on the camera and the computer, then start the "Remote Camera Control". USB cable 2 To the USB terminal • Use the fully charged battery pack or the AC Adaptor/charger (not supplied). 3 Make settings on the control panel, such as those - Sony DSLR-A700P | User's Guide - Page 144
Saving images recorded with the camera on a computer 1 Perform steps 1 and 2 in "Operating the camera from a computer". 2 Set up the camera or the computer and take a picture with the camera. The image is shot and is saved on the computer. 144 - Sony DSLR-A700P | User's Guide - Page 145
card/ Microdrive compliant printer. For details, see the operating instructions supplied with the printer. Printing using a computer You can "Picture Motion Browser Guide". Printing at a shop You can take a memory card containing images shot with your camera to a photo printing service shop. You can - Sony DSLR-A700P | User's Guide - Page 146
print RAW data files. Stage 1: Setting the camera Stage 2: Connecting the camera to the printer 1 Connect the camera to the printer. MENU button 2 To the USB terminal USB cable Multiselector • It is recommended to use the AC Adaptor/ charger (not supplied) to prevent the power from turning - Sony DSLR-A700P | User's Guide - Page 147
images. Paper size Auto 9×13cm/3.5"×5" Hagaki 10×15cm 4"×6" A6/4.1"×5.8" 13×18cm/5"×7" Letter A4/8.3"×11.7" A3/11.7"×16.5" Printer setup 89×127mm 100×147mm 10×15cm 101.6×152.4mm 105×148.5mm 127×178mm 216×279.4mm 210 selector cancels the print. Remove the USB cable or turn off the camera. When 147 - Sony DSLR-A700P | User's Guide - Page 148
The DPOF mark on each image is cleared. When you cancel your specification without printing images, select this item. Folder print Prints all the print images while viewing them on the TV. 1 Connect the camera to a TV (page 90). 2 Connect the camera to a printer (page 146). 3 Display the image you - Sony DSLR-A700P | User's Guide - Page 149
Troubleshooting Troubleshooting If you experience trouble with your camera, try the following solutions. Check the items on pages 149 to 157. Consult your Sony dealer or local authorized Sony service facility. Battery pack and power The battery pack cannot be installed. • As you insert the battery - Sony DSLR-A700P | User's Guide - Page 150
[Memory card] in the Setup menu, then insert your memory card into the camera (t step 3 in "Read This First", page 123). • The shutter cannot The subject is too close. Check the minimum focal distance of the lens. • You are shooting in manual focus mode, set to auto focus mode with the focus mode - Sony DSLR-A700P | User's Guide - Page 151
Troubleshooting A picture taken with the flash is too dark. • If the subject is . • The picture was taken with the lens hood on. Remove the lens hood when the built-in flash is used. With some lenses, the bottom of the picture may become dark even without the lens hood (t step 5 in "Read This First - Sony DSLR-A700P | User's Guide - Page 152
an image file has been processed by a computer or when the image file was recorded using a model other than that of your camera, playback on your camera is not guaranteed. • The camera is in USB mode. Delete the USB connection (page 132). The image does not appear on the TV screen. • Check [Video - Sony DSLR-A700P | User's Guide - Page 153
camera. • Turn on the camera. • When the battery level is low, install the charged battery pack (t step 1 in "Read This First"), or use the AC Adaptor/charger using "Picture Motion Browser", refer to the "Picture Motion Browser Guide". • Consult the computer or software manufacturer. After making a - Sony DSLR-A700P | User's Guide - Page 154
If "Memory Stick PRO Duo" is not supported, connect the camera to the computer (page 129). The computer recognizes play back, connect the camera to a TV. • Insert a battery into the battery holder with the +/- Remote Commander may not function properly. • A lens or hood may cover the remote sensor to - Sony DSLR-A700P | User's Guide - Page 155
Troubleshooting an image shot with the aspect ratio set to [16:9], the lateral end of the image may be cut . • When having images printed at a digital print shop, ask the shop whether they to the operating instructions supplied with the printer. Cannot print images. • Check that the camera and the - Sony DSLR-A700P | User's Guide - Page 156
camera. • The camera has been left unused for sometime with a low battery or no battery pack. Charge the battery pack and set the date again (t step 4 in "Read This First"). If the date setting is lost every time the battery pack is charged, consult your Sony dealer or local authorized Sony service - Sony DSLR-A700P | User's Guide - Page 157
lamp is not illuminated (t step 1 in "Read This First"). The camera does not work properly. • Turn off the camera. Remove the battery pack and insert it again. If an AC Adaptor/charger (not supplied) is used, disconnect the power cord. If the camera is hot, allow it to cool down before trying this - Sony DSLR-A700P | User's Guide - Page 158
used up. Replace the battery (pages 156, 169). Power insufficient • You tried to perform [Cleaning mode] when the battery level is insufficient. Charge the battery pack or use the AC Adaptor/charger (not supplied). No Memory Stick No CF card • The type of the memory card inserted into the camera is - Sony DSLR-A700P | User's Guide - Page 159
you replace the memory card. Unable to magnify. Unable to rotate image. • Images recorded with other cameras may not be enlarged or rotated. No images changed • You attempted to protect images or specified DPOF without changing the specification of those images. Troubleshooting Cannot create - Sony DSLR-A700P | User's Guide - Page 160
Printer error • Check the printer. • Check if the image you want to print is corrupted. Printer busy • Check the printer. 160 - Sony DSLR-A700P | User's Guide - Page 161
protection technology that uses encryption technology. Data recording/playback that requires MagicGate functions cannot be performed with this camera. *2 Supports high-speed data transfer using a parallel interface. • A "Memory Stick Duo" formatted with a computer is not guaranteed to operate - Sony DSLR-A700P | User's Guide - Page 162
On the CF card/Microdrive • Be sure to format the recording medium using this camera when you use it for the first time. • Data may be damaged in the . Be careful when you handle it. • Do not remove the label or attach a new label over the label. • When you carry or store the memory card, put it - Sony DSLR-A700P | User's Guide - Page 163
is shorter in cold places. We recommend the following to ensure longer battery pack use: - Put the battery pack in a pocket close to your body to warm it up, and insert it in your camera immediately before you start shooting. • The battery pack will run out quickly if you use the flash frequently - Sony DSLR-A700P | User's Guide - Page 164
pack is the specified type, remove the battery pack, replace it with new one or another one and check if the battery charger operates correctly. If the battery charger operates correctly, a battery error may have occurred. • If the battery charger is dirty, charging may not be performed successfully - Sony DSLR-A700P | User's Guide - Page 165
and operate popular accessories for this camera. For details, refer to the operating instructions of each of the accessories. AC-VQ900AM AC Adaptor/charger When a household power outlet (AC power) is available, using an AC Adaptor/charger eliminates the possibility of running out of battery. To wall - Sony DSLR-A700P | User's Guide - Page 166
RM-S1AM Remote Commander This Remote Commander allows you to release the shutter without touching the camera. This keeps the camera from shaking. In addition, you can keep the shutter button down during bulb exposure (page 43). To attach the Remote Commander, flip open the cover - Sony DSLR-A700P | User's Guide - Page 167
When using the flash (not supplied), remove the accessory shoe cap and slide the flash onto the camera. The removed cap can be placed on the eyepiece cover. Accessory shoe cap High Speed Sync (HSS) Shooting Although a high shutter speed cannot be used in normal flash recording, the HVL-F56AM or HVL- - Sony DSLR-A700P | User's Guide - Page 168
cases this malfunction cannot be repaired. x On carrying Be sure to attach the lens cap or body cap when not using the camera. When attaching the body cap, remove all the dust from the cap before placing it on the camera. x On cleaning Cleaning the LCD monitor Wipe the screen surface with an LCD - Sony DSLR-A700P | User's Guide - Page 169
battery Insert a charged battery pack in the camera, or connect the camera to a wall outlet (wall socket) using the AC Adaptor/charger (not supplied), and leave the camera an incorporated battery, this battery should be replaced by qualified service staff only. To ensure that the battery will be - Sony DSLR-A700P | User's Guide - Page 170
Specifications Camera [System] Camera Type Image format Digital Single Lens Reflex Camera with built-in flash and interchangeable lenses 23.5×15.6 mm (APS-C format) Lens All of Sony Lens [Image sensor] Total pixel number of camera Approx. 13 053 000 pixels Effective pixel number of camera - Sony DSLR-A700P | User's Guide - Page 171
(W/H/D, excluding protrusions) Mass Approx.690 g (1 lb 8.3 oz) (without batteries, memory card and body accessories) Operating temperature 0 to 40°C (32 to 104°F) (When using the Microdrive: 5 to 40°C (41 to 104°F)) BC-VM10 Battery charger Input rating 100 V - 240 V AC, 50/60 Hz Output rating - Sony DSLR-A700P | User's Guide - Page 172
Reset default z: reset a: not reset * t Pages on the "Read This First" A: AUTO shooting (page 34) B: Scene Selection (page 35) C: Reset of recording function (page 104) D: Reset default (page 126) Using the dial or button Items Reset to A B C Super SteadyShot - aaa Adjusting the diopter - - Sony DSLR-A700P | User's Guide - Page 173
Recording menu Items Image size Aspect ratio Quality D-RangeOptimizer Creative Style Custom button Exposure step Flash mode Flash control Power ratio Flash compens. ISO Auto max. ISO Auto min. AF-A setup AF area Priority setup AF illuminator AF w/ shutter Long exp.NR High ISO NR Reset to L:12M 3:2 - Sony DSLR-A700P | User's Guide - Page 174
button Ctrl dial setup Dial exp.comp Ctrl dial lock Button ops. Release w/oCard Release w/oLens Red eye reduc. Exp.comp.set Bracket order Auto review Auto off w/ VF Rec.info.disp. Img.orientation Playback menu Items Date imprint Index print PlaybackDisplay Slide show Reset to On w/ GripSensor AF/MF - Sony DSLR-A700P | User's Guide - Page 175
Setup menu Items LCD brightness Info.disp.time Power save Video output HDMI output Date/Time setup Memory card File number Folder name Select folder USB connection MassStrg.card Menu start Delete confirm. Audio signals Reset to ±0 5 sec 3 min - HD(1080i)prior. - CompactFlash Series Standard form - - Sony DSLR-A700P | User's Guide - Page 176
review 111 Autoflash 73 Automatic AF 52 176 B Battery charger 164 t step 1 in "Read This First" Battery pack 163 t step 1 in "Read This First" Bracket 57 Bracket order 111 Brightness 68 BULB shooting 43 Button ops 109 C Camera exp.comp 108 Direct Manual Focus .......... 101 Distance to - Sony DSLR-A700P | User's Guide - Page 177
167 Histogram display 85 Holding the camera t step 5 in "Read This time 120 Install 136 Internal rechargeable battery 169 ISO 64 ISO Auto Macro 35 Manual exposure 41 Manual flash 99 Manual focus 53 Manual shift 43 ........168 Multi segment 48 N New folder 124 Night portrait 36 - Sony DSLR-A700P | User's Guide - Page 178
Release w/oCard 109 Release w/oLens 109 Remote Camera Control .....142 Remote Commander 16, 60, 166 178 Reset default 126 Specifications 170 Sports action 35 Spot 48 Spot AF area 50 Sunset (Scene Selection)...... 35 Super SteadyShot scale t step 5 in "Read This First" T Troubleshooting - Sony DSLR-A700P | User's Guide - Page 179
are trademarks of Sony Corporation. • "InfoLITHIUM" is a trademark of Sony Corporation. • "PhotoTV HD" is a trademark of Sony Corporation. • Microsoft . • In addition, system and product names used in this manual are, in general, trademarks or registered trademarks of their respective
-
 1
1 -
 2
2 -
 3
3 -
 4
4 -
 5
5 -
 6
6 -
 7
7 -
8
-
9
-
10
-
11
-
12
-
13
-
14
-
15
-
16
-
17
-
18
-
19
-
20
-
21
-
22
-
23
-
24
-
25
-
26
-
27
-
28
-
29
-
30
-
31
-
32
-
33
-
34
-
35
-
36
-
37
-
38
-
39
-
40
-
41
-
42
-
43
-
44
-
45
-
46
-
47
-
48
-
49
-
50
-
51
-
52
-
53
-
54
-
55
-
56
-
57
-
58
-
59
-
60
-
61
-
62
-
63
-
64
-
65
-
66
-
67
-
68
-
69
-
70
-
71
-
72
-
73
-
74
-
75
-
76
-
77
-
78
-
79
-
80
-
81
-
82
-
83
-
84
-
85
-
86
-
87
-
88
-
89
-
90
-
91
-
92
-
93
-
94
-
95
-
96
-
97
-
98
-
99
-
100
-
101
-
102
-
103
-
104
-
105
-
106
-
107
-
108
-
109
-
110
-
111
-
112
-
113
-
114
-
115
-
116
-
117
-
118
-
119
-
120
-
121
-
122
-
123
-
124
-
125
-
126
-
127
-
128
-
129
-
130
-
131
-
132
-
133
-
134
-
135
-
136
-
137
-
138
-
139
-
140
-
141
-
142
-
143
-
144
-
145
-
146
-
147
-
148
-
149
-
150
-
151
-
152
-
153
-
154
-
155
-
156
-
157
-
158
-
159
-
160
-
161
-
162
-
163
-
164
-
165
-
166
-
167
-
168
-
169
-
170
-
171
-
172
-
173
-
174
-
175
-
176
-
177
-
178
-
179
 |
 |
Before your
operation
Using the shooting
functions
Using the viewing
functions
Using the menu
Using your computer
Printing images
Troubleshooting
Others
Index
Digital Single Lens Reflex Camera
User’s Guide/
Troubleshooting
“Read This First” (separate volume)
Explains the set-up and basic operations for shooting/
playback with your camera.