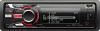
Sony DSX-S210X Operating Instructions
Sony DSX-S210X Manual
 |
View all Sony DSX-S210X manuals
Add to My Manuals
Save this manual to your list of manuals |
Sony DSX-S210X manual content summary:
- Sony DSX-S210X | Operating Instructions - Page 1
(1) FM/AM Digital Media Player Operating Instructions US Manual de instrucciones ES Owner's Record The model and serial numbers are located on the bottom of the unit. Record the serial number in the space provided below. Refer to these numbers whenever you call upon your Sony dealer regarding - Sony DSX-S210X | Operating Instructions - Page 2
this unit in the dashboard of the car for safety. For installation and connections, see the supplied installation/ connections manual. Warning This equipment has been tested and found to comply with the limits for a Class B digital device, pursuant to Part 15 of the FCC Rules. These limits are - Sony DSX-S210X | Operating Instructions - Page 3
Sony Corporation. "WALKMAN" and "WALKMAN" logo are registered trademarks of Sony Corporation. SensMe and the SensMe logo are trademarks or registered trademarks of Sony . iPhone®, iPod PANDORA, the PANDORA logo, and the Pandora trade dress are trademarks or registered trademarks of Pandora Media - Sony DSX-S210X | Operating Instructions - Page 4
Radio Storing and receiving stations 11 Storing automatically - BTM 11 Storing manually 11 Receiving the stored the SensMe™ function . . . . . 15 Installing "SensMe™ Setup" and "Content Transfer" in your - Passenger control 21 Pandora® via USB (iPhone) Playing back Pandora 21 Playing back via - Sony DSX-S210X | Operating Instructions - Page 5
29 Removing the unit 30 Specifications 31 Troubleshooting 32 Error displays/Messages 33 Support site If you have any questions or for the latest support information on this product, please visit the web site below: http://esupport.sony.com http://www.sony.com/mobileAV Provides information on - Sony DSX-S210X | Operating Instructions - Page 6
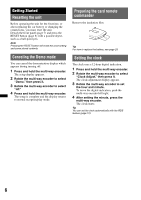
select "Clock Adjust," then press it. The clock adjustment display appears. 3 Rotate the multi-way encoder to set the hour and minute. To move the digital indication, push the multi-way encoder left/right. 4 After setting the minute, press the multi-way encoder. The clock starts. Tip You can set the - Sony DSX-S210X | Operating Instructions - Page 7
without detaching the front panel, the caution alarm will sound for a few seconds. The alarm will only sound if the built-in amplifier is used. 1 temperature or moisture. Avoid leaving it in a parked car or on a dashboard/rear tray. • Do not detach the front panel during playback of the USB device, - Sony DSX-S210X | Operating Instructions - Page 8
down/left/right to: Select a menu item. Press to: Enter sound setting/apply a setting. Press and hold to: Enter menu. Radio: Push up/down to: - Receive stored station. Push left/right to: - Tune in stations automatically (push). - Find a station manually (push and hold). USB: Push up/down to: - Skip - Sony DSX-S210X | Operating Instructions - Page 9
the radio band (FM/AM)*1/ switch the USB device (internal/external). Press and hold to: Enter/cancel the passenger control*4/enter the bookmark mode (Pandora USB). L ZAP/SHUF button page 15, 20, 24 To enter ZAPPIN™ mode (press); select shuffle play mode (press and hold). M PTY/CAT button*5 page - Sony DSX-S210X | Operating Instructions - Page 10
ATT (attenuate) button To attenuate the sound. To cancel, press again. I SOUND button To enter sound setting. J MODE button Press to: playback. To cancel, press again. Pandora USB: (6): PAUSE page 22 To pause playback. To cancel, press again. Radio: To receive stored stations (press); store stations - Sony DSX-S210X | Operating Instructions - Page 11
frequency in the preset list. A beep sounds when the setting is stored. 3 Press the multi-way encoder to receive the station. The display returns to normal repeatedly to fine adjust to the desired frequency (manual tuning). Storing manually 1 While receiving the station that you want to store, - Sony DSX-S210X | Operating Instructions - Page 12
RDS Overview FM stations with Radio Data System (RDS) service send inaudible digital information along with the regular radio program signal. Display items A Radio band B Clock C Preset number D Frequency* (Program service name), RDS data * While receiving the RDS station, "RDS" is displayed on the - Sony DSX-S210X | Operating Instructions - Page 13
compatibility of your USB device, visit the support site. Support site http://esupport.sony.com http://www.sony.com/mobileAV • MSC (Mass Storage Class) with wireless communication functions on the TUNE TRAY, as it may not receive phone signals or communication may be terminated. • Do not leave a USB - Sony DSX-S210X | Operating Instructions - Page 14
to connect. • For "WALKMAN" users, use of the optional adaptor XA-50WM the installation position, detach the front panel and open the TUNE TRAY manually. amount of recorded data. • DRM (Digital Rights Management) files may not be /WMA/AAC files is not supported. - lossless compression - copyright - Sony DSX-S210X | Operating Instructions - Page 15
the unit. 1 Download the "SensMe™ Setup" and "Content Transfer" software from the support site 2 Install the software in your computer For more details on the installation, visit http://esupport.sony.com or http://www.sony.com/mobileAV 3 Registering a USB device using "SensMe™ Setup" Connect a USB - Sony DSX-S210X | Operating Instructions - Page 16
group tracks by channel, track sound patterns need to be analyzed support site. 2 Install the software in your computer. For more details on the installation, visit http://esupport.sony.com or http://www.sony If a message appears, follow the on-screen instructions to proceed. 2 Drag and drop tracks - Sony DSX-S210X | Operating Instructions - Page 17
3 Selecting a track from the channel list using the multi-way encoder. • Change the channel Push the multi-way encoder up/down to select the desired channel. • Change the track Push the multi-way encoder left/right until the desired track appears, then press it. Playback starts from the beginning of - Sony DSX-S210X | Operating Instructions - Page 18
(page 29) or visit the support site. In these Operating Instructions, "iPod" is used as a general reference for the iPod functions on the iPod and iPhone, unless otherwise specified by the text or illustrations. Support site http://esupport.sony.com http://www.sony.com/mobileAV Notes • Do not place - Sony DSX-S210X | Operating Instructions - Page 19
playback. Removing the iPod 1 Stop the iPod playback. 2 Remove the iPod. Caution for iPhone When you connect an iPhone via USB, telephone volume is controlled by iPhone itself. In order to avoid sudden loud sound after a call, do not increase the volume on the unit during a telephone call. continue - Sony DSX-S210X | Operating Instructions - Page 20
TRAY, as this may cause smoke, fire, or other accident. • For iPod users, use the supplied adaptor XA-50IP. It is designed for use with this unit open because of the dashboard shape at the installation position, detach the front panel and open the TUNE TRAY manually. For how to detach the front panel - Sony DSX-S210X | Operating Instructions - Page 21
support site. Support site http://esupport.sony.com http://www.sony.com/mobileAV Notes • Do not place a cellular phone or a device with wireless communication functions on the TUNE TRAY, as it may not receive phone signals or communication may be terminated. • Certain Pandora service functions - Sony DSX-S210X | Operating Instructions - Page 22
connector to USB cable. 3 Press (SOURCE/OFF) repeatedly until "Pandora USB" appears, and then press (MODE) to switch the USB device. "Pandora USB EXT" and "Please launch Pandora Application on mobile device." appear. 4 Launch Pandora on the iPhone. 5 Adjust the volume on this unit. To pause playback - Sony DSX-S210X | Operating Instructions - Page 23
Searching for a track Searching a track by name - Quick-BrowZer™ You can search for a track in a USB device easily by category. 1 Press (BROWSE). The unit enters the Quick-BrowZer mode, and the list of search categories appears. 2 Rotate the multi-way encoder to select the desired search category, - Sony DSX-S210X | Operating Instructions - Page 24
25) Listening Position Subwoofer (page 26) Listening Position Custom Tune (page 26) Fader & Balance Front/Rear/Center ( ) Adjusts the relative level. Right/Left/Center ( ) Adjusts the sound balance. Subwoofer Tune & LPF Phase ( ) Selects the phase: "Normal," "Reverse." FREQ ( ) Selects the subwoofer - Sony DSX-S210X | Operating Instructions - Page 25
sound functions - Advanced Sound Engine Advanced Sound Engine, Sony's new sound engine, creates an ideal in-car sound field with digital signal processing. Advanced Sound Engine contains the following features: EQ7, Listening Position, DM+ Advanced, Rear and USB (SensMe™, Pandora USB) sources. - Sony DSX-S210X | Operating Instructions - Page 26
the multi-way encoder. 2 Rotate the multi-way encoder until "Listening Position Front/Rear" appears, then press it. 3 Push the multi-way encoder up/down to digitally compressed sound by restoring high frequencies lost in the compression process. This function works when the USB, SensMe™ or Pandora - Sony DSX-S210X | Operating Instructions - Page 27
The display returns to normal reception/play mode. Tip Adjusted DM+ settings can be memorized separately for USB (SensMe™, Pandora USB) sources. Using rear speakers as subwoofer - Rear Bass Enhancer Rear Bass Enhancer enhances the bass sound by applying the low pass filter setting (page 24) to the - Sony DSX-S210X | Operating Instructions - Page 28
"off." Play Mode Repeat (page 15, 20) ZAPPIN Tone*1 Has the beep sound between track passages: "on," "off." ZAPPIN Time*1 Selects the playback time for *1 When USB/SensMe™/iPod source is activated. *2 When FM is received. Additional Information Precautions • Cool off the unit beforehand if your car - Sony DSX-S210X | Operating Instructions - Page 29
iPhone may affect wireless performance. If you have any questions or problems concerning your unit that are not covered in this manual, consult your nearest Sony a good contact. • Be sure to observe the correct polarity when installing the battery. • Do not hold the battery with metallic tweezers, - Sony DSX-S210X | Operating Instructions - Page 30
Cleaning the connectors The unit may not function properly if the connectors between the unit and the front panel are not clean. In order to prevent this, detach the front panel (page 7) and clean the connectors with a cotton swab. Do not apply too much force. Otherwise, the connectors may be - Sony DSX-S210X | Operating Instructions - Page 31
rear) Subwoofer output terminal (mono) Power antenna (aerial) relay control terminal Power amplifier control terminal Inputs: Remote controller input terminal Antenna (aerial) input for installation and Service Pack, visit the following support site: http://esupport.sony.com http://www.sony - Sony DSX-S210X | Operating Instructions - Page 32
Troubleshooting The following checklist will help you remedy problems you may encounter with your unit. Before going through the checklist below, check the connection and operating procedures. If the problem is not solved, visit the following support site. Support site http://esupport.sony.com http - Sony DSX-S210X | Operating Instructions - Page 33
guide manual of this model to check the connection. Failure (Illuminates for about 1 second.) When the SAT tuner is connected, storing an SAT radio channel into a preset failed. t Be sure to receive the channel that you want to store, then try it again. Hubs Not Supported USB hub is not supported - Sony DSX-S210X | Operating Instructions - Page 34
your nearest Sony dealer. Overload operated due to a problem. t Press the RESET Pandora does not start up. t Start up Pandora and log in your account. USB External Not Supported The connected USB device is not Pandora device. t Please connect iPhone. NO Station There is no station on your Pandora - Sony DSX-S210X | Operating Instructions - Page 35
- Sony DSX-S210X | Operating Instructions - Page 36
, consulte el manual de instalación y de conexiones suministrado. HD RadioTM es una marca propietaria de iBiquity Digital Corp. El logotipo por satélite, póngase en contacto con el distribuidor Sony autorizado más cercano. Consulte los manuales que se incluyen en el módulo de sintonizador de - Sony DSX-S210X | Operating Instructions - Page 37
de este producto está prohibida sin la licencia(s) apropiada de Microsoft. iPhone, iPod, iPod classic, iPod nano y el iPod touch son marcas comerciales Thomson. PANDORA, el logotipo de PANDORA y la imagen de la marca Pandora son marcas comerciales o marcas comerciales registradas de Pandora Media, - Sony DSX-S210X | Operating Instructions - Page 38
. 11 Almacenamiento automático - BTM 11 Almacenamiento manual 11 Recepción de las emisoras almacenadas. . . 11 pasajero 22 Pandora® a través de USB (iPhone) Reproducción en Pandora 22 26 Uso de funciones de sonido sofisticadas - Advanced Sound Engine 27 Selección de la calidad de sonido - Sony DSX-S210X | Operating Instructions - Page 39
de altavoces posteriores como altavoz potenciador de graves - Rear Bass Enhancer 29 Compensación del nivel de volumen - Web: http://esupport.sony.com http://www.sony.com/mobileAV Proporciona información acerca de: • Modelos y fabricantes de reproductores de audio digital compatibles • Archivos MP3 - Sony DSX-S210X | Operating Instructions - Page 40
la pantalla de ajuste del reloj. 3 Gire el codificador multidireccional para ajustar la hora y los minutos. Para mover la indicación digital, presione el codificador multidireccional hacia la izquierda o hacia la derecha. 4 Una vez ajustados los minutos, presione el codificador multidireccional. El - Sony DSX-S210X | Operating Instructions - Page 41
Extracción del panel frontal Es posible extraer el panel frontal de la unidad para evitar que la roben. Alarma de precaución Si gira el interruptor de la llave de encendido hasta la posición OFF sin haber extraído el panel frontal, la alarma de precaución sonará durante unos segundos. La alarma - Sony DSX-S210X | Operating Instructions - Page 42
para acceder al modo Quick-BrowZer™ (USB); ubicar la estación en una lista (Pandora USB). C Botón PAUSE Para pausar la reproducción. Para cancelar esta función, vuelva en forma automática (presionar). - buscar emisoras en forma manual (manténgalo presionado). USB: Presiónelo hacia arriba/abajo para - Sony DSX-S210X | Operating Instructions - Page 43
dispositivo USB (interno o externo). Manténgalo presionado para: acceder al modo de control del pasajero o cancelarlo/ acceder al modo de marcadores (Pandora USB).*4 L Botón ZAP/SHUF página 15, 21, 25 Para acceder al modo ZAPPIN™ (presionar); para seleccionar el modo de reproducción aleatoria - Sony DSX-S210X | Operating Instructions - Page 44
Para encender la unidad; para cambiar la fuente (Radio/USB/SensMe™*2/Pandora USB). C Botones - Sony DSX-S210X | Operating Instructions - Page 45
las emisoras en el orden de frecuencia de la lista de presintonías. La unidad emite un pitido al almacenar el ajuste. Almacenamiento manual 1 Cuando reciba la emisora que desea almacenar, presione el botón (BROWSE). Aparecerá la lista de presintonías. 2 Presione el codificador multidireccional hacia - Sony DSX-S210X | Operating Instructions - Page 46
RDS Descripción general Las emisoras de radio FM que tienen el servicio de Sistema de datos de radio (RDS) envían información digital inaudible junto a la señal habitual del programa de radio. Elementos de la pantalla A Banda de radio B Reloj C Número de presintonía D Frecuencia* (nombre de servicio - Sony DSX-S210X | Operating Instructions - Page 47
ón acerca de la compatibilidad del dispositivo USB, visite el sitio web de soporte técnico. Sitio Web de soporte técnico en línea http://esupport.sony.com http://www.sony.com/mobileAV • Es posible utilizar dispositivos USB de almacenamiento masivo (MSC) que cumplan con el estándar USB. • Los códecs - Sony DSX-S210X | Operating Instructions - Page 48
abre por completo por la forma del tablero en la posición de instalación, desconéctelo y abra la bandeja TUNE TRAY en forma manual. Para obtener más información acerca de cómo extraer el panel frontal, consulte la página 7. • Es extremadamente peligroso conectar o extraer el dispositivo USB mientras - Sony DSX-S210X | Operating Instructions - Page 49
Para cambiar los elementos de la pantalla C, presione (DSPL). Notas • Los elementos que se muestran variarán en función del tipo de dispositivo USB, el formato de grabación y los ajustes. Para obtener más información, visite el sitio web de soporte técnico. • El número máximo de datos que se pueden - Sony DSX-S210X | Operating Instructions - Page 50
el software "SensMe™ Setup" y "Content Transfer" desde el sitio de soporte. 2 Instale el software en su computadora. Para obtener más información sobre la instalación, visite http://esupport.sony.com o http://www.sony.com/mobileAV Registro de un dispositivo USB con "SensMe™ Setup" Para activar la - Sony DSX-S210X | Operating Instructions - Page 51
Sugerencia Si conecta un dispositivo USB registrado que contiene pistas analizadas, se puede cancelar el registro del dispositivo USB. * Puede ocurrir que no se detecte correctamente. Transferencia de pistas al dispositivo USB con "Content Transfer" Para activar la función SensMe™ en esta unidad, - Sony DSX-S210X | Operating Instructions - Page 52
como referencia general para las funciones del iPod en el iPod y el iPhone, salvo que el texto o las ilustraciones especifiquen lo contrario. Sitio Web de soporte técnico en línea http://esupport.sony.com http://www.sony.com/mobileAV Notas • No coloque un teléfono celular o un dispositivo con - Sony DSX-S210X | Operating Instructions - Page 53
3 Conecte el adaptador suministrado al conector USB. 4 Conecte el iPod al adaptador suministrado. 5 Deslice la TUNE TRAY hacia adentro presionando PUSH CLOSE en la TUNE TRAY hasta que se cierre completamente. Las pistas del iPod empiezan a reproducirse automáticamente a partir del punto en el que - Sony DSX-S210X | Operating Instructions - Page 54
se reconoce el iPod.) * En caso de que se conecte un iPod touch o un iPhone, o si la última vez se realizó la reproducción en el iPod en el posición de instalación, desconéctelo y abra la bandeja TUNE TRAY en forma manual. Para obtener más información acerca de cómo extraer el panel frontal, consulte - Sony DSX-S210X | Operating Instructions - Page 55
Reproducción repetida 1 Mantenga presionado el codificador multidireccional. 2 Gire el codificador multidireccional para seleccionar "Repeat" y, a continuación, presiónelo. 3 Gire el codificador multidireccional para seleccionar el ajuste y, a continuación, presiónelo. El ajuste finalizó. 4 Presione - Sony DSX-S210X | Operating Instructions - Page 56
Pandora® a través de USB (iPhone) Pandora Radio Pandora y obtenga más información en www.pandora.com Para obtener más información acerca de los dispositivos que se pueden utilizar, visite el sitio web de soporte técnico. Sitio Web de soporte técnico en línea http://esupport.sony.com http://www.sony - Sony DSX-S210X | Operating Instructions - Page 57
. 3 Presione (SOURCE/OFF) varias veces hasta que aparezca "Pandora USB" y luego presione (MODE) para cambiar el dispositivo USB. Aparecerá "Pandora USB EXT" y "Please launch Pandora Application on mobile device.". 4 Inicie Pandora en el iPhone. 5 Ajuste el volumen desde esta unidad. Para pausar la - Sony DSX-S210X | Operating Instructions - Page 58
Agregar marcadores Se puede agregar un marcador a la canción o al artista que se reproduce actualmente y se puede guardar en su cuenta Pandora. 1 Durante el modo de reproducción, mantenga presionado (MODE) hasta que aparezca "Bookmark". 2 Gire el codificador multidireccional para seleccionar "Song" - Sony DSX-S210X | Operating Instructions - Page 59
2 Gire el codificador multidireccional hasta que aparezca el elemento deseado o uno próximo a él. Salta en incrementos del 10 % del número total de elementos. 3 Presione el codificador multidireccional. Vuelve a la pantalla del modo Quick-BrowZer y aparece el elemento seleccionado. 4 Presione el - Sony DSX-S210X | Operating Instructions - Page 60
multidireccional hacia la izquierda o hacia la derecha : gire el codificador multidireccional EQ7 Preset (página 27) EQ7 Parametric Tune (página 27) Listening Position Front/Rear (página 28) Listening Position Subwoofer (página 28) Listening Position Custom Tune (página 28) Fader & Balance Front - Sony DSX-S210X | Operating Instructions - Page 61
Sony, crea un campo sonoro ideal dentro del automóvil mediante el procesamiento digital de las señales. Advanced Sound Engine incluye las siguientes funciones: EQ7, Listening Position, DM+ Advanced, Rear Las fuentes de audio Tuner y USB (SensMe™, Pandora USB) pueden memorizar los ajustes de la curva - Sony DSX-S210X | Operating Instructions - Page 62
en el centro del sonido independientemente del lugar del automóvil en el que se encuentre. Las opciones para "Listening Position Front/ Rear" se indican a continuación. "Front R" (1): frente a la izquierda "Front L" (2): frente a la derecha "Front" (3): frente al centro "All" (4): en el centro del - Sony DSX-S210X | Operating Instructions - Page 63
. Sugerencia La configuración ajustada de DM+ se puede memorizar por separado para fuentes USB (SensMe™, Pandora USB). Uso de altavoces posteriores como altavoz potenciador de graves - Rear Bass Enhancer Rear Bass Enhancer mejora los sonidos bajos mediante la aplicación de un filtro de paso bajo - Sony DSX-S210X | Operating Instructions - Page 64
Ajuste de los elementos de configuración - MENU 1 Mantenga presionado el codificador multidireccional. 2 Gire el codificador multidireccional para seleccionar el elemento del menú deseado y, a continuación, presiónelo. 3 Presione el codificador multidireccional hacia arriba/abajo para seleccionar la - Sony DSX-S210X | Operating Instructions - Page 65
iPod nano (1ª generación)* - iPhone 4 - iPhone 3GS - iPhone 3G - iPhone * El control del pasajero iPhone" indican que un accesorio electrónico se diseñó para conectarse específicamente a los dispositivos iPod o iPhone este accesorio con el iPod o el iPhone puede afectar al rendimiento inalámbrico. Si - Sony DSX-S210X | Operating Instructions - Page 66
el fusible vuelve a fundirse después de sustituirlo, es posible que exista alguna falla de funcionamiento interno. En Fusible (10 A) tal caso, consulte con el distribuidor Sony más cercano. 32 - Sony DSX-S210X | Operating Instructions - Page 67
2 Extraiga la unidad. 1 Inserte las dos llaves de liberación simultáneamente hasta escuchar un clic. El gancho debe mirar hacia adentro. 2 Tire de las llaves de liberación para extraer la unidad. 3 Deslice la unidad para extraerla del marco. Especificaciones Sección del sintonizador FM Rango de - Sony DSX-S210X | Operating Instructions - Page 68
operativo Windows XP, Windows Vista, Windows 7 Para obtener información detallada acerca de versiones o Service Pack compatibles, visite el siguiente sitio web de soporte técnico: http://esupport.sony.com http://www.sony.com/mobileAV Monitor Color de alta densidad (16 bits) o más, 800 × 600 puntos - Sony DSX-S210X | Operating Instructions - Page 69
off" (página 30). • La señal de emisión es demasiado débil. t Use la sintonización manual. Durante la recepción de FM, la indicación "ST" parpadea. • Sintonice la frecuencia con precisión. • es posible realizar la conexión con Pandora. Apague Pandora en el dispositivo móvil e inícielo de nuevo. 35 - Sony DSX-S210X | Operating Instructions - Page 70
. t Consulte el manual de instalación de este en contacto con el distribuidor Sony más cercano. Overload El dispositivo Pandora no se inicia. t Inicie Pandora e inicie sesión en su cuenta. USB External Not Supported El dispositivo USB conectado no es un dispositivo Pandora. t Conecte un iPhone - Sony DSX-S210X | Operating Instructions - Page 71
Cannot Skip No se permite omitir pistas en Pandora. t Espere a que finalice el comercial. t Pandora limita la cantidad de saltos permitidos en su servicio. Espere a que comience la canci Si estas soluciones no ayudan a mejorar la situación, póngase en contacto con el distribuidor Sony más cercano. 37 - Sony DSX-S210X | Operating Instructions - Page 72
have any questions/problems regarding this product, try the following: 1 Read Troubleshooting in these Operating Instructions. 2 Reset the unit. Note: Stored data may be erased. 3 Please contact (U.S.A. only); Call 1-800-222-7669 URL http://www.SONY.com http://www.sony.net/ Sony Corporation Printed
-
 1
1 -
 2
2 -
 3
3 -
 4
4 -
 5
5 -
 6
6 -
 7
7 -
8
-
9
-
10
-
11
-
12
-
13
-
14
-
15
-
16
-
17
-
18
-
19
-
20
-
21
-
22
-
23
-
24
-
25
-
26
-
27
-
28
-
29
-
30
-
31
-
32
-
33
-
34
-
35
-
36
-
37
-
38
-
39
-
40
-
41
-
42
-
43
-
44
-
45
-
46
-
47
-
48
-
49
-
50
-
51
-
52
-
53
-
54
-
55
-
56
-
57
-
58
-
59
-
60
-
61
-
62
-
63
-
64
-
65
-
66
-
67
-
68
-
69
-
70
-
71
-
72
 |
 |
US
Operating Instructions
Manual de instrucciones
Owner’s Record
The model and serial numbers are located on the bottom of the unit.
Record the serial number in the space provided below.
Refer to these numbers whenever you call upon your Sony dealer regarding this product.
Model No. DSX-S210X
Serial No.
To cancel the demonstration (Demo) display, see page 6.
Para cancelar la pantalla de demostración (Demo), consulte la página 6.
4-286-013-
11
(1)
DSX-S210X
ES
©2011 Sony Corporation
FM/AM
Digital Media Player