Sony DVP-SR101P/B Operating Instructions - Page 9
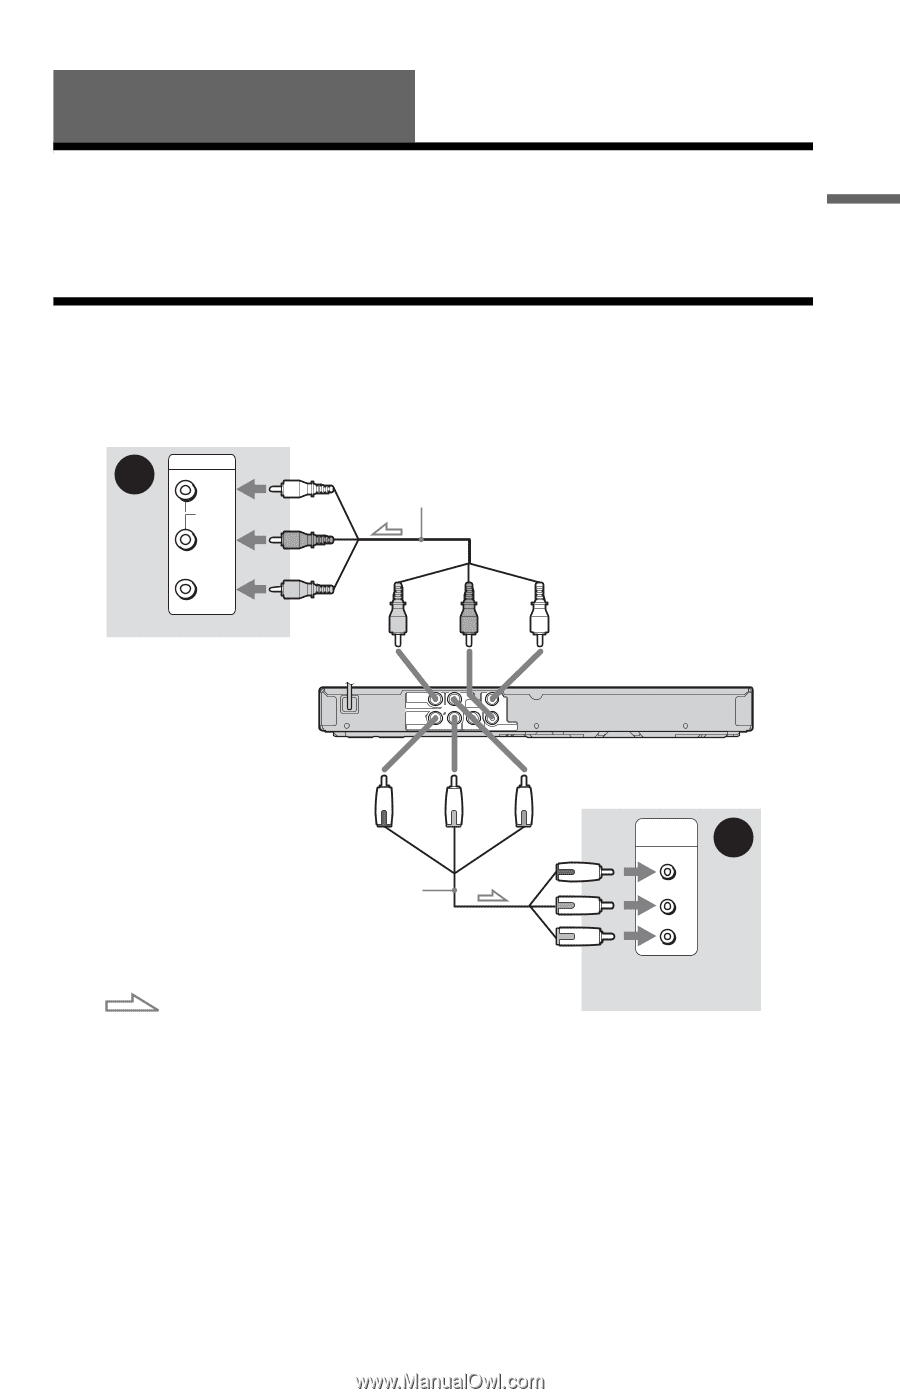
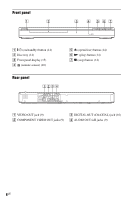
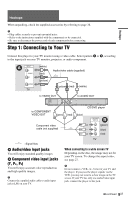
Hookups, Step 1: Connecting to Your TV, A Audio/video input jacks, B Component video input jacks (Y - instructions
 |
View all Sony DVP-SR101P/B manuals
Add to My Manuals
Save this manual to your list of manuals |
Page 9 highlights
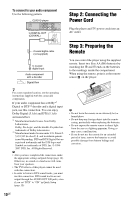
Hookups Hookups When unpacking, check the supplied accessories by referring to page 36. b • Plug cables securely to prevent unwanted noise. • Refer to the instructions supplied with the components to be connected. • Be sure to disconnect the power cord of each component before connecting. Step 1: Connecting to Your TV Connect this player to your TV monitor using a video cable. Select pattern A or B, according to the input jack on your TV monitor, projector, or audio component. A INPUT L AUDIO (white) (red) Audio/video cable (supplied) R (yellow) VIDEO TV (yellow) (red) (white) to VIDEO OUT VIDEO VIDEO OUT COMPONENT VIDEO OUT Y PB DIGITAL OUT PR COAXIAL L R AUDIO OUT to COMPONENT VIDEO OUT (green) (red) Component video cable (not supplied) to AUDIO OUT CD/DVD player (blue) COMPONENT VIDEO IN B Y (green) PB (blue) PR (red) TV : Signal flow A Audio/video input jacks You will enjoy standard quality images. B Component video input jacks (Y, PB, PR) You will enjoy accurate color reproduction and high quality images. b Connect the supplied audio cable to audio input jacks (L/R) on your TV. When connecting to a wide screen TV Depending on the disc, the image may not fit your TV screen. To change the aspect ratio, see page 27. b Do not connect a VCR, etc., between your TV and the player. If you pass the player signals via the VCR, you may not receive a clear image on the TV screen. If your TV has only one audio/video input jack, connect the player to this jack. ,continued 9US
-
 1
1 -
2
-
3
-
 4
4 -
 5
5 -
 6
6 -
 7
7 -
 8
8 -
 9
9 -
 10
10 -
 11
11 -
 12
12 -
 13
13 -
 14
14 -
15
-
16
-
17
-
18
-
19
-
20
-
21
-
22
-
23
-
24
-
25
-
26
-
27
-
28
-
29
-
30
-
31
-
32
-
33
-
34
-
35
-
36
-
37
-
38
-
39
-
40
-
41
-
42
-
43
-
44
-
45
-
46
-
47
-
48
 |
 |