Sony FWD-42PV1A Operating Instructions
Sony FWD-42PV1A Manual
 |
View all Sony FWD-42PV1A manuals
Add to My Manuals
Save this manual to your list of manuals |
Sony FWD-42PV1A manual content summary:
- Sony FWD-42PV1A | Operating Instructions - Page 1
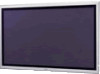
2-581-145-01 (1) FWD-42PV1/42PV1P/42PV1A Flat Panel Display JP Operating Instructions GB Mode d'emploi FR Bedienungsanleitung DE Manual de instrucciones ES Istruzioni per l'uso IT ɹ CS FWD-42PV1/42PV1P/42PV1A 2005 Sony Corporation - Sony FWD-42PV1A | Operating Instructions - Page 2
Sony Customer Information Services Center 1-800-222-7669 or http://www.sony.com/ Declaration of Conformity Trade Name: SONY Model: FWD-42PV1/42PV1P/42PV1A Responsible Party: Sony with the instructions, may off and on, the user is encouraged to try approved in this manual could void your - Sony FWD-42PV1A | Operating Instructions - Page 3
Table of Contents Precautions 5 (GB) Location and Function of Parts and Controls ....... 7 (GB) Front / management 16 (GB) Using On-screen Menus 17 (GB) Operating Through Menus 17 (GB) GB Menu Guide 17 (GB) Watching the Picture 23 (GB) Switching the Input Signal 23 (GB) Input Signal, Picture - Sony FWD-42PV1A | Operating Instructions - Page 4
(GB) Setting an IP address and communication speed 42 (GB) Obtaining an IP address automatically (DHCP) .... 42 (GB) Setting an IP address manually (Manual 42 (GB) Setting a communication speed 43 (GB) Self-diagnosis Function 43 (GB) Operating a Specific Display With the Remote Commander 44 (GB - Sony FWD-42PV1A | Operating Instructions - Page 5
the floor, be sure to use the optional stand. On installation • Allow adequate air circulation to with the unit, the following problems, such as malfunction of the Remote These do not indicate malfunction. Although the plasma display panel is manufactured with extremely high Sony dealers. 5 (GB) - Sony FWD-42PV1A | Operating Instructions - Page 6
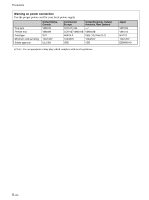
Precautions Warning on power connection Use the proper power cord for your local power supply. Plug type Female end Cord type Minimum cord set rating Safety approval United States, Canada VM0233 VM0089 SVT 10A/125V UL/CSA Continental Europe United Kingdom, Ireland, Australia, New Zealand COX- - Sony FWD-42PV1A | Operating Instructions - Page 7
on page 8 (GB). 3Stand installation hooks Use these hooks to install the stand (not supplied). 4AC OUT socket (three brade type) You can connect a system (the power rating: maximum 0.5 A). For more details, consult your Sony dealer. Note Be sure not to connect the device of which power consumption - Sony FWD-42PV1A | Operating Instructions - Page 8
Location and Function of Parts and Controls Indicator Section Control Button Section (Top) 12 12345 6 1Remote control detector Receives the signals from the Remote Commander. 2POWER/STANDBY indicator Lights up in green when the display unit is powered on. Lights up in red in the standby mode. - Sony FWD-42PV1A | Operating Instructions - Page 9
display using the RS-232C protocol. For details, contact your authorized Sony dealers. 2CONTROL S IN/OUT (Control S Signal Input/ Output) connectors DVI : Connects to the digital RGB signal output of video devices. Supports HDCP copy protection. AUDIO (Stereo minijack) : Inputs an audio signal. - Sony FWD-42PV1A | Operating Instructions - Page 10
) Slot OPTION 1 (VIDEO/COM) 6COMMUNICATION slot This slot supports commucation function. A blank panel is attached to this slot display unit via the network. 7VIDEO connectors (A BKM-FW10 is preinstalled only in the FWD-42LX1/32LX1.) S VIDEO IN (Mini DIN 4-pin) : Connects to the Y/ C signal output - Sony FWD-42PV1A | Operating Instructions - Page 11
in the display; BKM-FW10, BKM-FW11 or BKM-FW12. (A BKM-FW10 is the same as the connectors 7.) For details on installation, consult your Sony dealers. COMPONENT/RGB Input Adaptor BKM-FW11 (Not supplied) Location and Function of Parts and Controls RGB/COMPONENT ACTIVE THROUGH ADAPTOR BKM-FW12 (Not - Sony FWD-42PV1A | Operating Instructions - Page 12
INPUT2 connectors. Each press toggles between RGB and COMPONENT. 7PICTURE button Selects Picture mode. Each press toggles between Vivid, Standard, and User 1 to 3. 8ASPECT button Press to change the aspect ratio (Wide Mode). 9M/m/ - Sony FWD-42PV1A | Operating Instructions - Page 13
qk CHROMA button Adjusts the chroma when the picture mode is set to any of "User1" to "User3." Press this button and adjust the chroma with the M/m or - Sony FWD-42PV1A | Operating Instructions - Page 14
has entered standby mode. When using the stand (not supplied) Front 20 (7 7/8) 10 10 (4) (4) When mounting the display horizontally Front 25 (9 7/8) 10 10 (4) (4) Side 25 (9 7/8) 5 (2) Units: cm (inches) When mounting the display vertically (FWD-42PV1P) Front 20 (7 7/8) 25 (9 7/8) 25 - Sony FWD-42PV1A | Operating Instructions - Page 15
result due to the characteristics of the Plasma Display Panel. It is possible to channel numbers, on-screen menus, refer to the user manual of connected equipment. C Reduce brightness of the Never pull the cable itself. • Refer to the instruction manual of the equipment to be connected. • Insert the - Sony FWD-42PV1A | Operating Instructions - Page 16
Connections To remove the AC power cord After squeezing the AC plug holder and freeing it, grasp the plug and pull out the AC power cord. Cable management Using the cable holders You can neatly bundle the cables with the cable holders (×4) provided. Attach the cable holders as shown in the - Sony FWD-42PV1A | Operating Instructions - Page 17
section ENTER Operation of the unit is explained in these operating instructions for the case of operation using the Remote Commander. The M/m menu level, press M/m to move the cursor to and press ENTER or - Sony FWD-42PV1A | Operating Instructions - Page 18
Using On-screen Menus Adjust Sound You can make fine adjustment of the sound. Set Picture Mode to any of "User1" to "User3" first. Note You cannot adjust the following items when Picture Mode is set to "Vivid" or "Standard." For details, see "Adjusting the Sound Quality" on page 36 (GB). SCREEN - Sony FWD-42PV1A | Operating Instructions - Page 19
only with INPUT2. • Sync Mode settings cannot be carried out for the input through the option boards. • This unit does not support the three value sync format of composite sync and 576/60P. • When you select the video signal for the synchronous mode setting, you cannot use - Sony FWD-42PV1A | Operating Instructions - Page 20
Using On-screen Menus Remote This menu is used for remote control settings. Index Number Sets the index number of the display. Note When you set the index number, use the buttons on the display unit. The index number cannot be set with the Remote Commander. For details on the Index Number, see " - Sony FWD-42PV1A | Operating Instructions - Page 21
an IP address to communicate between the display unit and BKM-FW32 (Network Management Adaptor). DHCP: Automatic configuration to set an IP address. Manual: Manual configuration to set an IP address. For details, see "Setting an IP Address and communication speed" on page 42 (GB). Select Set ENTER - Sony FWD-42PV1A | Operating Instructions - Page 22
Using On-screen Menus SCREEN SAVER menu Corrects or reduces damage from ghosting or burn-in that may result from the same image being displayed on the screen for long periods of time. SCREEN SAVER Pic. Inversion: Off Pic. Orbit All White: Off Background: Gray Auto Dimmer: On Select Set - Sony FWD-42PV1A | Operating Instructions - Page 23
Watching the Picture Before you start • Power on the display. • Power on the connected equipment and play a video source. • To display the input signal information and Picture Mode on the screen when turning on the power or switching the input signal, set "Display" in the Custom Setup menu to On. • - Sony FWD-42PV1A | Operating Instructions - Page 24
Watching the Picture Input Signal, Picture Mode and Display Status Information Input signal and Picture Mode information appear on the screen for about five seconds when the power is turned on or when the input signal is switched. To disable this function, follow the steps below. 1 Press MENU. - Sony FWD-42PV1A | Operating Instructions - Page 25
Preset input signals Signal name Color system or horizontal/ vertical frequency Computer signals 1 VGAa)-1 (VGA 350) 31.5 kHz 70 Hz 2 640×480@60 Hz (VESAb) STD) 31.5 kHz 60 Hz 3 Macc) 13" 35.0 kHz 67 Hz 4 VGA (VGA TEXT) 31.5 kHz 70 Hz 5 800×600@60 Hz (VESA STD) 37.9 kHz 60 Hz 6 - Sony FWD-42PV1A | Operating Instructions - Page 26
Selecting Image Quality / Adjusting the Picture Selecting Image Quality You can set an image quality suitable for the type of picture or the brightness of the location where the unit is installed. 1 Press MENU. The main menu appears on the screen. PICTURE/SOUND CONTROL Picture Mode: Adjust - Sony FWD-42PV1A | Operating Instructions - Page 27
Phase Select "Phase" with M/m and press ENTER. Adjust the phase with M/m/ - Sony FWD-42PV1A | Operating Instructions - Page 28
Adjusting the Picture Gamma Correct. Balances the light and dark portions of pictures automatically. 1 Select "Gamma Correct." with M/m and press ENTER. The following menu appears on the screen. PICTURE/SOUND CONTROL Adjust Picture Gamma Correct.: High Reset Mid Low Select Set ENTER Exit - Sony FWD-42PV1A | Operating Instructions - Page 29
Picture Enlargement You can enlarge pictures to suite your taste. For Wide Mode, the following choices are available. Original Picture (Picture Type) Enlarged Picture Wide Zoom Ordinary pictures with a 4:3 aspect ratio (screen aspect ratio: 4:3). Images are enlarged naturally to full screen - Sony FWD-42PV1A | Operating Instructions - Page 30
Picture Enlargement 4 Press M/m to move the cursor (yellow) to "Auto Wide" and press ENTER. The following menu appears on the screen. SCREEN CONTROL Wide Setup Auto Wide: 4:3 Mode: Ofnf OWnide Zoom Select Set ENTER Exit MENU 5 Select the Auto Wide setting with M/m. Off: Images are reproduced - Sony FWD-42PV1A | Operating Instructions - Page 31
image, there may be times when noise continues to occur even after you have used Auto Adjust. In such cases, adjust the dot phase manually. Adjusting manually (1) Select the item you want to adjust and press ENTER. The following appears on the screen. (When you select "Dot Phase") SCREEN CONTROL - Sony FWD-42PV1A | Operating Instructions - Page 32
Resizing and Positioning the Picture H Size Select "H Size" with M/m and press ENTER. Adjust the horizontal size of the picture with M/m/ - Sony FWD-42PV1A | Operating Instructions - Page 33
Viewing two pictures at the same time You can show two pictures from different signal sources, such as a computer and a video, side by side. 1 Press MENU. The main menu appears on the screen. PICTURE/SOUND CONTROL Picture Mode: Adjust Picture Adjust Sound Standard Viewing two pictures at the - Sony FWD-42PV1A | Operating Instructions - Page 34
Analog RGB Component Y/C Composite Digital RGB Supported Supported Supported Analog RGB Supported Supported Supported Component Y/C Composite Supported Supported Supported Supported Supported Supported Supported Supported Supported Supported - - - - Select Set ENTER Exit MENU 2 Press - Sony FWD-42PV1A | Operating Instructions - Page 35
Setting up the Multi Display You can make settings for connecting multiple display units to form a video wall. 1 Press MENU. The main menu appears on the screen. PICTURE/SOUND CONTROL Picture Mode: Adjust Picture Adjust Sound Standard Select Set ENTER Exit MENU 2 Select "SCREEN CONTROL" with - Sony FWD-42PV1A | Operating Instructions - Page 36
Adjusting the Sound Quality Adjusting the Sound Quality When a speaker SS-SP42FW (not supplied) installed, you can adjust sound treble level, bass level, or balance of the speaker (left and right) volume. The surround mode can also be set. Adjusting the Treble, Bass, and Balance, etc. Press MENU to - Sony FWD-42PV1A | Operating Instructions - Page 37
matrix with M/m. Y/CB/CR: When the signal format is 480I or 480P. Y/PB/PR: When signal format is 1080I or 720P. Refer to the operating instructions of each device for details on the settings. 5 Press ENTER to return to the previous screen. 37 (GB) - Sony FWD-42PV1A | Operating Instructions - Page 38
, repeat the process from step 1. Note If the built-in clock tends to lose time, the internal battery may be exhausted. Please contact your authorized Sony dealer to have the battery replaced. 38 (GB) - Sony FWD-42PV1A | Operating Instructions - Page 39
On/Off Timer Function 1 In the TIMER/CLOCK menu, press M/m to move the cursor (yellow) to "On/Off Timer" and press ENTER. The following menu appears on the screen. TIMER/CLOCK Clock Set Clock Display: On/Off Timer Off Every day Day of Week Select Set ENTER Exit MENU 2 Select either "Every day" - Sony FWD-42PV1A | Operating Instructions - Page 40
a computer, is displayed for a long time, an after-image (ghosting) may be burned into the display panel. To correct or lessen the severity of this problem, this unit is equipped with a screen saver function. There are four types of screen saver. "Pic. Inversion" reverses the color tone of the image - Sony FWD-42PV1A | Operating Instructions - Page 41
Changing the Image Position Automatically 1 In the SCREEN SAVER menu, press M/m to move the cursor (yellow) to "Pic. Orbit" and press ENTER. The following menu appears on the display panel. SCREEN SAVER Pic. Orbit Orbit: Orbit Range: Orbit Cycle: Off Small 30sec Select Set ENTER Exit MENU 2 - Sony FWD-42PV1A | Operating Instructions - Page 42
Set ENTER Exit MENU 5 Select "Execute" with M/m and press ENTER. An IP address is automatically obtained. Setting an IP address manually (Manual) 1 Select "Manual" in step 4 of "Obtaining an IP address automatically (DHCP)" and press ENTER. The following menu appears on the screen. INITIAL - Sony FWD-42PV1A | Operating Instructions - Page 43
000 . 000 . 000 Select Set ENTER Exit MENU 5 Select the next item to be set manually with M/m and repeat the same procedure and press ENTER. 6 After values are set for all of flashes is two. 2 Unplug the unit. Inform your authorized Sony dealer of the number of flashes. 1 In the INITIAL SETUP/ - Sony FWD-42PV1A | Operating Instructions - Page 44
Operating a Specific Display With the Remote Commander Operating a Specific Display With the Remote Commander Using the supplied Remote Commander, you can operate a specific display without affecting other displays installed at the same time. 1 Press ID MODE ON on the Remote Commander. Monitor - Sony FWD-42PV1A | Operating Instructions - Page 45
Plasma Display Panel Display resolution 1366 dots (horizontal) × 768 lines (vertical) FWD-42PV1/42PV1A adaptor BKM-FW10 (only for the FWD-42LX1/ 32LX1) VIDEO (NTSC, PAL, SECAM, NTSC4 50/60 Hz, FWD-42PV1/42PV1P/42PV1A: 3.5 A (Maximum) Power consumption FWD-42PV1/42PV1P/42PV1A: 260 W Operating - Sony FWD-42PV1A | Operating Instructions - Page 46
projections) Mass FWD-42PV1/42PV1P/42PV1A: Approx. 29 kg (63 lb 15 oz) Supplied accessories AC power cord (1) AC plug holder (2) Cable holder (6) Remote Commander RM-980 (1) Size AAA (R03) batteries (2) Operating instructions (1) Optional accessories Display stand SU-42FW Speaker - Sony FWD-42PV1A | Operating Instructions - Page 47
141-0001 6-7-35 Sony Corporation Printed in Korea
-
 1
1 -
 2
2 -
 3
3 -
 4
4 -
 5
5 -
 6
6 -
 7
7 -
8
-
9
-
10
-
11
-
12
-
13
-
14
-
15
-
16
-
17
-
18
-
19
-
20
-
21
-
22
-
23
-
24
-
25
-
26
-
27
-
28
-
29
-
30
-
31
-
32
-
33
-
34
-
35
-
36
-
37
-
38
-
39
-
40
-
41
-
42
-
43
-
44
-
45
-
46
-
47
 |
 |
FWD-42PV1/42PV1P/42PV1A
2-581-145-
01
(1)
2005 Sony Corporation
Operating Instructions
Mode d’emploi
Bedienungsanleitung
Manual de instrucciones
Istruzioni per l’uso
GB
FR
DE
ES
IT
取扱説明書
FWD-42PV1/42PV1P/42PV1A
Flat Panel Display
JP
この取扱説明書には、事故を防ぐための重要な注意事項と製品の取り扱
いかたを示してあります。
この取扱説明書をよくお読みのうえ、
製品を
安全にお使いください。お読みになったあとは、いつでも見られるとこ
ろに必ず保管してください。
お買い上げいただきありがとうございます。
電気製品は安全のための注意事項を守らないと、
火災や人身事故になることがあります。
CS