Sony HCD-E300 Operating Instructions
Sony HCD-E300 - Blu-ray Disc™ / Dvd Receiver Component Manual
 |
View all Sony HCD-E300 manuals
Add to My Manuals
Save this manual to your list of manuals |
Sony HCD-E300 manual content summary:
- Sony HCD-E300 | Operating Instructions - Page 1
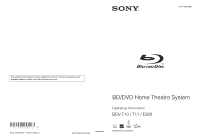
4-147-229-13(1) The software of this system may be updated in the future. To find out details on any available updates, please visit: http://esupport.sony.com (1) Sony Corporation Printed in Malaysia BD/DVD Home Theatre System Operating Instructions BDV-T10 / T11 / E300 © 2009 Sony Corporation - Sony HCD-E300 | Operating Instructions - Page 2
alert the user to the presence of important operating and maintenance (servicing) instructions in the literature accompanying the appliance. Owner's Record The model and serial numbers are located at the rear exterior of the control unit. Record the serial number in the space provided below. Refer - Sony HCD-E300 | Operating Instructions - Page 3
manual could void your authority to operate this equipment. Important Safety Instructions 1) Read these instructions. 2) Keep these instructions. 3) Heed all warnings. 4) Follow all instructions servicing to qualified service personnel. Servicing Sony • "Blu-ray Disc" is a trademark. • "Blu-ray Disc," - Sony HCD-E300 | Operating Instructions - Page 4
Sony Corporation. • Other system and product names are generally trademarks or registered trademarks of the manufacturers. ™ and ® marks are not indicated in this document. About These Operating Instructions • The instructions in these Operating Instructions describe the controls on the remote - Sony HCD-E300 | Operating Instructions - Page 5
back amplifier: You can enjoy surround back speaker sound wirelessly. • S-AIR receiver: You can enjoy system sound in another room. The S-AIR products can be purchased as options (the S-AIR product lineup differs depending on the area). Notes or instructions for the surround amplifier, surround back - Sony HCD-E300 | Operating Instructions - Page 6
Operating Instructions ....... 4 About the S-AIR function 5 Unpacking 7 Index to Parts and Control 11 Automatically 66 Setting the Speakers 67 Controlling Your TV with the Supplied Remote 69 Using the Sleep 88 Troubleshooting 89 Self-diagnosis Function 95 Playable Discs 96 Supported Audio - Sony HCD-E300 | Operating Instructions - Page 7
speaker (1) • FM wire antenna (aerial) (1) • Foot pads (1 set) or • Speaker cords (5, white/red/ blue/gray/green) • Operating Instructions • Speaker and TV Connections guide • Setup Disc (DVD) • DIGITAL MEDIA PORT adapter (TDM-iP20) (1) • Video cord (1) • Subwoofer (1) • Remote commander - Sony HCD-E300 | Operating Instructions - Page 8
• FM wire antenna (aerial) (1) • Foot pads (1 set) or • Speaker cords (5, white/red/ blue/gray/green) • Operating Instructions • Speaker and TV Connections guide • Setup Disc (DVD) • DIGITAL MEDIA PORT adapter (TDM-iP20) (1) • Video cord (1) • Subwoofer (1) • Remote commander (remote) (1) • R6 - Sony HCD-E300 | Operating Instructions - Page 9
BDV-E300 • Front speakers (2) • Surround speakers (2) • Center speaker (1) • Subwoofer (1) • FM wire antenna (aerial) (1) • Foot pads (1 set) or • Speaker cords (6, white/red/ blue/gray/green/purple) • Operating Instructions • Speaker and TV Connections guide • Setup Disc (DVD) • DIGITAL MEDIA - Sony HCD-E300 | Operating Instructions - Page 10
. • Do not use a new battery with an old one. • Do not drop any foreign object into the remote casing, particularly when replacing the batteries. • If you do not intend to use the remote for an extended period of time, remove the batteries to avoid possible damage from battery leakage and corrosion - Sony HCD-E300 | Operating Instructions - Page 11
Index to Parts and Control For more information, refer to the pages indicated in parentheses. Remote control TOP ONE-TOUCH THEATER PLAY TV BRAVIA Sync S-AIR DYNAMIC MODE NIGHT BASS TV 123 456 789 ENTER CLEAR 0 TIME FAVORITES CC WIDE SYSTEM AUDIO - Sony HCD-E300 | Operating Instructions - Page 12
69, 84) Returns to the previous display. C/X/x/c Moves the highlight to a displayed item. (ENTER) Enters the selected item. GUIDE (page 69) Displays the Digital Electronic Programme Guide (EPG). TOOLS (page 69) Displays the operation menu for the current display. G FUNCTION (pages 32, 36, 44, 45 - Sony HCD-E300 | Operating Instructions - Page 13
) Lights up while virtual 7.1ch decoding is activated. E Power indicator Lights up while the system is turned on. F Front panel display G Disc tray (page 36) H (remote sensor) 13US - Sony HCD-E300 | Operating Instructions - Page 14
Front panel display About the indications in the front panel display PL x NEO:6 TUNED ST SLEEP EXT HDMI HD 24P NIGHT BASS A Current surround format B Lights up when a station is received. (Radio only) (page 51) C Lights up when stereo sound is received. (Radio only) (page 51) D Lights up when the - Sony HCD-E300 | Operating Instructions - Page 15
VIDEO OUT VIDEO OUT Y PB / CB PR / CR LAN(100) SPEAKER HDMI OUT DMPORT DC5V 700mA MAX FRONT R FRONT L SUR R SUR L (DIGITAL MEDIA PORT) jack (page 23) N HDMI OUT jack (page 21) O SPEAKER jacks (page 20) * CAUTION Please do not remove the screws unless you are installing the EZW-T100. 15US - Sony HCD-E300 | Operating Instructions - Page 16
in the room. Subwoofer Center speaker Front left speaker (L) Front right speaker (R) A A 30 30 A B A 45 45 A B Surround left speaker (L) Surround right speaker (R) Note • Use caution when placing the speakers and/or speaker stands attached to the speakers on a specially treated (waxed - Sony HCD-E300 | Operating Instructions - Page 17
product lineup differs depending on the area. For the position of the surround back speakers, refer the illustration below (C). Subwoofer Center speaker Front left speaker (L) Front right speaker (R) Surround left speaker (L) Surround right speaker (R) 30 30 45 45 C Surround back left - Sony HCD-E300 | Operating Instructions - Page 18
is especially fragile, attach the screws securely to a beam and fasten them to the wall. Install the speakers on a vertical and flat wall where reinforcement is applied. • Sony is not responsible for accidents or damage caused by improper installation, insufficient wall strength or improper screw - Sony HCD-E300 | Operating Instructions - Page 19
wall. BDV-T10/BDV-T11 For the center speaker 160 mm (6 3/8 inches) BDV-E300 For the center speaker 219 mm (8 5/8 inches) 8 to 10 mm (11/32 to 13/32 inch) For the other speakers 8 to 10 mm (11/32 to 13/32 inch) For the other speakers 8 to 10 mm (11/32 to 13/32 - Sony HCD-E300 | Operating Instructions - Page 20
other connections are made. Note • When you connect another component with a volume control, turn down the volume of the other components to a level where sound is not distorted. Connecting the speakers The connector of the speaker cords and the color tube are color-coded depending on the type of - Sony HCD-E300 | Operating Instructions - Page 21
jacks on your TV, select the connection method. Rear panel of the unit SPEAKER CENTER SUBWOOFER B HDMI cable* EZW-T100 COMPONENT VIDEO OUT PR / CR PB to the TV both with a component video cable and video cord. Picture quality will be improved compared to using only the video cord connection. When - Sony HCD-E300 | Operating Instructions - Page 22
an audio signal to the unit from the TV. To listen to TV sound via the system, perform this connection. Rear panel of the unit SPEAKER CENTER SUBWOOFER EZW-T100 COMPONENT VIDEO OUT PR / CR PB / CB Y LAN(1S0PE0A)KER VIDEO OUT HDMI OUT DMPORT D70C05mVA MAX SDAIGT/ICTAALBLINE TV DIGITAL - Sony HCD-E300 | Operating Instructions - Page 23
of the unit EZW-T100 slot (See "Wireless system options".) F DIGITAL MEDIA PORT adapter (page 55) SPEAKER CENTER SUBWOOFER H Digital coaxial cord (not supplied) COMPONENT VIDEO OUT PR / CR PB / CB Y an S-AIR Product" (page 56) or refer to the operating instructions of the S-AIR product. 23US - Sony HCD-E300 | Operating Instructions - Page 24
TV has multiple audio/video inputs You can enjoy sound with the speakers of the system through the connected TV. Connect the components as :Signal flow Select the component on the TV. For details, refer to the operating instructions of the TV. If the TV does not have multiple audio/video inputs, a - Sony HCD-E300 | Operating Instructions - Page 25
DC5V EXT 500mA MAX COAAXNITAELN7N5 A FM TV L R AUDIO IN AUDIO L AM AE.CCMAL-AMCI2C R AUDIO IN AM or AM loop antenna (aerial) (supplied) FM wire antenna (aerial) (supplied) Note • Keep the AM loop antenna (aerial) and cord away from the system or other AV components, as noise may result - Sony HCD-E300 | Operating Instructions - Page 26
Getting Started Inserting the external memory Insert the external memory device (1 GB or larger USB flash memory, such as Sony USM2GL, USM4GL, or USM1GH, not supplied) into the EXT slot. Check that "EXT" lights up in the front panel display when turning the system on. - Sony HCD-E300 | Operating Instructions - Page 27
[Network Settings] (page 84). SPEAKER CENTER SUBWOOFER COMPONENT VIDEO OUT VIDEO OUT Y PB / CB PR / CR LAN(100) SPEAKER HDMI OUT DMPORT DC5V 700mA MAX For details on the network (LAN) cables, refer to the operating instructions supplied with the modem or router. • For optimal performance of - Sony HCD-E300 | Operating Instructions - Page 28
unit to a wall outlet (mains), connect all the speakers to the unit. Wall outlet (mains): The shape off the demonstration mode (Except for U.S. models) After connecting the AC power cord (mains the demonstration simply by pressing "/1 on the remote. For details, see "About the demonstration" - Sony HCD-E300 | Operating Instructions - Page 29
3: Performing the Easy Setup Follow the Steps below to make the basic adjustments for using the system. Displayed items vary depending on the country model. 123 456 789 0 "/1 C/X/x/c, HOME 1 Turn on the TV. 2 Press [/1 on the unit. 3 Switch the input selector on your TV so that the signal from - Sony HCD-E300 | Operating Instructions - Page 30
changed. Check that there are no problems with the video. Nothing is displayed picture is displayed in the selected resolution for about 30 seconds, then the display asks for confirmation. Follow the on-screen instructions HDMI cable The Setup Display for the [Control for HDMI] function appears. Go to - Sony HCD-E300 | Operating Instructions - Page 31
the [Control for HDMI] function (page 63) when connecting Sony components that are compatible with the Control for HDMI function. If you do not use the [Control for front of each speaker should face the calibration mic, and there should be no obstruction between the speakers and the calibration mic - Sony HCD-E300 | Operating Instructions - Page 32
Auto Calibration]. The conclusions appear on the TV screen. Press C/c to change the page. The first page shows the distance of speakers. The second page shows the level of speakers. If the conclusions are OK, unplug the calibration mic and press X/x to select [OK]. Note • The environment of the room - Sony HCD-E300 | Operating Instructions - Page 33
Getting Started Step 5: Enjoying Surround Sound You can enjoy surround sound simply by selecting one of the system's pre-programmed decoding modes. They bring the exciting and powerful sound of movie theaters into your home. X/x/c, 123 456 789 0 SYSTEM MENU Selecting surround sound effects - Sony HCD-E300 | Operating Instructions - Page 34
movie mode decoding. - "PLII MUSIC" performs Dolby Pro Logic II music mode decoding. • Multi-channel source: The system outputs sound from the speakers depending on the number of channels of the source. "A.F.D. 7.1CH" creates the surround back sound virtually and gives you the sound as 7.1 channel - Sony HCD-E300 | Operating Instructions - Page 35
Getting Started Sound from Surround effect "HP 2CH"2) (HEADPHONE 2 CHANNEL STEREO) Effect This decoding mode appears only when you connect headphones to the surround amplifier. The system outputs the sound from the headphones regardless of sound format or number of channels. Multichannel surround - Sony HCD-E300 | Operating Instructions - Page 36
the disc tray, and then press Z. Depending on the disc, some operations may be different or restricted. Refer to the operating instructions supplied with your disc. FUNCTION "/1 Nx Z FUNCTION VOLUME Disc tray VOLUME +/- ONE-TOUCH PLAY "/1 SUBTITLE DISPLAY TOP MENU C/X/x/c, HOME FUNCTION - Sony HCD-E300 | Operating Instructions - Page 37
[On], the TV that is connected to the system with an HDMI cable can be sync-operated with the system. For details, see "Using the Control for HDMI Function for "BRAVIA" Sync" (page 63). Tip • You can change the speed at which the volume is turned up and down. To turn - Sony HCD-E300 | Operating Instructions - Page 38
disc. Note • When using the HDMI connection, there may be a delay before the playback picture appears on the screen, and the beginning portion of the playback picture may not be displayed. • To use this function, set [Control for HDMI] to [On] in [HDMI Settings] (page 82). Available OPTIONS 1 Press - Sony HCD-E300 | Operating Instructions - Page 39
DVD's menu To display the Top Menu A BD/DVD is divided into a lot of sections, which make up a picture or music feature. These sections are called "titles." When you play a BD/ DVD which contains several titles, you , or number buttons to select the item, and follow the on-screen instructions. 39US - Sony HCD-E300 | Operating Instructions - Page 40
Searching for a scene quickly (Scene Search) You can move quickly between scenes within the title currently being played back. 1 Press SCENE SEARCH during playback or in pause mode. Playback pauses and a bar with a scene indicator (square-shaped - indicates the current point) appears at the bottom - Sony HCD-E300 | Operating Instructions - Page 41
Playback Displaying the playing time and play information You can check the title information, including the video transmission rate, etc. Press DISPLAY during playback. The displayed information differs depending on the disc type and system status. Example: When playing a BD-ROM To view the - Sony HCD-E300 | Operating Instructions - Page 42
display, then press or c. 3 Press X/x repeatedly until "A/V SYNC" appears in the front panel display, then press or c. 4 Press X/x to adjust the delay between the picture and sound. You can adjust from 0 ms to 300 ms in 25 ms increments. 5 Press . The setting is made. 6 Press SYSTEM MENU. The system - Sony HCD-E300 | Operating Instructions - Page 43
DVD Viewing Settings] (page 81). 7 Insert a BD-ROM with BONUSVIEW/ BD-LIVE. The operation method differs depending on the disc. Refer to the instruction manual supplied with the disc. To delete data in the external memory You can delete unnecessary data. 1 If a disc is inserted, remove the disc from - Sony HCD-E300 | Operating Instructions - Page 44
Playing a CD To select a track 1 Press HOME. 2 Press C/c to select [Music]. 123 456 789 0 TIME C/X/x/c, HOME FUNCTION N OPTIONS ./> m/M x MUTING X VOLUME +/- 1 Press FUNCTION repeatedly until "BD/ DVD" appears in the front panel display. 2 Insert a CD. The Music Player screen appears. 3 - Sony HCD-E300 | Operating Instructions - Page 45
Playback Available OPTIONS 1 Press OPTIONS. The options menu appears. 2 Press X/x to select an item, then press . The available items differ depending on the disc type or system situation. Items [Play] [Play from beginning] (during playback) [Play from beginning] (in stop mode) [Stop] Details - Sony HCD-E300 | Operating Instructions - Page 46
have a Sony TV compatible with "PhotoTV HD," you can enjoy images in high picture quality by the following connection and setting. 1 Connect the unit to the TV using an HDMI cable. 2 Set the TV's video setting to [VIDEO-A] mode. For details on [VIDEO-A], refer to the operating instructions supplied - Sony HCD-E300 | Operating Instructions - Page 47
or sound stream. • "MOVIE": The system provides the sound for movies. • "MOVIE-D.C.S.-"*: The system reproduces the sound characteristics of the Sony Pictures Entertainment "Cary Grant Theater" cinema production studio. • "MUSIC": The system provides the sound for music. • "SPORTS": The system adds - Sony HCD-E300 | Operating Instructions - Page 48
the sound from the right or left channel and listen to the sound of the selected channel through both the right and left speakers. AUDIO 123 456 789 0 x DVD-VR The types of sound tracks recorded on a disc are displayed. Example: • [ Stereo] • [ Stereo (Audio1)] • [ Stereo (Audio2)] • [ Main - Sony HCD-E300 | Operating Instructions - Page 49
Sound Adjustment Enjoying Multiplex Broadcast Sound (DUAL MONO) You can enjoy multiplex broadcast sound when the system receives or plays a Dolby Digital multiplex broadcast signal. Note • To receive the Dolby Digital signal, you need to connect a TV or other component to the unit with an optical - Sony HCD-E300 | Operating Instructions - Page 50
, this effect is more pronounced, as speech (movie dialog, etc.) is easy to hear. When sound is not output from the center speaker, or you are using the headphones, the system optimally adjusts the volume. To turn off the sound effect Press NIGHT so that "NIGHT" disappears from - Sony HCD-E300 | Operating Instructions - Page 51
You can enjoy radio sound with the system's speakers. CLEAR D.TUNING 123 456 789 0 "/1 Number buttons SYSTEM MENU C/X/x/c, HOME FUNCTION TUNING +/- OPTIONS PRESET +/- x VOLUME +/- DISPLAY Current station Current band and preset number FM 7 88.00 MHz SONY RADIO Station name Tip • You can - Sony HCD-E300 | Operating Instructions - Page 52
"TUNER FM" or "TUNER AM," you can check the frequency using the front panel display. Press DISPLAY. Each time you press DISPLAY on the remote, the display changes as shown. 1 Station name* 2 Frequency** * This is displayed if you have entered a name for a preset station. ** Returns to the original - Sony HCD-E300 | Operating Instructions - Page 53
Tuner To operate by using D.TUNING 1 Press FUNCTION repeatedly until "TUNER FM" or "TUNER AM" appears in the front panel display. 2 Press D.TUNING. 3 Press the number buttons to select the frequencies. 4 Press . If an FM program is noisy If an FM program is noisy, you can select monaural reception. - Sony HCD-E300 | Operating Instructions - Page 54
To change the preset number Select the desired preset number by pressing PRESET +/-, then perform the procedure from Step 3. If an FM program is noisy If an FM program is noisy, you can select monaural reception. There will be no stereo effect, but reception will improve. 1 Press SYSTEM MENU. 2 - Sony HCD-E300 | Operating Instructions - Page 55
or connected TV. For operation details, refer to the operating instructions of the DIGITAL MEDIA PORT adapter. Tip • Depending on the may be able to operate a connected component using either the buttons on the remote or the unit. The following illustration shows an example of buttons that can be - Sony HCD-E300 | Operating Instructions - Page 56
AIR main units depends on the use environment.) • S-AIR sub unit: This is for receiving sound. - Surround amplifier: You can enjoy surround speaker sound wirelessly. - S-AIR receiver: You can enjoy system sound in another room. Room A S-AIR main unit Inserting the wireless transmitter/transceiver - Sony HCD-E300 | Operating Instructions - Page 57
wireless transmitter. Rear of the unit SPEAKER CENTER SUBWOOFER COMPONENT VIDEO OUT VIDEO OUT Y PB / CB PR / CR LAN(100) SPEAKER HDMI OUT DMPORT DC5V 700mA MAX see the operating instructions of the S-AIR sub unit. Tip • When you change the S-AIR configuration, Sony recommends that you - Sony HCD-E300 | Operating Instructions - Page 58
AIR receiver can be placed in another room for enjoying the system's sound there. For details of the S-AIR receiver, refer to the operating instructions of the S-AIR receiver. 1 Press SYSTEM MENU. 2 Press X/x repeatedly until "S-AIR MENU" appears in the front panel display, then press or c. 3 Press - Sony HCD-E300 | Operating Instructions - Page 59
the S-AIR receiver You can control the system from the S-AIR receiver by using the following buttons. Press N, X, x, ./> S-AIR CH Operation Share the same operations on the remote and unit. Change the function of the system. For details, refer to the operating instructions of the S-AIR receiver - Sony HCD-E300 | Operating Instructions - Page 60
the unit, see "To set the ID of the unit" (page 57). • To set the ID of the S-AIR sub unit, refer to the operating instructions of the S-AIR sub unit. 3 Press SYSTEM MENU. 4 Press X/x repeatedly until "S-AIR MENU" appears in the front panel display, then press or c. 5 Press X/x repeatedly until - Sony HCD-E300 | Operating Instructions - Page 61
of the surround amplifier, a slim instrument, such as a paper clip, can be used. x For the S-AIR receiver Refer to the operating instructions of the S-AIR receiver. When sound transmission is established, "PAIRING" and "COMPLETE" appear alternately in the front panel display. Note • Perform pairing - Sony HCD-E300 | Operating Instructions - Page 62
.11b/g channel 11 • The transmission may be improved by changing the transmission channel (frequency) of the other wireless system(s). For details, refer to the operating instructions of the other wireless system(s). 62US - Sony HCD-E300 | Operating Instructions - Page 63
with the "BRAVIA" Sync function only. By connecting Sony components that are compatible with the Control for HDMI function with an HDMI cable, operation TV "/1. For details, see "Controlling Your TV with the Supplied Remote" (page 69) and refer to the operating instructions of the TV. ONE-TOUCH - Sony HCD-E300 | Operating Instructions - Page 64
or TV "/1 on the system's remote, the system turns off automatically. Note • Before using the System Power Off function, set the function for TV power. For details, refer to the operating instructions of the TV. • Depending on the status, the system or the connected components may not turn off - Sony HCD-E300 | Operating Instructions - Page 65
the system. • When TV sound is output from the speakers of the system, you can adjust the volume and turn off the sound of the system using the TV remote. Note • While the TV is in PAP (picture and picture) mode, the System Audio Control function will not work. When the TV exits PAP mode - Sony HCD-E300 | Operating Instructions - Page 66
AUDIO IN Calibration mic 6 Press X/x to select [Start]. To cancel, select [Cancel]. 7 Press . [Auto Calibration] starts. The system adjusts the speaker settings automatically. Be quiet during the measurement. Note • Before [Auto Calibration], make sure that the surround amplifier turns on and you - Sony HCD-E300 | Operating Instructions - Page 67
]. The conclusions appear on the TV screen. Press C/c to change the page. The first page shows the distance of speakers. The second page shows the level of speakers. Note • If measurement fails, follow the message then retry [Auto Calibration]. Tip • You can change a measurement unit (feet or - Sony HCD-E300 | Operating Instructions - Page 68
. 68US Tip • You can change a measurement unit (feet or meters) by pressing the color button (RED). x [Level] You can adjust the sound level of the speakers. You can set the parameters from -6.0 dB to +6.0 dB. Be sure to set [Test Tone] to [On] for easy adjustment. [Front Left/Right] 0.0 dB: Set - Sony HCD-E300 | Operating Instructions - Page 69
speakers at one time, press VOLUME +/-. Controlling Your TV with the Supplied Remote By adjusting the remote signal, you can control your TV with the supplied remote. Note • When you replace the batteries of the remote with your TV. Manufacturer Code number SONY 501 (default), 502 DAEWOO 506 - Sony HCD-E300 | Operating Instructions - Page 70
558 547, 549 541, 551 543 Controlling the TV with the remote You can control the TV using the following buttons. To use closed captioning. GUIDE Display the Digital Electronic Programme Guide (EPG). TOOLS remote buttons of the SONY TV. For details, refer to the operating instructions of the TV. - Sony HCD-E300 | Operating Instructions - Page 71
Using the Sleep Timer You can set the system to turn off at a preset time, so you can fall asleep listening to music. You can preset the time in 10-minute increments. 1 Press SYSTEM MENU. 2 Press X/x repeatedly until "SLEEP MENU" appears in the front panel display, then press or c. 3 Press X/x to - Sony HCD-E300 | Operating Instructions - Page 72
front panel display. The child lock function is activated and the buttons on the unit are locked. (You can operate the system by using the remote.) To cancel, press x for more than 5 seconds so that "CHILD LOCK" and "OFF" appear in the front panel display. Note • When you operate the buttons - Sony HCD-E300 | Operating Instructions - Page 73
Other Operations Saving Power in Standby Mode Check that the following settings are made: - [Control for HDMI] is set to [Off] (page 63). - "S-AIR STBY" is set to "STBY OFF" (page 59). - "DEMO" is set to "DEMO OFF" (page 72). - [Standby Mode] is set to [Normal] (page 83). 73US - Sony HCD-E300 | Operating Instructions - Page 74
Settings and Adjustments Using the Setup Display You can make various adjustments of items such as picture and sound. Select (Setup) on the home menu when you need to change the settings of the system. Note • Playback settings stored in the disc - Sony HCD-E300 | Operating Instructions - Page 75
] You can update and improve the functions of the system. For information about update functions, refer to the following website: http://esupport.sony.com Note • Do not disconnect the AC power cord (mains lead) or network cable while downloading or updating software. • All operations, including - Sony HCD-E300 | Operating Instructions - Page 76
of the system using an update disc provided by a Sony dealer or local authorized Sony service facility. 1 Insert the update disc. The display asks x [Screen Format] You can select the display configuration for a 4:3 screen picture on a 16:9 wide-screen TV. [Original]: Select this when connecting to - Sony HCD-E300 | Operating Instructions - Page 77
30 seconds, then the display asks for confirmation. Follow the on-screen instructions. "HD" lights up in the front panel display when outputting 720p/1080i/1080p video signals. Note • If the picture is distorted or no picture appears, wait for about 30 seconds without pressing any buttons. The - Sony HCD-E300 | Operating Instructions - Page 78
to the connected TV. Combining xvYCC-compatible video with a TV that supports x.v.Color display makes it possible to more accurately reproduce object colors present with no jitter. Normally select this position. [Frame]: The picture, including subjects that do not move dynamically, is output in high - Sony HCD-E300 | Operating Instructions - Page 79
. [HDMI priority]: Outputs 2-channel stereo sound from the system's speakers, and enables sound output from the HDMI OUT jack. Sound format "TONE," and "DEC. MODE" functions are disabled. • When the System Audio Control function (page 65) is activated, this setting may change automatically. x [Sound - Sony HCD-E300 | Operating Instructions - Page 80
], the display for entering the language code appears. Enter the code for your language by referring to "Language Code List" (page 102). x [BD Parental Control] Playback of some BD-ROMs can be limited according to the age of the users. Scenes may be blocked or replaced with different scenes. 1 Enter - Sony HCD-E300 | Operating Instructions - Page 81
When you select [Select Region Code], the display for entering the region code appears. Enter the code for the area restriction by referring to "Parental Control/ Area Code List" (page 102). Note • If you forget the password, reset the system (page 86) and set a new password (see [Password] (page 81 - Sony HCD-E300 | Operating Instructions - Page 82
an HDMI cable. [Off]: Off. x [Volume Limit] If you change the output method of the TV to the system speaker on the TV menu or by pressing THEATER, the System Audio Control (page 65) is activated and loud sound may be output depending on the volume level of the system. You can - Sony HCD-E300 | Operating Instructions - Page 83
display information when switching audio modes or during playback. [On]: Automatically displays information on the screen when changing the viewing titles, picture modes, audio signals, etc. [Off]: Displays information only when you press DISPLAY. x [Screen Saver] The screen saver image appears when - Sony HCD-E300 | Operating Instructions - Page 84
router. The items that need to be set may differ, depending on the Internet service provider or the router. For details, refer to the instruction manuals that have been provided by your Internet service provider or supplied with the router. 1 Press X/x to select [IP Address Acquisition], then press - Sony HCD-E300 | Operating Instructions - Page 85
a character using C/c, and press . [Easy Setup] You can recall the Easy Setup to make the basic settings. 1 Press C/c to select [Start], then press . 2 Follow the instructions for "Step 3: Performing the Easy Setup" (page 29) from step 4. Settings and Adjustments 85US - Sony HCD-E300 | Operating Instructions - Page 86
Parental Control], [Parental Control Region Code], [Password] settings) The display asks for confirmation. Note • When [All Settings] is selected, all system settings other than the settings related to the password are reset, and the system turns off. • Settings for "Adjusting pictures for videos - Sony HCD-E300 | Operating Instructions - Page 87
, panel, and controls with a soft cloth slightly moistened with a mild detergent solution. Do not use any type of abrasive pad, scouring powder or solvent such as alcohol or benzine. If you have any questions or problems concerning your system, please consult your nearest Sony dealer. On cleaning - Sony HCD-E300 | Operating Instructions - Page 88
On moving the system Before moving the system, make sure that there is no disc inserted, and remove the AC power cord (mains lead) from the wall outlet (mains). Notes about the Discs On handling discs • To keep the disc clean, handle the disc by its edge. Do not touch the surface. • Do not stick - Sony HCD-E300 | Operating Instructions - Page 89
difficulties while using the system, use this troubleshooting guide to help remedy the problem before requesting repairs. Should any problem persist, consult your nearest Sony dealer. Note that if service personnel changes some parts during repair, these parts may be retained. In the event of - Sony HCD-E300 | Operating Instructions - Page 90
applied to some BD/DVD programs could affect picture quality. If you still experience problems even when you connect your unit directly to your effect when you play a CD. Remedy • The speaker cord is not connected securely. • Press MUTING on the remote if "MUTING ON" is displayed in the front panel - Sony HCD-E300 | Operating Instructions - Page 91
No sound or only a very lowlevel sound is heard from the surround speakers. • Check the speaker connections and settings (pages 20, 67). • Check the decoding mode stations cannot be tuned in. Noise is heard on AM radio. The remote does not function. Remedy • Check that the antenna (aerial) is - Sony HCD-E300 | Operating Instructions - Page 92
or search. above. Refer to the operating instructions supplied with the disc. Messages do not selection button on the subtitle or angles cannot be remote (page 39). changed. • Multi-lingual tracks/ and • Contact your Sony dealer or local authorized Sony service facility. "LOCKED" appears - Sony HCD-E300 | Operating Instructions - Page 93
is connected securely. • Check the connected component's setting for the Control for HDMI function. Refer to the operating instructions supplied with the component. • If you change the HDMI connection, 72). The system menu does not work. • Press HOME on the remote. Additional Information 93US - Sony HCD-E300 | Operating Instructions - Page 94
The S-AIR function Symptom Remedy S-AIR connection is not established (sound transmission is not established), e.g., the indicator of the S-AIR sub unit does the following: • Turns off. • Flashes. • Turns red. • If you use another S-AIR main unit, place it more than 26 1/4 feet (8 meters) away - Sony HCD-E300 | Operating Instructions - Page 95
, check the following. When an error code appears in the front panel display Error code Corrective action Exxxx Contact your nearest Sony dealer or local authorized Sony service facility and give the error code. SYSTEM ERR UPDATE NG Turn off the system and disconnect the AC power cord (mains - Sony HCD-E300 | Operating Instructions - Page 96
has not been correctly finalized. Notes about BD-ROM compatibility Since the Blu-ray Disc specifications are new and evolving, some discs may not be with cartridge • DVD-RAMs • HD DVDs • DVD Audio discs • PHOTO CDs • Data part of CD-Extras • VCDs/Super VCDs • HD layer on Super Audio CDs • BD-ROMs - Sony HCD-E300 | Operating Instructions - Page 97
playback features may not be available. Refer to the instructions supplied with the BD/DVD. Region code (BD this product. Note about double-layer DVDs The playback pictures and sound may be momentarily interrupted when the layers supports Ver. 2.1 BD-RE and Ver. 1.1 and 1.2 BD-R - Sony HCD-E300 | Operating Instructions - Page 98
a "TV" (DIGITAL IN) DTS-ES Discrete 6.1, DTS-ES Matrix 6.1, DTS96/24 DTS-HD High Resolution Audio a* a - - DTS-HD Master Audio a - a: Supported format. -: Unsupported format. * BD only. Note • The table above is valid only when you set [BD Audio Setting] to [Direct] (page 78) and [Sound - Sony HCD-E300 | Operating Instructions - Page 99
[HDMI] VIDEO OUT jack COMPONENT VIDEO OUT jack HDMI OUT jack 480i 480i 480i 480i 480i 480p 480i 480i 720p 480i 480i 1080i no picture no picture 1080p When [Output Video Format] is set to [Component Video] VIDEO OUT jack COMPONENT VIDEO OUT jacks HDMI OUT jack 480i 480i 480i - Sony HCD-E300 | Operating Instructions - Page 100
(BDV-E300) POWER OUTPUT AND TOTAL HARMONIC DISTORTION: (FTC Output Power) for the US model Front L/ kHz step) Antenna (aerial) FM wire antenna (aerial) Antenna (aerial) Intermediate frequency 450 kHz Speakers (BDV-T10/BDV-T11) Front (SS-TSB95) Speaker system Speaker unit Rated impedance - Sony HCD-E300 | Operating Instructions - Page 101
) (w/h/d) 5.6 kg (12 lb 6 oz) Speakers (BDV-E300) Front (SS-TSB93) Speaker system Speaker unit Rated impedance Dimensions (approx.) Mass (approx.) 3 3/4 in × 15 3/4 in) (w/h/d) incl. projecting parts Mass (approx.) 5.4 kg (11 lb 15 oz) Design used in the certain printed wiring boards. • Over 85 - Sony HCD-E300 | Operating Instructions - Page 102
Ukrainian 1564 Urdu 1572 Uzbek 1581 Vietnamese 1587 Volapük 1613 Wolof 1632 Xhosa 1665 Yoruba 1684 Chinese 1697 Zulu 1703 Not specified Parental Control/Area Code List Code Area 2044 Argentina 2047 Australia 2046 Austria 2057 Belgium 2070 Brazil 2079 Canada 2090 Chile 2092 China 2115 Denmark Code - Sony HCD-E300 | Operating Instructions - Page 103
Sony Blu-ray Disc player ("Product") and associated software ("Software") are provided and maintained by Sony Electronics Inc. and its affiliates ("Sony"). Sony also provides and maintains associated service (the "Service under this Agreement only as part of a sale or control, direct life support - Sony HCD-E300 | Operating Instructions - Page 104
control of any matter otherwise subject to indemnification by you and you shall not in any event settle any matter without the written consent of Sony and/or Indemnified Parties. 10. DISCLAIMER OF WARRANTIES AND DAMAGES; LIMITATION OF LIABILITY YOU UNDERSTAND THAT USAGE OF THE PRODUCT AND SERVICE - Sony HCD-E300 | Operating Instructions - Page 105
warranty accompanying the Product, plus any additional terms posted on the Service or Site, together constitute the entire agreement between Sony and you with respect to your use of the Product, Service copies of this license document, but changing it is to freedom, not price. Our General Public Licenses - Sony HCD-E300 | Operating Instructions - Page 106
that there is no warranty for this free software. , so that any problems introduced by others will part thereof, to be licensed as a whole at no charge to all third parties under the terms of this License. c) If the modified program normally reads exercise the right to control the distribution of - Sony HCD-E300 | Operating Instructions - Page 107
to address new problems or concerns. incorporate parts of be guided by WARRANTIES OF MERCHANTABILITY AND FITNESS FOR A PARTICULAR PURPOSE. THE ENTIRE RISK AS TO THE QUALITY AND PERFORMANCE OF THE PROGRAM IS WITH YOU. SHOULD THE PROGRAM PROVE DEFECTIVE, YOU ASSUME THE COST OF ALL NECESSARY SERVICING - Sony HCD-E300 | Operating Instructions - Page 108
verbatim copies of this license document, but changing it is of use, not price. Our General Public Licenses charge for this service if you wish that there is no warranty for the free library. not be affected by problems that might be introduced control compilation and installation of the library. 108US - Sony HCD-E300 | Operating Instructions - Page 109
transferring a copy, and you may at your option offer warranty protection in exchange for a fee. 2. You may the intent is to exercise the right to control the distribution of derivative or collective works This option is useful when you wish to copy part of the code of the Library into a program - Sony HCD-E300 | Operating Instructions - Page 110
the fact that part of it is address new problems or concerns. guided by WARRANTIES OF MERCHANTABILITY AND FITNESS FOR A PARTICULAR PURPOSE. THE ENTIRE RISK AS TO THE QUALITY AND PERFORMANCE OF THE LIBRARY IS WITH YOU. SHOULD THE LIBRARY PROVE DEFECTIVE, YOU ASSUME THE COST OF ALL NECESSARY SERVICING - Sony HCD-E300 | Operating Instructions - Page 111
effectively convey the exclusion of warranty; and each file should have Sony conveys the following notice and asks that you read it. Package name: sony SUBSTITUTE GOODS OR SERVICES; LOSS OF parts of the library used. This can be in the form of a textual message at program startup or in documentation - Sony HCD-E300 | Operating Instructions - Page 112
.. Notice about JPEG Parts of this product utilize the research results of the Independent JPEG Group. Package name sony-target-grel-libjpeg-6b must acknowledge somewhere in your documentation that you've used the IJG code. In legalese: The authors make NO WARRANTY or representation, either express - Sony HCD-E300 | Operating Instructions - Page 113
. This software is provided 'as-is', without any express or implied warranty. In no event will the authors be held liable for any damages arising use this software in a product, an acknowledgment in the product documentation would be appreciated but is not required. 2. Altered source versions - Sony HCD-E300 | Operating Instructions - Page 114
BD-ROM BD-ROMs (Blu-ray Disc Read-Only Memory) are commercially Blu-ray Disc holds up to 25 GB, and a dual-layer Blu-ray Disc holds up to 50 GB of data. DCS (Digital Cinema Sound) In collaboration with Sony Pictures Entertainment, Sony In this format, the surround speakers output stereo sound with an - Sony HCD-E300 | Operating Instructions - Page 115
surround speakers and a center speaker. The surround speakers output monaural sound. Dolby TrueHD Dolby TrueHD is a lossless coding technology that supports up you to enjoy high quality digital picture and sound. The HDMI specification supports HDCP (High-bandwidth Digital Content Protection - Sony HCD-E300 | Operating Instructions - Page 116
Parental Control A function of the BD/DVD to limit playback of the disc by the and so on. PhotoTV HD "PhotoTV HD" allows for a highly-detailed pictures, and photo-like expression of subtle textures and colors. By connecting Sony "PhotoTV HD" compatible devices using an HDMI cable, whole new world of - Sony HCD-E300 | Operating Instructions - Page 117
Menu 80 BD/DVD Viewing Settings 80 BDAV 96 BD-Live 43 BDMV 96 BD-R 114 BD-RE 114 Blu-ray Disc 114 C CD 44, 96 Child Lock 72 Cinema Conversion Mode 77 Control for HDMI 38, 63, 82 D D. C. A. C. (Digital Cinema Auto Calibration) 66, 114 DEMO 72 DIGITAL MEDIA PORT 55 DIMMER 71 - Sony HCD-E300 | Operating Instructions - Page 118
- Sony HCD-E300 | Operating Instructions - Page 119
-
 1
1 -
 2
2 -
 3
3 -
 4
4 -
 5
5 -
 6
6 -
 7
7 -
8
-
9
-
10
-
11
-
12
-
13
-
14
-
15
-
16
-
17
-
18
-
19
-
20
-
21
-
22
-
23
-
24
-
25
-
26
-
27
-
28
-
29
-
30
-
31
-
32
-
33
-
34
-
35
-
36
-
37
-
38
-
39
-
40
-
41
-
42
-
43
-
44
-
45
-
46
-
47
-
48
-
49
-
50
-
51
-
52
-
53
-
54
-
55
-
56
-
57
-
58
-
59
-
60
-
61
-
62
-
63
-
64
-
65
-
66
-
67
-
68
-
69
-
70
-
71
-
72
-
73
-
74
-
75
-
76
-
77
-
78
-
79
-
80
-
81
-
82
-
83
-
84
-
85
-
86
-
87
-
88
-
89
-
90
-
91
-
92
-
93
-
94
-
95
-
96
-
97
-
98
-
99
-
100
-
101
-
102
-
103
-
104
-
105
-
106
-
107
-
108
-
109
-
110
-
111
-
112
-
113
-
114
-
115
-
116
-
117
-
118
-
119
 |
 |
© 2009 Sony Corporation
Sony Corporation
Printed in Malaysia
(1)
The software of this system may be updated in the future. To find out details on any
available updates, please visit: http://esupport.sony.com
4-147-229-
13
(1)
Operating Instructions
BDV-T10 / T11 / E300
BD/DVD Home Theatre System